# Customer Account Pages (Shortcodes)
WP SmartPay provides a set of frontend shortcodes that let your customers log in, register, manage their profile, and view their payment history — all without leaving your site.
## Shortcode Reference
### `[smartpay_user_login]`
Renders a login form for customers. After a successful login the customer is redirected to the page set in **SmartPay → Settings → General → Login Redirect**, or back to the page they were trying to access before the login wall appeared.
Use this on a dedicated "Sign In" page.
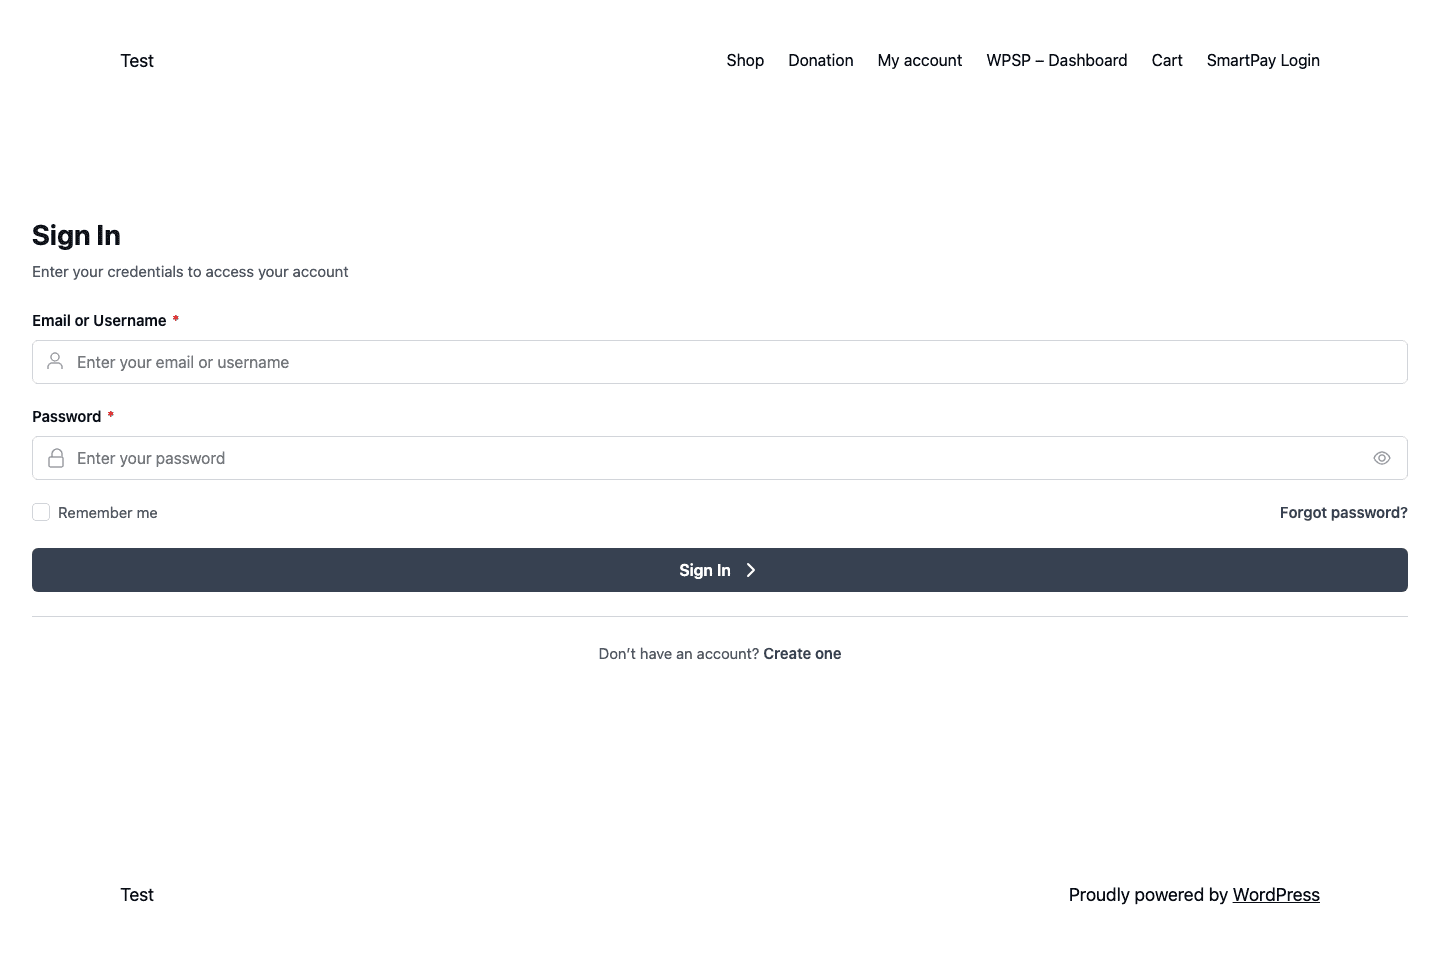 The `[smartpay_user_login]` shortcode renders a sign-in form with a "Create one" link through to your registration page.### `[smartpay_user_registration]`
Displays a registration form that creates a new WordPress user account. After registration, the customer is automatically logged in and redirected to the login redirect page.
You can place both login and registration shortcodes on the same page (e.g., two columns: "Already a member? Log in | New here? Register").
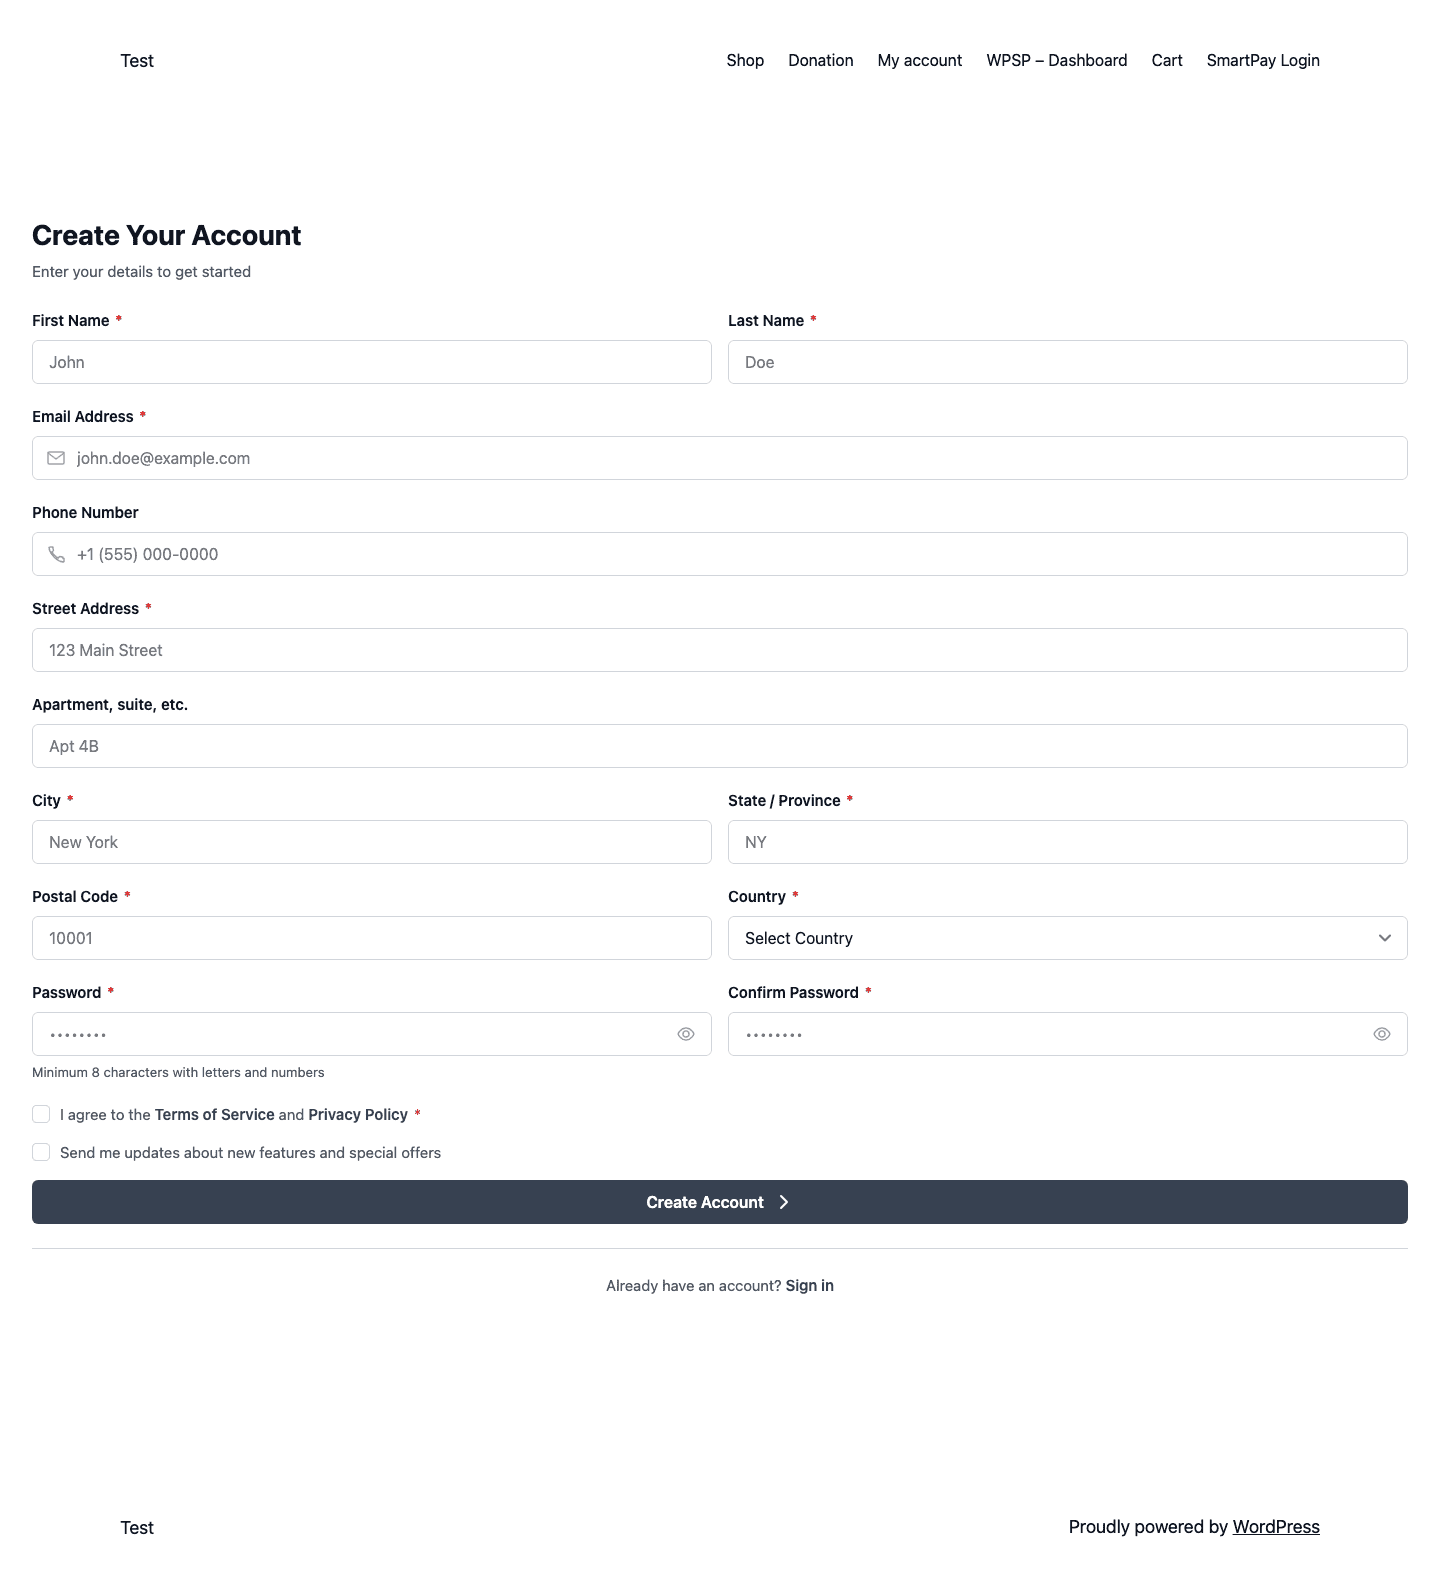 The `[smartpay_user_registration]` shortcode renders a full registration form, including billing address and a terms-of-service consent checkbox.### `[smartpay_user_profile]`
A form where the logged-in customer can update their:
* Display name
* Email address
* Password (change with confirmation)
The form is split into **Personal Information**, **Address**, and **Security** tabs, and includes a profile picture uploader.
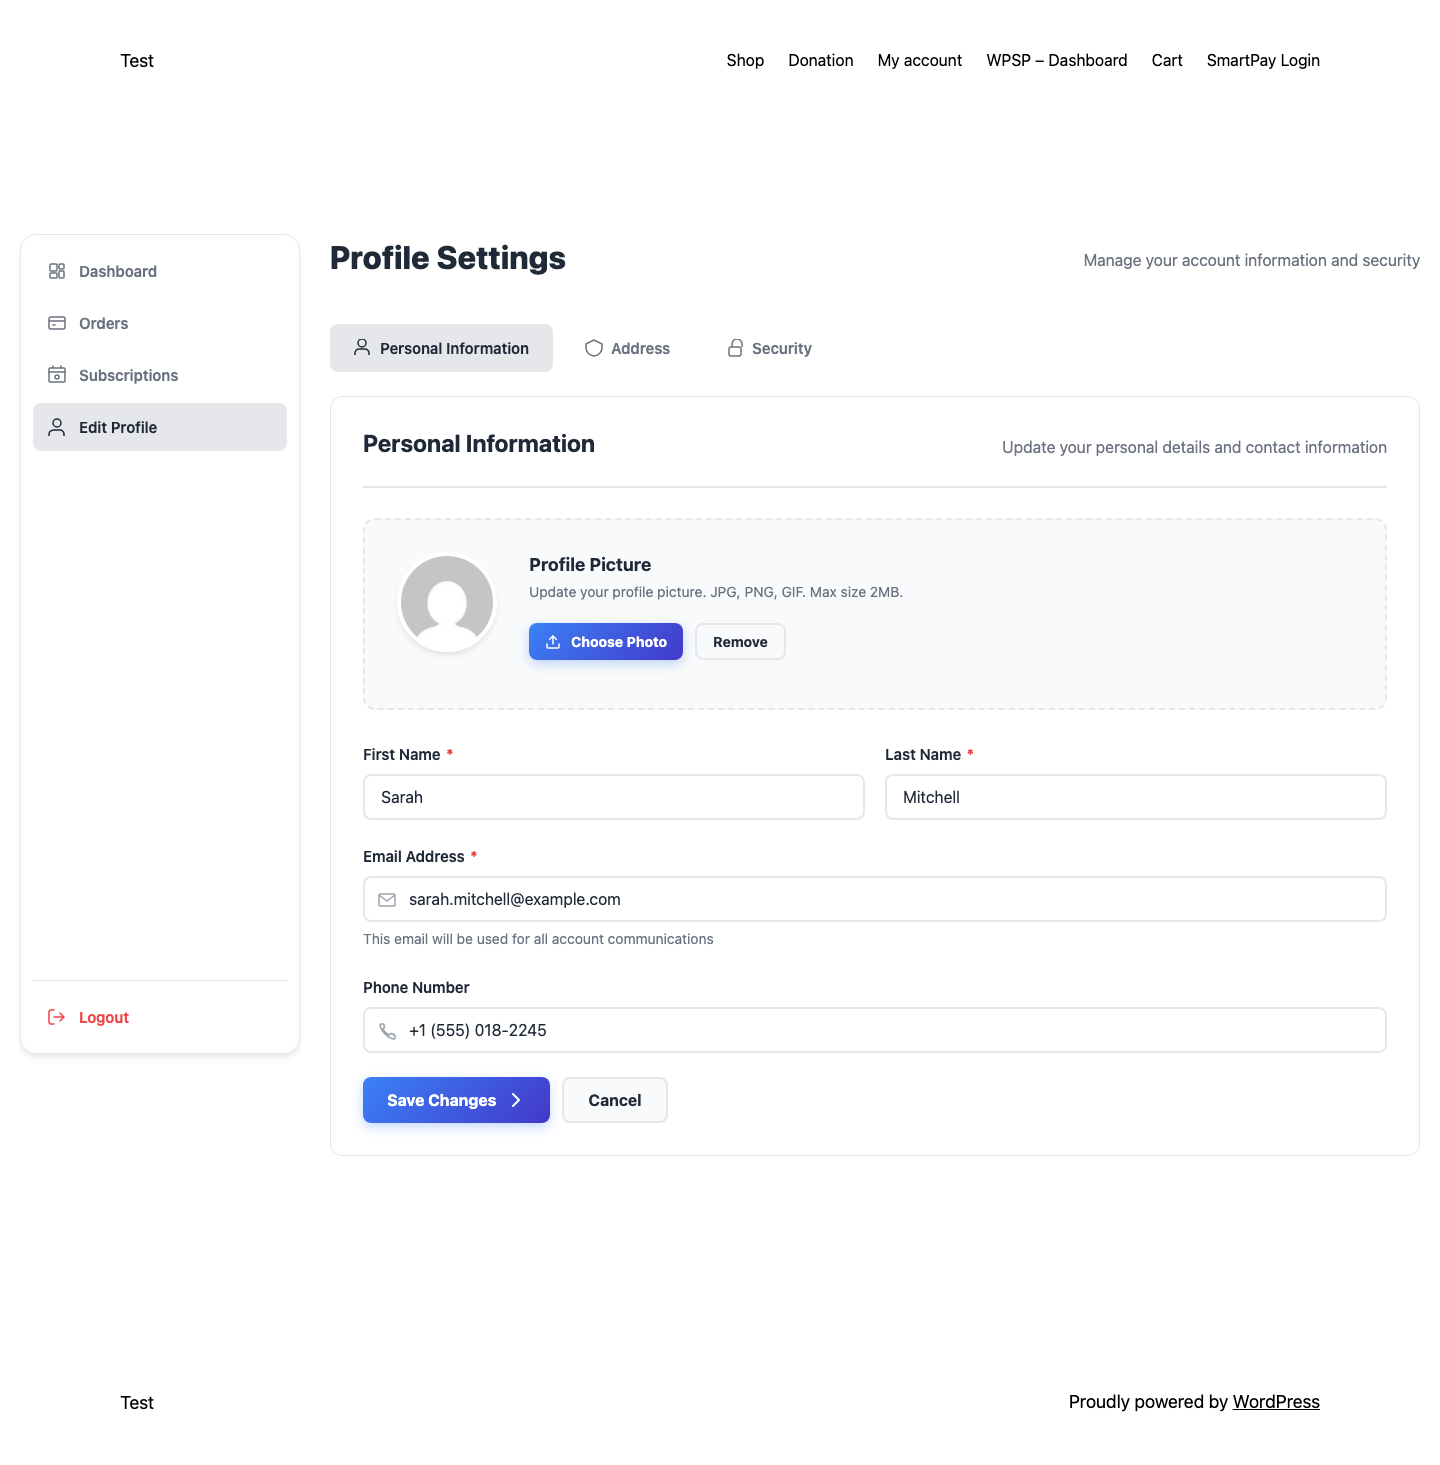 The `[smartpay_user_profile]` shortcode renders Profile Settings with Personal Information, Address, and Security tabs.### `[smartpay_dashboard]`
A payment history dashboard for the logged-in customer showing all their past payments — date, form/product, amount, status, and a link to the individual receipt. This is the most common "My Account" page shortcode.
It also renders summary cards for total orders, total spent, and active subscriptions, plus a side navigation linking to Orders, Subscriptions, and Edit Profile.
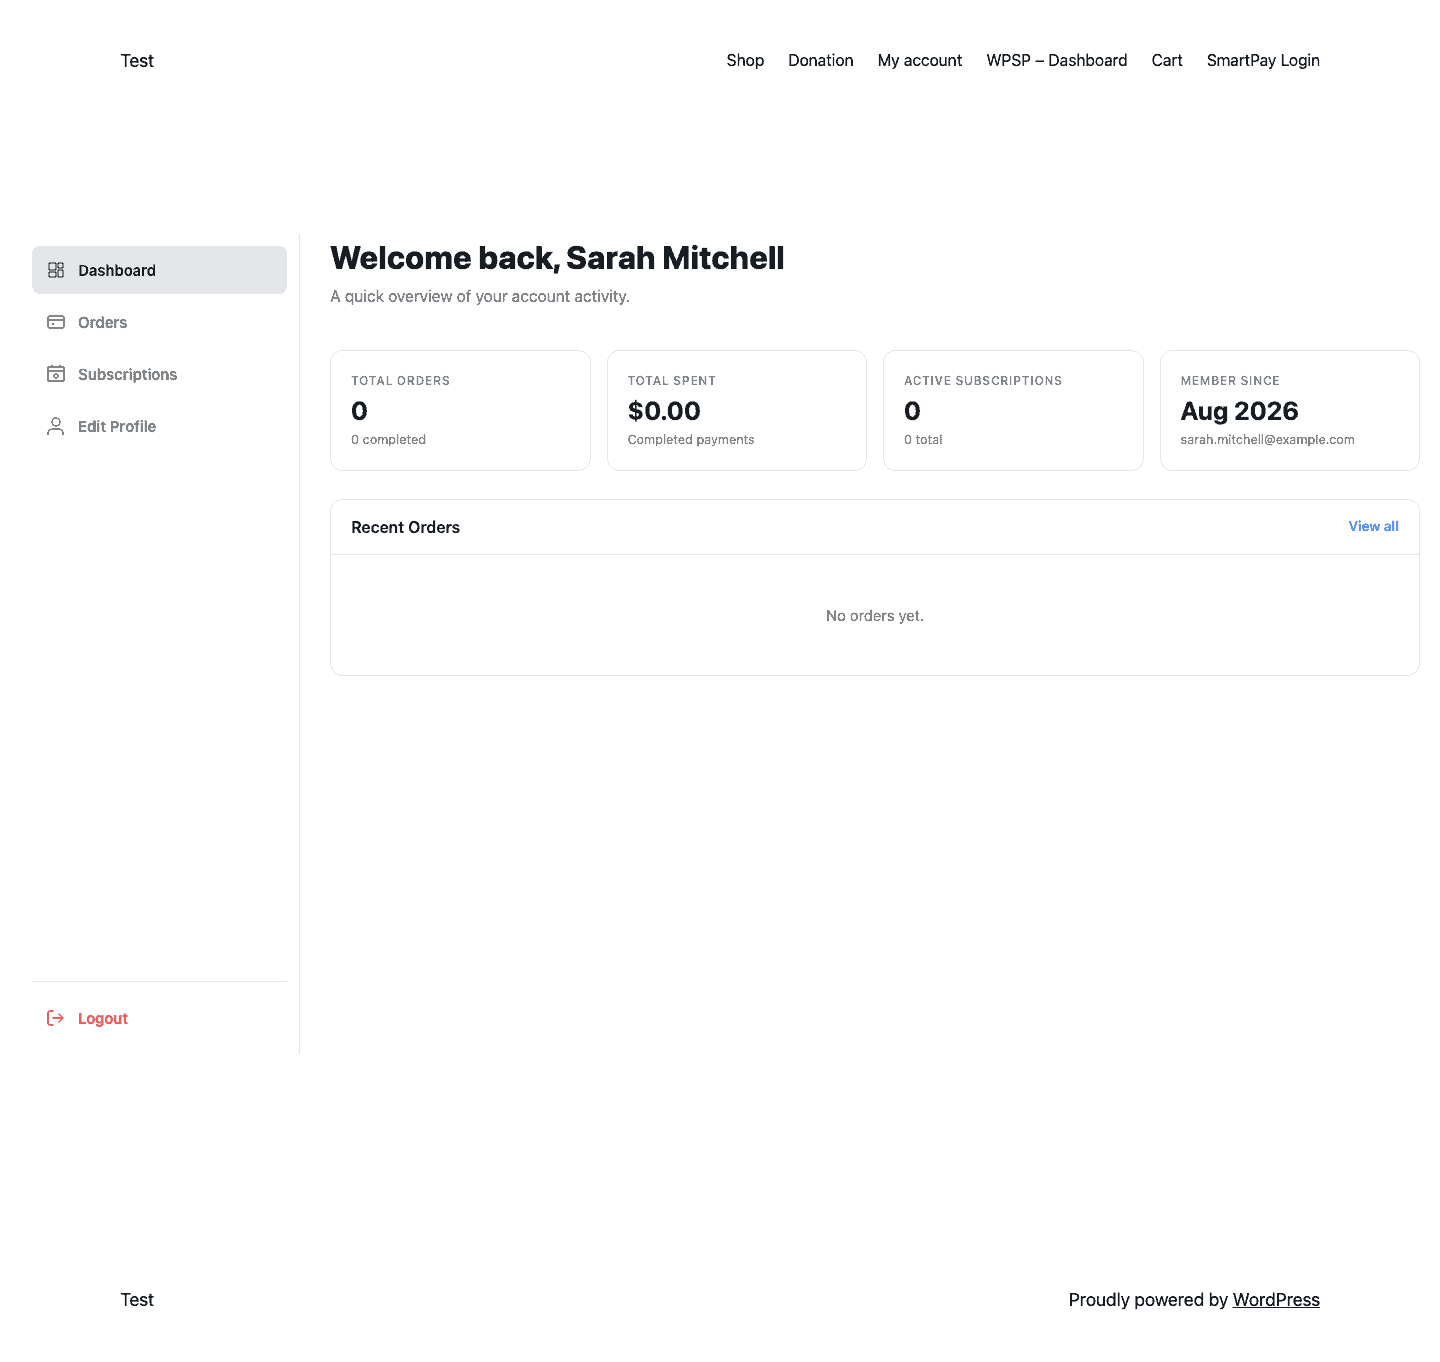 The `[smartpay_dashboard]` shortcode renders the customer's account overview. A newly registered account starts empty, as shown here.## Setting Up the Account Pages
1. Create a WordPress page for each account function you want to offer. Suggested pages and shortcodes:
| Page Name | Shortcode |
|---|---|
| Sign In | `[smartpay_user_login]` |
| Register | `[smartpay_user_registration]` |
| My Account | `[smartpay_dashboard]` |
| Edit Profile | `[smartpay_user_profile]` |
2. Go to **SmartPay → Settings → General** and assign the correct page to each setting:
* **Login Page** → Sign In page
* **Registration Page** → Register page
* **Customer Dashboard** → My Account page
## Linking the Pages Together
Add a link from your navigation menu or forms to:
* The Sign In page for logged-out visitors
* The My Account (Dashboard) page for logged-in customers
SmartPay handles the redirect automatically when using **Require Login** on payment forms — unauthenticated visitors are sent to the Login Page setting value.
## Customising with Theme CSS
SmartPay's frontend forms use the class prefix `.smartpay-`. You can target any element with CSS in your theme's stylesheet or via the WordPress Customizer to match the forms to your brand.
# Additional Charges on a Form (Pro)
WP SmartPay Pro lets you add a surcharge to any payment form — either a flat fee or a percentage of the subtotal. This is useful for covering processing fees, adding a convenience charge, or including a platform fee on top of the base price.
 The Additional Charges section inside the form editor Pricing panel — toggle it on to reveal charge type and amount.## Where to Configure It
1. Open the form: **SmartPay → Forms → Edit**.
2. In the right sidebar, expand the **Pricing** panel.
3. Locate the **Additional Charges** section (Pro).
4. Toggle **Enable Additional Charge** to on.
## Charge Type
* **Flat Fee** — A fixed amount added to every payment, regardless of the subtotal. For example, a $2.00 handling fee.
* **Percentage** — A percentage of the payment amount. For example, 3% to pass on credit card processing fees.
## How It Appears at Checkout
When an additional charge is configured, the checkout form shows an itemised breakdown before the pay button:
* Subtotal (the base form amount)
* Additional charge label + amount
* Total
This transparency helps customers understand what they are paying before clicking the pay button.
## Impact on Invoices
If the Pro invoice feature is enabled, the additional charge appears as a separate line item on the auto-generated invoice. This keeps the invoice accurate for accounting purposes.
## Common Use Cases
* **Passing on card fees** — Add a 2.9% + $0.30 surcharge to recover credit card processing costs.
* **Platform fee** — If you are collecting money on behalf of a third party and retaining a percentage.
* **Convenience fee** — A flat fee for accepting online versus cash/cheque payments.
> **Note:** Some regions have regulations on passing credit card surcharges to customers. Check your local laws before enabling a processing fee surcharge.
# AffiliateWP
Tracks affiliate referrals for every SmartPay payment. When a visitor arrives through an affiliate link and completes a payment, SmartPay records the referral in AffiliateWP and marks it as unpaid so it enters the commission payout queue automatically.
### Requirements
* [AffiliateWP](https://affiliatewp.com/) (premium) must be installed and active. A license is required — get one at [affiliatewp.com/pricing](https://affiliatewp.com/pricing/).
### Setup
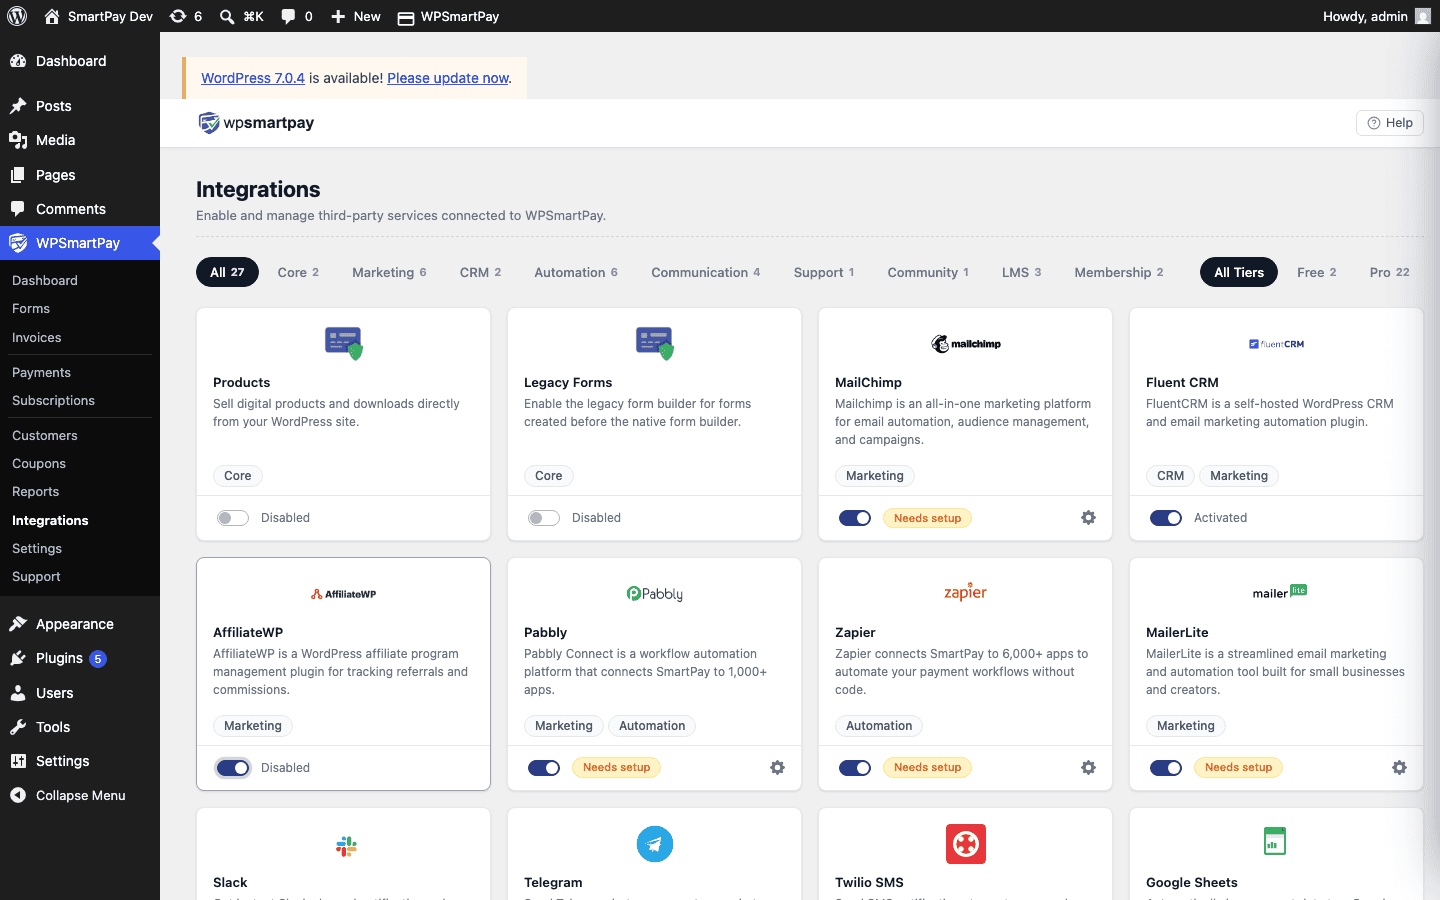
1. Go to **SmartPay → Extensions** and toggle **AffiliateWP** on.
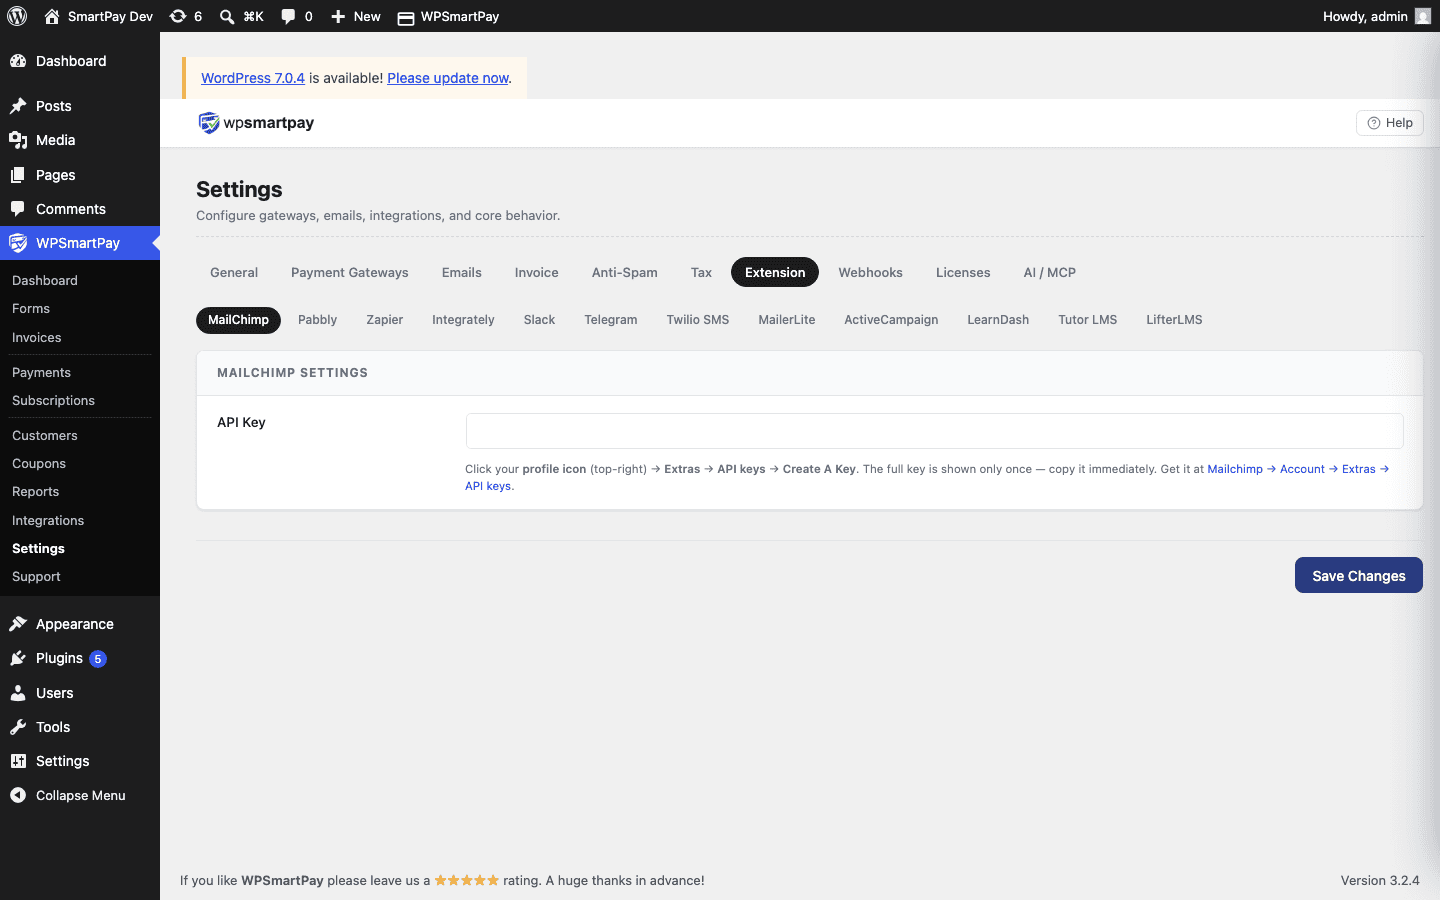
2. Click the gear icon to open **Settings → Extensions → AffiliateWP**.
3. Tick **Enable referrals on all forms and products** to track every payment sitewide — or leave it off to use the per-form toggle in the form editor sidebar.
4. Click **Save Changes**.
> **Per-form tracking:** When global tracking is off, open any form in the form editor, go to the **AffiliateWP** panel in the sidebar, and enable tracking for that form individually.
# AI Form Builder
# AI Form Builder
The **AI Form Builder** (WP SmartPay Pro) lets you generate a complete payment form from a plain-English prompt. Instead of dragging and dropping individual blocks, describe what you need and the AI assembles the form structure for you — you then review, adjust, and publish.
> **Pro feature:** The AI Form Builder requires WP SmartPay Pro with an active license and an AI Provider configured under **SmartPay → Settings → AI / MCP → AI Provider**.
## Prerequisites
* WP SmartPay Pro installed and licensed
* An AI provider API key configured — go to **SmartPay → Settings → AI / MCP** and open the **AI Provider** tab. Enter your API key (OpenAI, Anthropic, or compatible) and save.
## Opening the AI Form Builder
1. Go to **SmartPay → Forms** and open any existing form, or click **Add New** to start fresh.
2. In the form editor, look for the **Plugins** icon in the top-right toolbar area (the puzzle-piece icon, next to **Settings**).
3. Click it to open the plugin sidebar, then click **AI Form Builder** in the panel list.
> **Note:** If the API key is not configured, the AI Form Builder panel shows a warning: "Add an API key in Settings → AI / MCP → AI Provider first." Configure the key, then return to the form editor.
## Generating a Form
1. In the **AI Form Builder** sidebar panel, type a description of the form you want in the **Describe your form** textarea. Be specific about the fields and purpose.
2. Click **Generate**.
3. The AI calls the REST endpoint and returns a list of block definitions. A preview of the blocks appears in the panel — for example "• name fields, • email, • address, • text input: Company Name".
4. Review the list. If the structure looks right, click **Insert** to add the blocks to the form canvas.
5. If you want to try again, click **Clear** and enter a revised prompt.
### Example Prompts
* "A donation form with a custom amount, donor name, and a message field."
* "A registration form for an event — collect name, email, company, and dietary requirements."
* "A simple payment form with name, email, and an address for shipping."
## Reviewing and Editing the Generated Form
After inserting, the blocks appear on the form canvas exactly as you would have placed them manually. You can:
* Select any block and adjust its settings in the inspector (e.g., toggle sub-fields on the Name block, choose Layout Columns)
* Drag blocks to reorder them
* Delete blocks you do not need
* Add additional blocks from the block inserter (**+**) or the **Guide**
## Publishing the Form
Once you are satisfied with the form, click **Publish** (or **Update** for an existing form) in the top-right corner. The shortcode appears in the Forms list and can be pasted onto any page or post.
## Tips
* The AI generates field blocks only — it does not configure pricing or gateway settings. Set those in the **WPSmartPay Form** sidebar after inserting the blocks.
* The more detail you include in your prompt, the better the result. Mention specific fields by name.
* If the API call fails, check your API key under **Settings → AI / MCP → AI Provider** and verify you have not exceeded your monthly call limit.
# Anti-Spam Checkout (Pro)
Spam bots that submit payment forms with fake emails waste your integrations, trigger unwanted email notifications, and pollute your payment records. WP SmartPay Pro provides built-in anti-spam protection at the checkout form level through honeypot fields and CAPTCHA integration hooks.
## Built-In Honeypot
All SmartPay payment forms include a hidden honeypot field by default. Human visitors never see or fill it; bots that blindly fill all form fields trigger the trap and their submission is silently rejected. No configuration is needed — this protection is always on.
## CAPTCHA Integration (Pro)
Pro adds CAPTCHA validation hooks at the form render and submission stages. These hooks let compatible CAPTCHA plugins insert their challenge widget and enforce validation before the payment is processed.
### Enabling CAPTCHA
1. Go to **SmartPay → Settings → Anti-Spam**.
2. Toggle on the CAPTCHA provider you want to use.
3. Enter the site key and secret key from your CAPTCHA provider's dashboard.
4. Save settings.
### Compatible CAPTCHA Providers
* **Google reCAPTCHA v2** ("I'm not a robot" checkbox)
* **Google reCAPTCHA v3** (invisible, score-based)
* **hCaptcha**
* **Cloudflare Turnstile**
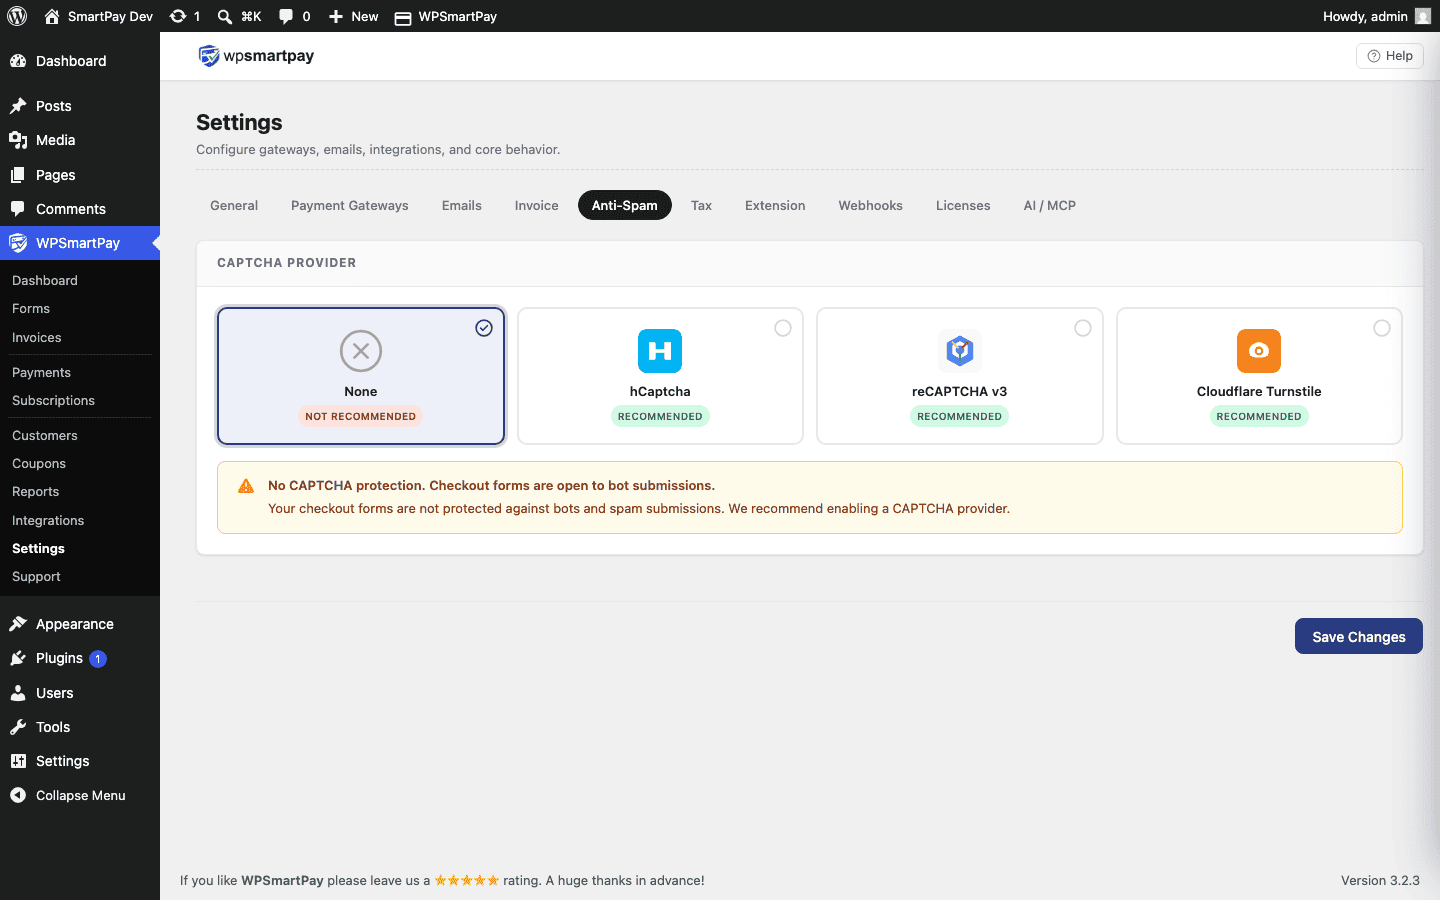 Anti-Spam settings under SmartPay → Settings — enable a CAPTCHA provider and enter your site and secret keys.## Per-Form vs Global
CAPTCHA can be applied globally to all forms or selectively per form. To disable CAPTCHA on a specific form (e.g., for a member-only checkout where users are already logged in):
1. Open the form in the editor.
2. In the **Options** sidebar panel, find **Anti-Spam**.
3. Toggle **Disable CAPTCHA** for this form only.
## What Happens When Spam Is Detected
* **Honeypot triggered** — The submission is silently dropped. No error shown (avoids tipping off the bot).
* **CAPTCHA failed** — The customer sees an error message asking them to complete the CAPTCHA before trying again. The payment is not processed.
> **Note:** If you are using reCAPTCHA v3 and legitimate users are being blocked (false positives), lower the score threshold in Anti-Spam settings or switch to reCAPTCHA v2, which requires explicit human interaction.
# Authorize.Net
Authorize.Net is a long-established US-based payment gateway that processes credit and debit card payments. It is widely used by North American businesses that need a reliable, PCI-compliant gateway without merchant-of-record complexity. WP SmartPay Pro supports Authorize.Net via its Accept.js hosted payment form.
## Prerequisites
* An [Authorize.Net account](https://www.authorize.net). You will also need a separate merchant bank account — Authorize.Net is a payment gateway, not a payment processor with built-in banking.
* Your Authorize.Net API Login ID and Transaction Key.
* WP SmartPay Pro with a valid license.
* HTTPS on your site.
## Country Availability
Authorize.Net is primarily available to businesses in the United States, Canada, United Kingdom, Europe, and Australia.
## Finding Your Authorize.Net Credentials
1. Log in to your [Authorize.Net Merchant Interface](https://account.authorize.net).
2. Go to **Account → Settings → API Credentials & Keys**.
3. Copy your **API Login ID**.
4. Click **New Transaction Key** to generate and copy a Transaction Key.
5. For sandbox: create a free [Authorize.Net Sandbox account](https://developer.authorize.net/hello_world/sandbox/) and follow the same steps to get test credentials.
## Connecting Authorize.Net in SmartPay
1. Go to **SmartPay → Settings → Payment Gateways**.
2. Find **Authorize.Net** and tick **Enable**.
3. Enter your **Live API Login ID** and **Live Transaction Key**.
4. Enter your **Test API Login ID** and **Test Transaction Key** (from the sandbox account).
5. Click **Save Settings**.
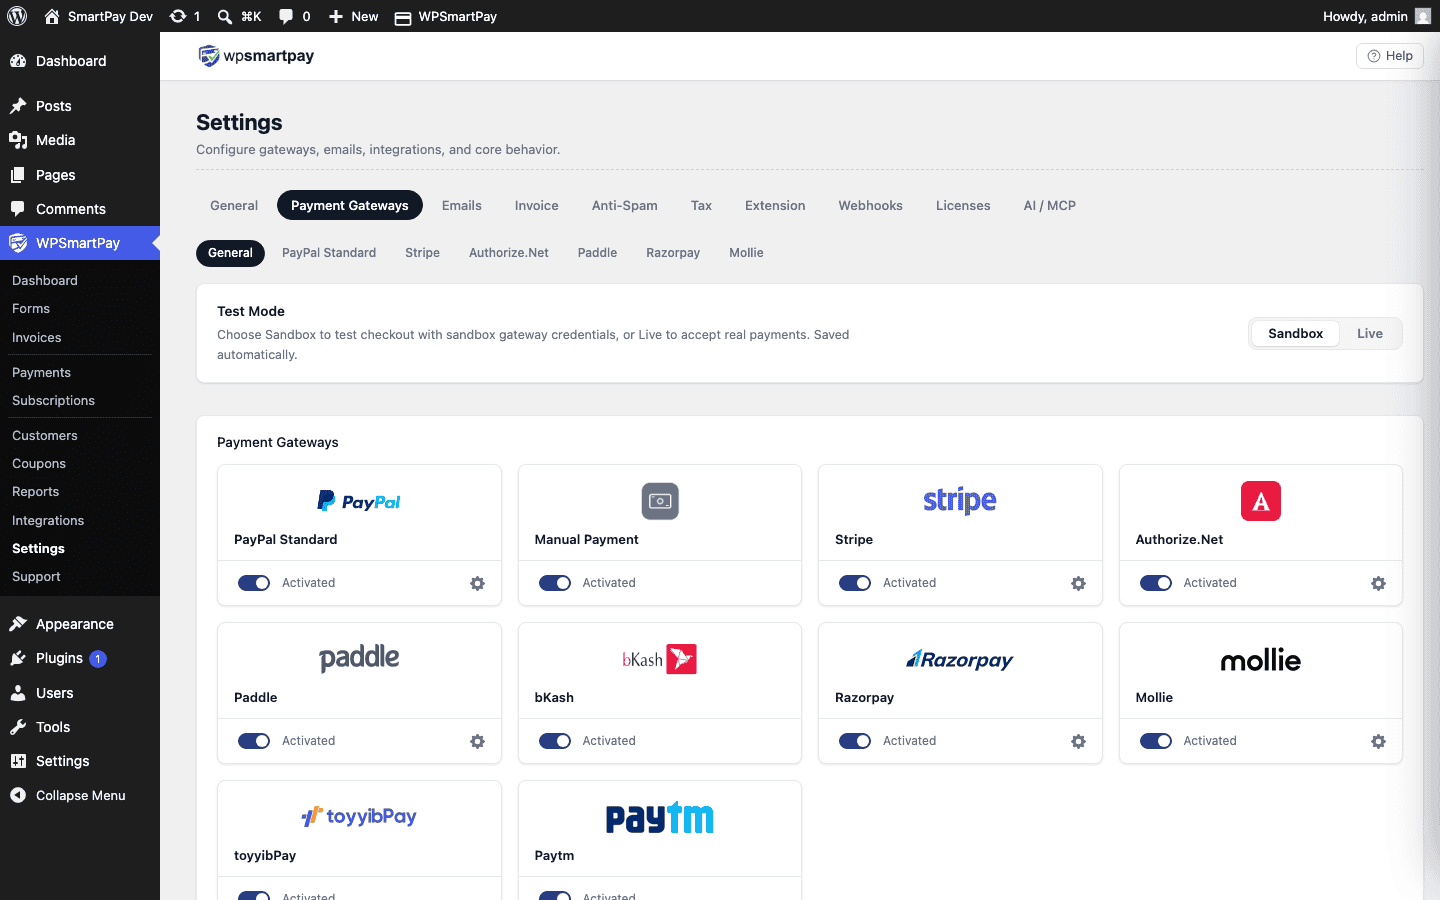 Authorize.Net settings — enter your API Login ID and Transaction Key for live and sandbox environments.## Test Mode Configuration
Toggle **Test Mode** on in SmartPay. Use these test card numbers with the sandbox credentials:
| Card Number | Result |
|---|---|
| `4007000000027` | Always succeeds (Visa) |
| `4012888818888` | Always succeeds (Visa) |
| `4000000000000002` | Always declines |
## Supported Payment Methods
* Visa, Mastercard, American Express, Discover, JCB, Diners Club
* eCheck (ACH bank transfer) — requires additional Authorize.Net activation
## Supported Currencies
USD (primary), CAD, GBP, EUR, and others depending on your merchant account configuration.
## Common Errors & Fixes
* **"The API Login ID or Transaction Key is invalid"** — Credentials from the wrong environment (sandbox vs production). Verify which mode SmartPay is in and use the matching set.
* **"This transaction has been declined"** — In live mode, the card was declined by the issuing bank. In test mode, check you are using the correct test card numbers above.
* **Duplicate transaction error** — Authorize.Net's duplicate detection flags identical transactions within a short window. If a customer double-submits, the second attempt may be declined with a duplicate error.
# Automation Integrations (Zapier, Uncanny Automator)
WP SmartPay Pro connects to Zapier, Integrately, Pabbly Connect, and Uncanny Automator, letting you trigger automated workflows whenever a payment event fires — across thousands of third-party apps without writing code.
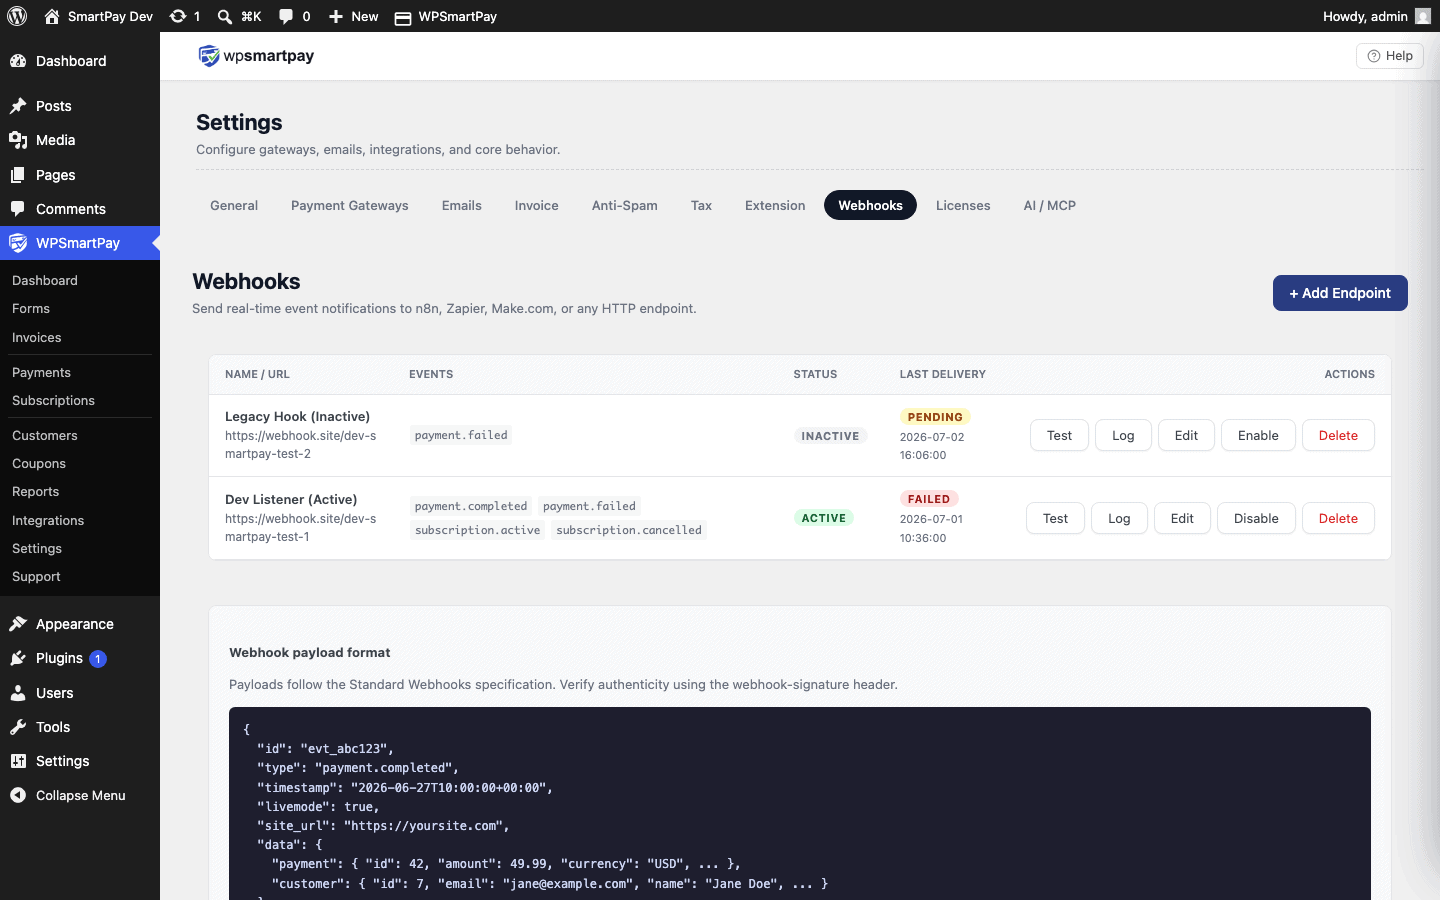## How Automation Integrations Work
SmartPay sends a JSON payload to a webhook URL each time a payment event occurs. Your automation platform receives this webhook, extracts the payment data, and runs the actions you've configured (add a row to Google Sheets, send a custom email, create a Trello card, etc.).
## Setting Up Webhooks (Zapier, Integrately, Pabbly)
1. In your automation platform, create a new Zap / flow and choose **Webhooks by Zapier** (or equivalent) as the trigger.
2. Select **Catch Hook** and copy the webhook URL.
3. In WordPress, go to **SmartPay → Settings → Webhooks**.
4. Click **Add Endpoint**, paste the URL, and select which events to send.
5. Make a test payment — your automation platform will receive a sample payload to map fields.
### Available Webhook Events
| Event | Trigger |
|---|---|
| `payment.completed` | Any payment is confirmed as paid |
| `payment.failed` | A payment fails or is declined |
| `payment.refunded` | A refund is issued |
| `subscription.created` | A new subscription is created |
| `subscription.renewed` | A subscription renewal payment succeeds |
| `subscription.cancelled` | A subscription is cancelled |
| `subscription.completed` | A fixed-term subscription finishes all installments |
### Payload Example
```
{
"event": "payment.completed",
"payment": {
"id": 1234,
"key": "sp_abc123",
"amount": 4900,
"currency": "USD",
"status": "completed",
"gateway": "stripe",
"form_id": 5,
"form_title": "Figma UI Kit",
"customer": {
"name": "Jane Smith",
"email": "jane@example.com"
},
"created_at": "2026-07-28T10:23:00Z"
}
}
```
## Uncanny Automator Integration
Uncanny Automator is a WordPress-native automation plugin that works entirely on your server — no external accounts or API keys required. It connects SmartPay to WooCommerce, LearnDash, BuddyBoss, bbPress, Gravity Forms, and hundreds of other WordPress plugins.
### Setting Up
1. Install and activate **Uncanny Automator** (free or Pro from uncannyautomator.com).
2. In WordPress, go to **Automator → Add New Recipe**.
3. Set the recipe type to **Logged-in** or **Everyone**.
4. For the **Trigger**, select **WP SmartPay → User completes a payment**.
5. Choose a specific form or set to "Any form".
6. Add your **Actions** — examples:
* Enroll user in a LearnDash course
* Add user to a BuddyBoss group
* Send a custom WordPress email
* Grant a user role
* Add a WooCommerce product to the user's account
7. Publish the recipe.
## Popular Automation Recipes
* **Payment → Google Sheets row:** Add a new row with buyer name, email, amount, and date to a tracking spreadsheet.
* **Subscription created → Onboarding email sequence:** Start a 5-email onboarding sequence in Mailchimp or ActiveCampaign.
* **Payment failed → Slack alert + SMS:** Notify your team instantly on every failed renewal.
* **Subscription cancelled → Win-back sequence:** Tag the contact in FluentCRM to trigger a 3-email win-back campaign.
* **Payment completed → Airtable record:** Create a new record in your Airtable customer tracker.
## Troubleshooting
* **Webhook not firing:** Go to **SmartPay → Settings → Webhooks** and check the delivery log for the endpoint. If it shows errors, verify the URL is correct and the receiving platform is accepting the webhook.
* **Zapier not receiving test data:** Make a real test purchase (Test Mode on) after adding the webhook — Zapier needs a live HTTP request to map fields, not a manual sample.
* **Uncanny Automator not triggering:** Confirm the recipe is published (not draft) and the trigger form matches the form used at checkout. Also check the Automator log at **Automator → Logs** for the trigger attempt.
# Available Shortcodes
### 1. \[smartpay\_dashboard\]
While installing **WPSmartPay**, you will get a **Sample Dashboard** by default. If you want to use it elsewhere or want to customize it with your own preference, simply copy-paste the **Shortcode** in **Elementor** or **Gutenburg** and start customizing.
### 2. \[smartpay\_payment\_receipt\]
After purchasing a downloadable, a payment receipt will automatically generate all the order details. If you want to use it elsewhere or want to customize it, simply copy-paste the **Shortcode** in **Elementor** or **Gutenburg** and start customizing.
### 3. \[smartpay\_form\]
You will get a **form page** in **WPSmartPay** to create a **form** from scratch. If you want to share your designed **form** elsewhere or customize it with **Elementor** or **Gutenburg** block, simply copy-paste the **Shortcode** in **Elementor** or **Gutenburg** and start customizing.
#### **Parameters:**
```
[smartpay_form id="1" behavior="embedded" label="Sample form"]
```
**ID:** A unique **ID** will generate automatically while creating a **form**.
**Behavior**: By default, it will remain empty. After publishing, it will show a **button** with the **level** name. If you click on the **button** a pop-up window will appear instantly to show you the form.
If you set the behavior parameter as **“embedded”** it will take you directly to the form after publishing.
**Level:** Level indicates the button text.
### 4. \[smartpay\_product\]
You will get a product page in **WPSmartPay** where you can **add new** products. Share your products anywhere, simply copy-paste the **Shortcode**.
#### **Parameters:**
```
[smartpay_product id="15" behavior="embedded" label="Sample product"]
```
**ID:** A unique **ID** will generate automatically while creating a **product**.
**Behavior**: By default, it will remain empty. After publishing, it will show a **button** with the **level** name. If you click on the **button** a pop-up window will appear instantly to show you the product.
If you set the behavior parameter as **“embedded”** it will take you directly to the product page after publishing.
**Level:** Level indicates the button text.
# bKash
bKash is Bangladesh's most widely used mobile financial service (MFS), with over 60 million registered users. WP SmartPay Pro integrates bKash's Payment Gateway API, allowing you to accept bKash payments directly on your WordPress site.
## Prerequisites
* A bKash Merchant account — apply at [bkash.com/business](https://www.bkash.com/business).
* Your bKash API credentials from the bKash Merchant Portal.
* WP SmartPay Pro with a valid license.
* HTTPS on your site.
## Country Availability
bKash is only available to businesses registered in Bangladesh. Customers must have a bKash account (personal or merchant) to pay.
## Finding Your bKash API Credentials
1. Log in to the bKash Merchant Portal.
2. Navigate to **API Credentials**.
3. Copy your **App Key**, **App Secret**, **Username**, and **Password**.
4. bKash provides separate credentials for sandbox (test) and production (live) — copy both sets.
## Connecting bKash in SmartPay
1. Go to **SmartPay → Settings → Payment Gateways**.
2. Find **bKash** and tick **Enable**.
3. Enter your **Live App Key**, **App Secret**, **Username**, and **Password**.
4. Enter the same fields for your **Sandbox** credentials.
5. Click **Save Settings**.
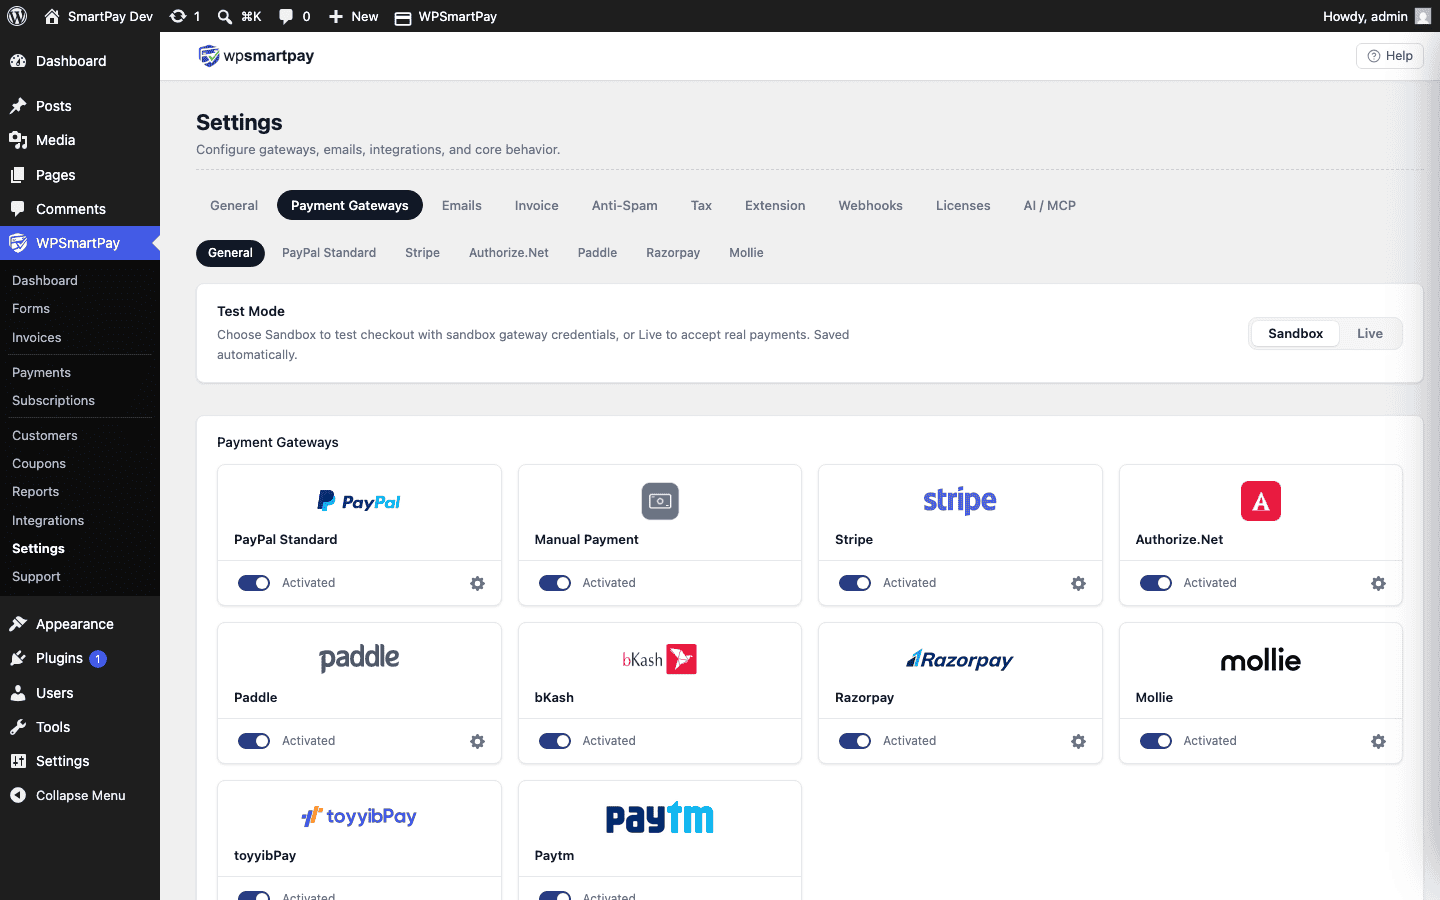 bKash settings — enter your App Key, App Secret, Username, and Password for both live and sandbox environments.## Test Mode Configuration
Toggle **Test Mode** on in SmartPay. Use bKash's sandbox credentials and the test phone numbers provided in the bKash developer documentation to simulate payments.
## How bKash Checkout Works
When a customer chooses bKash at checkout:
1. SmartPay creates a bKash payment token via the API.
2. The customer is redirected to bKash's hosted payment page (or a PIN entry screen on mobile).
3. After approval on the bKash app, the customer is returned to your site.
4. SmartPay receives the payment callback and confirms the status.
## Supported Currencies
Bangladeshi Taka (BDT) only.
## Common Errors & Fixes
* **"Invalid credentials"** — App Key, App Secret, Username, or Password is incorrect. Copy credentials again from the bKash Merchant Portal carefully — some fields are case-sensitive.
* **Sandbox payments not completing** — Use only the test phone numbers provided in bKash's sandbox documentation; real bKash numbers will not work in sandbox mode.
* **Payment expired** — bKash tokens expire after a short period (typically 60 seconds). If the customer takes too long to enter their PIN, the transaction expires and must be retried.
# Bulk Coupon Generation (Pro)
Instead of creating discount codes one at a time, WP SmartPay Pro can generate dozens or hundreds of unique coupon codes in seconds. Use this for email campaigns, affiliate programs, event giveaways, or any promotion requiring large numbers of one-time-use codes.
## Opening the Bulk Generator
1. Go to **SmartPay → Coupons**.
2. Click **Generate Bulk Coupons** (button at the top of the list).
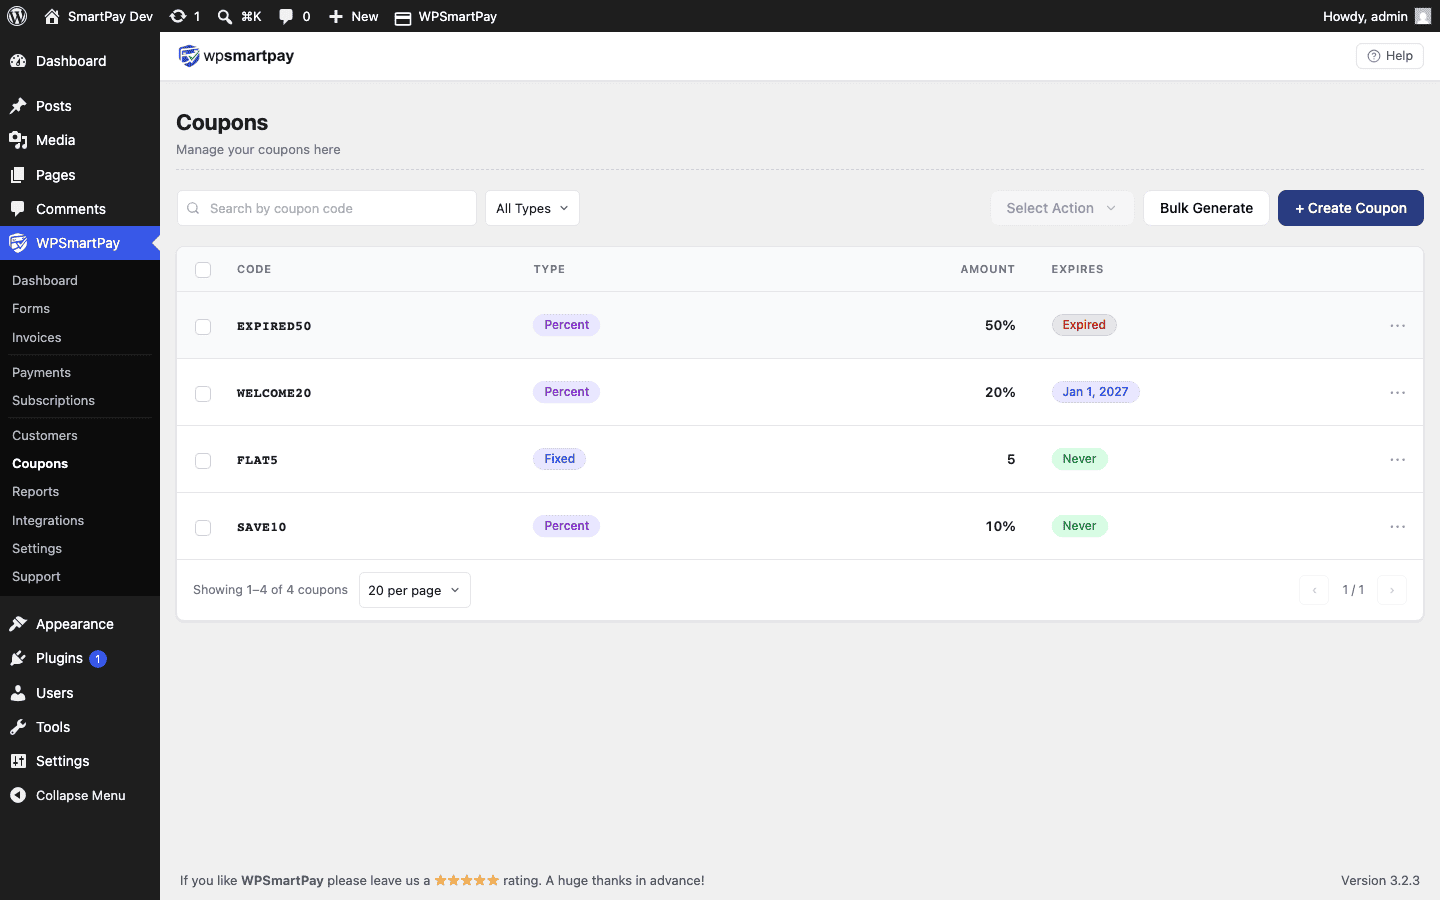 The Coupons list — click Generate Bulk Coupons to open the generator.## Generator Fields
* **Quantity** — How many codes to generate (e.g., 100, 500).
* **Prefix** — Optional text prepended to every generated code (e.g., `LAUNCH-` produces codes like `LAUNCH-A4K9`).
* **Suffix** — Optional text appended to every code.
* **Code Length** — The length of the random part between the prefix and suffix. Default is 8 characters.
* **Discount Type** — Flat or Percentage (applies to all generated codes).
* **Discount Amount** — The discount value for all generated codes.
* **Expiry Date** — Optional expiry that applies to all generated codes.
* **Maximum Uses** — Max uses per code (usually 1 for one-time-use campaigns).
## Generating & Exporting
1. Fill in the fields and click **Generate**.
2. SmartPay creates all the codes and adds them to the Coupons list immediately.
3. Click **Export CSV** to download a spreadsheet of all generated codes — ready to paste into an email campaign or share with affiliates.
## Use Cases
* **Email campaign** — Generate 500 unique 20%-off codes, paste into your email marketing tool as personalisation tags, and send one to each subscriber.
* **Affiliate program** — Each affiliate gets a code with a prefix matching their name (e.g., `ALICE-…`). Monitor usage counts to see which affiliate drove the most conversions.
* **Event giveaway** — Print unique codes on event badges or in goodie bags. Each attendee gets a single-use code.
> **Tip:** Set **Maximum Uses** to 1 when you want each code to be truly one-time-use. If you want the same code to work for multiple customers but still limit total use, increase the maximum accordingly.
# Cancelling a Subscription
You can cancel a WP SmartPay subscription from the admin dashboard, and customers using Stripe can cancel their own subscriptions through the Stripe Billing Portal. This article covers both paths, plus how to reactivate a cancelled subscription.
## Admin Cancellation
1. Go to **SmartPay → Subscriptions**.
2. Click the subscription you want to cancel to open its detail page.
3. Click the **Cancel** button.
4. Confirm the cancellation in the dialog.
SmartPay immediately sends a cancel request to the gateway API. The subscription moves to **Cancelled** status and the Next Renewal date is cleared.
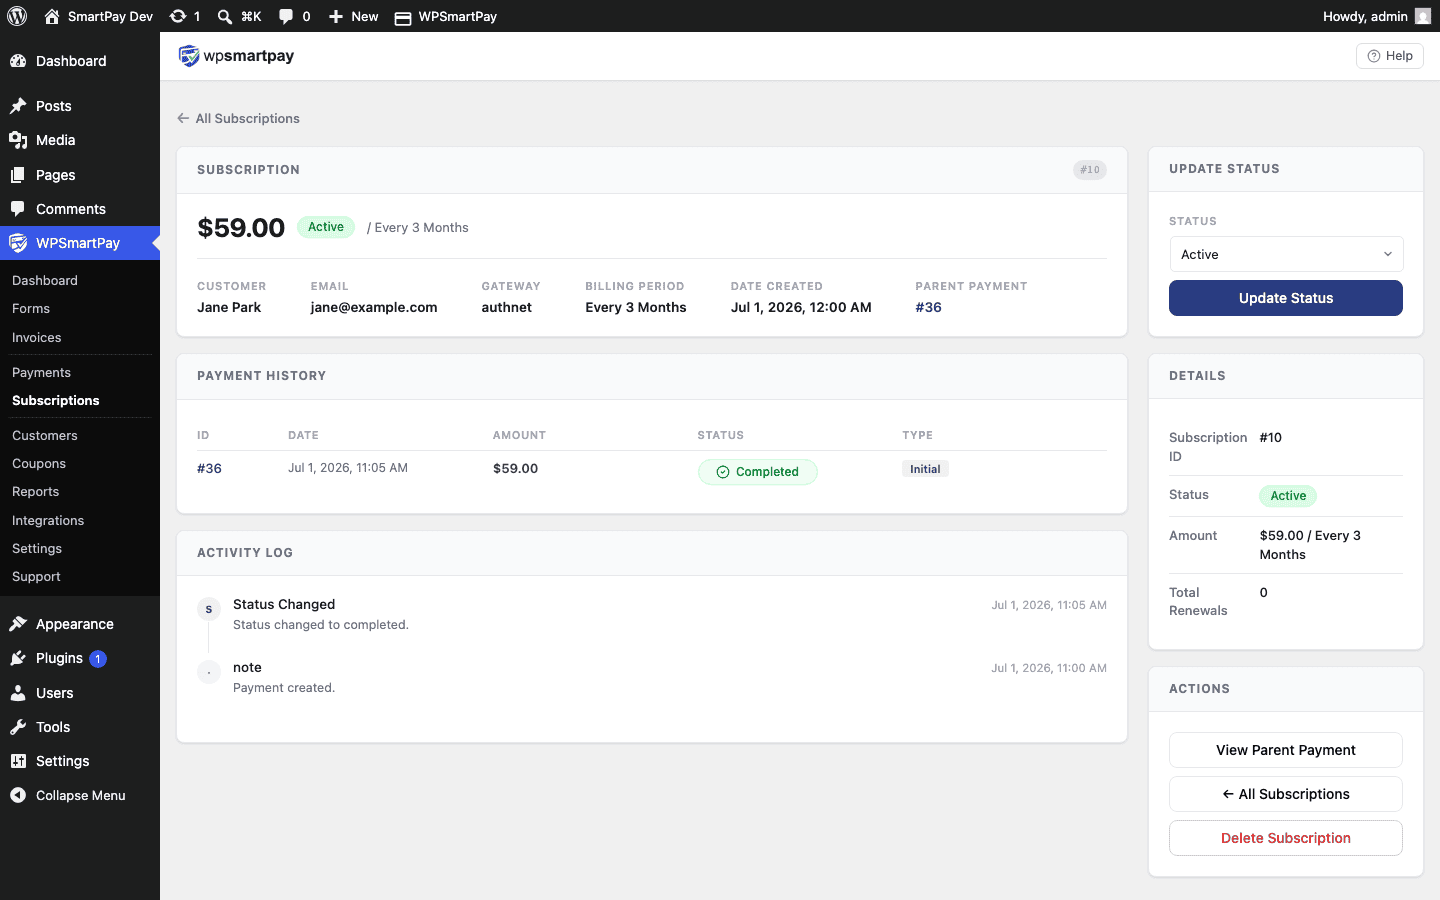 Cancel a subscription from its detail page — the gateway subscription is cancelled simultaneously.## Immediate vs End-of-Period Cancellation
SmartPay cancels subscriptions immediately by default — no further renewals occur after you click Cancel. If you want the subscription to remain active until the end of the current billing period and then stop (giving the customer the rest of the paid period), you need to handle this in your gateway dashboard directly (Stripe supports "cancel at period end").
## Customer Self-Cancellation (Stripe)
Stripe customers can manage their own subscription through the **Stripe Customer Portal**. When a customer cancels there:
1. Stripe sends a `customer.subscription.deleted` webhook to your site.
2. SmartPay receives the webhook and updates the subscription status to **Cancelled**.
To give customers access to the Stripe Portal, share the portal link from your Stripe dashboard, or embed it as a link on your customer account/dashboard page.
## Reactivating a Cancelled Subscription
SmartPay does not currently support reactivating a cancelled subscription from the admin panel. To restart billing for a customer:
1. Ask the customer to subscribe again through the payment form.
2. A new subscription record is created and the billing restarts from the new signup date.
If the customer needs the same subscription terms (same plan, same price), point them back to the original form — no special steps are needed.
> **Note:** Cancelling a subscription in SmartPay cancels it in the gateway as well. You cannot cancel the subscription in SmartPay but keep it active in Stripe, or vice versa.
# Changelog
---
## WP SmartPay
Last updated on August 13, 2026
## Version 3.3.1
Released on August 13, 2026
**Improvements**
### Faster frontend page loads
License validation, database migration checks, and gateway settings registration no longer run on every frontend page load. These operations are deferred to admin, WP-CLI, and background contexts only — visitor pages skip the overhead entirely, reducing PHP execution time on high-traffic sites.
**Fixes**
### License grace window bounded to 3 days
The frontend license fallback is now capped at 3 days. Previously a site that never loaded wp-admin could remain in a perpetual "valid" state indefinitely. After the grace window expires, the plugin withholds pro features until a successful license check runs. A successful check resets the window.
### Malformed license responses no longer cause repeated API calls
If the licence store returned a malformed response, the decoded result (null) was cached and get\_transient() returned a falsy value that triggered a fresh blocking HTTP call on every subsequent request. Malformed responses are now discarded; the plugin falls back to the last known-good status instead.
### MCP tools now directly accessible to AI agents
All 15 SmartPay abilities (create invoice, create form, list payments, and more) now register as direct MCP tools. Previously an AI agent had to call the discover-abilities meta-tool first — a two-step proxy flow most clients do not support. Invoice and form creation via MCP now work without additional configuration.
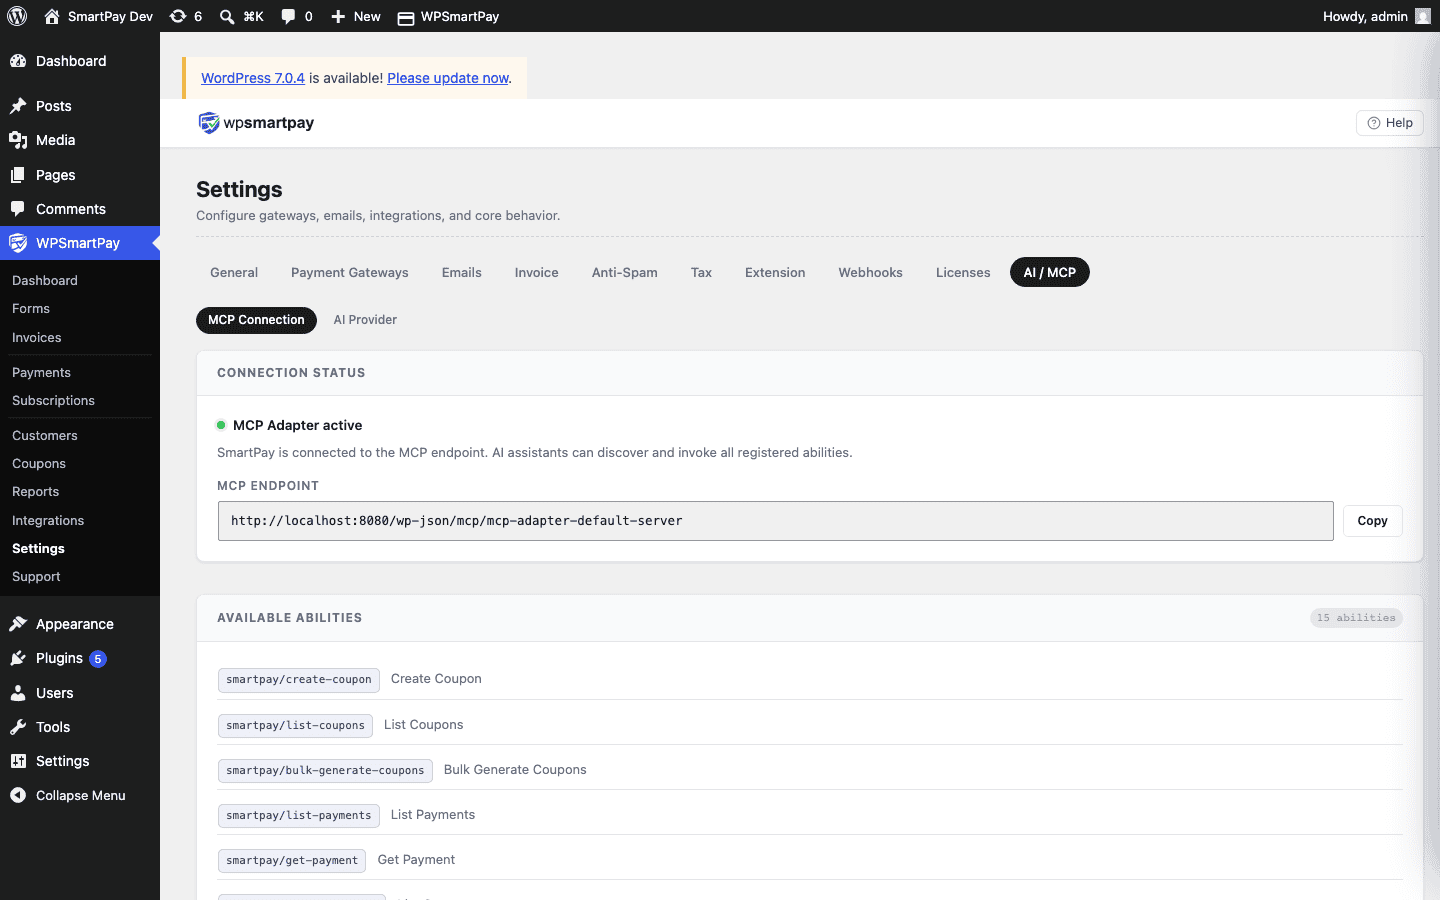
### MailChimp crash on empty API key fixed
When the MailChimp integration was active but no API key had been entered, completing a payment threw a fatal error inside MailChimpClient and crashed the payment flow. The integration now checks for a missing key before instantiating the client and returns early.
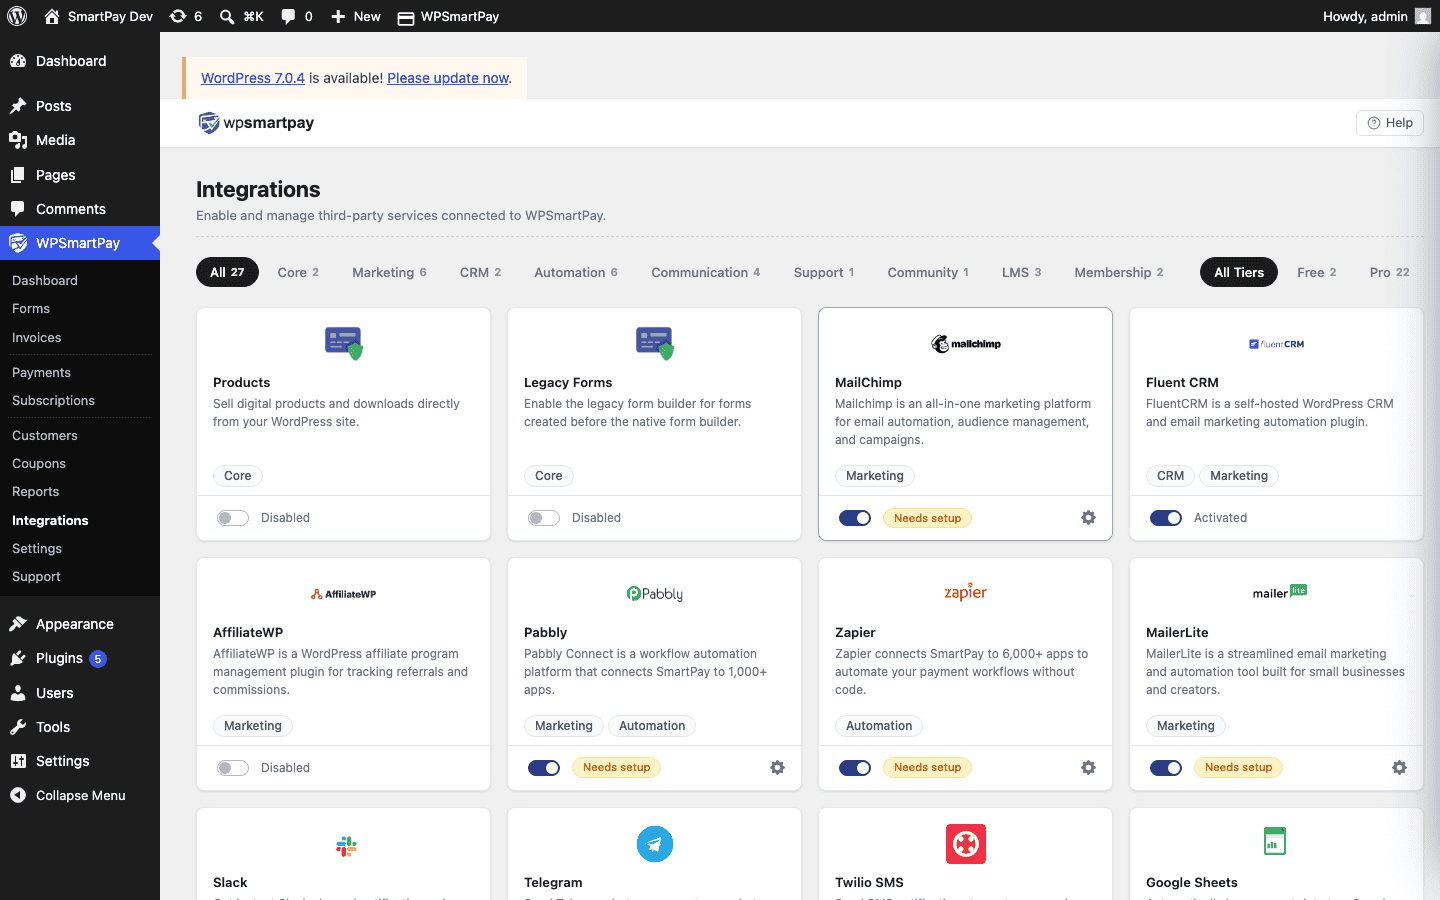
### Admin menu structure restored
Pro no longer restructures the SmartPay admin menu. Grouping and dividers now come from the free plugin, so the sidebar looks identical with or without Pro active (requires WPSmartPay 3.2.4+).
---
## Version 3.3.0
Released on July 24, 2026
**New**
### AI Provider settings
Configure Anthropic (Claude) or OpenAI (GPT) as the AI engine powering all SmartPay AI features — API key, model selection, and monthly call limit stored server-side. Toggle Copilot widget visibility from the same settings page.
### AI Form Builder
Type a plain-language description inside the Gutenberg form editor and SmartPay AI generates a complete, correctly-nested block structure and inserts it in one click. No manual block configuration needed.
### Admin Payment Copilot
Opt-in floating chat widget on SmartPay admin pages. Ask about recent payments, customers, and coupons, or create discount codes using natural language.
### AI Payment Recovery Agent
When a payment fails, AI automatically drafts a personalized re-engagement email scheduled 2 hours later. Manage and resend recovery emails via the REST API at /smartpay-pro/v1/ai/recovery.
### WPSmartPay Form Gutenberg block
Renamed from "SmartPay Form", the block now lists native forms from the form builder and renders the full embedded payment form — no more popup-only limitation.
### Integrately integration
Connect SmartPay to 1,200+ apps via webhook automation with the same one-click setup as Zapier and Pabbly.
### Wishlist Member integration
Automatically add customers to membership levels on payment completion, with per-form level override in the form editor.
### Restrict Content Pro integration
Create RCP memberships on payment completion and expire them on subscription cancellation, with per-form level override.
### Uncanny Automator integration
Expose SmartPay payment events as triggers inside Automator recipes, bridging 200+ WordPress plugins and 1,000+ external apps.
### WPFunnels integration
Redirect customers to a WPFunnels funnel page or custom URL after payment, with a global default and per-form override.
### LearnDash integration
Automatically enroll customers in LearnDash courses on payment completion and revoke access on cancellation, with per-form course override in the form editor sidebar.
### Tutor LMS integration
Enroll customers in Tutor LMS courses on payment completion and cancel enrollment on cancellation, with per-form override.
### LifterLMS integration
Enroll customers in LifterLMS courses on payment completion and expire enrollment on cancellation, with per-form override.
### WP User Registration integration
Automatically create a WordPress user account on payment completion with configurable role assignment, welcome email, and per-form role override.
### Fluent Support integration
Automatically open a Fluent Support helpdesk ticket on payment completed or failed, with configurable mailbox, subject template, and body template.
### FluentCommunity integration
Enroll customers into FluentCommunity spaces on payment completion and optionally remove them on subscription cancellation, with per-form space override.
### MCP settings page
One-click Install MCP Adapter button with fallback manual download and install guide for connecting SmartPay to AI agent clients.
**Improvements**
### LMS settings available before plugin is installed
LMS settings sections now register even when the LMS plugin is not yet installed, so admins can pre-configure course selections before going live.
### Webhooks and gateway settings consolidated
Webhooks moved under the Settings tab with a dedicated list page. Zapier and Pabbly webhook URLs auto-migrate to native endpoints on upgrade. Gateway Selection Layout setting moved to Settings → Gateways.
**Fixes**
### Stripe no longer conflicts with Divi and Elementor
Stripe currency check no longer runs on every frontend page load, resolving conflicts with Divi and Elementor that blocked the checkout popup from opening.
### DB migrations restricted to admin context
Migration scripts now run only in wp-admin, eliminating a fatal error on Elementor and Divi frontend pages.
### Checkout modal renders above page builders
Checkout modal z-index raised to 99999 so it renders above Divi, Elementor, and other high-z-index page builders.
### Zapier webhook payload expanded
Zapier webhook payload switched to JSON and expanded with all payment fields. Zapier's Catch Hook now detects fields automatically without manual field mapping.
### FluentCRM integration rewritten
Customers are now actually subscribed to lists on payment completion. Adds a global list selector in Settings → Extensions → FluentCRM and a per-form override in the form editor sidebar.
### MailerLite activation and subscription fixed
MailerLite integration activation check corrected; subscribers are now added on payment completion.
### MCP Adapter active status detection corrected
MCP Adapter status now correctly detects whether the plugin file is installed and active. Previously showed as active on WordPress 6.8+ due to a built-in MCP class collision.
### AI settings subsections render correctly
AI Provider and other subsections on the AI/MCP settings page now render correctly instead of showing "No settings available".
---
## Version 3.2.0
Released on July 23, 2026
**New**
### Slack integration
Rich Blocks-formatted payment notifications via Slack Incoming Webhooks with custom message templates and per-form channel override.
### Telegram integration
Bot API payment notifications with HTML formatting, configurable events (completed, failed, cancelled), and a custom message template.
### Twilio SMS integration
Customer and admin SMS notifications on payment events with configurable message templates for both the site owner and the paying customer.
### Google Sheets integration
Automatic payment row logging via Google Apps Script webhook — no OAuth or API keys required. Each payment appends a new row with all relevant fields.
---
## Version 3.1.0
Released on July 6, 2026
**New**
### AI / MCP integration
Built-in Model Context Protocol server exposing 15 abilities — coupons, payments, customers, invoices, subscriptions, and forms — to Claude, Cursor, and any MCP-compatible AI agent.
### Generic outgoing webhooks
Multi-endpoint delivery following the Standard Webhooks spec with HMAC-SHA256 signed requests, automatic retry, and a full delivery log. Includes a migration path from existing Zapier and Pabbly endpoints.
### Bulk coupon generation
Generate large batches of unique coupon codes with custom prefix and suffix in one action, with CSV export of all generated codes.
---
## Version 3.0.1
Released on July 2026
**New**
### Authorize.Net gateway
Accept credit and debit card payments via Authorize.Net with both Accept Hosted (redirect) and Accept.js (embedded card form) checkout modes. Apple Pay and PayPal Express available as additional payment methods.
**Improvements**
### Gateway configuration centralized
Gateway list moved to Settings → Gateways so all gateway configuration is in one place, separate from the Extensions page.
### Branding and style update
Updated admin branding, icons, and card styles across the plugin for a more consistent visual identity.
---
## Version 3.0.0
Released on June 2026
**New**
### Redesigned admin UI
Completely rebuilt admin interface with a React SPA dashboard, improved navigation, and a consistent design system across all Pro pages.
### Pro reporting
Dedicated reporting page with revenue, forms, subscriptions, goals, and payment recovery tabs — all visualized with charts and filterable date ranges.
### Native Form builder
Gutenberg-based native payment form builder with drag-and-drop fields, pricing blocks, and a dedicated form editor sidebar for Pro settings.
### Invoices
Generate and send PDF invoices for payments with customizable templates, logo, and business details.
### Subscription and Payment management
Dedicated subscription and payment list pages with per-record detail views, status management, and customer history.
### Manual Payment gateway
Accept offline or bank-transfer payments manually. Admins mark payments as completed from the dashboard; customers receive a pending confirmation email.
# Checkout Layout: Stacked vs Split
WP SmartPay offers two checkout layouts that control how the payment form looks on the frontend: **Stacked** (single column) and **Split** (two columns). You choose the layout per form in the editor Options panel.
## Stacked Layout (Default)
All checkout fields — name, email, amount selector, gateway, and pay button — are displayed in a single vertical column. This is the default for all new forms.
**Best for:**
* Narrow page columns or sidebar embeds
* Mobile-first audiences (single column reads naturally on phones)
* Simple donation forms with few fields
## Split Layout
The form is divided into two columns side by side:
* **Left column** — Customer details (name, email, amount input) and any custom blocks you have added to the form canvas.
* **Right column** — Gateway selector (if multiple gateways are active on the form) and the pay button.
**Best for:**
* Full-width page embeds where the extra space improves readability
* Forms with lots of fields — spreading them across columns reduces scroll
* Visually separating "what you're paying for" from "how you're paying"
## How to Change the Checkout Layout
1. Open the form in the editor: **SmartPay → Forms → Edit**.
2. In the right sidebar, click the **Options** panel to expand it.
3. Locate the **Checkout Layout** setting.
4. Select **Stacked** or **Split**.
5. Click **Update** to save.
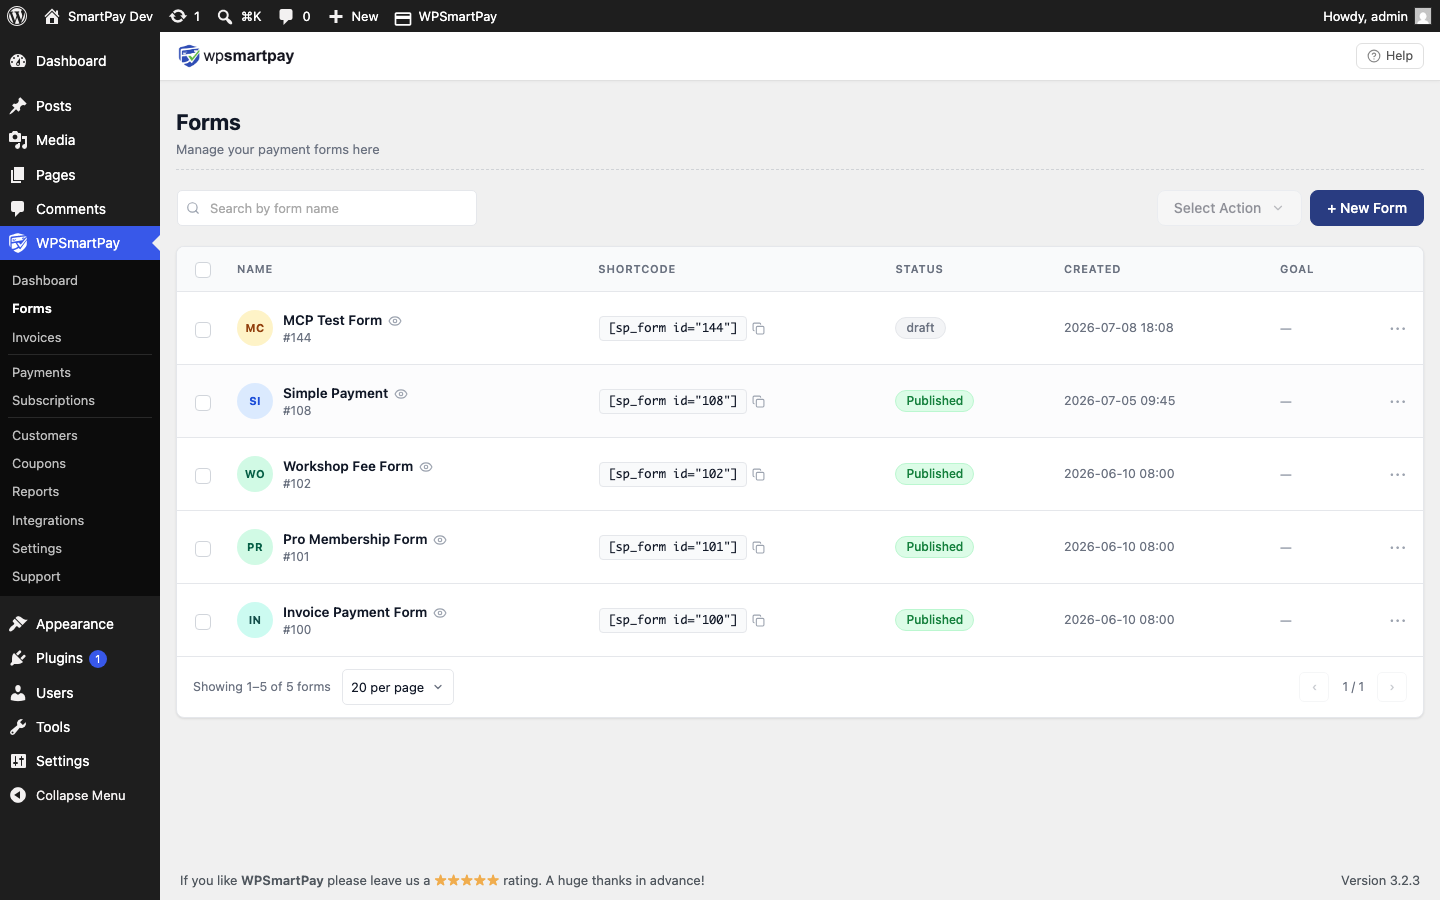 Open the Forms list, then click Edit on any form to access the Checkout Layout option.## Mobile Behaviour
On screens narrower than 768 px, both layouts collapse to a single column regardless of the setting. SmartPay's checkout stylesheet handles this automatically — no custom CSS is required.
> **Tip:** Use your browser's developer tools (press F12 and toggle the mobile device view) to preview how a form looks at different screen sizes before publishing.
# Common Errors & Fixes
This article lists the most frequently reported issues in WP SmartPay and how to resolve them quickly.
## "No gateway selected" at Checkout
**Symptom:** The checkout form appears but there is no payment button or gateway selector.
**Cause:** No gateway is enabled in SmartPay settings, or the form does not have a gateway assigned.
**Fix:**
1. Go to **SmartPay → Settings → Payment Gateways**.
2. Enable at least one gateway (Test Payment is always available for quick testing).
3. Open the form in the editor and confirm the **Payment** sidebar panel shows an active gateway.
## Stripe Webhook Signature Failure
**Symptom:** Stripe payments complete on Stripe's side but stay Pending in SmartPay. The debug log shows "webhook signature verification failed".
**Fix:**
1. Go to your Stripe Dashboard → **Developers → Webhooks**.
2. Click the webhook endpoint to see its details.
3. Copy the **Signing Secret** (starts with `whsec_`).
4. Paste it into the **Webhook Secret** field in SmartPay's Stripe gateway settings.
5. Save and test with a new payment.
## License Key Not Activating
**Symptom:** Clicking "Activate License" shows an error or the status stays Inactive.
**Fixes:**
* Double-check the key for extra spaces or line breaks when pasting.
* Confirm you have not exceeded the activation limit for your license plan — deactivate on an unused site first.
* Check that your server can make outbound HTTPS requests to the licensing server (some firewalls block external connections). Ask your host to confirm.
* Try deactivating and reactivating: clear the existing key, save, then re-enter and activate.
## Currency Mismatch Error
**Symptom:** Gateway declines the payment with a currency-related error.
**Cause:** The currency set in SmartPay General Settings is not supported by your gateway account, or the gateway is not configured to accept that currency.
**Fix:**
1. Check your gateway dashboard to see which currencies your account supports.
2. Go to **SmartPay → Settings → General** and update the currency to match a supported one.
3. For Stripe: confirm the currency is enabled in your Stripe account settings.
## Missing Receipt Page / 404 After Payment
**Symptom:** After a successful payment, the customer sees a 404 or blank page instead of the receipt.
**Fix:**
1. Create a WordPress page with the `[smartpay_payment_receipt]` shortcode.
2. Go to **SmartPay → Settings → General**.
3. Set the **Payment Success Page** field to that page.
4. Save settings.
## Payments Stuck at Pending
This is the most common issue and is almost always caused by webhooks not reaching your site. See [Payment Not Completing](https://docs.wpsmartpay.com/en/sp-tr-04-payment-not-completing) for a full troubleshooting checklist.
## Forms Appear Blank on Frontend
**Symptom:** The shortcode or block is on the page but nothing renders.
**Fixes:**
* Confirm the free SmartPay plugin is active — Pro alone will not render forms.
* Check for JavaScript errors in the browser console (press F12). JS errors from other plugins can break SmartPay's checkout rendering.
* Deactivate other plugins one by one to identify a conflict.
* Switch to a default WordPress theme temporarily to rule out a theme conflict.
# Contacting Support
The WP SmartPay support team is available to help with plugin configuration, payment gateway issues, and Pro feature questions. This article explains how to reach support and what information to include to get the fastest possible resolution.
## Support Ticket
The primary support channel is the ticket system at the WP SmartPay website. Submit a ticket from your account dashboard or at [wpsmartpay.com/support](https://wpsmartpay.com/support).
> **Note:** Support is available to active Pro license holders. Free plugin users are supported through the WordPress.org support forum: [wordpress.org/support/plugin/wp-smartpay](https://wordpress.org/support/plugin/wp-smartpay/).
## What to Include in Your Ticket
Including the right information upfront typically saves 1–2 days of back-and-forth:
### 1. System Info
Copy your System Info from **SmartPay → Support → System Info** and paste it into the ticket. This gives the support team your WordPress version, PHP version, active plugins, and SmartPay configuration at a glance.
### 2. Debug Log
If the issue involves a payment failure or integration not firing:
1. Enable `define('SMARTPAY_DEBUG', true);` in wp-config.php.
2. Reproduce the issue.
3. Go to **SmartPay → Support → Debug Log**.
4. Copy the relevant log entries (especially any ERROR entries around the time of the failure).
5. Paste into the ticket.
### 3. Steps to Reproduce
Describe exactly what you did, what you expected to happen, and what actually happened instead. Include:
* Which payment form is affected (form ID)
* Which gateway is in use
* Whether Test Mode is on or off
* Any recent changes to the site (plugin updates, theme changes, server migrations)
### 4. Screenshots or Error Messages
If there is a visible error on the frontend or admin, include a screenshot or copy the exact error text.
## Community Resources
* **Documentation** — This KB covers setup, configuration, and common issues. Search it first before opening a ticket.
* **WordPress.org Forum** — For free plugin users: [wordpress.org/support/plugin/wp-smartpay](https://wordpress.org/support/plugin/wp-smartpay/)
## Support Response Times
The SmartPay support team typically responds to tickets within 1 business day. Tickets submitted with complete information (system info + debug log + steps to reproduce) are usually resolved faster than those requiring additional follow-up questions.
# Offering Installment Payment Plans for Courses
High-ticket courses and coaching programs lose potential students when the full price must be paid upfront. Offering a payment plan — such as 3 monthly installments instead of one lump sum — can significantly increase conversions. WP SmartPay Pro handles installment billing natively through its subscription feature with a fixed billing count.
## Scenario
An online educator sells a 12-week business course for $597. To reduce checkout friction, they want to offer a 3-payment plan: $199/month for 3 months. After 3 payments the subscription ends automatically — no need for the student or admin to manually cancel.
## What You Need
* WP SmartPay Pro (subscription billing with fixed installment count)
* A subscription-compatible gateway: Stripe, Mollie, or Paddle
* Optionally: LearnDash, LifterLMS, or Tutor LMS integration for course access gating
## Step 1: Create a Fixed-Term Subscription Form
1. Go to **SmartPay → Forms → Add New**.
2. Set the price to $199.
3. In the **Subscription** settings, set billing period to **Monthly**.
4. Set **Subscription Length** to **3 months** (or 3 billing cycles).
5. The subscription will automatically complete after the 3rd payment — no manual cancellation needed.
## Step 2: Offer Both Options on One Page
Display two forms side by side: the one-time payment ($597) and the payment plan ($199 × 3). Use a simple two-column layout:
```
Pay in Full — $597
[smartpay_form id="10"]
3 Monthly Payments — $199/mo
[smartpay_form id="11"]
```
## Step 3: Gate Course Access (Optional)
If you use LearnDash, LifterLMS, or Tutor LMS:
1. Go to **SmartPay → Extensions** and activate your LMS integration.
2. Map the subscription form to the course or group in your LMS.
3. Students gain access after the first payment and lose access if a payment fails.
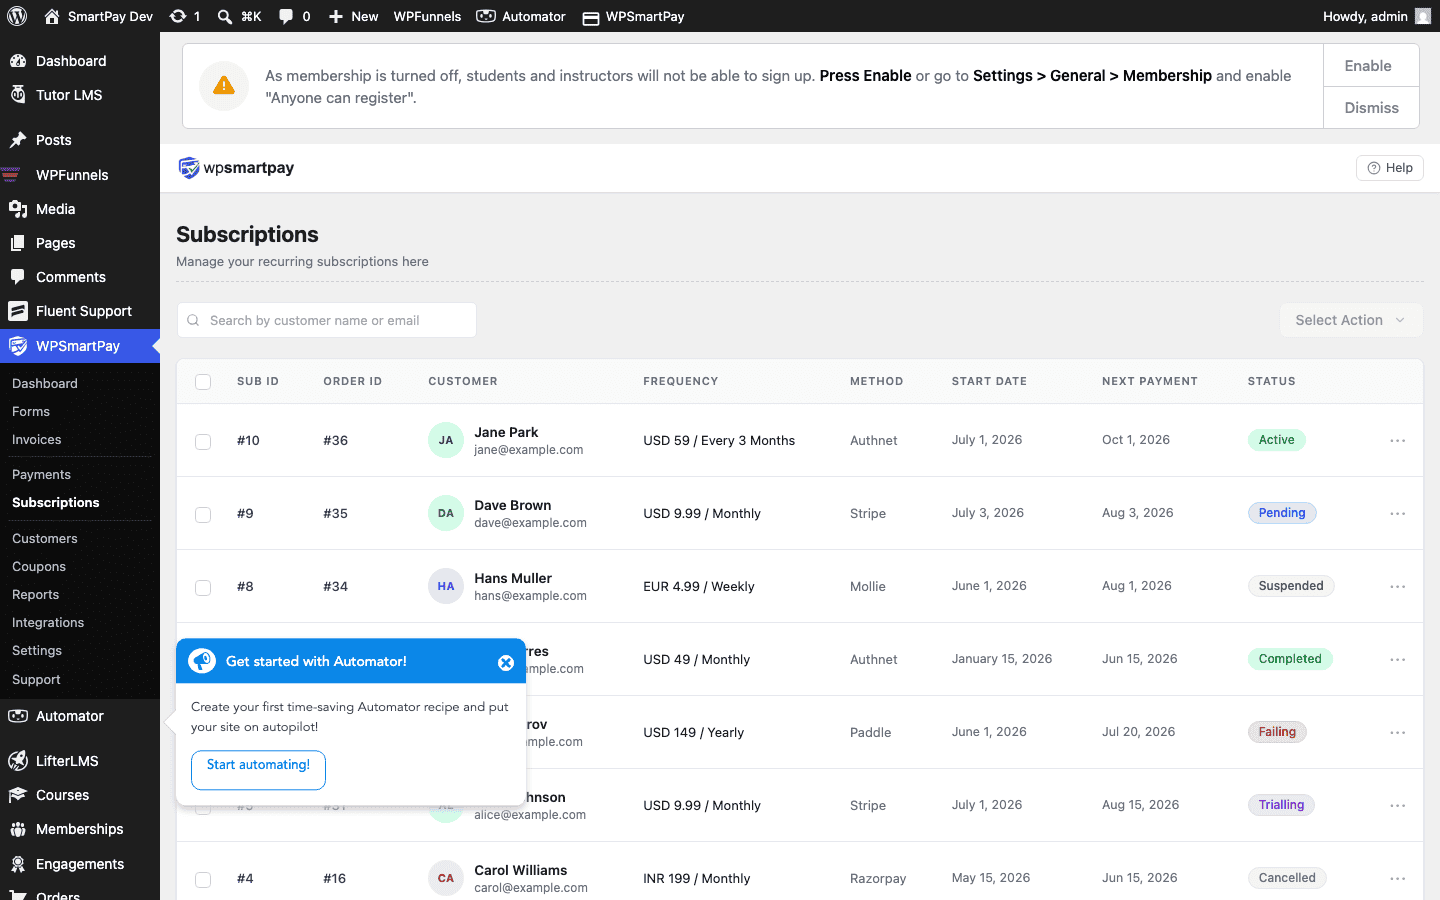 Subscriptions list — payment plan subscribers appear here. Status changes to Completed after all installments are paid.## What Happens After All Payments
After the 3rd monthly charge, SmartPay marks the subscription as **Completed**. No further charges are made. The student's course access (if LMS-gated) remains active — completion of the payment plan doesn't remove access.
## Handling a Failed Installment
If one of the 3 payments fails:
1. SmartPay marks the subscription as **Failing** and retries automatically (Smart Retries for Stripe).
2. The student receives a payment failure notification email.
3. If retries are exhausted, the subscription is cancelled and LMS access is suspended until payment resumes.
4. The student can update their payment method via the customer account page and reactivate.
## Result
Students who couldn't afford $597 upfront can now enroll for $199 today. The payment plan runs automatically — SmartPay charges the student's card on the same date each month for 3 months, sends receipts, and marks the subscription complete when done. No manual invoicing, no spreadsheets.
## Tips
* Offer a small discount for paying in full (e.g., save $0 vs $597 all-at-once for $597 vs 3×$199=$597) — or deliberately price it so the plan costs more (3×$219=$657) to incentivize the upfront option.
* Use the **Revenue Report** to see how many students are on payment plans vs paid-in-full, useful for cash flow forecasting.
* Add a coupon code to your welcome email that gives a discount on a future course — a simple retention tactic.
# Creating a Payment Form
# Creating a Payment Form
Payment forms are the core of WP SmartPay — they appear on your site and let visitors pay you directly. This guide walks you through creating your first form from scratch in the Gutenberg editor.
## Open the Forms List
Go to **SmartPay → Forms** in your WordPress admin sidebar. You will see a list of all existing payment forms.
 The Forms list shows all your payment forms with status, shortcode, and quick action links.## Start a New Form
Click **Add New** at the top right of the forms list. A modal appears asking how you want to begin:
 The New Form modal lets you pick a template or start with a blank form.* **Blank Form** — Starts with an empty canvas. Good for custom layouts.
* **Templates** (Pro) — Pre-built forms for common use cases such as donations, product sales, and event tickets. Templates are fully editable after selection.
## Set the Form Title
Once the editor opens, click the **Add title** field at the top and type your form name. This title appears in the admin forms list and in the shortcode tooltip but is not shown to customers at checkout unless you add a heading block to the form canvas.
## The Form Editor Layout
The form editor is the standard WordPress Gutenberg block editor with SmartPay-specific sidebar panels on the right:
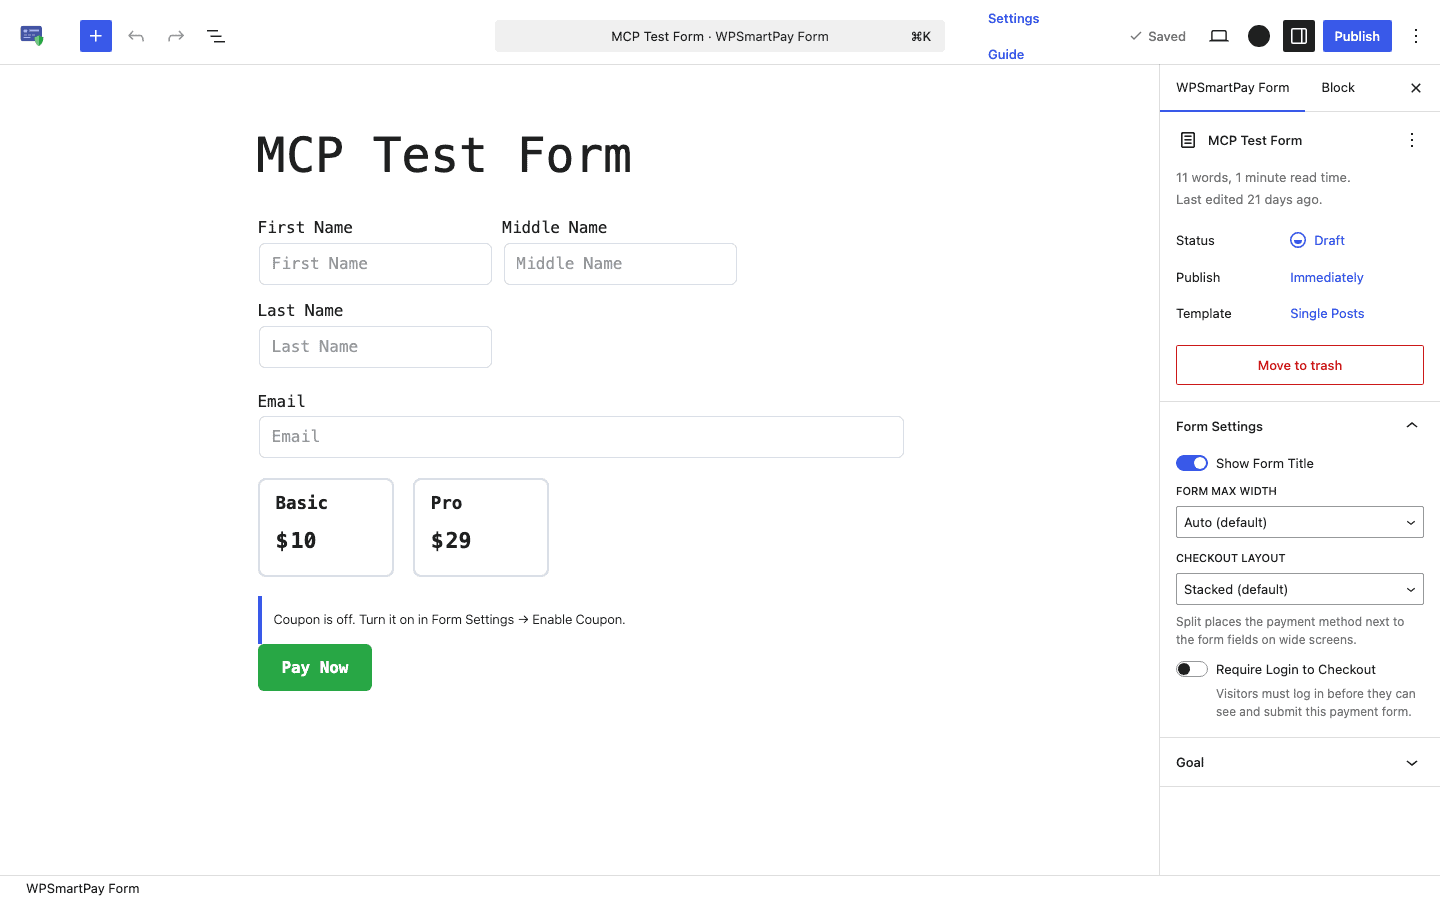
* **Canvas (centre)** — The visual form area. The Name, Email, pricing, and Pay Now blocks are inserted by default. You can add extra blocks (text, heading, address, custom fields) above or below them.
* **WPSmartPay Form panel (right sidebar)** — Form-level settings: Form Max Width, Checkout Layout, Require Login to Checkout, Goal, and Coupon.
* **Block panel (right sidebar)** — Inspector for whichever block is currently selected.
> **Note:** The customer email, name, and pay button are added to the canvas automatically. You do not need to add them from scratch.
## Adding Fields with the Guide
To add more fields to your form, click the **Guide** button in the editor header (top-right toolbar, next to **Settings**). The **WPSmartPay Help Guide** modal opens.
 The Guide modal — click any field button to add it to your form instantly.* **Required fields** section shows Name Field and Email — these are already on the form by default.
* **Add more fields** section lists optional blocks: Text Input, Text Area, Radio, Checkbox, Select, and Address. Click any button to insert that field at the bottom of the canvas.
You can also add blocks with the standard Gutenberg block inserter (**+** button in the toolbar or between blocks), but the Guide is the fastest way for SmartPay-specific fields.
## Configuring the Pricing
1. In the right sidebar, click the **Pricing** panel to expand it.
2. Choose **Fixed** to charge a set amount, or **Custom Amount** to let the visitor enter their own.
3. Enter the amount in the text field. The currency symbol comes from **Settings → General → Currency**.
4. Optionally add predefined amount cards (e.g., $10, $25, $50) for donation-style forms.
## Choosing a Gateway
In the **Payment** sidebar panel, select the gateway that will process payments on this form. Only gateways enabled in **Settings → Payment Gateways** appear here. If only one gateway is enabled, it is selected automatically.
## Publish the Form
1. When the form is ready, click **Publish** in the top-right corner of the editor.
2. WordPress saves the form and assigns it a numeric ID.
3. Back in the Forms list, the shortcode column shows `[sp_form id="123"]` — copy this to embed the form on any page.
> **Tip:** Use **Preview** (top-right toolbar) to see how the form looks on the frontend before publishing.
## Editing an Existing Form
From the Forms list, click the form title or the **Edit** link under it to reopen the editor. Changes take effect immediately after you click **Update**.
# Creating & Managing Coupons
WP SmartPay Pro includes a coupon system that lets you create discount codes for your payment forms. Customers enter the code at checkout and the discount is applied automatically before payment.
## Opening the Coupons List
Go to **SmartPay → Coupons**. The list shows all existing coupons with their code, discount type, usage count, and status.
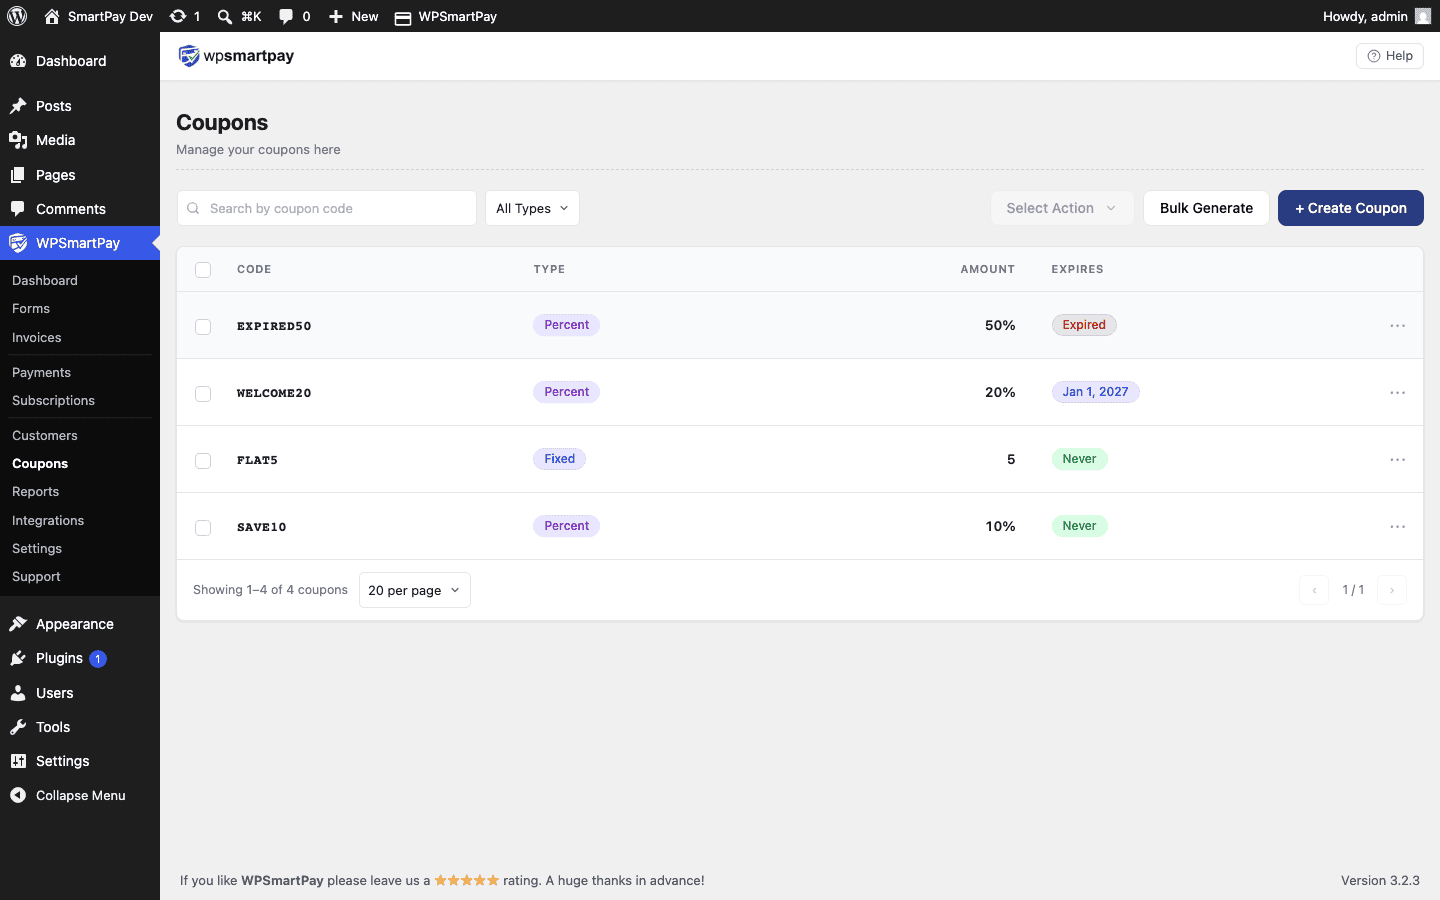 The Coupons list with discount type, usage, and status at a glance.## Creating a New Coupon
Click **Add Coupon** at the top right of the list. A drawer or form opens with these fields:
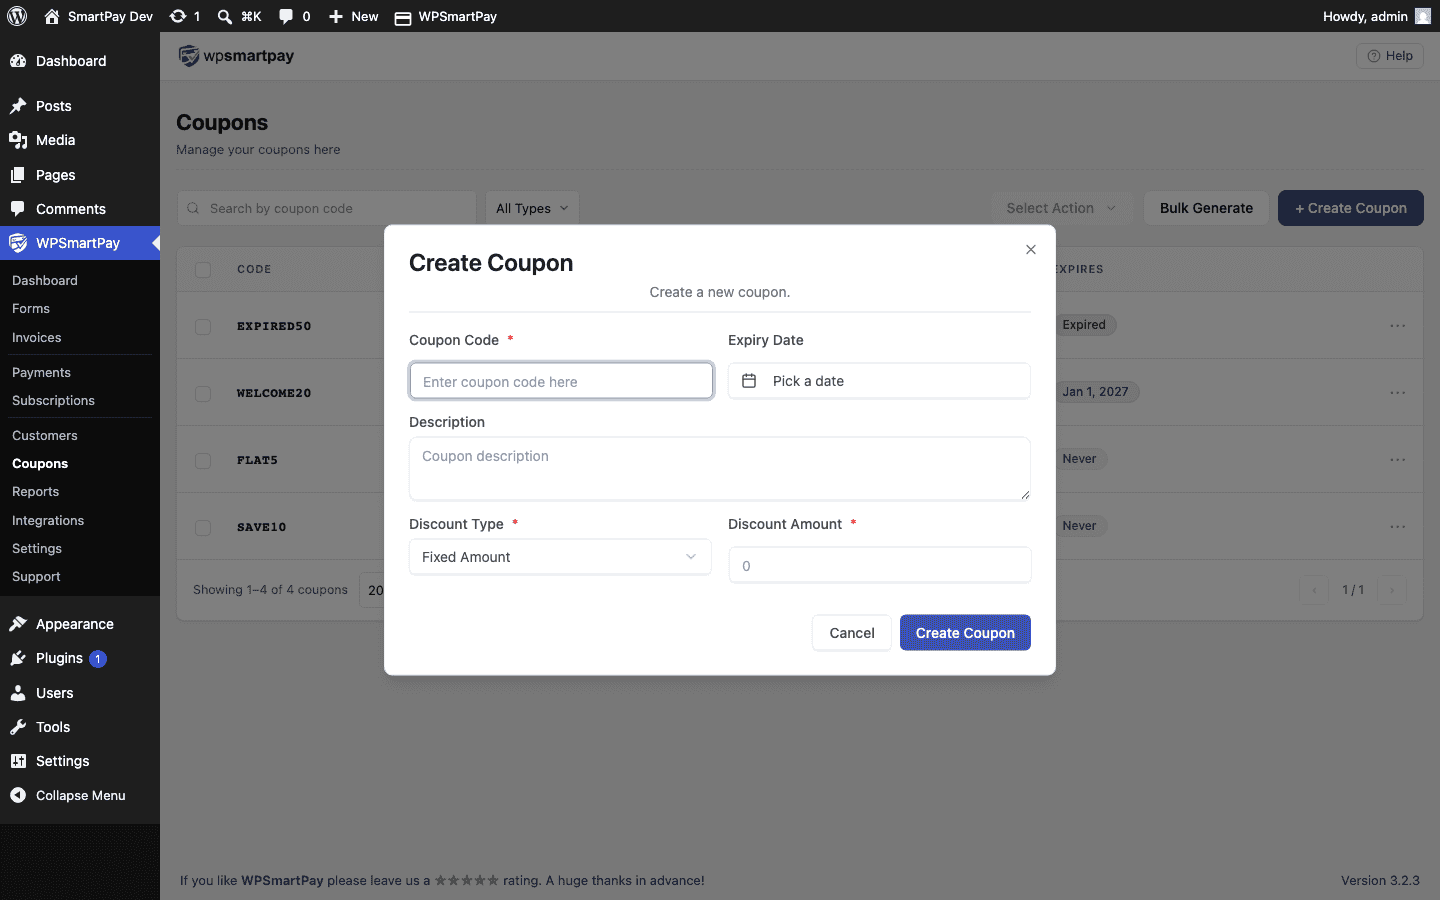 The Add Coupon form — fill in the code, discount type, amount, and expiry details.### Required Fields
* **Coupon Code** — The code customers will enter at checkout (e.g., SAVE20, WELCOME10). Can be any alphanumeric string. Not case-sensitive.
* **Discount Type** — Choose **Flat** (fixed amount off) or **Percentage** (percent off the total).
* **Discount Amount** — For Flat: the dollar amount. For Percentage: the percentage (e.g., 20 for 20% off).
### Optional Fields
* **Status** — Active or Inactive. Inactive coupons are rejected at checkout even if the code is entered correctly.
* **Start Date** — The coupon is not valid before this date.
* **End Date / Expiry** — The coupon stops working after this date and time.
* **Maximum Uses** — Total number of times the coupon can be used across all customers. Leave blank for unlimited.
* **Max Uses Per Customer** — How many times a single customer (matched by email) can use the code.
* **Applicable Forms** — Restrict the coupon to one or more specific payment forms. Leave blank to allow it on any form.
## Editing a Coupon
Click the coupon code or the **Edit** action in the Coupons list to reopen the form. All fields except the original code can be changed after creation.
## Deleting a Coupon
Click **Delete** in the coupon's action row. Deleted coupons are removed permanently. Payments made with the coupon are not affected — the discount is already recorded on those payment records.
## Usage Tracking
The **Used** column in the Coupons list shows how many times each code has been applied. Click the usage count to see a list of payments that included this coupon.
# Creating & Sending an Invoice
WP SmartPay Pro lets you create invoices proactively — before the customer has paid — and send them a link to pay directly from the invoice. This is ideal for B2B billing, project work, or any situation where you need to bill before delivering a product.
## Opening the Invoice Creator
1. Go to **SmartPay → Invoices**.
2. Click **Create Invoice** at the top right.
3. A drawer panel slides in from the right.
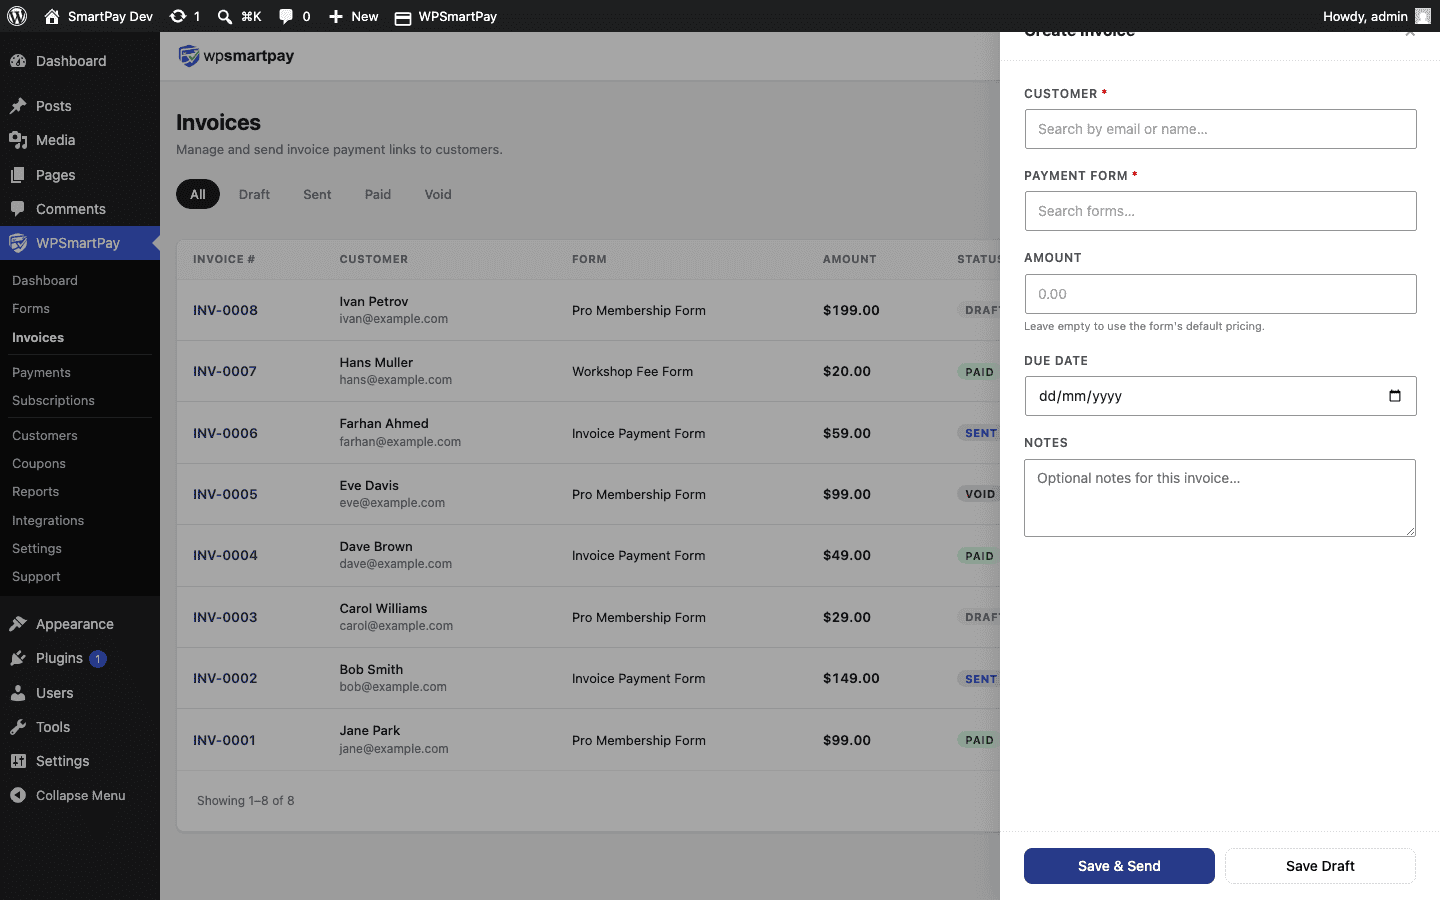 The Create Invoice drawer — fill in the customer, line items, tax, and due date.## Required Fields
### Customer
Search for an existing customer by email or name. If the customer has not paid through SmartPay before, type their email address to create a new customer record on the fly.
### Linked Form
Associate the invoice with a payment form. The form determines which SmartPay integrations fire when the invoice is paid (LMS enrolment, email sync, etc.).
### Line Items
Add one or more line items to the invoice:
* **Description** — What is being billed (e.g., "Website redesign — Phase 1").
* **Quantity** — Number of units (default 1).
* **Unit Price** — Price per unit.
Click **Add Line Item** to add more rows. Each row calculates its own subtotal (quantity × unit price).
### Tax & Additional Charges
If tax is configured on the linked form, it appears automatically. You can also add an additional charge (flat or percentage) in this section.
### Due Date
Set a due date for the invoice. Invoices past their due date automatically move to **Overdue** status.
## Saving the Invoice
Click **Save as Draft** to save without sending, or **Send Invoice** to create the invoice and immediately email the payment link to the customer.
The invoice status changes to **Sent** when the email is delivered.
## Shareable Payment Link
Every invoice has a public URL that you can share with the customer directly. The invoice page shows all line items, totals, and a pay button. When the customer pays, the invoice is marked **Paid** automatically.
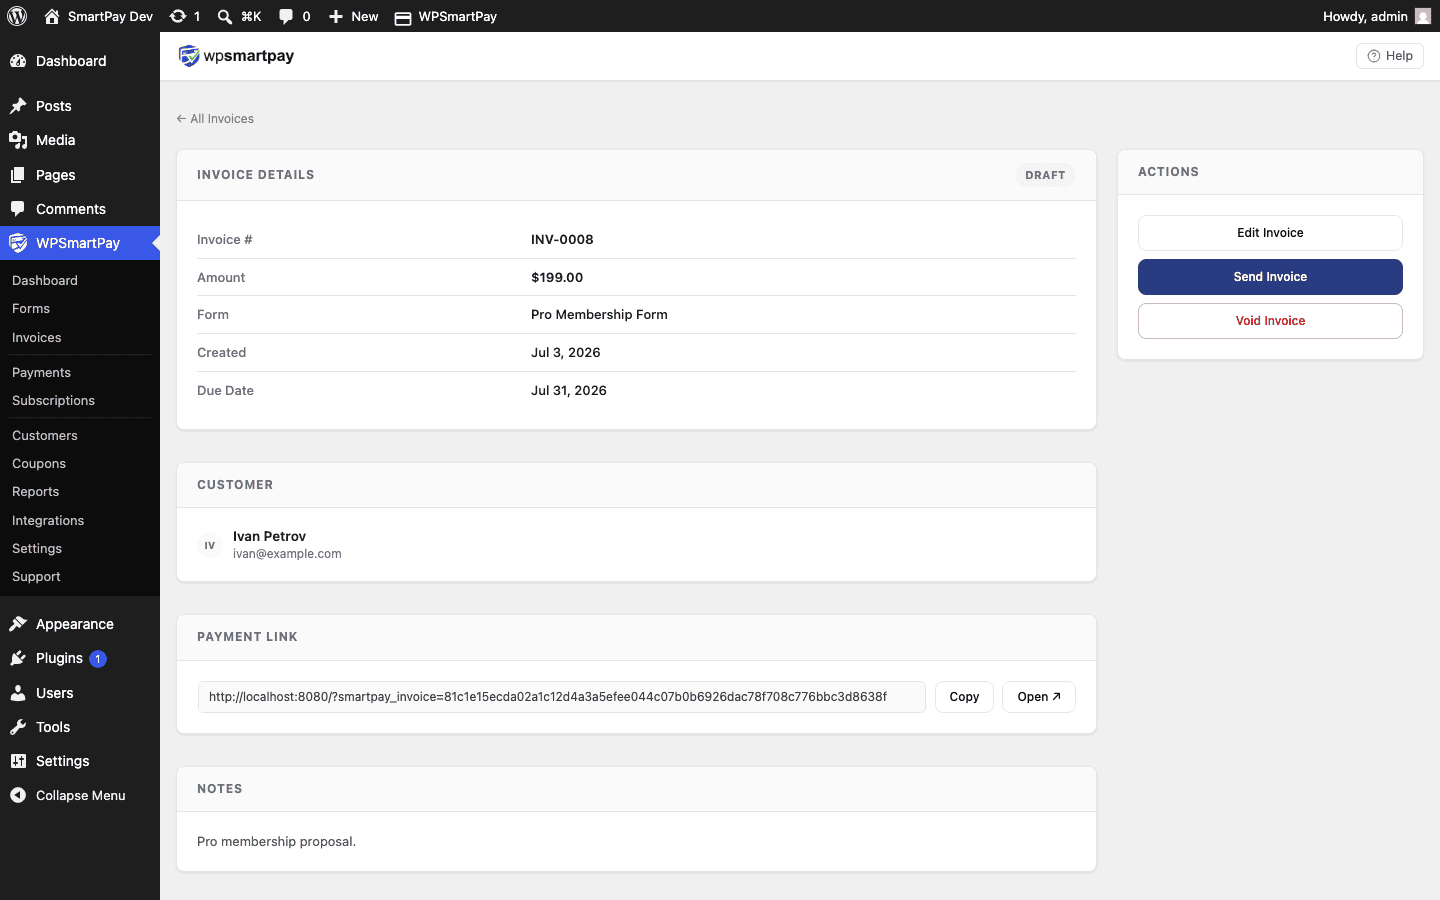 The invoice detail page — customers see the full invoice and can pay through it directly.> **Tip:** Copy the invoice public link from the invoice detail page and paste it into any email, messaging app, or quote document. No SmartPay account is needed for the customer to view and pay the invoice.
# How Customers Use Coupon Codes
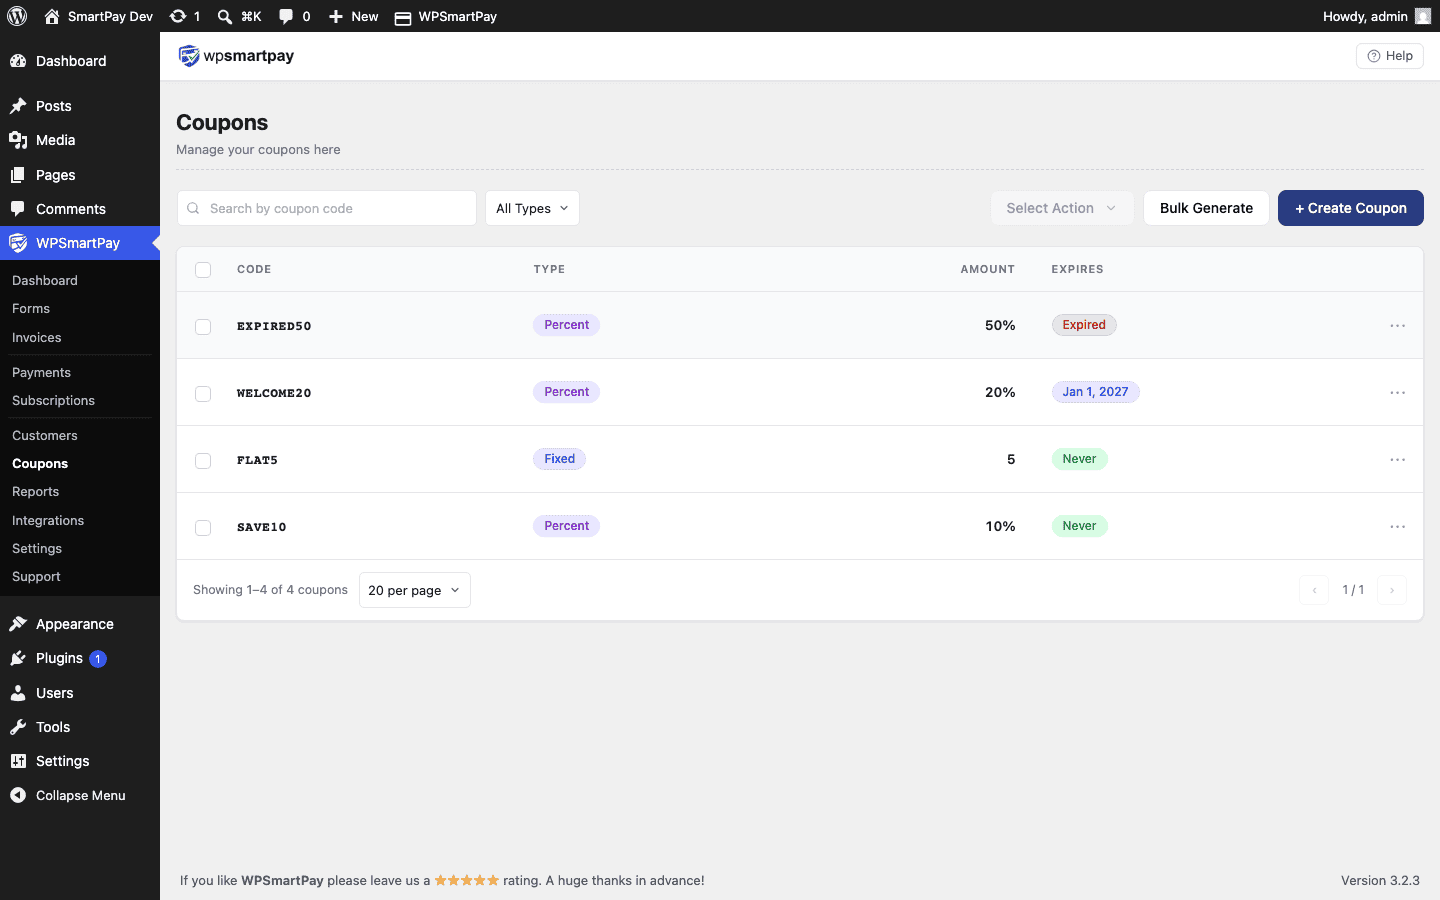
Once a coupon is active in WP SmartPay, customers can apply it at checkout without any additional setup on your end. This article explains the customer experience when using a discount code.
## Where the Coupon Field Appears
On any payment form that has coupons enabled, a **Have a coupon code?** link or input field appears on the checkout form — typically below the amount fields and above the pay button.
## Applying a Code
1. The customer clicks **Have a coupon code?** (if collapsed) to reveal the input.
2. They type or paste their code into the field.
3. They click **Apply**.
4. SmartPay validates the code instantly (no page reload).
5. If valid, the checkout amount updates to show the discount applied and the new total.
## Removing a Code
After applying a code, a **Remove** link appears next to the applied discount. Clicking it removes the discount and restores the original amount — without the customer needing to refresh the page.
## Error Messages
If a code cannot be applied, the customer sees an inline error message:
* **"Invalid coupon code"** — The code does not exist or has a typo.
* **"This coupon has expired"** — The current date is past the coupon's end date.
* **"This coupon has reached its usage limit"** — The maximum number of uses has been reached across all customers.
* **"You have already used this coupon"** — Per-customer usage limit reached for this email address.
* **"This coupon is not valid for this form"** — The coupon is restricted to specific forms and this form is not included.
## What the Customer Sees at Checkout
After a valid code is applied, the checkout form shows a breakdown:
* Subtotal (original price)
* Coupon code — discount amount (e.g., SAVE20 — −$20.00)
* Total (price after discount)
The customer sees the exact saving before clicking the pay button, which improves conversion and reduces refund requests from confused buyers.
> **Tip:** Coupon codes are not case-sensitive. A customer entering `save20`, `SAVE20`, or `Save20` will all resolve to the same coupon.
# Customer Detail Page
Clicking a customer in the SmartPay list opens their profile page — a complete view of their contact information, purchase history, subscriptions, and lifetime value.
## Opening a Customer Profile
Go to **SmartPay → Customers** and click the customer's name to open their detail page.
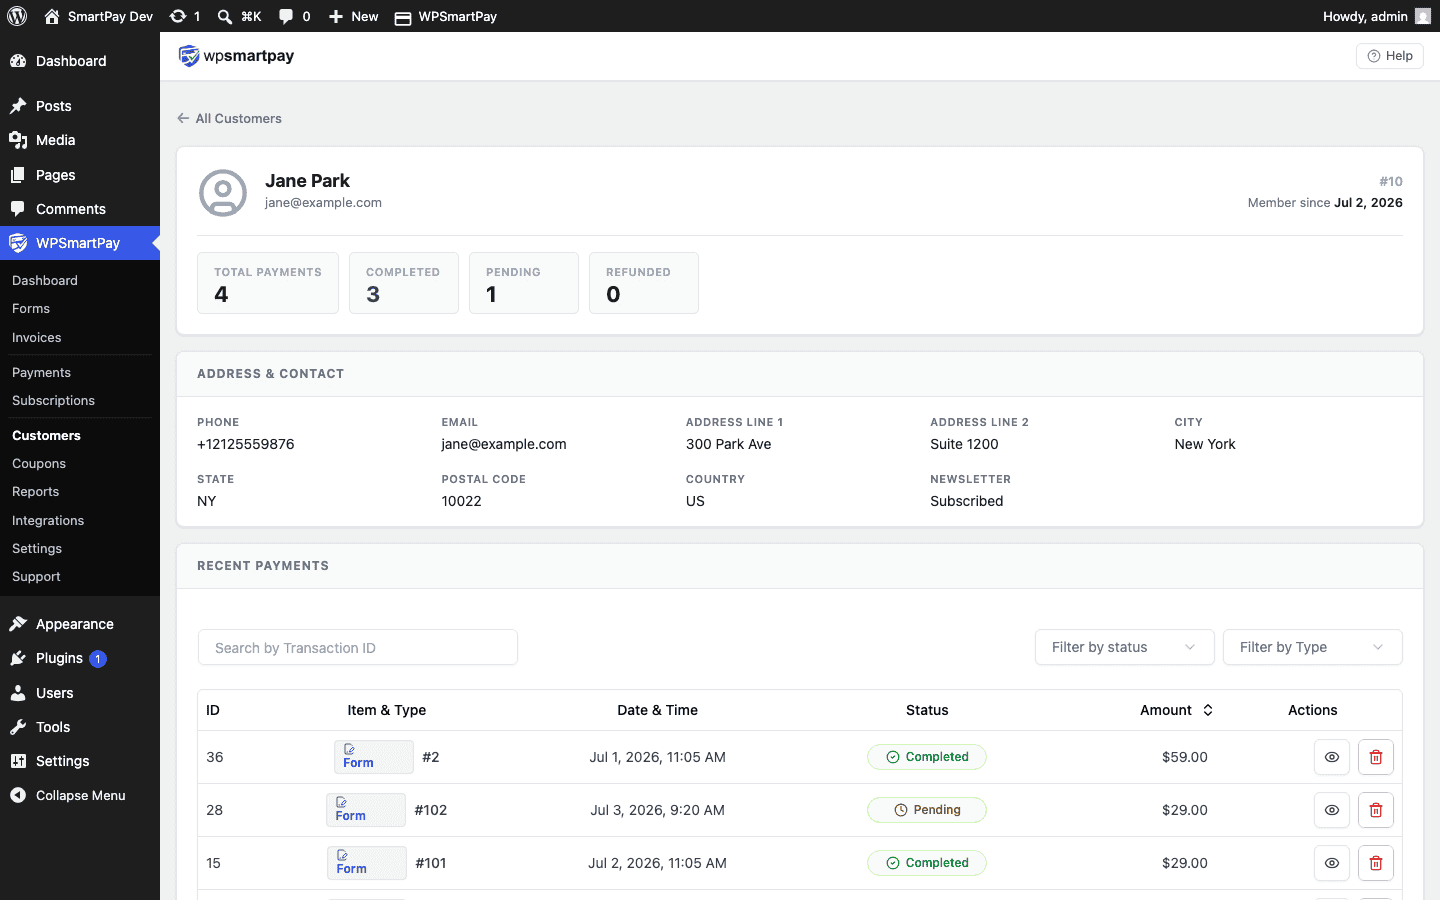 The customer profile shows all contact info, payment stats, and a full payment history.## Profile Hero
The top of the page shows:
* **Avatar** — Auto-generated from the customer's email via Gravatar. No Gravatar account? A generated letter-avatar is shown instead.
* **Name** — As entered at checkout.
* **Email** — Primary email address. Click to pre-fill your email client.
* **WordPress User** — If the customer has a WordPress account linked to this email, a user link appears here.
## Stats Strip
Three summary cards beneath the hero show quick stats:
* **Total Payments** — Count of completed payments from this customer.
* **Lifetime Revenue** — Sum of all completed payment amounts.
* **Last Payment** — Date and amount of the most recent completed payment.
## Payments Table
A scrollable table lists every payment associated with this customer — most recent first — with columns for form/product, amount, gateway, status, and date. Click any row to open the full payment detail page.
## Subscriptions Panel (Pro)
If the customer has any subscriptions, a **Subscriptions** panel appears below the payments table showing:
* Subscription ID and linked form
* Amount and billing interval
* Status (Active, Cancelled, Expired)
* Next renewal date (for active subscriptions)
Click the subscription ID to open the full subscription detail page where you can view renewal history or cancel.
# Customer List
The WP SmartPay customer list gives you a directory of every person who has made a payment through your site. From here you can search for customers, see their purchase history at a glance, and open a full customer profile.
## Opening the Customers List
Go to **SmartPay → Customers** in your WordPress admin sidebar.
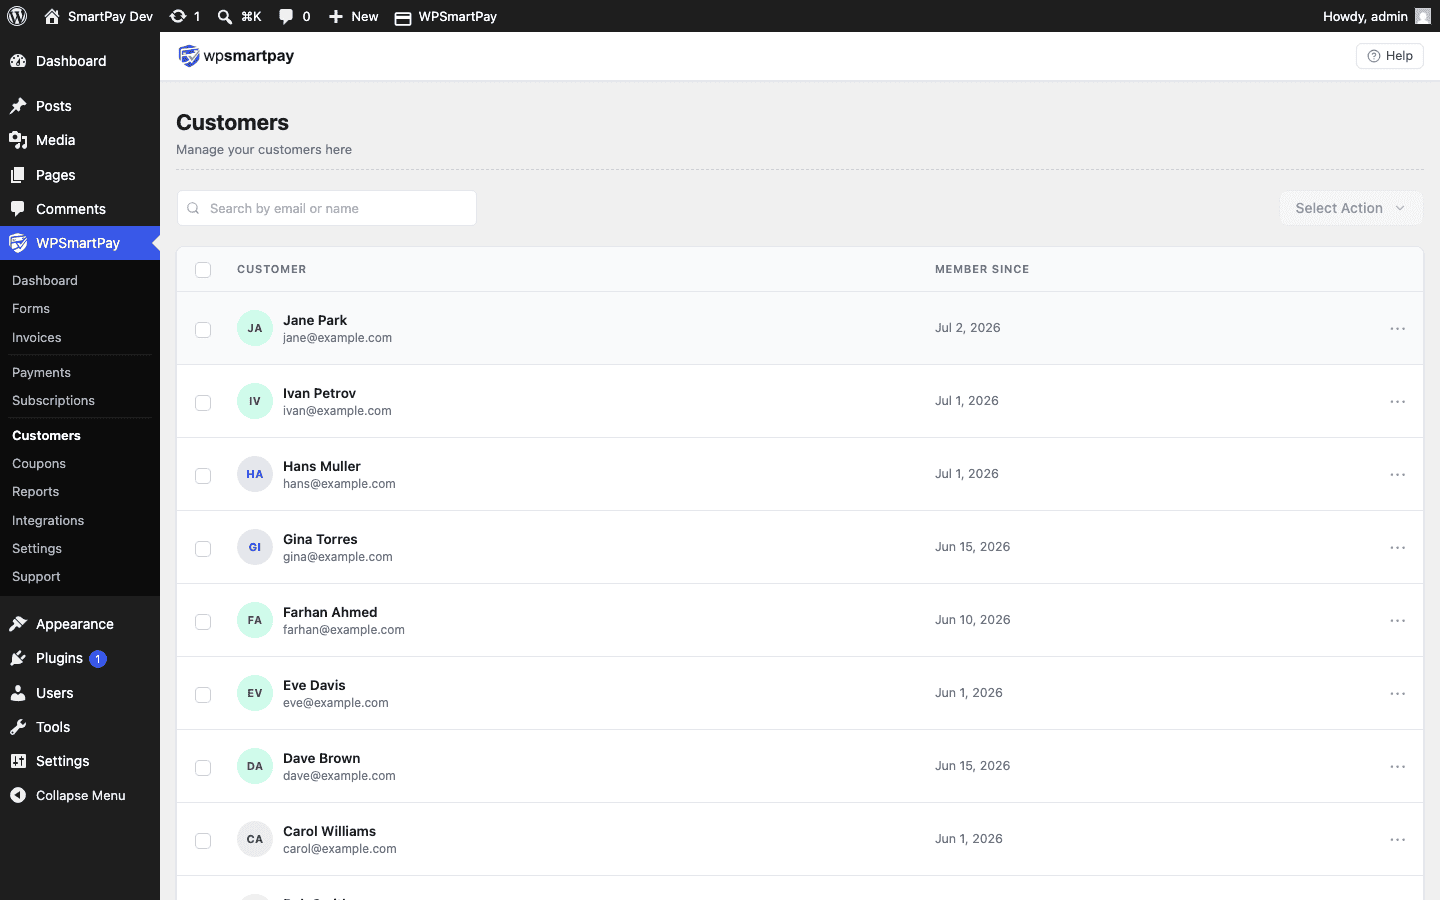 The Customers list with search, totals, and a row per customer.## Column Overview
* **Name** — Customer's display name. Click to open the customer detail page.
* **Email** — The email used at checkout. All payments from this email are grouped under one customer record, even if the customer pays through multiple forms.
* **Payments** — Total number of completed payments from this customer.
* **Revenue** — Lifetime total of completed payments in your store currency.
* **Date** — When the customer record was first created (their first payment).
## Searching Customers
Use the search bar at the top to find a customer by:
* Full or partial name
* Email address (partial match supported)
Results update as you type.
## Sorting
Click any column header to sort the list. Sorting by **Revenue** descending identifies your highest-value customers. Sorting by **Date** ascending shows who your earliest customers were.
## Customer Records vs WordPress Users
SmartPay creates a *customer record* for every unique email address that pays through the plugin, regardless of whether that person has a WordPress user account. Customers without a WP account can still pay through any form — they are not required to log in unless **Require Login** is enabled on the specific form they are using.
> **Note:** If a customer pays with two different email addresses, SmartPay creates two separate customer records. There is no automatic merge — you would need to update payments manually if the customer requests consolidation.
# Customising & Printing Invoices
WP SmartPay Pro lets you customise the appearance of all invoices with your business name, logo, footer text, and invoice numbering format. You can also print invoices directly from the browser.
## Invoice Branding Settings
Go to **SmartPay → Settings → General** and look for the invoice-related fields:
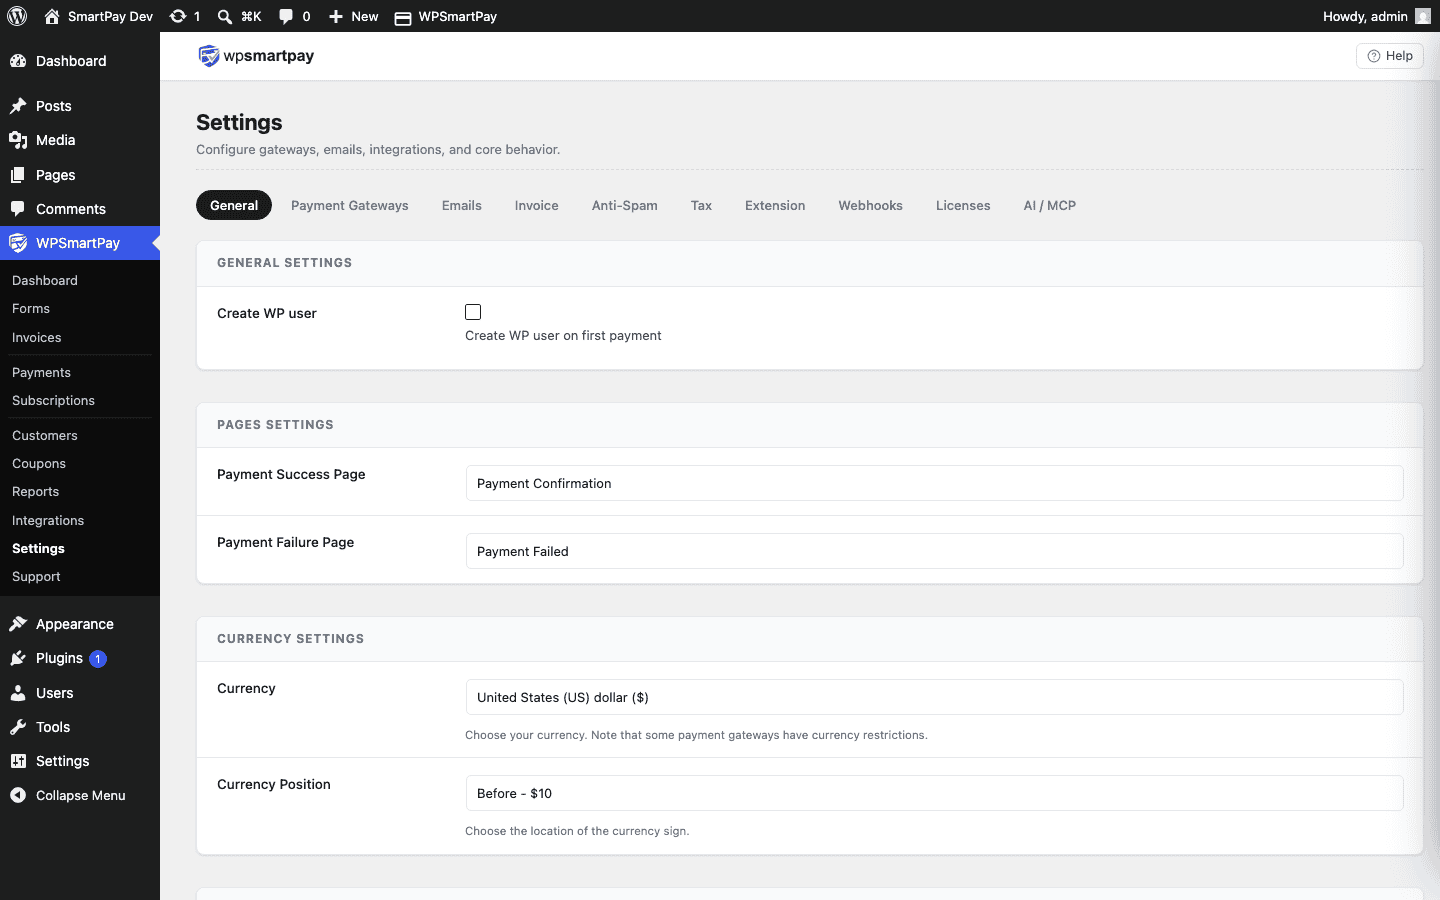 Invoice branding fields in General Settings — all invoices use these values.* **Business Name** — Appears at the top of every invoice as the seller name.
* **Business Logo** — Upload your logo (PNG or SVG recommended). It appears in the top-left corner of the invoice.
* **Footer Text** — Optional text at the bottom of every invoice — good for your business registration number, VAT number, terms of service URL, or a thank-you note.
* **Invoice Number Prefix** — Prepended to every invoice number (e.g., prefix `INV-` gives invoice numbers like `INV-0042`).
## Print-Optimised Invoice Page
Every invoice has a dedicated print view. To access it:
1. Open the invoice detail page (**SmartPay → Invoices → click an invoice**).
2. Click **Print Invoice**.
3. The page reloads with a clean, print-optimised layout — no admin bar, no sidebar, white background.
## Print to PDF
To save an invoice as a PDF:
1. Open the print view (above).
2. In your browser, press Ctrl+P (Windows/Linux) or ⌘+P (Mac).
3. In the print dialog, change the **Destination** to **Save as PDF**.
4. Click **Save** and choose a filename.
This works in Chrome, Firefox, Edge, and Safari without any additional plugin.
## What Appears on Printed Invoices
The printed invoice includes:
* Your logo and business name
* Invoice number and dates (issue + due)
* Customer billing information
* All line items with quantities, unit prices, and line totals
* Tax breakdown (if applicable)
* Additional charges (if applicable)
* Subtotal and total
* Payment status (Paid, Overdue, etc.)
* Your footer text
> **Tip:** Set your logo to at least 200×60 px and use a transparent background PNG for the cleanest print result. Large raster images may print slowly or at reduced resolution.
# Admin Dashboard Overview
# Admin Dashboard Overview
The WP SmartPay dashboard is the first screen you see after clicking **SmartPay** in your WordPress admin sidebar. It gives you an instant read on revenue, recent orders, and key metrics — all in one place.
 The SmartPay dashboard gives you a live view of revenue, orders, and recent activity.## Stats Period Tabs
At the top of the dashboard you will find three time-period tabs: **Today**, **This Week**, and **This Month**. Clicking a tab instantly updates every stat card and chart below it — no page reload needed.
## Stats Cards
Below the tabs, four cards show the key numbers for the selected period:
* **Revenue** — Total revenue from completed payments in the selected period.
* **Orders** — Number of completed payments (not pending or failed).
* **Pending** — Payments currently in a pending or processing state.
* **Failed** — Payments that failed or were abandoned.
 Stats cards and the monthly revenue bar chart.## Revenue Chart
The bar chart displays revenue grouped by day (Today), day of week (This Week), or month (This Month). Each bar represents the total completed payment revenue for that period. Hovering over a bar shows the exact amount.
## Recent Payments
Below the chart is a list of the most recent payments — typically the last 10 — showing the customer name, amount, gateway, and status. Clicking any row takes you to the full payment detail page.
## Top Forms & Top Products
Two horizontal strips show which payment forms and digital products are generating the most revenue. Each entry shows the name and the total revenue earned in the selected period. Use this to identify your highest-performing content.
## Quick Links Strip
A row of shortcut buttons near the bottom lets you jump to common sections without navigating the sidebar:
* **Products** — Your digital product catalogue.
* **Forms** — Payment form list.
* **Customers** — Full customer directory.
* **Payments** — Complete payment ledger.
* **Coupons** (Pro) — Discount code management.
* **Settings** — Plugin configuration.
## All-Time Totals Strip
At the very bottom, three counters show lifetime site totals regardless of the selected period: total number of payment forms, total customers, and total digital products. These figures never reset and give you a long-term snapshot of your store's scale.
> **Tip:** The dashboard only counts **Completed** payments in the revenue totals. Refunded, failed, or pending payments are excluded from Revenue and Orders — which means your revenue figures always reflect money actually received.
## Setup Needed Panel
If your store has items that require attention — an unlicensed pro plugin, no active payment gateway, or an integration with an incomplete configuration — a **SETUP NEEDED** panel appears at the top of the dashboard.
 The SETUP NEEDED panel highlights configuration items that need your attention before the store is fully ready.Common items shown in this panel include:
* **No active payment gateway** — No gateway has been enabled in Settings → Payment Gateways. Customers cannot pay until at least one gateway is active.
* **Pro license not activated** — The pro plugin is installed but the license key has not been entered or verified. Go to **Settings → License** to activate it.
* **Integration needs setup** — An integration is activated but its API key or required settings are missing. The notice links directly to the integration's settings page.
Each item in the panel includes a link or button to jump directly to the relevant settings screen. Work through the list until the panel disappears — it will not show once all items are resolved.
> **Note:** The SETUP NEEDED panel is only visible to admin users. Your customers never see it.
# Debug Log
WP SmartPay can write detailed diagnostic messages to a log file as payments are processed, webhooks are received, and integrations run. The debug log is the first place to look when something isn't working as expected.
## Enabling Debug Logging
Add the following line to your site's `wp-config.php` file (before the line that says "stop editing"):
```
define('SMARTPAY_DEBUG', true);
```
WordPress's own `WP_DEBUG` and `WP_DEBUG_LOG` constants do not need to be enabled — SmartPay's debug log is independent.
> **Warning:** Debug logging can write sensitive information (API responses, webhook payloads, error details) to a file. Enable it only during troubleshooting, and disable it again once the issue is resolved.
## Viewing the Debug Log
Once debug logging is enabled, go to **SmartPay → Support → Debug Log**. The log viewer shows the most recent entries, newest at the top.
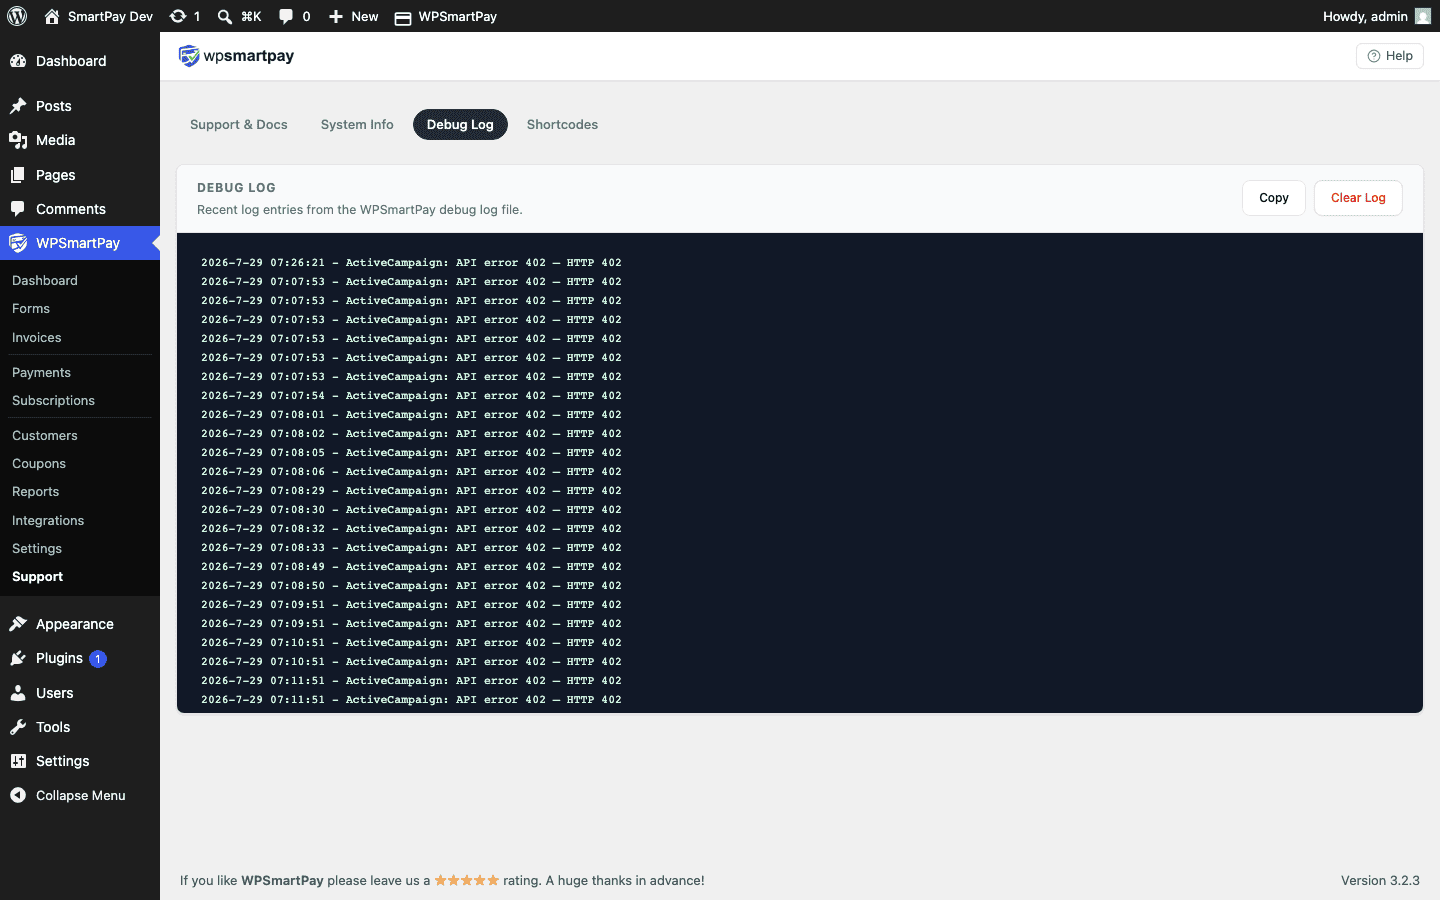 The Debug Log viewer under SmartPay → Support — entries are shown newest first with level badges.## Reading Log Entries
Each log entry has three parts:
* **Timestamp** — Date and time the event occurred (in your server's timezone).
* **Level** — `INFO` (normal flow), `WARNING` (non-critical issue), or `ERROR` (something failed).
* **Message** — A description of what happened, often including the gateway response or PHP error details.
Look for `ERROR` entries first — they directly indicate what failed. `WARNING` entries flag unusual situations. `INFO` entries show normal processing steps and are useful for confirming that a webhook was received and processed.
## Clearing the Log
Click **Clear Log** at the top of the debug log page to erase all entries and start fresh. Do this after resolving an issue to keep the log from growing large.
## Log File Location
The log is written to a file at `wp-content/uploads/smartpay-logs/debug.log`. You can access it via FTP or cPanel File Manager if the admin log viewer is unavailable.
# Admin Settings
The WPSmartPay Admin Settings system provides a comprehensive framework for managing plugin configuration through WordPress admin interface. This system offers extensive hooks and filters that allow developers to customize, extend, and integrate with the settings interface.
### Action Hooks
#### smartpay\_settings\_saved
**Fires**: After WPSmartPay settings are saved on a tab/section.
**Parameters**:
* `$output` (array) — Final sanitized options saved.
* `$input` (array) — Raw submitted input.
* `$tab` (string) — Current tab slug.
* `$section` (string) — Current section slug.
```php
add_action('smartpay_settings_saved', function( $output, $input, $tab, $section ) {
// React to settings changes.
}, 10, 4);
```
#### smartpay\_admin\_add\_menu\_items
**Fires**: After WPSmartPay registers default admin menus; add custom submenu pages.
**Parameters**: none
```php
add_action('smartpay_admin_add_menu_items', function() {
add_submenu_page('smartpay', 'Reports', 'Reports', 'manage_options', 'smartpay-reports', function() {
echo 'Reports
';
});
}, 20);
```
### Filter Hooks
The WPSmartPay settings system provides a comprehensive set of filters for customizing the admin settings interface. These filters allow you to add new settings tabs, sections, fields, and control how data is sanitized and displayed.
#### smartpay\_settings\_tabs
* **Purpose:** Add or modify the main settings tabs
* **Parameters:** `$tabs` (array) - Array of tab slugs => tab labels
```php
add_filter('smartpay_settings_tabs', function( $tabs ) {
$tabs['my_custom_tab'] = __('My Custom Tab', 'smartpay');
return $tabs;
});
```
#### smartpay\_settings\_sections\_{tab}
* **Purpose:** Define sections within a specific tab
* **Parameters:** `$sections` (array) - Array of section slugs => section labels
```php
add_filter('smartpay_settings_sections_general', function( $sections ) {
$sections['advanced'] = __('Advanced Options', 'smartpay');
return $sections;
});
```
#### smartpay\_settings\_sections
* **Purpose:** Filter all sections across all tabs
* **Parameters:** `$sections` (array) - Complete sections array
#### smartpay\_settings\_{tab}
* **Purpose:** Register settings fields for specific tabs
* **Parameters:** `$settings` (array) - Settings array for the tab
* **Available tabs:** `general`, `gateways`, `emails`, `licenses`, `extensions`, `debug_log`
```php
add_filter('smartpay_settings_general', function( $settings ) {
$settings['main']['my_custom_setting'] = array(
'id' => 'my_custom_setting',
'name' => __('My Custom Setting', 'smartpay'),
'desc' => __('Description of my setting', 'smartpay'),
'type' => 'text',
);
return $settings;
});
```
#### smartpay\_settings
* **Purpose:** Filter the complete assembled settings structure
* **Parameters:** `$smartpay_settings` (array) - Complete settings array
```php
add_filter('smartpay_settings', function( $settings ) {
// Modify the entire settings structure
return $settings;
});
```
#### smartpay\_settings\_{tab}-{section}\_sanitize
* **Purpose:** Sanitize raw input for a specific tab-section combination
* **Parameters:** `$input` (array) - Raw submitted input
```php
add_filter('smartpay_settings_general-main_sanitize', function( $input ) {
// Custom sanitization for general tab, main section
if (isset($input['my_field'])) {
$input['my_field'] = sanitize_text_field($input['my_field']);
}
return $input;
});
```
#### smartpay\_settings\_sanitize\_{type}
* **Purpose:** Sanitize values by field type
* **Parameters:** `$value` (mixed), `$key` (string) - Field value and key
```php
add_filter('smartpay_settings_sanitize_text', function( $value, $key ) {
// Custom sanitization for text fields
return sanitize_text_field($value);
}, 10, 2);
```
#### smartpay\_settings\_sanitize
* **Purpose:** General sanitization filter for all settings
* **Parameters:** `$value` (mixed), `$key` (string) - Field value and key
```php
add_filter('smartpay_settings_sanitize', function( $value, $key ) {
// Apply custom sanitization to all settings
if ($key === 'special_field') {
return wp_kses_post($value);
}
return $value;
}, 10, 2);
```
#### smartpay\_non\_setting\_types
* **Purpose:** Declare field types that are not persistent settings
* **Parameters:** `$types` (array) - Array of non-setting field types
```php
add_filter('smartpay_non_setting_types', function( $types ) {
$types[] = 'custom_display_only';
return $types;
});
```
#### smartpay\_after\_setting\_output
* **Purpose:** Modify generated field HTML before output
* **Parameters:** `$html` (string), `$args` (array) - Generated HTML and field arguments
```php
add_filter('smartpay_after_setting_output', function( $html, $args ) {
if ($args['id'] === 'special_field') {
$html .= 'Additional help text
';
}
return $html;
}, 10, 2);
```
#### smartpay\_get\_settings
* **Fires**: When WPSmartPay loads the combined settings array.
**Parameters**:
* `$settings` (array)
```php
add_filter('smartpay_get_settings', function( $settings ) {
$settings['feature_flag'] = true;
return $settings;
});
```
### Complete Example: Adding a Custom Tab
```php
// 1. Add the tab
add_filter('smartpay_settings_tabs', function( $tabs ) {
$tabs['my_plugin'] = __('My Plugin', 'smartpay');
return $tabs;
});
// 2. Add sections to the tab
add_filter('smartpay_settings_sections_my_plugin', function( $sections ) {
$sections['main'] = __('Main Settings', 'smartpay');
$sections['advanced'] = __('Advanced Settings', 'smartpay');
return $sections;
});
// 3. Add settings to the tab
add_filter('smartpay_settings_my_plugin', function( $settings ) {
$settings['main'] = array(
'my_text_field' => array(
'id' => 'my_text_field',
'name' => __('Text Field', 'smartpay'),
'desc' => __('Enter some text', 'smartpay'),
'type' => 'text',
),
'my_checkbox' => array(
'id' => 'my_checkbox',
'name' => __('Enable Feature', 'smartpay'),
'desc' => __('Check to enable this feature', 'smartpay'),
'type' => 'checkbox',
),
);
$settings['advanced'] = array(
'my_select' => array(
'id' => 'my_select',
'name' => __('Select Option', 'smartpay'),
'desc' => __('Choose an option', 'smartpay'),
'type' => 'select',
'options' => array(
'option1' => __('Option 1', 'smartpay'),
'option2' => __('Option 2', 'smartpay'),
),
),
);
return $settings;
});
// 4. Add custom sanitization
add_filter('smartpay_settings_my_plugin-main_sanitize', function( $input ) {
if (isset($input['my_text_field'])) {
$input['my_text_field'] = sanitize_text_field($input['my_text_field']);
}
return $input;
});
```
### Common Use Cases
* Add custom plugin settings
* Integrate with external services
* Custom admin pages
* Settings validation
# Customers
The WPSmartPay Customer Management system provides comprehensive functionality for handling customer data, user creation, profile management, and customer dashboard customization. This system integrates with WordPress user management while providing additional customer-specific features.
### Action Hooks
#### smartpay\_customer\_user\_created
**Fires**: After a WP user is programmatically created for a payer (if enabled).
**Parameters:**
* `$user` (int|WP\_User) — New user ID or object.
* `$payment` (SmartPay\\Models\\Payment)
```php
add_action('smartpay_customer_user_created', function( $user, $payment ) {
// Assign role, send welcome sequence, etc.
}, 10, 2);
```
#### smartpay\_customer\_updated
**Fires**: After a customer profile is updated via REST.
**Parameters:**
* `$customer` (SmartPay\\Models\\Customer)
* `$requestData` (array) — Raw request body.
```php
add_action('smartpay_customer_updated', function( $customer, $requestData ) {
// Sync to external CRM.
}, 10, 2);
```
#### smartpay\_customer\_dashboard\_tab\_link / smartpay\_customer\_dashboard\_tab\_content
**Fires**: To add custom tabs and tab content to the customer dashboard.
**Parameters:**
* `$customer` (SmartPay\\Models\\Customer) — For content hook.
* `$payments` (Illuminate\\Support\\Collection) — For content hook.
```php
add_action('smartpay_customer_dashboard_tab_link', function() {
echo 'My Tab';
});
add_action('smartpay_customer_dashboard_tab_content', function( $customer, $payments ) {
echo 'Hello!
';
}, 10, 2);
```
### Common Use Cases
* Custom user roles
* CRM integration
* Customer dashboard extensions
* Welcome email sequences
* Customer data synchronization
# Downloads
The WPSmartPay Download Management system provides secure file delivery for digital products purchased through the platform. This system includes comprehensive access control, validation, and delivery mechanisms to ensure only authorized customers can access their purchased digital content.
### Action Hooks
#### smartpay\_download\_access\_denied
**Fires:** When a download link validation fails (invalid token/permission).
**Parameters:**
* `$args` (array) — Query args for the request.
* `$validation` (array) — Validation result details.
```php
add_action('smartpay_download_access_denied', function( $args, $validation ) {
// Log abuse attempts.
}, 10, 2);
```
#### smartpay\_download\_payment\_invalid
**Fires:** When the associated payment is invalid or not completed.
**Parameters:**
* `$args` (array)
* `$validation` (array)
* `$payment` (SmartPay\\Models\\Payment|null)
```php
add_action('smartpay_download_payment_invalid', function( $args, $validation, $payment ) {
// Notify customer or support.
}, 10, 3);
```
#### smartpay\_download\_product\_invalid
**Fires:** When the product requested for download is invalid or not permitted.
**Parameters:**
* `$args` (array)
* `$validation` (array)
* `$payment` (SmartPay\\Models\\Payment)
* `$product` (SmartPay\\Models\\Product|null)
```php
add_action('smartpay_download_product_invalid', function( $args, $validation, $payment, $product ) {
// Handle invalid product download attempt.
}, 10, 4);
```
#### smartpay\_before\_download\_delivery
**Fires:** Right before sending the download file to the browser.
**Parameters:**
* `$args` (array)
* `$validation` (array)
* `$payment` (SmartPay\\Models\\Payment)
* `$product` (SmartPay\\Models\\Product)
* `$requestedFile` (array) — File metadata from product files list.
```php
add_action('smartpay_before_download_delivery', function( $args, $validation, $payment, $product, $file ) {
// Add logging, watermarking, or counter updates.
}, 10, 5);
```
### Common Use Cases
* Download tracking
* Access control
* Watermarking files
* Download limits
* Security monitoring
# Email
The WPSmartPay Email System provides comprehensive email notification functionality for various plugin events including payments, customer communications, and administrative notifications. The system offers extensive customization options through hooks and filters.
### Filter Hooks
#### smartpay\_email\_headers
**Fires:** When building email headers for WPSmartPay notifications.
**Parameters:**
* `$headers` (string) — Email headers string.
```php
add_filter('smartpay_email_headers', function( $headers ) {
return $headers . "\r\nBcc: accounting@example.com";
});
```
### Common Use Cases
* Multi-recipient emails
* Custom email headers
* Email tracking
* SMTP configuration
* Email templates
# Forms
The WPSmartPay Forms System provides comprehensive functionality for managing payment forms, both in the admin panel and on the frontend. This system includes form creation, customization, and integration with the payment processing workflow.
### Action Hooks
#### smartpay\_form\_created / smartpay\_form\_updated / smartpay\_form\_deleted
**Fires:** On Form created, updated and deleted inside **admin panel**
**Parameters:**
* `$form` (SmartPay\\Models\\Form) - Form Model
```php
add_action('smartpay_form_updated', function( $form ) {
// Sync form fields to CRM.
});
```
#### before\_smartpay\_payment\_form / before\_smartpay\_payment\_form\_button / after\_smartpay\_payment\_form\_button / after\_smartpay\_payment\_form
**Fires:** On Before Payment form, before form button, after form button and after form in the **checkout form (frontend)**
**Parameters:**
* `$form` (array|object) — Form configuration.
```php
add_action('before_smartpay_payment_form', function( $form ) {
echo 'Special promo available today!
';
});
```
### Common Use Cases
* Custom form fields
* Promotional banners
* Terms and conditions
* Trust badges
* Form analytics
# Initialization Plugin
The WPSmartPay Plugin Initialization system provides hooks and constants for detecting when the WPSmartPay plugin is loaded and ready for use. This system is essential for other plugins and themes that need to integrate with WPSmartPay functionality.
### Version Constant
WPSmartPay defines a version constant that can be used to check if the plugin is installed and active.
#### SMARTPAY\_VERSION
**Type:** Constant
**Defined:** When WPSmartPay plugin is loaded.
**Use Case:** Check if WPSmartPay is installed and get version information
```php
// Check if WPSmartPay is installed
if (!defined('SMARTPAY_VERSION')) {
// WPSmartPay is not installed or not active
add_action('admin_notices', function() {
//
});
return;
}
// Check version compatibility
if (version_compare(SMARTPAY_VERSION, '1.0.0', '<')) {
add_action('admin_notices', function() {
//
});
}
```
### smartpay\_loaded
**Type:** Action
**Fires:** On plugins\_loaded hook when WPSmartPay boots
**Parameters:** None
**Use Case:** Early initialization tasks that need to run as soon as WPSmartPay is loaded.
```php
add_action('smartpay_loaded', function() {
// Early bootstrap hooks
error_log('SmartPay plugin loaded');
// Initialize custom functionality
});
```
### smartpay\_init
**Type:** Action
**Fires:** On `init` hook when WPSmartPay initializes
**Parameters:** None
**Use Case:** Initialize functionality that depends on WordPress being fully loaded.
```php
add_action('smartpay_init', function() {
// Initialize after WordPress is fully loaded
error_log('SmartPay plugin initialized');
// Do other tasks
});
```
# Integration
The WPSmartPay Integrations System provides a comprehensive framework for managing third-party integrations and extensions. This system allows developers to create, register, and manage integrations that extend WPSmartPay's functionality with external services and platforms.
### Action Hooks
#### smartpay\_integration\_{namespace}\_loaded
**Type:** Action (dynamic)
**Fires:** After an active integration namespace is booted.
**Parameters:** none
```php
add_action('smartpay_integration_mailchimp_loaded', function() {
// Initialize mapping, etc.
});
```
#### smartpay\_integrations\_loaded
**Type:** Action
**Fires:** After all integrations have been processed.
**Parameters:** none
```php
add_action('smartpay_integrations_loaded', function() {
// Post-load tasks.
});
```
### Filter Hooks
#### smartpay\_integrations
**Purpose:** Register Custom Integration
```php
add_filter('smartpay_integrations', function($integrations) {
$integrations['my_integration'] = array(
'name' => 'My Integration',
'manager' => 'My\Integration\Manager',
'type' => 'free', // 'pro'
'categories' => array('CRM'),
'description' => 'Custom integration'
);
return $integrations;
});
```
#### smartpay\_integration\_manager
**Purpose:** Custom Manager
```php
add_filter('smartpay_integration_manager', function($manager, $integration) {
if ($integration['name'] === 'My Integration') {
return 'My\Custom\Manager';
}
return $manager;
}, 10, 2);
```
#### smartpay\_integration\_get\_not\_installed\_message
**Purpose:** Not Installed Message
```php
add_filter('smartpay_integration_get_not_installed_message', function($message, $integration) {
if ($integration['name'] === 'My Integration') {
return 'My Integration is not installed. Please install it first.';
}
return $message;
}, 10, 2);
```
### Common Use Cases
* CRM integration
* Email marketing
* Analytics tracking
* External APIs
* Custom services
# Payment
The WPSmartPay Payment System provides comprehensive functionality for processing payments, managing payment gateways, and handling payment-related events. This system includes hooks for payment processing, gateway management, currency handling, and payment status tracking.
### Action Hooks
#### smartpay\_before\_payment\_processing
**Fires:** Right before processing a payment request, after request validation and data preparation.
**Parameters:**
* `$payment_data` (array) — Prepared payment payload to be processed.
```php
add_action('smartpay_before_payment_processing', function( $payment_data ) {
// Inspect or modify pending payment data, log, etc.
});
```
#### smartpay\_{gateway}\_ajax\_process\_payment
**Type:** Action (dynamic)
**Fires:** When initiating an AJAX-based gateway charge for a selected gateway.
**Parameters:**
* `$paymentData` (array) — Payment data to send to the gateway.
```php
add_action('smartpay_stripe_ajax_process_payment', function( $paymentData ) {
// Handle Stripe AJAX payment initiation.
});
```
#### smartpay\_{gateway}\_process\_payment
**Type:** Action (dynamic)
**Fires:** When initiating a non-AJAX gateway charge for a selected gateway.
**Parameters:**
* `$paymentData` (array) — Payment data to send to the gateway.
```php
add_action('smartpay_free_process_payment', function( $paymentData ) {
// Mark free orders as paid immediately.
});
```
#### smartpay\_payment\_created
**Fires:** After a payment record is created and saved.
**Parameters:**
* `$payment` (SmartPay\\Models\\Payment) — Newly created payment model.
```php
add_action('smartpay_payment_created', function( $payment ) {
// Notify services, Queue receipt email, analytics tracking, etc.
});
```
#### smartpay\_payment\_completed
**Fires**: When a payment status becomes completed.
**Parameters:**
* `$payment` (SmartPay\\Models\\Payment) — Completed payment model.
```php
add_action('smartpay_payment_completed', function( $payment ) {
// Fulfill order, grant access, license activation, etc.
});
```
#### smartpay\_payment\_cancelled
**Fires:** When a payment transitions to cancelled states.
**Parameters:**
* `$payment` (SmartPay\\Models\\Payment)
```php
add_action('smartpay_payment_cancelled', function( $payment ) {
// Revoke access, notify user, restore inventory.
});
```
#### smartpay\_payment\_failed / smartpay\_payment\_refunded / smartpay\_payment\_abandoned
**Fires:** On specific failure/refund/abandoned status changes.
**Parameters:**
* `$payment` (SmartPay\\Models\\Payment) - Payment Model
```php
add_action('smartpay_payment_failed', function( $payment ) {
// Alert support team.
});
```
#### smartpay\_before\_payment\_receipt / smartpay\_before\_payment\_receipt\_data / smartpay\_after\_payment\_receipt / smartpay\_payment\_{gateway}\_receipt
**Fires:** Around the payment receipt rendering and for gateway-specific (dynamic) receipt sections.
**Parameters:**
* `$payment` (SmartPay\\Models\\Payment) - Payment Model
```php
add_action('smartpay_payment_paypal_receipt', function( $payment ) {
echo 'PayPal Transaction: ' . esc_html($payment->transaction_id) . '
';
});
```
### Filter Hooks
#### smartpay\_prepare\_payment\_data
**Fires:** When building the normalized payment payload from request data.
**Parameters:**
* `$prepared` (array) — Payment data array.
* `$_data` (array) — Raw request data.
```php
add_filter('smartpay_prepare_payment_data', function( $prepared, $_data ) {
$prepared['extra']['source'] = 'landing-page-7';
return $prepared;
}, 10, 2);
```
#### smartpay\_payment\_extra\_data
**Fires:** Before saving the `extra` payload on the payment model.
**Parameters:**
* `$extra` (array) — Extra payment data.
```php
add_filter('smartpay_payment_extra_data', function( $extra ) {
$extra['utm'] = $_COOKIE['utm'] ?? [];
return $extra;
});
```
#### smartpay\_currencies
**Fires:** When building the currency list.
**Parameters:**
* `$currencies` (array)
```php
add_filter('smartpay_currencies', function( $currencies ) {
$currencies['XYZ'] = ['name' => 'Example', 'symbol' => '¤'];
return $currencies;
});
```
#### smartpay\_gateways
**Fires:** To register available payment gateways.
**Parameters:**
* `$gateways` (array)
```php
add_filter('smartpay_gateways', function( $gateways ) {
$gateways['mygateway'] = [ 'admin_label' => 'My Gateway', 'checkout_label' => 'My Gateway', 'gateway_icon' => 'https://...' ];
return $gateways;
});
```
#### smartpay\_get\_ip
**Fires:** When resolving the client IP address.
**Parameters:**
* `$ip` (string)
```php
add_filter('smartpay_get_ip', function( $ip ) {
return $ip === '127.0.0.1' ? ($_SERVER['HTTP_X_REAL_IP'] ?? $ip) : $ip;
});
```
#### smartpay\_get\_available\_payment\_gateways
**Fires:** To alter the list of available gateways shown in settings UI.
**Parameters:**
* `$availableGateways` (array)
```php
add_filter('smartpay_get_available_payment_gateways', function( $available ) {
$available['newpay'] = ['label' => 'NewPay'];
return $available;
});
```
#### smartpay\_get\_additional\_payment\_data
**Fires**: To add/alter calculated payment data (totals, billing info, etc.).
**Parameters:**
* `$paymentData` (array)
```php
add_filter('smartpay_get_additional_payment_data', function( $paymentData ) {
$paymentData['note'] = 'VIP order';
return $paymentData;
});
```
### Common Use Cases
* Payment validation
* Gateway integration
* Payment tracking
* Receipt customization
* Currency support
# Products
The WPSmartPay Products System provides comprehensive functionality for managing digital products, including product creation, updates, deletion, and purchase validation. This system includes hooks for product lifecycle management and custom purchase logic.
### Action Hooks
#### smartpay\_product\_created / smartpay\_product\_updated / smartpay\_product\_deleted
**Fires:** On product created, updated and deleted
**Parameters:**
* `$product` (SmartPay\\Models\\Product) - Product Model
```php
add_action('smartpay_product_created', function( $product ) {
// Index product in search service or sync to external systems
});
add_action('smartpay_product_updated', function($product) {
// Sync changes or Update cache
});
// Product deleted
add_action('smartpay_product_deleted', function($product) {
// Clean up data or Archive product
});
```
#### smartpay\_product\_modal\_popup\_content / smartpay\_before\_product\_payment\_form\_button / smartpay\_after\_product\_payment\_form\_button
**Fires:** Within the **modal** checkout UI to inject content before/after the pay button.
**Parameters:**
* `$product` (SmartPay\\Models\\Product|null)
```php
add_action('smartpay_product_modal_popup_content', function( $product ) {
echo 'Secure checkout
';
});
```
### Filter Hooks
#### smartpay\_product\_is\_purchasable
**Fires:** When checking if a product can be purchased.
**Parameters:**
* `$isPurchasable` (bool) — Default purchasable state.
* `$product` (SmartPay\\Models\\Product) — Product Model.
```php
add_filter('smartpay_product_is_purchasable', function( $is_purchasable, $product ) {
return $product->status === 'publish' ? $is_purchasable : false;
}, 10, 2);
```
### Common Use Cases
* Product validation
* Stock management
* Access control
* User permissions
* Product analytics
# Selling Digital Products with Instant Delivery
Selling a PDF guide, a template pack, an ebook, or a software license doesn't require WooCommerce. WP SmartPay's payment forms collect payment and trigger email delivery through your email marketing or automation tool — customers receive their purchase instantly without you lifting a finger.
## Scenario
A designer sells a Figma UI kit for $49. After purchase, the customer should immediately receive an email with the download link. The designer also wants buyers automatically added to a "Customers" email list for future product announcements.
## What You Need
* WP SmartPay (free) for the payment form
* WP SmartPay Pro for email marketing integrations
* A payment gateway (Stripe recommended for instant processing)
* An email marketing tool: Mailchimp, MailerLite, ActiveCampaign, or similar
## Step 1: Host Your Digital File
Upload your file to a secure location. Options include:
* A password-protected page on your site with the download link
* Google Drive or Dropbox with a shareable link
* A private page with your file embed
Keep this URL private — it will only be shared via the confirmation email, not publicly.
## Step 2: Create the Payment Form
1. Go to **SmartPay → Forms → Add New**.
2. Set the price to $49 (fixed amount, no subscription).
3. Add a product name like "Figma UI Kit — Premium Pack".
4. In the form settings, set the **Success Redirect URL** to a "Thank You" page that explains the buyer will receive an email shortly.
## Step 3: Configure the Confirmation Email
1. Go to **SmartPay → Settings → Email Notifications**.
2. Open the **Payment Received** email template.
3. In the email body, add your download link: ```
Hi {customer_name},
Thank you for your purchase! Here's your download link:
{download_url}
This link is personal to your purchase. Please don't share it publicly.
Enjoy!
{site_name}
```
4. Save the template.
 Configure the Payment Received email to include the download link immediately after purchase.## Step 4: Add Buyers to Your Email List
1. Go to **SmartPay → Extensions** and activate **Mailchimp** (or your preferred tool).
2. Enter your API key and select the audience list to add buyers to.
3. Map the SmartPay form to that list — buyers are added automatically after payment.
## Step 5: Test the Purchase Flow
1. Enable **Test Mode** in SmartPay settings.
2. Submit the form with a test card (e.g., `4242 4242 4242 4242` for Stripe).
3. Check your email inbox — the confirmation email with the download link should arrive within seconds.
4. Verify the buyer was added to your email list.
5. Disable test mode when ready to go live.
## Result
The buyer submits payment, Stripe processes it in real time, SmartPay fires the payment confirmation email, and the customer has their download link within seconds. No orders to fulfill, no manual follow-up, no WooCommerce needed.
## Handling Multiple Products
Create a separate SmartPay form for each digital product. You can list them all on a single "Shop" page using multiple shortcodes side by side, styled with CSS columns. Each form sends its own product-specific confirmation email.
## Tips
* Use **Zapier integration** to connect SmartPay to Gumroad, Notion, Google Sheets, or any tool not natively supported.
* Generate a **time-limited URL** by hosting files in Amazon S3 with pre-signed URLs, then include the link in the SmartPay confirmation email.
* Add a coupon code field to the form so you can run launch discounts without changing the base price.
# Donation Forms
WP SmartPay is well-suited for nonprofit fundraising and crowdfunding. This guide explains how to set up a donation form with suggested amounts, an open amount field, and a progress bar toward your fundraising goal.
## Payment Forms vs Donation Forms
There is no separate "donation form" type in SmartPay — a standard payment form becomes a donation form simply by enabling the **Custom Amount** pricing type and optionally adding suggested amount cards. The checkout experience feels like a donation form to the visitor, even though it is the same form engine.
## Setting Up a Donation Form
1. Go to **SmartPay → Forms → Add New**.
2. Give the form a title such as "Monthly Giving" or "Help Us Reach Our Goal".
3. In the right sidebar, expand the **Pricing** panel.
4. Select **Custom Amount** as the pricing type.
5. Click **Add Amount** to add suggested tiers (e.g., 10, 25, 50, 100).
6. Set a **Minimum Amount** (e.g., 5) to prevent $0 or accidental tiny donations.
7. Mark the most common amount (e.g., 25) as the default — it will be pre-selected at checkout.
8. Optionally leave a **Default Amount** in the open input to guide donors who click away from the cards.
9. Publish the form and embed it on your Donate page using the shortcode.
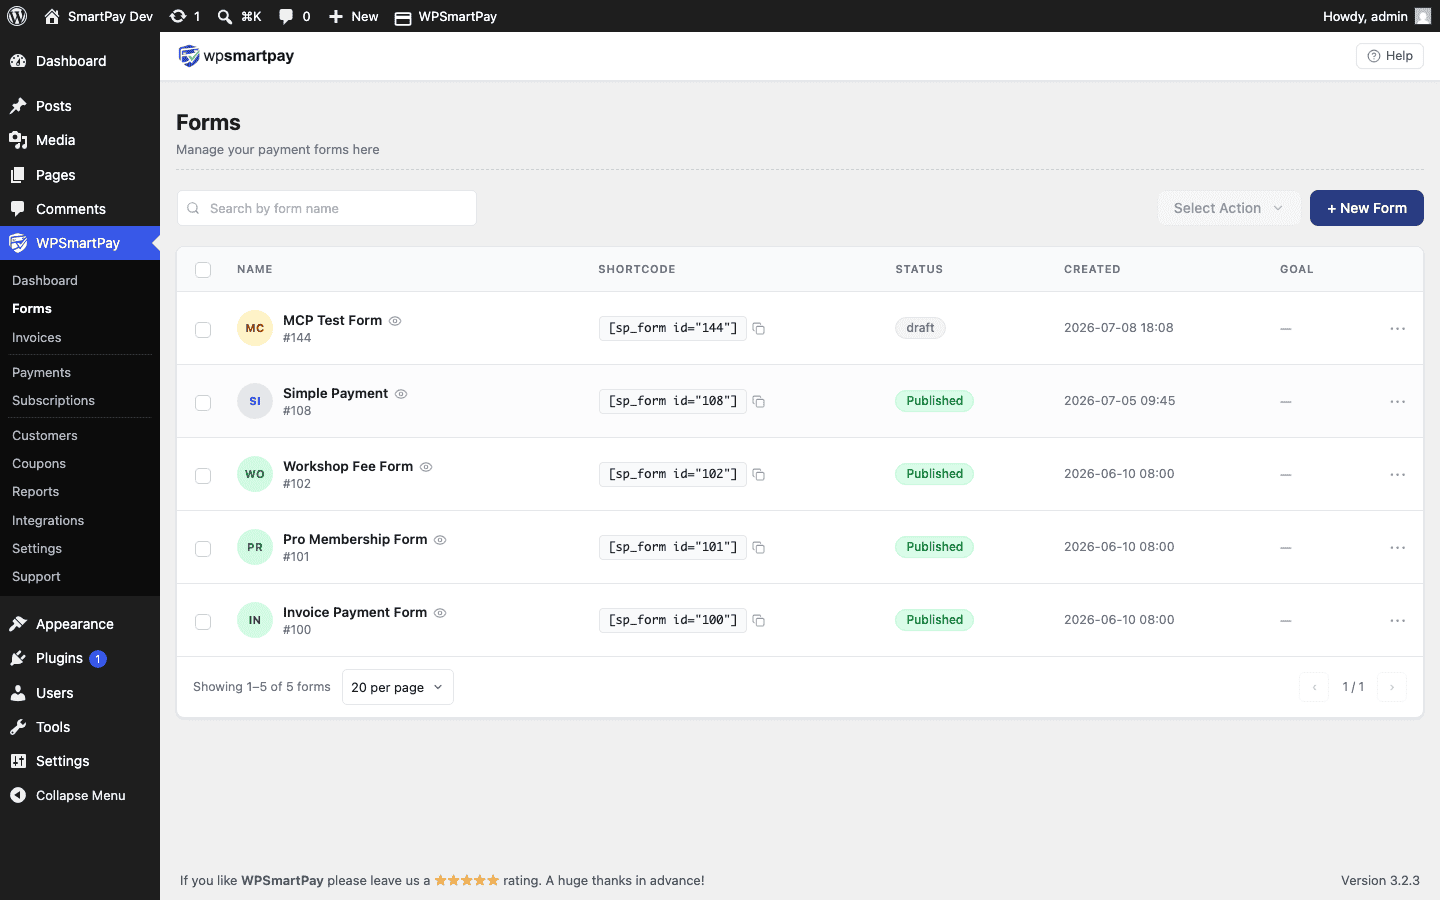 Start with a blank form or pick a template — donation templates are available in Pro.## Revenue Goal & Progress Bar (Pro)
With WP SmartPay Pro you can set a revenue goal against a specific form and display a visual progress bar anywhere on your site using a shortcode.
1. Go to **SmartPay → Reports → Goals**.
2. Click **Add Goal**, select the donation form, set a target amount and a time period (month, year, or lifetime).
3. Save the goal and copy the progress bar shortcode.
4. Paste the shortcode on the same page as your donation form — it will update in real time as donations come in.
See the [Revenue Goals & Progress Bar](https://docs.wpsmartpay.com/en/sp-rp-05-revenue-goals) article for full configuration details.
## Thank-You / Receipt Page
After a successful donation the customer is redirected to the **Payment Receipt** page. You can customise this page to include a warm thank-you message by editing the page set in **SmartPay → Settings → General → Payment Success Page**. Add the `[smartpay_payment_receipt]` shortcode to that page to display the donation amount and details.
> **Tip:** Enabling **Test Mode** in **SmartPay → Settings → Payment Gateways** lets you make simulated donations to test the whole flow without processing any real charges.
# Email Marketing Integrations
WP SmartPay Pro integrates with the leading email marketing platforms, automatically subscribing buyers to your lists and tagging them based on what they purchased — no manual exports or CSV uploads required.
## Supported Platforms
* **Mailchimp** — audience-based lists with tags and merge fields
* **MailerLite** — groups and automation triggers
* **ActiveCampaign** — lists, tags, and automations
* **FluentCRM** — self-hosted CRM/email tool for WordPress
* **ConvertKit** — sequences and tags
## Setting Up Mailchimp
1. In Mailchimp, go to **Account → Extras → API keys** and create a new key.
2. In WordPress, go to **SmartPay → Extensions → Mailchimp → Settings**.
3. Paste your API key and click **Connect**. Your Mailchimp audiences will appear.
4. Select the default audience for new buyers.
5. Optionally map payment forms to specific audiences: each form can send buyers to a different Mailchimp audience.
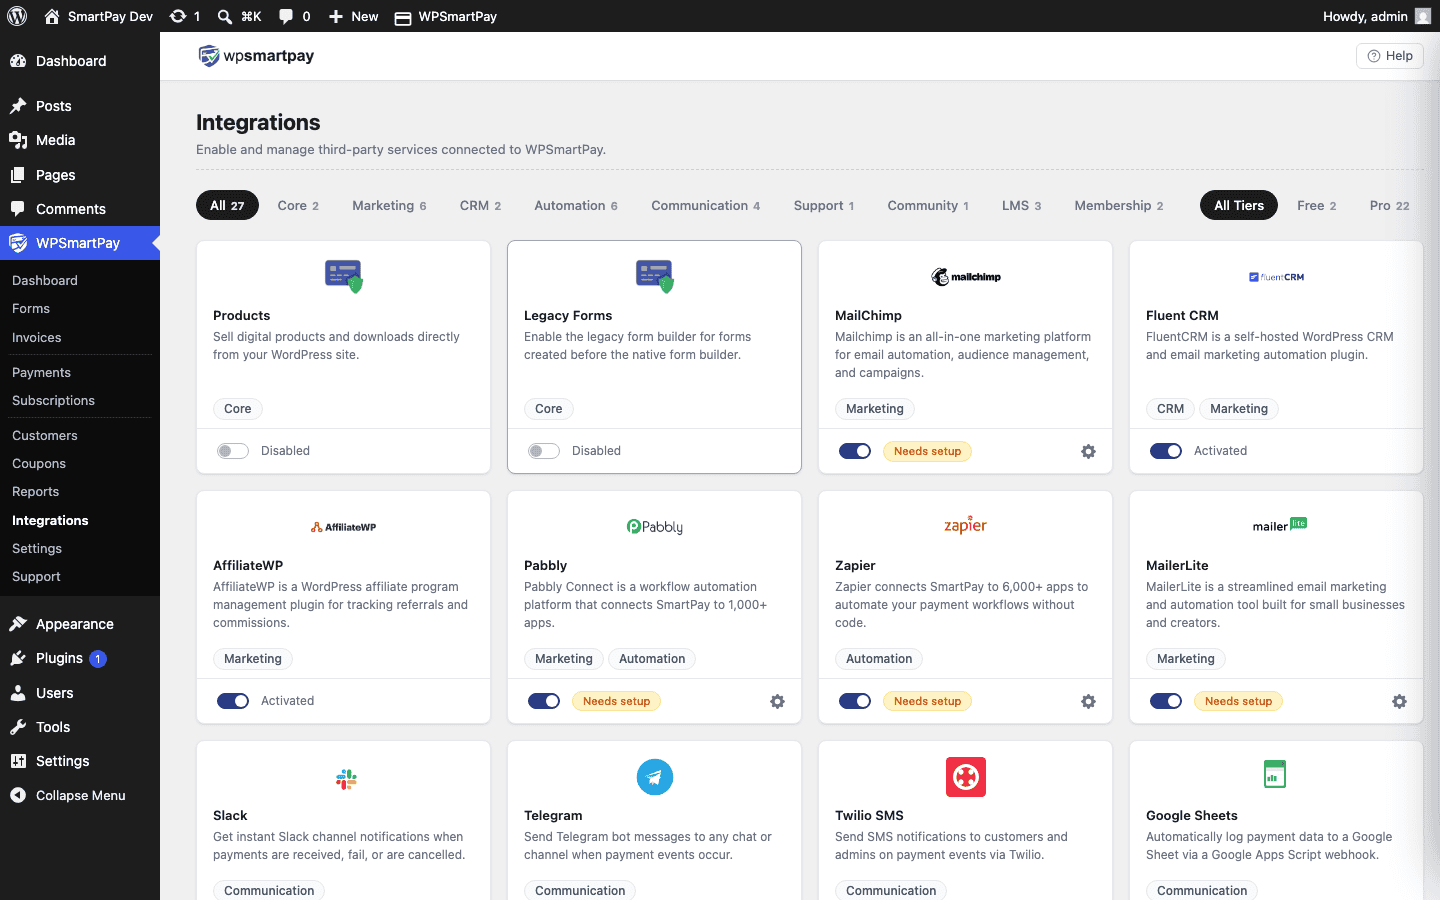 Activate Mailchimp from the Extensions page, then click the gear icon to enter your API key.## Setting Up ActiveCampaign
1. In ActiveCampaign, go to **Settings → Developer → API Access**. Copy your URL and API key.
2. In WordPress, go to **SmartPay → Extensions → ActiveCampaign → Settings**.
3. Enter your URL and key.
4. Select the list and optionally add tags (e.g., "smartpay-buyer", "product-name").
5. Optionally choose an automation to trigger when a new contact is added.
## Setting Up FluentCRM
FluentCRM is already installed on your WordPress site, so no API key is needed:
1. Go to **SmartPay → Extensions → FluentCRM → Settings**.
2. Select the FluentCRM list and tag to apply when a payment is completed.
3. Save. SmartPay will add the buyer as a FluentCRM contact and apply the tag.
## What Happens at Purchase
When a payment is completed, SmartPay:
1. Fires the `smartpay_payment_completed` hook
2. The email marketing integration receives the hook
3. The buyer's email, first name, and last name are sent to the platform API
4. If the contact already exists, they are not duplicated — tags/lists are updated
5. Any configured automation trigger fires in the email platform
## Tagging by Product or Form
If your email platform supports tags (ActiveCampaign, FluentCRM, ConvertKit), you can configure SmartPay to apply a different tag per payment form. This lets you segment buyers by product:
* Form "UI Kit Purchase" → tag: *product-ui-kit*
* Form "Course Enrollment" → tag: *product-course*
* Form "Membership Signup" → tag: *product-membership*
Set this up in the form editor's **Integrations** tab after activating the email marketing extension.
## Subscription Events
For subscription forms, SmartPay also sends contact updates when:
* **Subscription cancelled:** A cancellation tag can be applied (e.g., *subscription-cancelled*) to trigger a win-back email sequence
* **Renewal paid:** A renewal tag updates the contact's last activity date
* **Trial started:** A trial tag can enroll the contact in a trial nurture sequence
## Troubleshooting
* **Contacts not appearing:** Confirm the integration is activated and the API key is valid. Test by making a purchase in Test Mode and checking if the contact appears.
* **Wrong audience:** Check the form-level integration mapping — a form's integration setting overrides the global default.
* **Double opt-in blocking adds:** Disable double opt-in in Mailchimp (or the relevant platform) if contacts need to be added without confirmation email.
# Email Notifications
WP SmartPay sends automated emails to customers and admins when payments are processed, subscriptions change, and invoices are issued. All email templates are configurable at **SmartPay → Settings → Emails**.
## Opening Email Settings
Go to **SmartPay → Settings → Emails**.
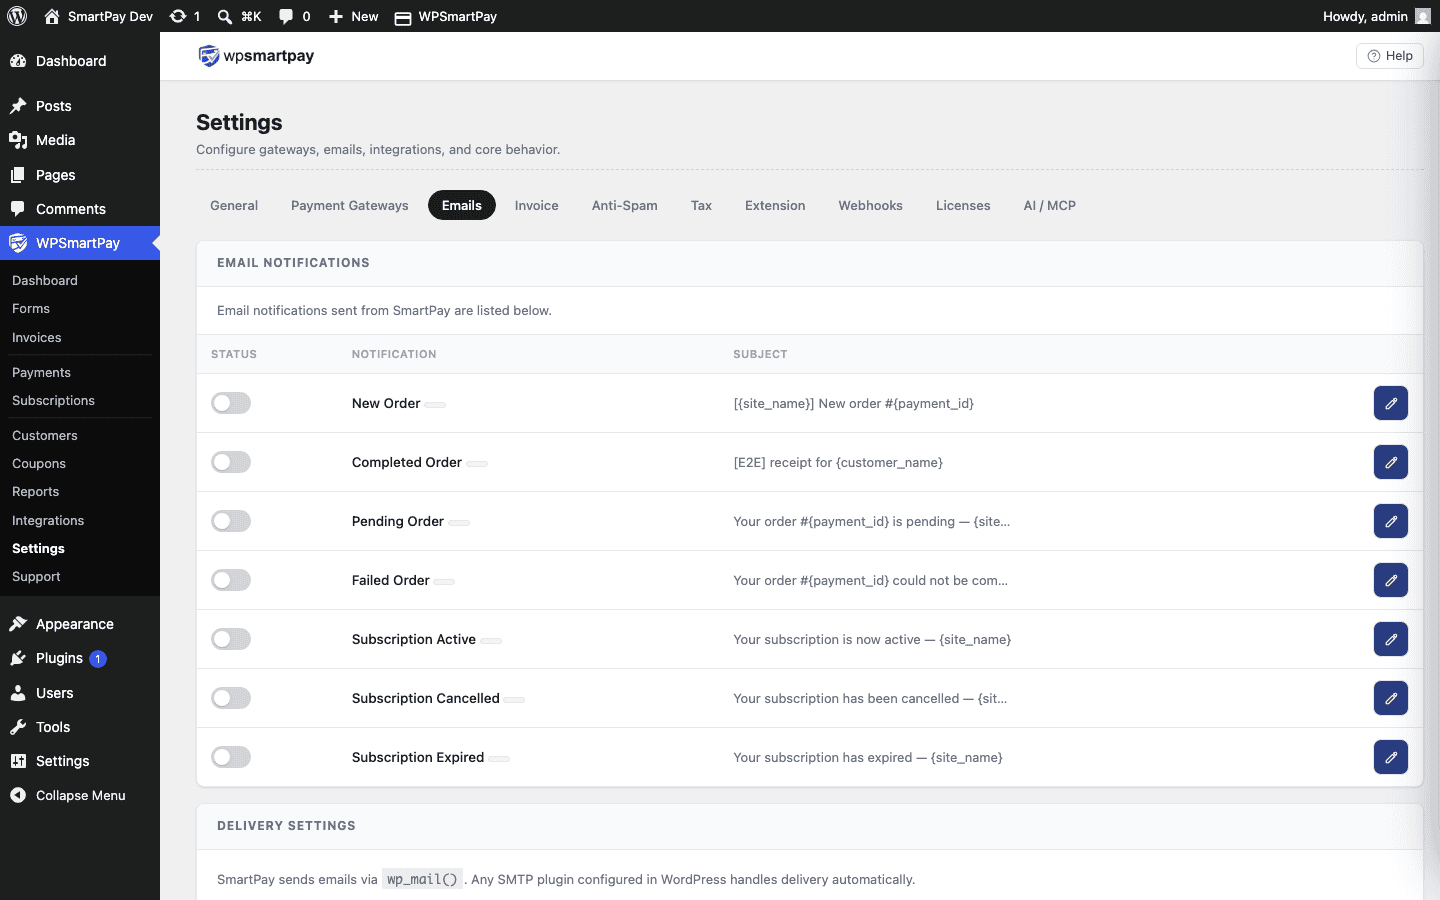 Email Settings — configure the sender details and individual email templates.## Global Email Settings
* **From Name** — The sender name that appears in the recipient's inbox (e.g., "WP SmartPay" or your business name).
* **From Email** — The sender email address. Should match your domain to avoid spam filters (e.g., `hello@yourdomain.com`). Avoid using `@gmail.com` or free email providers as a From address.
* **Email Header Image** — Optional logo or banner image displayed at the top of HTML emails.
* **Email Footer Text** — Text appended to the bottom of every outgoing email — your address, unsubscribe note, or legal text.
## Available Email Templates
### Payment Receipt (Customer) — Free
Sent to the customer after every successful payment. Contains the payment amount, date, and form/product name.
### New Payment Notification (Admin) — Free
Sent to the admin email when a new completed payment is recorded. Includes customer details and payment amount. Useful for small stores that want immediate notification of every sale.
### Payment Complete (Customer) — Pro
An extended template with customisable subject and body. Includes merge tags for personalisation.
### Subscription Renewal (Customer) — Pro
Sent when a subscription renewal payment succeeds.
### Subscription Cancelled (Customer) — Pro
Sent when a subscription is cancelled, either by the admin or by the customer.
### Invoice Sent (Customer) — Pro
Sent when you click Send Invoice on a Pro invoice. Includes the invoice public link so the customer can view and pay.
## Merge Tag Variables
Use these merge tags in email subject and body fields to personalise content:
| Merge Tag | Replaces With |
|---|---|
| `{customer_name}` | Customer's name |
| `{customer_email}` | Customer's email |
| `{payment_amount}` | Payment total with currency symbol |
| `{payment_id}` | Payment reference number |
| `{payment_date}` | Date of the payment |
| `{form_name}` | Name of the payment form |
| `{site_name}` | Your WordPress site name |
| `{site_url}` | Your site URL |
| `{receipt_link}` | URL of the payment receipt page |
## Enabling and Disabling Individual Emails
Each email template has an **Enable** checkbox. Untick to stop that specific email from being sent. For example, you might disable the admin new-payment notification if you are using a webhook to Slack instead.
## Testing Emails
Click **Send Test Email** on any template to receive a sample with placeholder data. Use this to confirm deliverability before going live.
# Embedding Forms on Pages
Once you have created a payment form in WP SmartPay, you embed it on any WordPress page or post using a shortcode or a dedicated Gutenberg block. This guide covers both methods.
## Finding the Shortcode
Go to **SmartPay → Forms**. In the forms list, each row has a **Shortcode** column showing the form's embed code in the format `[sp_form id="123"]`.
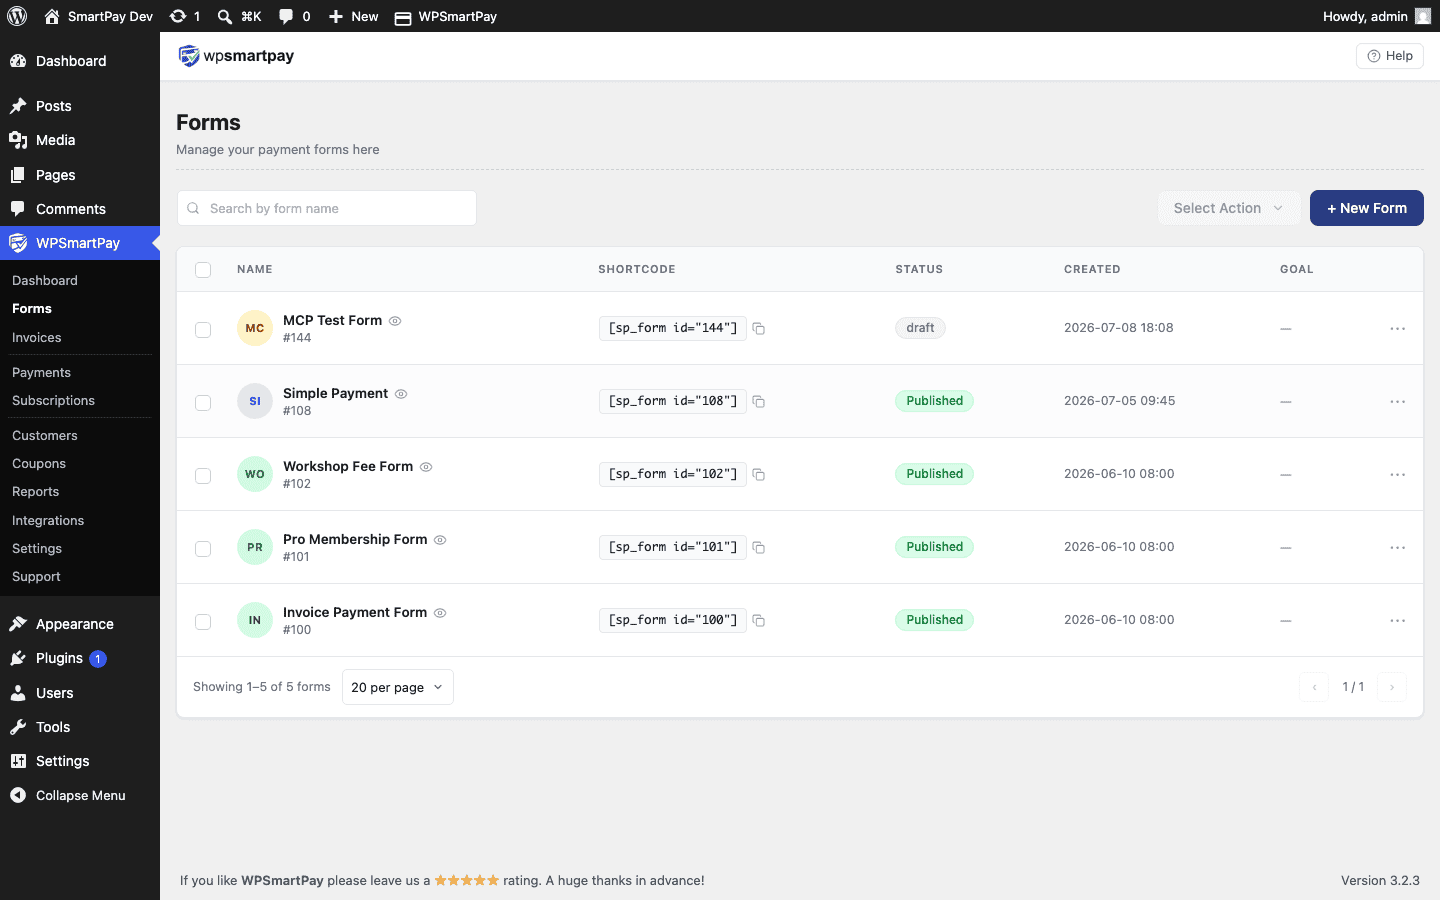 The Shortcode column in the Forms list — click to copy the shortcode for any form.Click the shortcode to copy it to your clipboard.
## Method 1 — Gutenberg Shortcode Block
1. Open the page or post you want to embed the form on.
2. In the Gutenberg block editor, click the **+** button to add a block.
3. Search for **Shortcode** and select it.
4. Paste the shortcode (e.g. `[sp_form id="42"]`) into the block.
5. Click **Update** or **Publish**.
> **Note:** The Shortcode block does not render a preview in the editor — it shows the raw shortcode text. Visit the published page to see the form.
## Method 2 — WP SmartPay Form Block
1. In the block editor, click the **+** button and search for **SmartPay Form**.
2. Select the **WP SmartPay Form** block.
3. In the block's dropdown, choose the form you want to embed.
4. The editor shows a live preview of the form inside the block.
5. Click **Update** or **Publish**.
The SmartPay Form block is the recommended method for Gutenberg sites — you get a visual preview and can select the form from a friendly dropdown instead of typing a shortcode.
## Classic Editor (TinyMCE)
If you are using the Classic Editor plugin:
1. Paste the shortcode directly into the post content area.
2. Make sure you are in **Text** mode (not Visual mode) if the shortcode is not rendering.
3. Click **Update**.
## Full-Page Embed vs Inline Embed
You can embed the form anywhere on a page — in the middle of content, in a sidebar widget, or as the sole element on a dedicated page. SmartPay's checkout CSS adapts to the container width.
For a cleaner experience, many sites create a dedicated "Donate" or "Buy Now" page with only the form on it. This keeps the URL shareable and the layout uncluttered.
## Legacy Shortcode
Older versions of WP SmartPay used `[smartpay_form id="123"]`. This shortcode still works but `[sp_form id="123"]` is the current standard. Both are equivalent.
# Selling Event Tickets with Tiered Pricing
Event organizers often need to sell multiple ticket types — Early Bird, Standard, and VIP — each at a different price, with a single checkout experience. WP SmartPay's form pricing handles this with no third-party event plugin required.
## Scenario
A conference organizer is selling tickets for an annual summit. They want three ticket tiers: Early Bird ($49), Standard ($99), and VIP ($199 with networking dinner). All tickets are one-time payments. Buyers receive a confirmation email with event details.
## What You Need
* WP SmartPay (free) for the payment form
* A payment gateway (Stripe for instant processing)
* Optional: Zapier or Uncanny Automator to sync registrants to a spreadsheet or CRM
## Step 1: Create the Registration Form with Tiered Pricing
1. Go to **SmartPay → Forms → Add New**.
2. In the **Payment Amount** block, set the pricing type to **Set Prices**.
3. Add three price options:
* Early Bird — $49
* Standard — $99
* VIP (Includes Networking Dinner) — $199
4. Add a **Text Field** block for "Company Name" (optional).
5. Set the success redirect to a "Registration Confirmed" page with event logistics (venue, schedule, etc.).
## Step 2: Customize the Confirmation Email
1. Go to **SmartPay → Settings → Emails**.
2. Edit the **Payment Received** template.
3. Include the ticket type (via the `{payment_title}` tag), date, venue address, and any access instructions.
4. For VIP buyers, you may want to note the dinner details separately — this can be done via a Zapier workflow that detects the $199 payment amount and sends a second email.
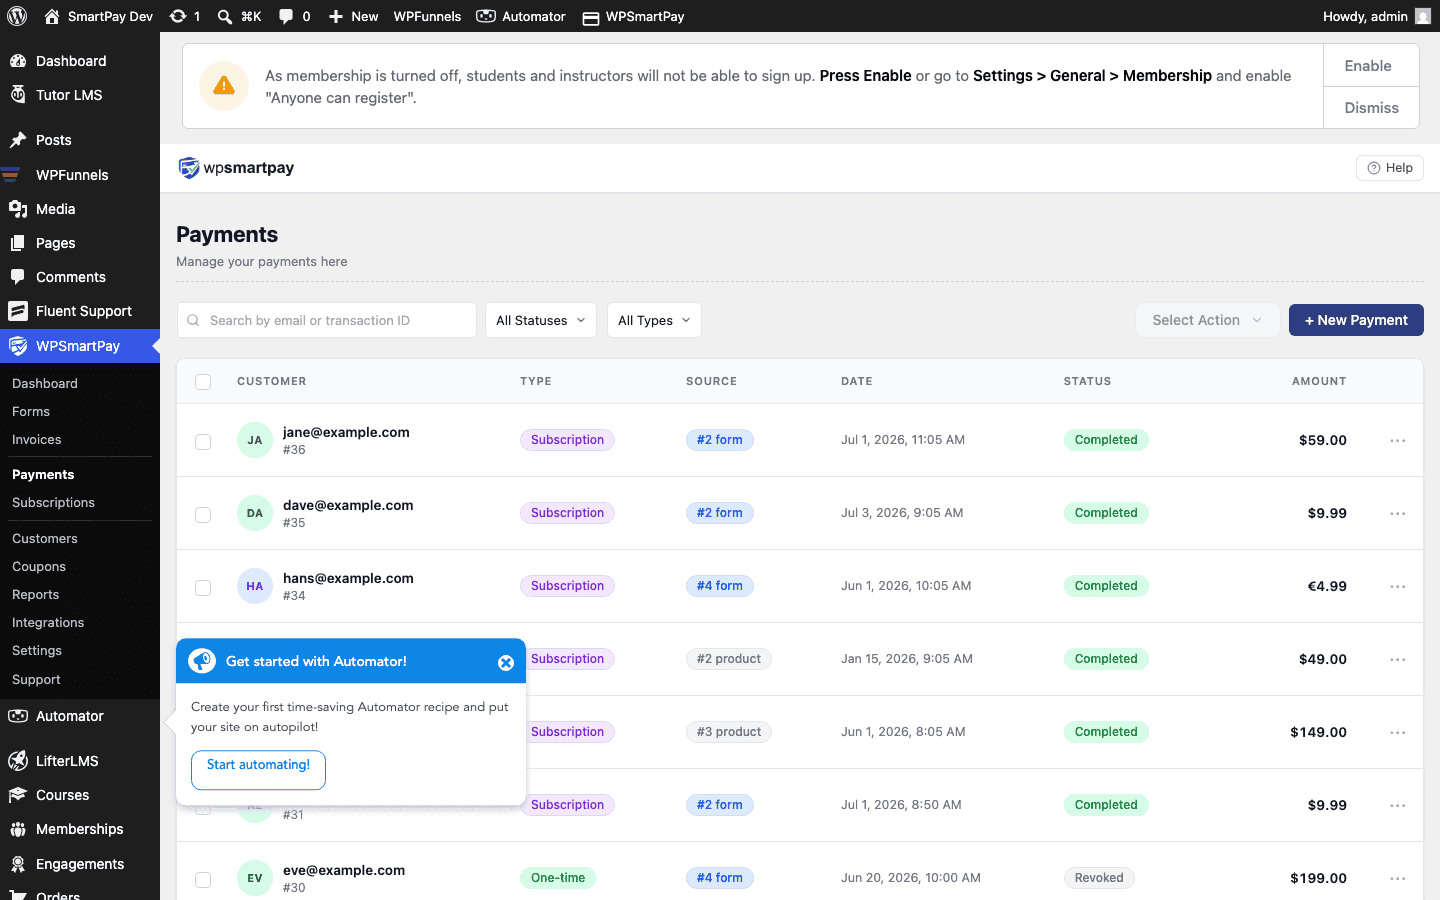 Payments list — each registration appears here with the ticket tier, amount, and buyer details.## Step 3: Export the Attendee List
After registrations come in, go to **SmartPay → Customers** to see all registrants. For a spreadsheet export, connect SmartPay to **Google Sheets via Zapier**: each new payment triggers a Zap that appends a row with name, email, and ticket type.
## Handling Refund Requests
If an attendee can no longer attend:
1. Go to **SmartPay → Payments** and find their payment.
2. Open the payment detail and click **Refund**.
3. Enter the refund amount (full or partial) and confirm.
4. SmartPay processes the refund through the original gateway (Stripe refunds appear on the card within 5–10 business days).
## Limiting Ticket Availability
WP SmartPay forms do not have a built-in attendee cap. To enforce ticket limits:
* Monitor registrations in **SmartPay → Reports → Forms** and manually disable the form when sold out.
* Or use **Uncanny Automator** to trigger a webhook that disables the form once a target payment count is reached.
## Result
Registrants visit the event page, pick their ticket tier, pay in under 60 seconds, and immediately receive a confirmation email with event details. The organizer sees all registrants in SmartPay's customer and payments list with no separate event management tool required.
## Tips
* Use a **coupon code** for speaker discounts or partner promo codes — create a unique coupon per partner to track referral conversions.
* Duplicate the form for a future event year rather than editing the live one — this preserves the payment history accurately.
* Use the **Invoices** feature (Pro) if corporate sponsors need formal invoices for their accounting teams.
# FAQ: General Questions
Answers to the most common questions about WP SmartPay — what it does, what it requires, and how it compares to other payment plugins.
## What is WP SmartPay?
WP SmartPay is a WordPress payment plugin that lets you accept one-time and recurring payments directly from your site using a simple form. The free plugin supports PayPal Standard and one-time payments. WP SmartPay Pro adds subscription billing, invoices, coupons, bulk payments, reports, and 20+ gateway and integration options.
## Does WP SmartPay require WooCommerce?
No. WP SmartPay is completely independent of WooCommerce. It is designed for digital products, memberships, donations, and services — not physical goods with shipping and inventory. If you need a cart-based shopping experience, WooCommerce is the better fit. If you need a fast, focused payment form, WP SmartPay is the better fit.
## Which payment gateways are supported?
The free plugin includes **PayPal Standard** and a **Manual / Offline** gateway. WP SmartPay Pro adds:
* Stripe (cards, Apple Pay, Google Pay)
* Paddle Classic and Paddle Billing (merchant of record)
* Razorpay (India — cards, UPI, net banking)
* Mollie (Europe — cards, iDEAL, SEPA)
* bKash (Bangladesh)
* Toyyibpay (Malaysia)
* Paytm (India)
* Authorize.Net (US, Canada, UK)
## What PHP and WordPress versions are required?
* **PHP:** 8.2 or higher
* **WordPress:** 6.0 or higher
* The free plugin must be active for WP SmartPay Pro to work
## Does WP SmartPay work with page builders?
Yes. Payment forms are embedded using a shortcode (`[smartpay_form id="123"]`) which works in Elementor, Divi, Beaver Builder, Gutenberg, and any theme that supports standard WordPress shortcodes.
## Is WP SmartPay PCI compliant?
Payment card data never passes through your WordPress server. Card details are handled directly by the payment gateway (Stripe, Paddle, etc.) using hosted fields or hosted checkout pages. This means your site is SAQ-A compliant — the lightest level of PCI compliance — with no card data ever stored on your hosting.
## Can I accept payments in multiple currencies?
WP SmartPay processes payments in the currency set in **Settings → General → Currency**. The available currencies depend on your payment gateway. Stripe supports 135+ currencies; PayPal, Razorpay, and others support their respective regional currencies. You cannot have different forms in different currencies on the same site (one currency per installation).
## Does WP SmartPay have a free trial or money-back guarantee?
WP SmartPay Pro is sold with a 14-day refund policy. If the plugin doesn't meet your needs, contact support within 14 days of purchase for a full refund. No trial license is required — the free plugin lets you test basic payment forms before upgrading.
## How do I update the plugin?
1. Go to **WordPress Admin → Dashboard → Updates**.
2. If a Pro update is available, it will appear after your license is activated in **SmartPay → Settings → License**.
3. Click **Update Now**. Automatic updates require an active license.
## Can I use WP SmartPay on multiple sites?
It depends on your license tier. Check your license details at **SmartPay → Settings → License**. Most Pro licenses cover a set number of sites. Contact support if you need to transfer a license from one domain to another.
## Where can I get support?
* **Documentation:** docs.wpsmartpay.com (you're here)
* **Support tickets:** wpsmartpay.com/support (Pro license required)
* **Community:** WordPress.org support forums (free plugin questions)
# FAQ: Payments & Refunds
Answers to common questions about payments, failed charges, and refunds in WP SmartPay.
## Why is a payment showing as "Pending"?
A payment stays in Pending status when the gateway has received the charge request but hasn't confirmed the outcome yet. This is normal for:
* **PayPal Standard (IPN):** PayPal notifies SmartPay asynchronously. Allow 1–5 minutes. If it stays Pending, check that your IPN URL is correctly set in your PayPal account under Profile → Notifications → Instant Payment Notifications.
* **Bank transfer gateways (Mollie SEPA, bKash):** These have settlement delays of 1–3 business days by design.
* **Missing webhook:** If a Stripe or Razorpay payment is Pending after 10 minutes, the webhook may not be registered. Go to **SmartPay → Settings → Webhooks** and verify the endpoint is listed in your gateway dashboard.
## A customer says they were charged but I don't see the payment — what happened?
This usually means the webhook didn't fire or was missed:
1. Log into your gateway dashboard (Stripe Dashboard → Events, Razorpay Dashboard → Webhooks) and look for the payment event.
2. Check whether the webhook URL matches the one in **SmartPay → Settings → Webhooks**.
3. Replay the event from the gateway dashboard — SmartPay will process it and create the payment record.
If the charge appears in your gateway but the replay fails, contact SmartPay support with the payment intent / order ID from the gateway.
## How do I issue a full or partial refund?
1. Go to **SmartPay → Payments**.
2. Click the payment to open the detail view.
3. Click **Refund** and enter the amount (leave blank for full refund).
4. Confirm. SmartPay calls the gateway API immediately and the refund is initiated.
Refund timelines: Stripe — 5–10 business days; PayPal — 3–5 business days; Razorpay — 5–7 business days; Mollie — depends on payment method.
## Can I refund a payment made more than 90 days ago?
This depends on your gateway:
* **Stripe:** Refunds are available up to 90 days from the original charge.
* **PayPal:** Refunds are available up to 180 days.
* **Razorpay:** No official time limit, but older refunds may require support approval.
For payments outside the refund window, you'll need to issue a manual bank transfer or PayPal payment directly to the customer.
## How do I re-send a payment receipt to a customer?
Go to **SmartPay → Payments**, open the payment, and click **Resend Receipt**. The customer will receive the same email that was sent at the time of purchase.
## A customer's card was declined. What should they do?
The most common reasons for card declines:
* Incorrect card number, expiry, or CVV — ask the customer to re-enter carefully
* Insufficient funds — the customer needs to use a different card
* Bank blocking international charges — the customer's bank may require authorization for online payments; they should call their bank
* Daily transaction limit exceeded — common for prepaid debit cards
SmartPay displays the exact decline reason from the gateway on the checkout form so customers can see what went wrong immediately.
## Is test mode active on my live site? How do I check?
Go to **SmartPay → Settings → General**. If **Test Mode** is enabled, a yellow notice appears at the top of every SmartPay admin page. Payments in test mode are fake — no real money moves. Always disable test mode before going live.
## How do I change the currency for my payment forms?
Go to **SmartPay → Settings → General → Currency**. Set the currency and save. This changes the currency for all forms site-wide. Note: some gateways don't support certain currencies — if you switch to an unsupported currency, that gateway will fail at checkout.
# FAQ: Subscriptions & Billing
Answers to the most common questions about subscription billing, renewal cycles, cancellations, and plan changes in WP SmartPay Pro.
## Which gateways support subscription billing?
Recurring billing requires a gateway that supports scheduled charges. In WP SmartPay Pro, these are:
* **Stripe** — full subscription support including free trials and installments
* **Paddle** — handles subscription billing as merchant of record
* **Mollie** — recurring payments via SEPA, iDEAL, and cards (EU)
* **Razorpay** — subscriptions via UPI AutoPay and cards (India)
PayPal Standard, bKash, Toyyibpay, Paytm, and Authorize.Net support one-time payments only.
## What happens when a subscription renewal fails?
1. The gateway attempts to charge the customer's saved payment method.
2. If declined, the subscription status changes to **Failing**.
3. SmartPay sends an automatic **Payment Failure** email to the customer.
4. The gateway retries (Stripe: Smart Retries over 4 days; Paddle: retries for up to 4 weeks).
5. If all retries fail, the subscription changes to **Cancelled** and any connected membership access is revoked.
## Can a customer update their payment method?
Yes. Customers can update their payment method from the **Customer Account Page** (a page with the `[smartpay_account]` shortcode). From there they can update their card via a Stripe-hosted or Paddle-hosted secure interface. The new card is charged on the next renewal.
## Can a customer cancel their own subscription?
Yes, from the Customer Account Page. Clicking **Cancel Subscription** cancels the subscription at the end of the current billing period — the customer retains access until then. Immediate cancellation is also available.
Admins can also cancel from **SmartPay → Subscriptions → (subscription detail) → Cancel**.
## How do I pause a subscription instead of cancelling it?
SmartPay does not have a built-in pause feature. As a workaround:
1. Cancel the subscription now (status → Cancelled).
2. When the customer is ready to resume, create a new subscription for them via **SmartPay → Subscriptions → Add New**.
3. For Stripe-powered subscriptions, you can also use the Stripe Dashboard to pause the subscription directly — SmartPay will sync the status on the next webhook event.
## Can I change the price of an active subscription?
Changing the price of a subscription plan form affects new subscribers only — existing active subscriptions are not retroactively changed. To change the price for an existing subscriber:
* **Stripe:** Update the subscription in the Stripe Dashboard — price change takes effect at next renewal.
* **Paddle:** Use the Paddle Dashboard to update the subscription plan.
SmartPay will reflect the new amount in the next payment record created by the webhook.
## How do free trials work?
1. Create or edit a subscription form.
2. In the form settings, enable **Free Trial** and set the trial duration (e.g., 7 days).
3. When a customer subscribes, no charge is made immediately.
4. After the trial period ends, the gateway charges the first payment automatically.
5. If the customer cancels during the trial, no charge is ever made.
Stripe and Paddle support free trials. Mollie trials require a €0.01 mandate confirmation.
## What's the difference between "Cancelled" and "Completed" subscription status?
* **Cancelled** — The subscription ended before the intended billing period (customer cancelled, payment failed, or admin cancelled).
* **Completed** — The subscription ran for its full intended duration. This only applies to fixed-term subscriptions (e.g., 3-month installment plans) where a billing count limit was set. After all installments are paid, the status becomes Completed automatically.
## Can I offer both monthly and annual billing on the same form?
Not within a single form — each SmartPay form has one billing period. The recommended approach is to create two separate forms (monthly and annual) and embed them side by side on the pricing page using shortcodes. Use a coupon code to apply a discount to the annual form if desired.
# Fixing 403 Webhook Response
If you're experiencing issues with your [Paddle payment gateway for WooCommerce](https://wpsmartpay.com/paddle-for-woocommerce/) and [Paddle payment gateway for Easy Digital Downloads](https://wpsmartpay.com/paddle-for-easydigitaldownloads/) where the order status doesn't automatically update after a purchase, it may be due to Cloudflare blocking Paddle's webhook requests.
This guide will walk you through how to whitelist Paddle's IP addresses in Cloudflare to resolve this issue.
Track Webhook Attempts and Resolve Repeated Failed Responses## Why Does This Happen?
When Paddle sends a webhook to your WordPress store to notify it of a completed purchase, Cloudflare might block these requests if their IP addresses are not whitelisted. This leads to a 403 Forbidden response, causing the order status to remain incomplete until manually updated.
## Steps to Whitelist Paddle's IP Addresses in Cloudflare
Follow these steps to whitelist Paddle's IP addresses and ensure your webhook requests are not blocked:
**Step 1: Log in to Cloudflare-** Navigate to Cloudflare's website and log in with your credentials.
**Step 2: Select Your Domain-** In your Cloudflare dashboard, select the domain for your WooCommerce store from the list of domains.
**Step 3: Navigate to Security Settings-** In the left-hand sidebar, click on Security. Under the Security section, select WAF (Web Application Firewall).
**Step 4: Access IP Access Rules-** Within the WAF settings, navigate to the Tools tab. Here, you will find IP Access Rules.
**Step 5: Add Paddle's IP Addresses-**
* In the IP Access Rules section, add each of Paddle's IP addresses listed in [Paddle's documentation](https://developer.paddle.com/classic/webhook-reference/d8bbc4ae5cefa-security).
* Set the action to Allow for each IP address.
* Enter the IP address in the IP Address field.
* Select your website from the dropdown list.
* Choose Allow as the action.
* Click Add to save the rule.
Cloudflare WAF Tools - IP Access Rules Configuration Screen**Step 6: Test the Webhook-** Once you have added all of Paddle's IP addresses, test the webhook to ensure it is no longer blocked.
### Additional Tips
Ensure your IP Access Rules are up-to-date with the latest IP addresses from [Paddle's documentation](https://developer.paddle.com/classic/webhook-reference/d8bbc4ae5cefa-security).
Regularly monitor your webhook logs in WooCommerce and Easy Digital Downloads and Cloudflare to catch any future issues early. By following these steps, you can ensure that Paddle's webhooks are not blocked by Cloudflare, thereby maintaining seamless order processing in your WordPress store.
Complete a test purchase in your store and verify that the order status updates automatically.
# Fluent Support
Automatically opens a helpdesk ticket in Fluent Support when a payment is completed or fails — so your support team always has a ticket ready without the customer having to submit one manually.
### Requirements
* [Fluent Support](https://wordpress.org/plugins/fluent-support/) must be installed and active (free version on WordPress.org). Configure at least one mailbox in **Fluent Support → Mailboxes** before enabling this integration.
### Setup
1. Go to **SmartPay → Extensions** and toggle **Fluent Support** on.
2. Click the gear icon to open **Settings → Extensions → Fluent Support**.
3. Choose the **Mailbox** that should receive tickets.
4. Set the **Subject Template** using placeholders: `{{payment_id}}`, `{{customer_name}}`, `{{amount}}`.
5. Write the **Body Template** for the ticket description.
6. Select which events (*Payment Completed*, *Payment Failed*) should create a ticket.
7. Click **Save Changes**.
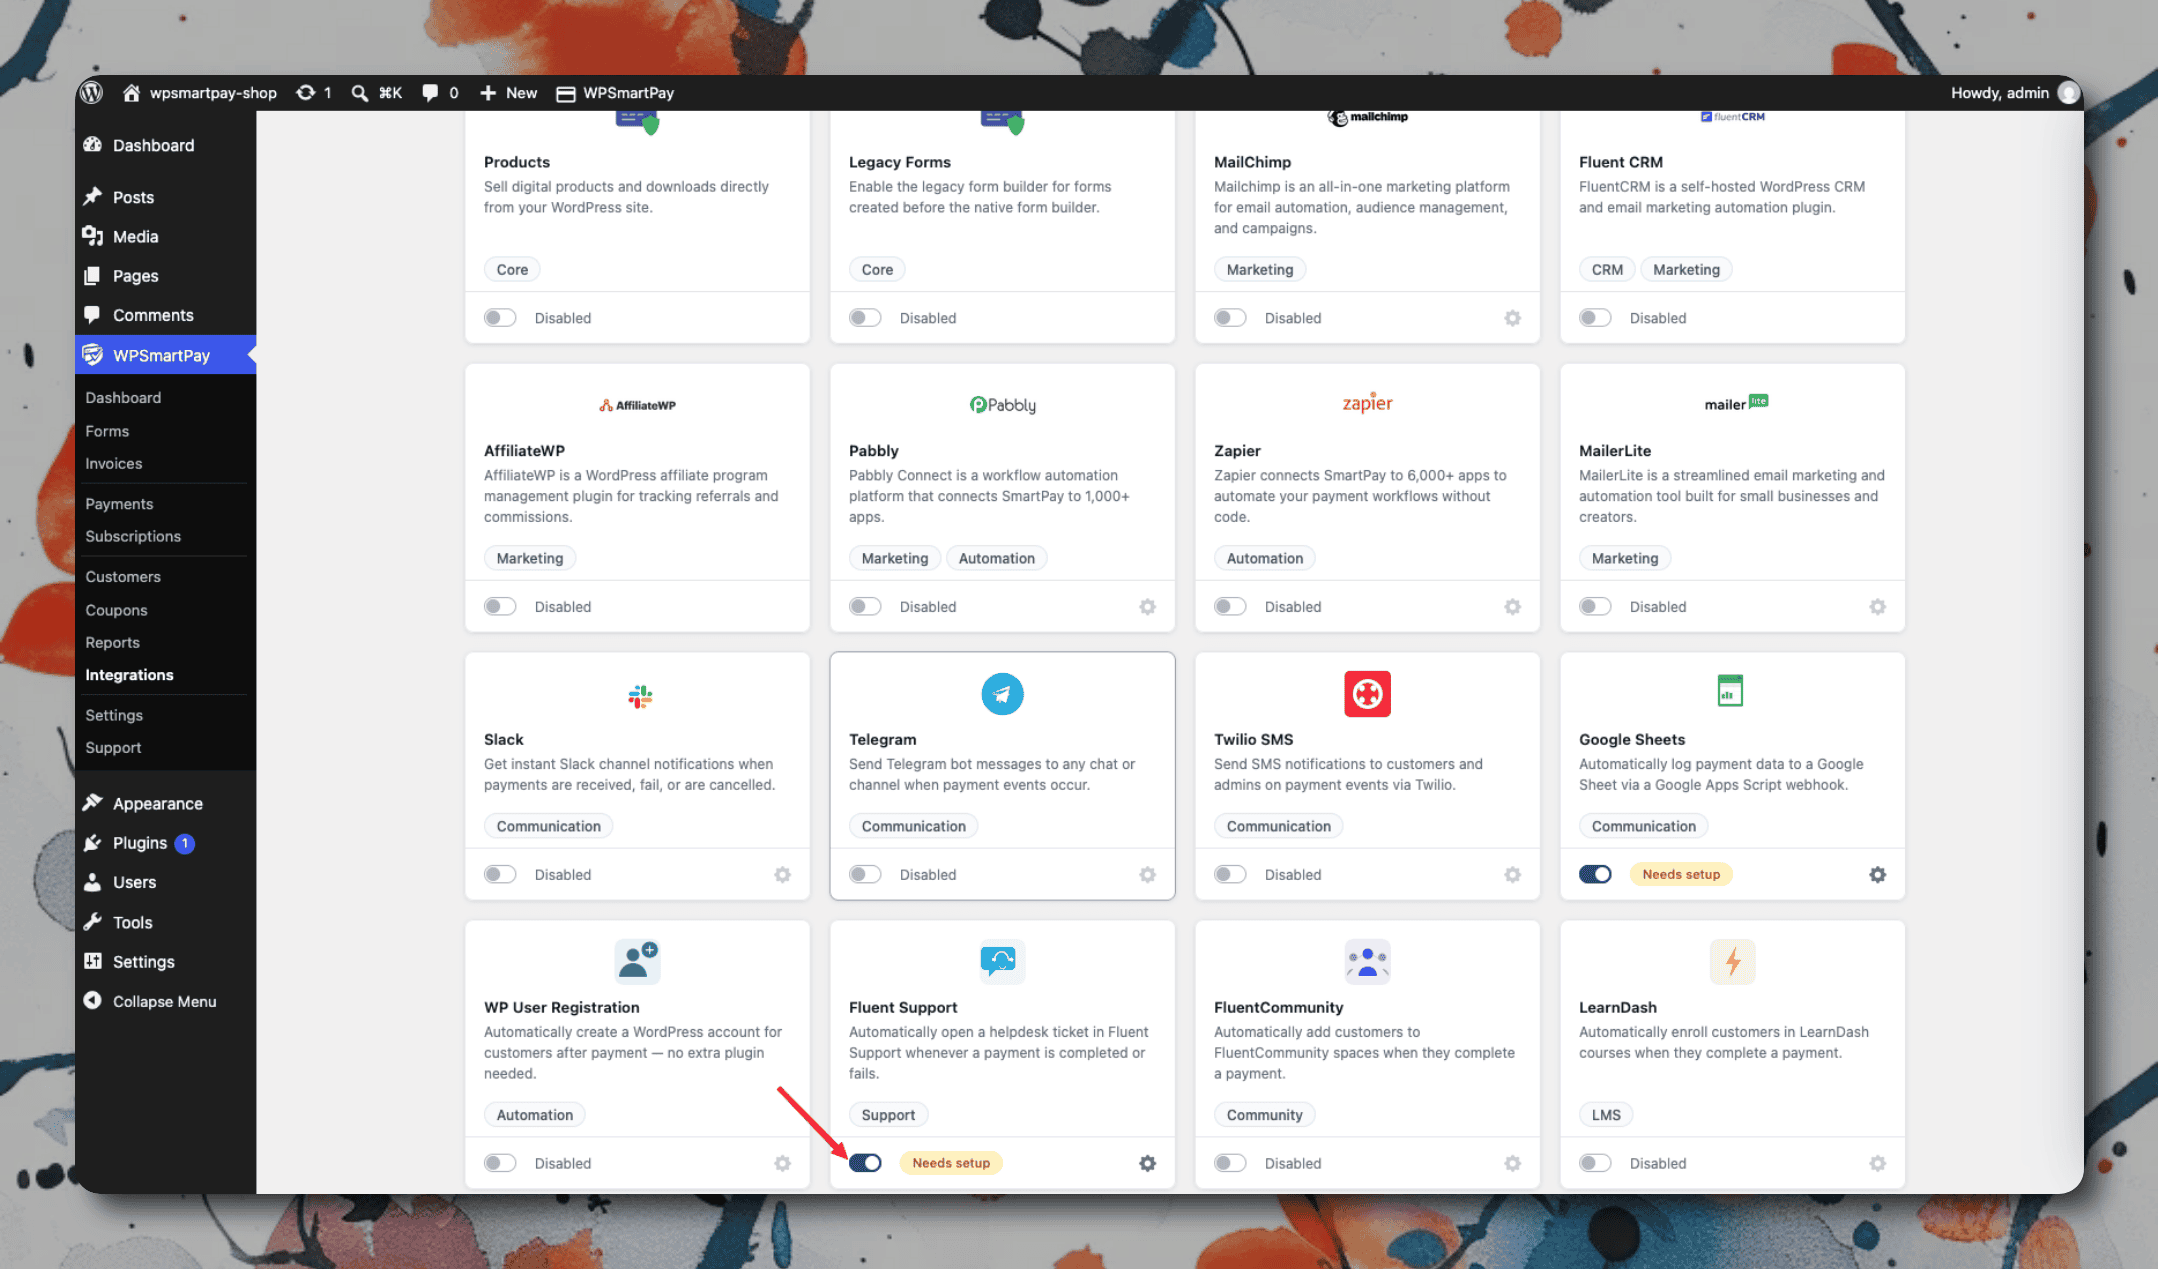---
# FluentCommunity
Enrolls customers into FluentCommunity spaces on payment completion and optionally removes them on subscription cancellation.
Ideal for paid community memberships where access is tied to an active subscription.
### Requirements
* [FluentCommunity](https://wordpress.org/plugins/fluent-community/) must be installed and active (free version on WordPress.org). Create at least one Space in **FluentCommunity → Spaces** before configuring this integration.
### Setup
1. Go to **SmartPay → Extensions** and toggle **FluentCommunity** on.
2. Click the gear icon to open **Settings → Extensions → FluentCommunity**.
3. Select the default **Space** to enroll customers into on payment completion.
4. Enable **Remove on Cancellation** to unenroll customers when their subscription is cancelled.
5. Click **Save Changes**.
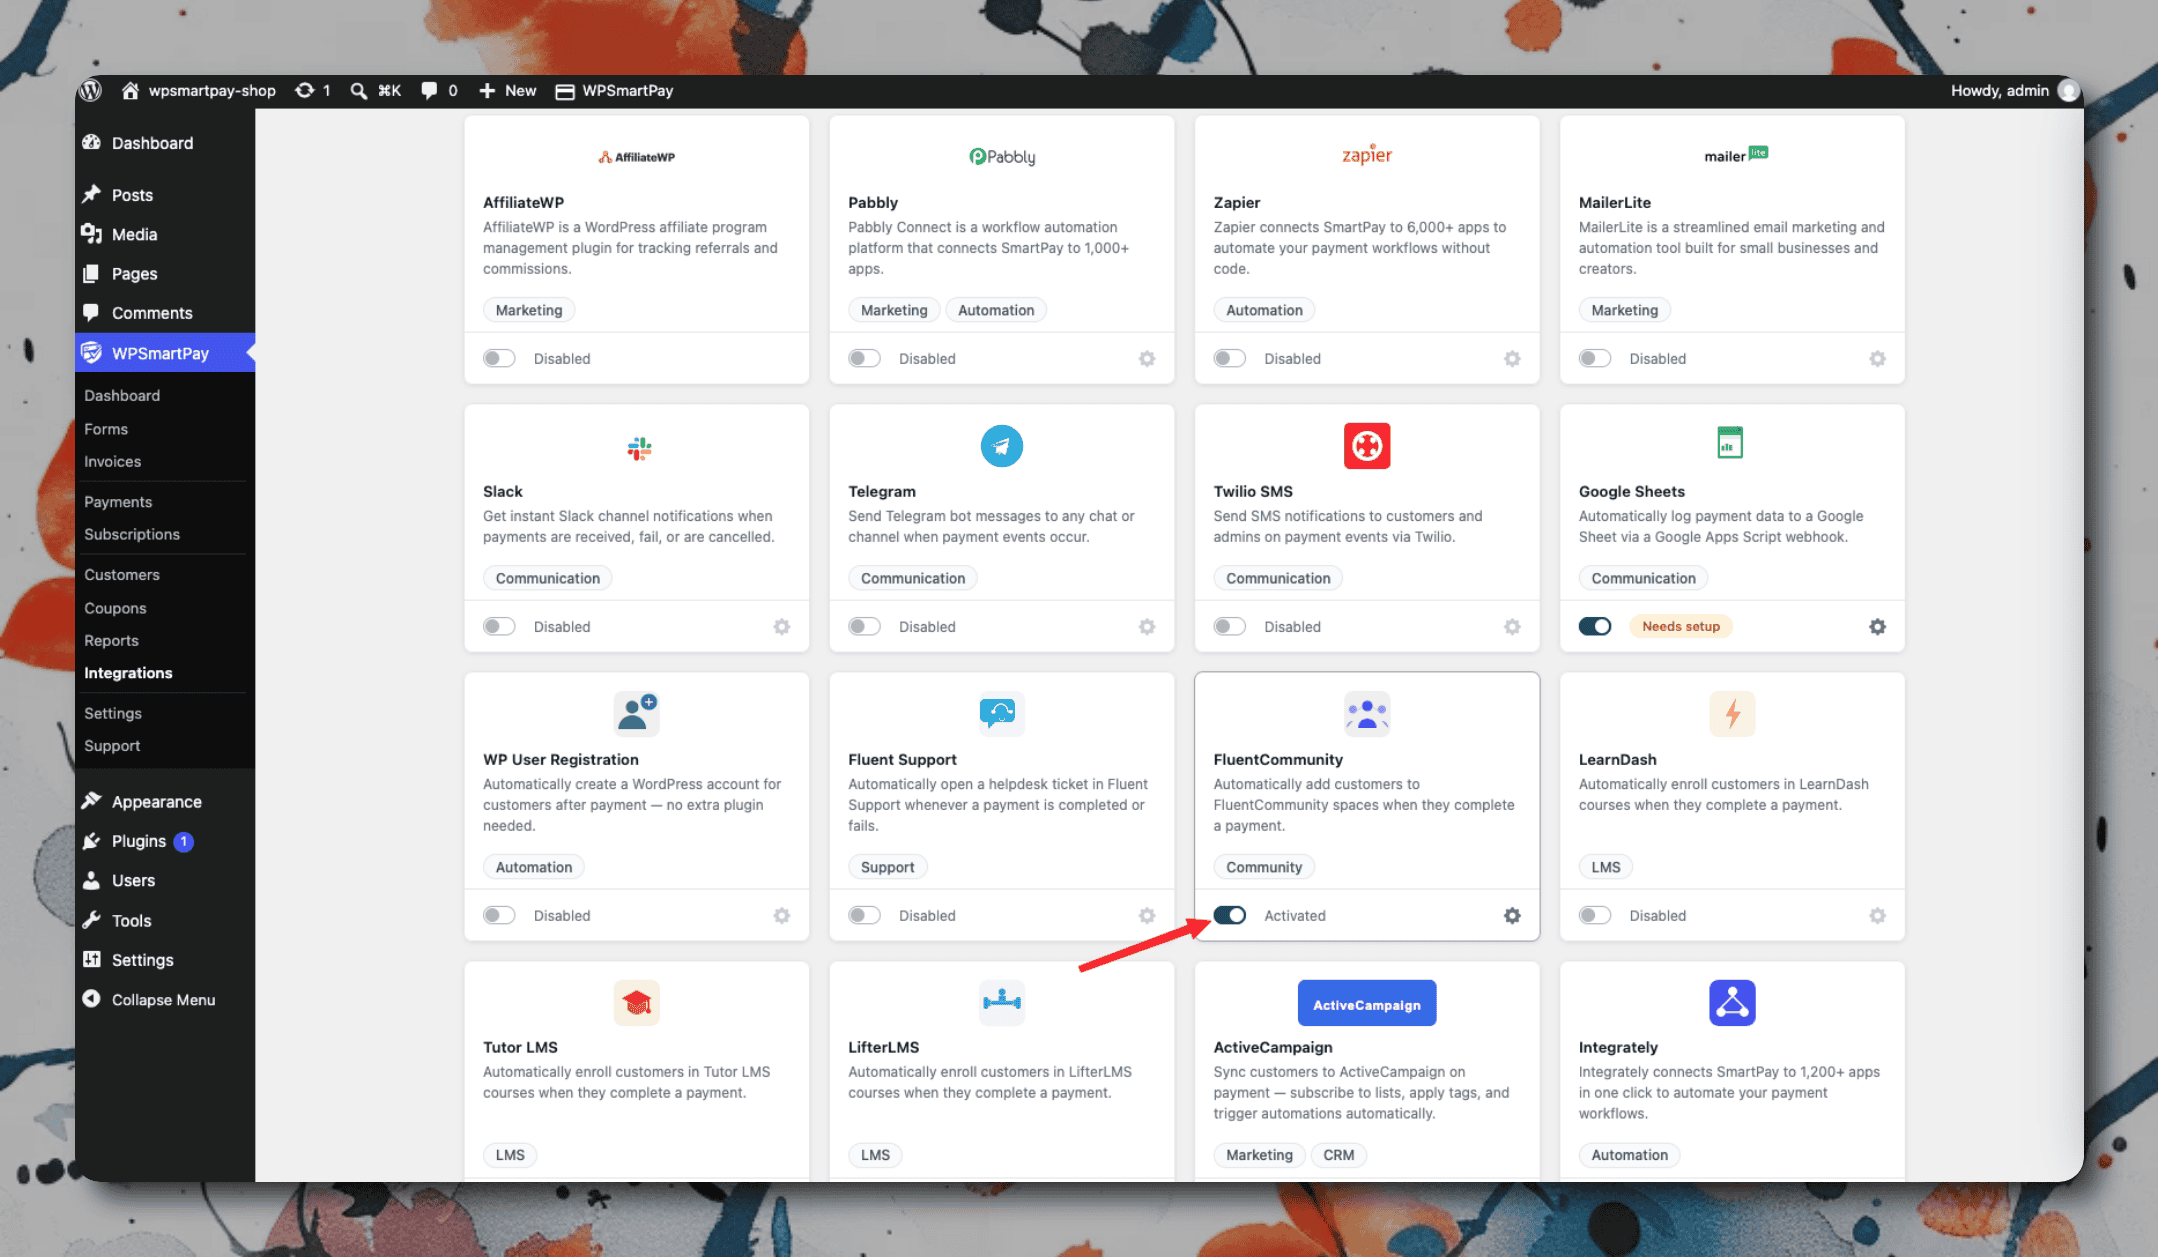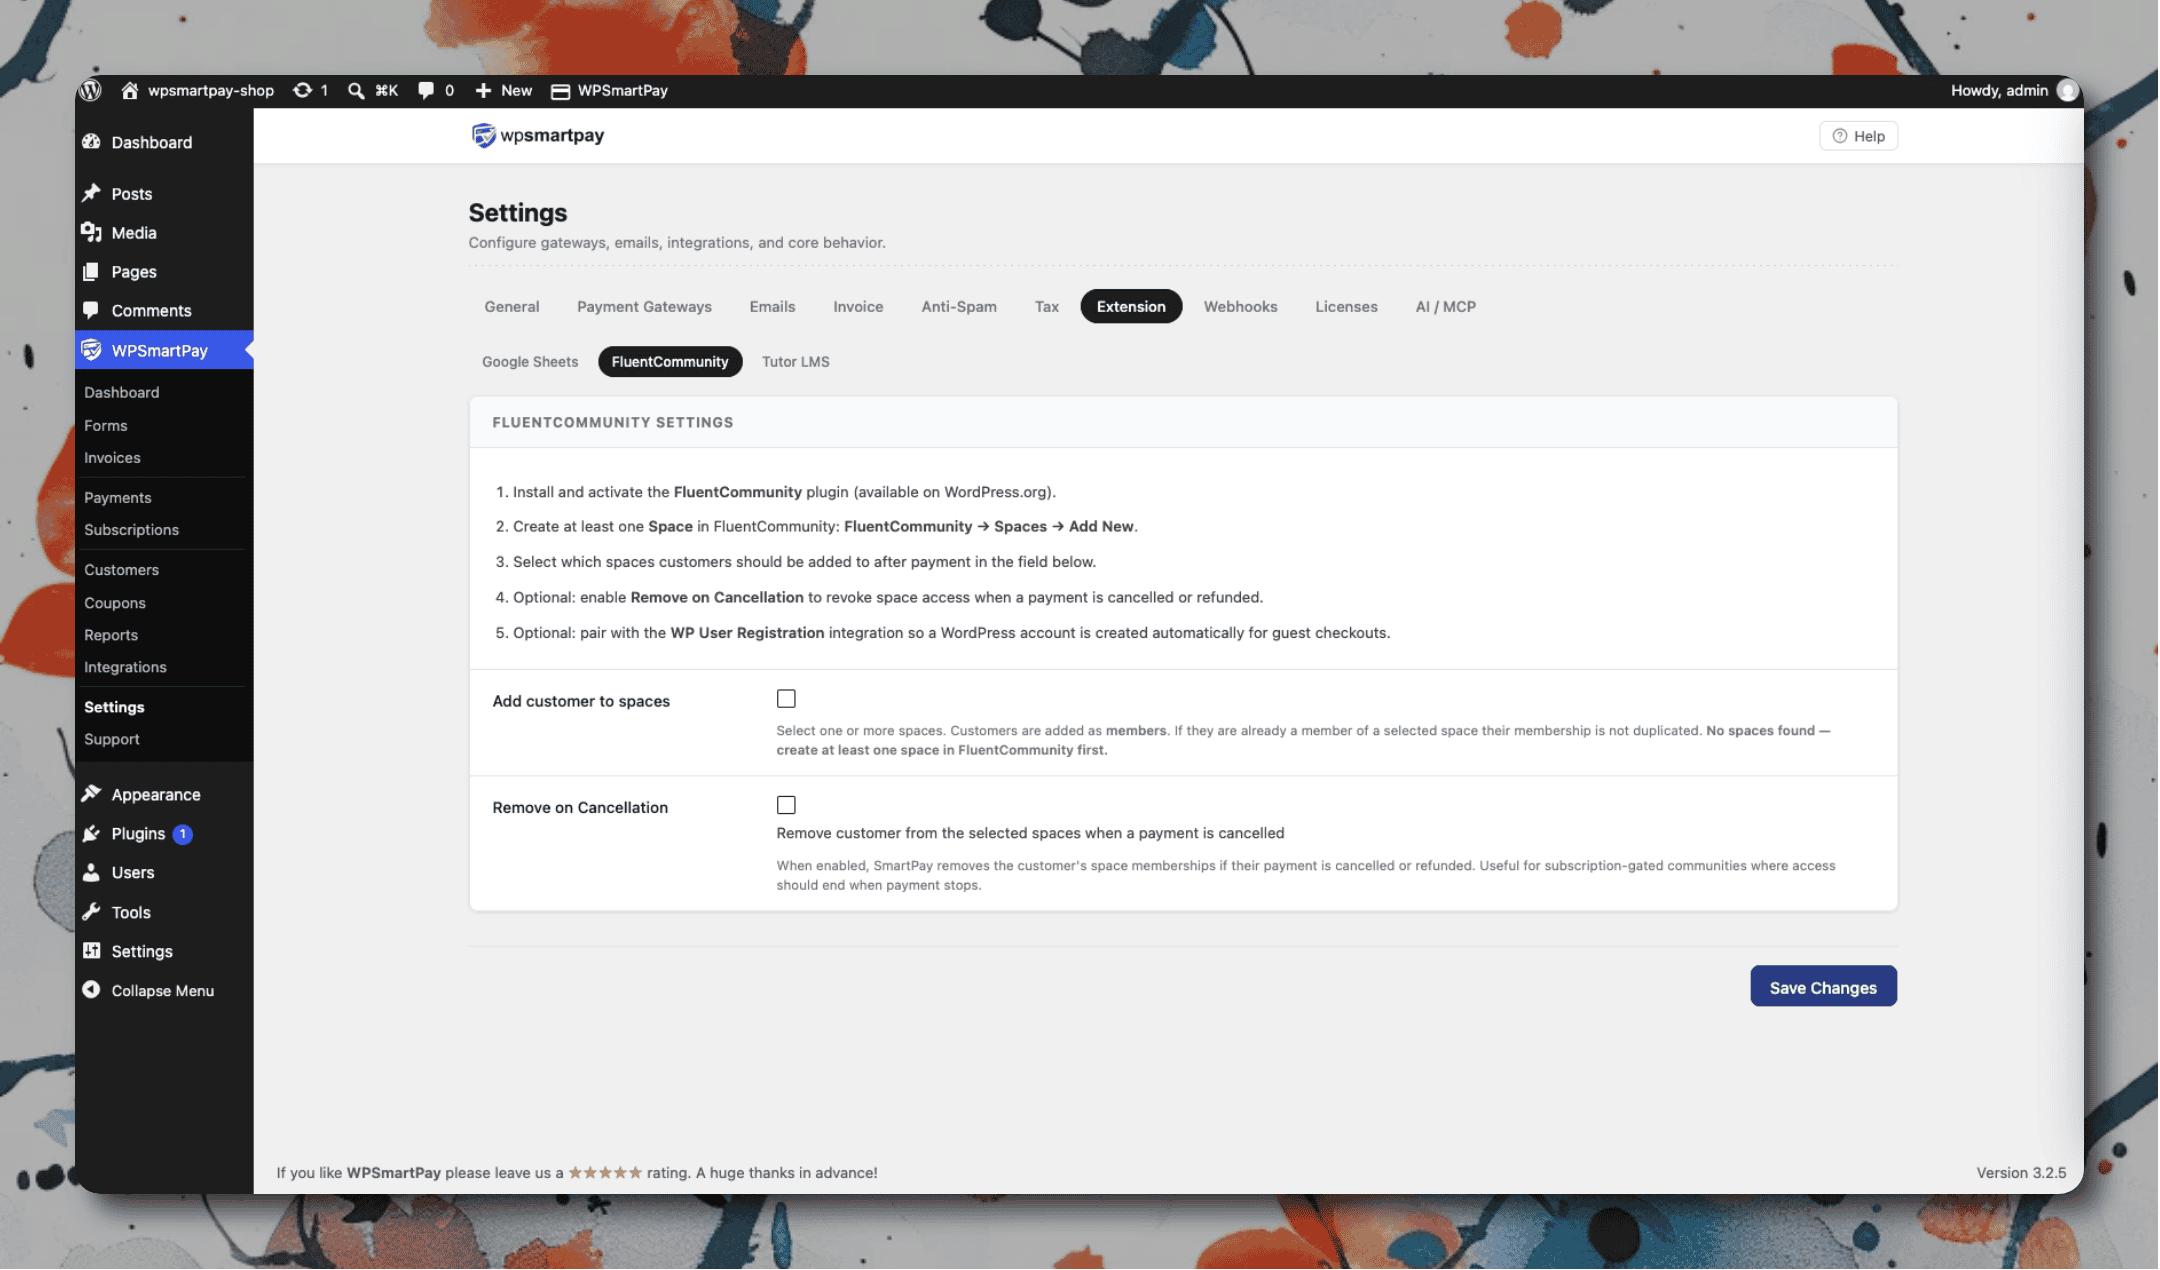> **Per-form space override:** Open any form in the form editor, go to the **FluentCommunity** panel in the sidebar, and select a different space for that specific form.
# Form Analytics & Conversion Data (Pro)
WP SmartPay Pro tracks how each payment form performs — how many times it is viewed, how many payments it generates, and what percentage of visitors convert into paying customers. This data lives in the **Reports → Forms** tab.
## Accessing Form Analytics
1. Go to **SmartPay → Reports**.
2. Click the **Forms** tab.
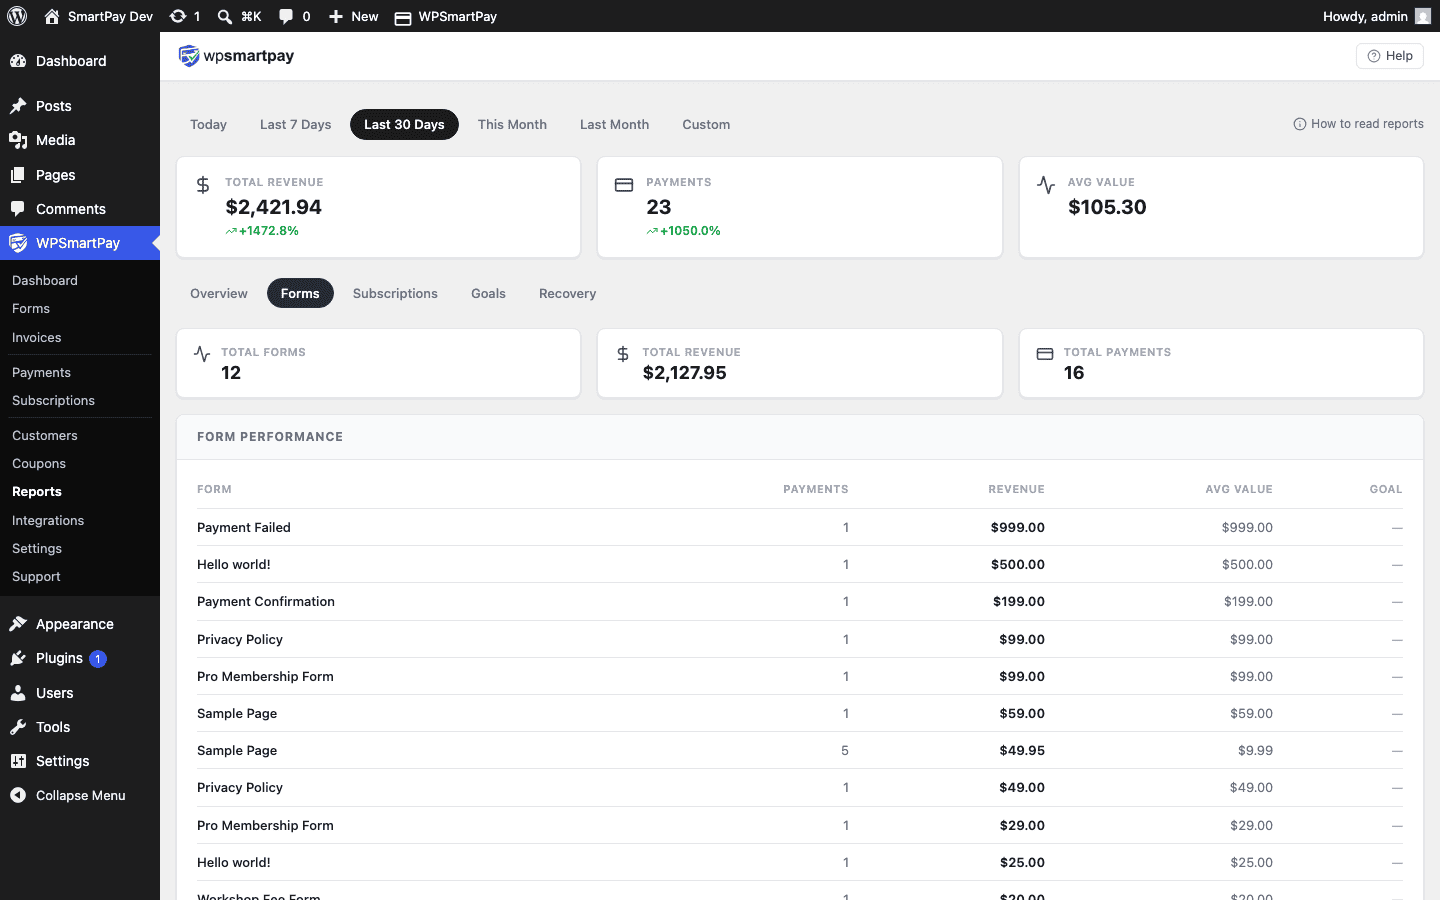 The Forms report tab shows views, completions, revenue, and conversion rate for each form.## What the Report Shows
The Forms report table has one row per active form with the following columns:
* **Form Name** — The title of the payment form, with a link to edit it.
* **Views** — Total number of times the form was loaded on a page during the selected period.
* **Completions** — Number of successful (Completed status) payments submitted through the form.
* **Revenue** — Total revenue from completed payments on this form in the selected period.
* **Conversion Rate** — Completions ÷ Views × 100. A higher rate means more visitors are completing checkout.
## Date Filter
Use the date range selector at the top of the Reports page to filter all metrics to a specific period: Today, This Week, This Month, or a custom range. Changing the period updates all tabs simultaneously.
## Sorting the Table
Click any column header to sort the table by that metric. Click again to reverse the sort order. Sorting by Revenue identifies your highest-earning forms; sorting by Conversion Rate reveals which forms are most effective at converting visitors.
## Interpreting Conversion Rate
* A low conversion rate with high views suggests the form is being discovered but something is stopping checkout completion — possibly the price, a confusing layout, or a required login gate.
* A high conversion rate with low views means the form converts well but needs more traffic — consider embedding it on more pages or promoting the URL.
> **Note:** Views are tracked only when the form shortcode `[sp_form id="…"]` or the WP SmartPay Form block is rendered on a published page. Views from editor previews or password-protected pages are not counted.
# Form Configuration
In WordPress admin, go to **Smartpay > Forms**. You will find all the **Forms**. Click **Add New** to create new **Form**.
You will find Gutenberg based form builder. Change the **Form Title**. Add necessary form fields.
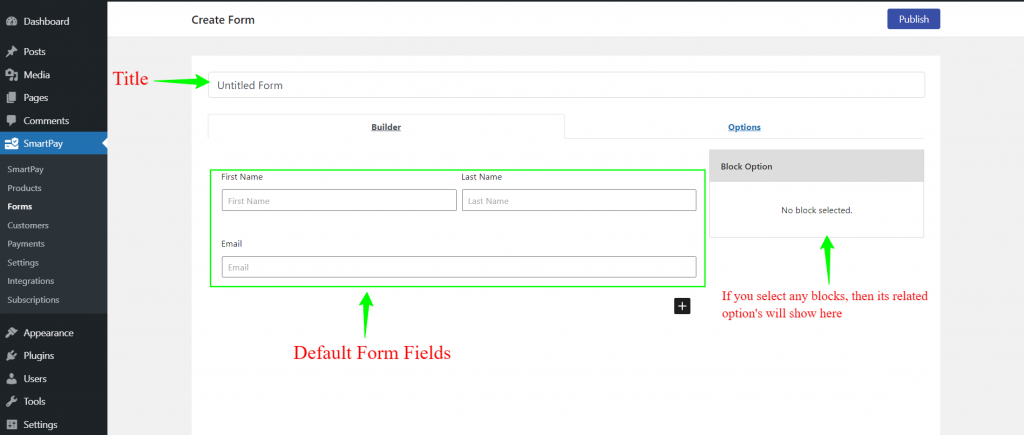
Click onto **Options** Tabs. You will get **Form amount** related Fields.
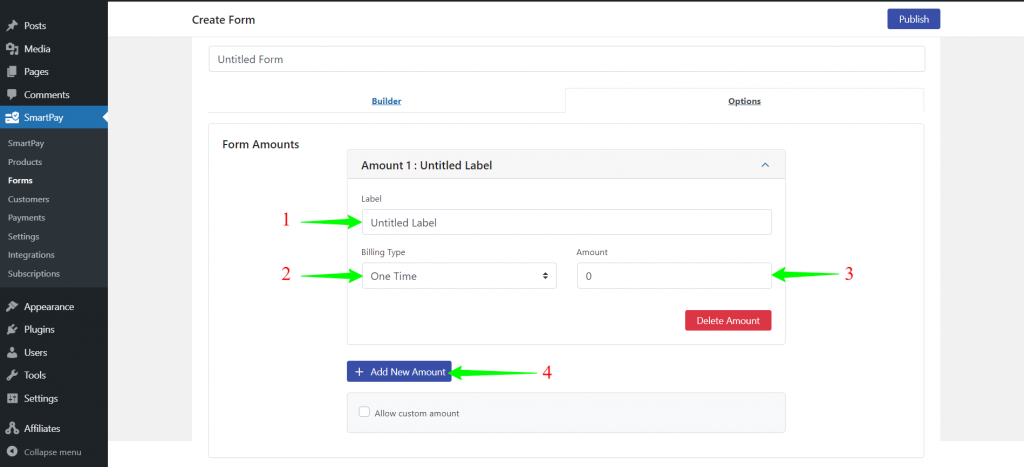
## Form Amounts Fields
1. **Label**: Set the amount label that you want to show in frontend.
2. **Billing Type**: Set the form billing type. Options are **One time payment** and **Subscription payment**.
3. **Amount**: Set the amount for the payment.
4. Click on **Add New Amount** for adding new **Amount**.
```
Note: Subscription billing option is only available in Smartpay Pro Plugin
```
After finalizing **Form** **Fields** and **Form Amounts**, Click **Publish** Button. You will get **Preview** Button. Click on **Preview** Button. This will take you to frontend of that form.
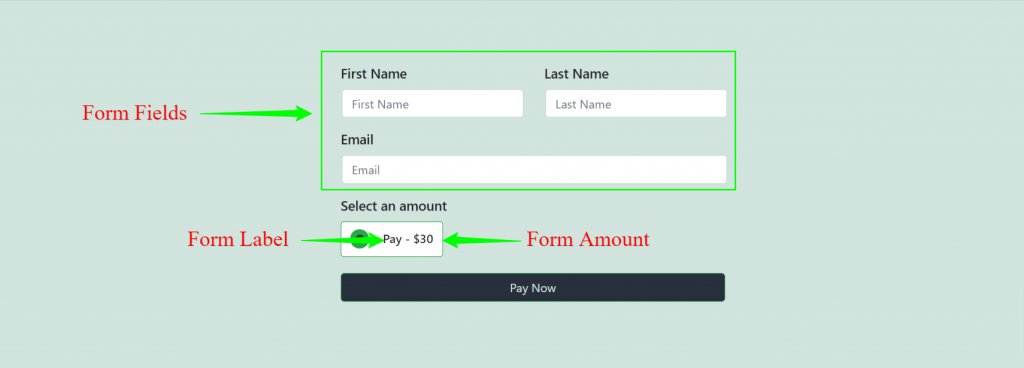
Now you can provide this **Form URL** to customer and start receiving payments from customer.
## Additional Form Fields
### Address Field
Type **/Address** in builder . you will find **Address Fields Block**. Click on the **Address Fields** , **Address** **Fields** block will be inserted in the builder.
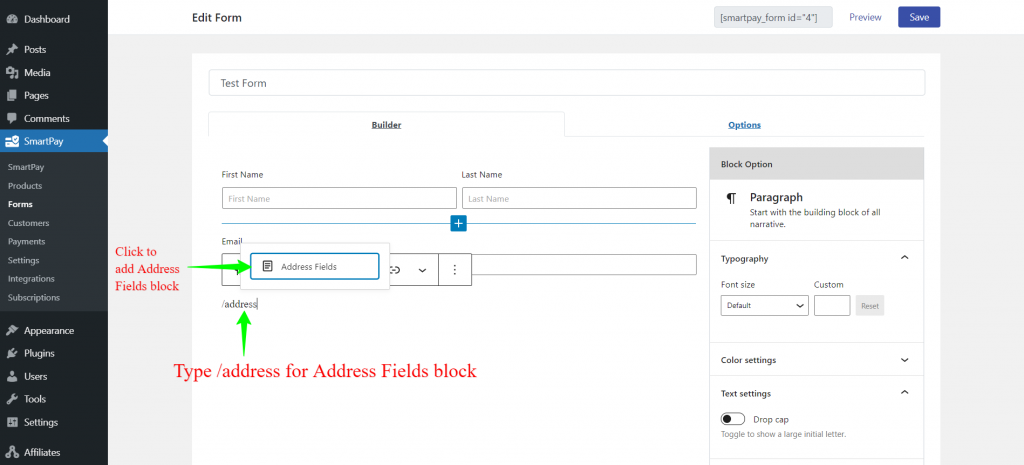
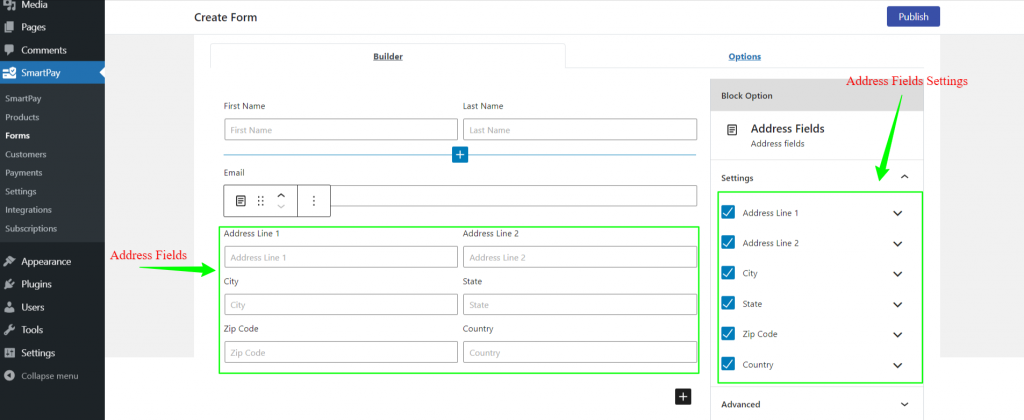
### Checkbox Field
Type **/checkbox** in builder . you will find **Checkbox Field**. Click on the **Checkbox Field** , **Checkbox Field** block will be inserted in the builder.
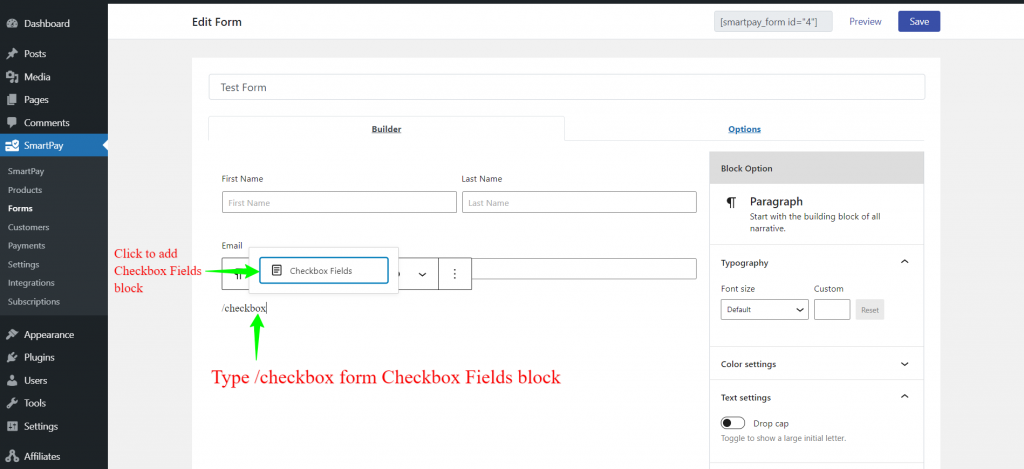
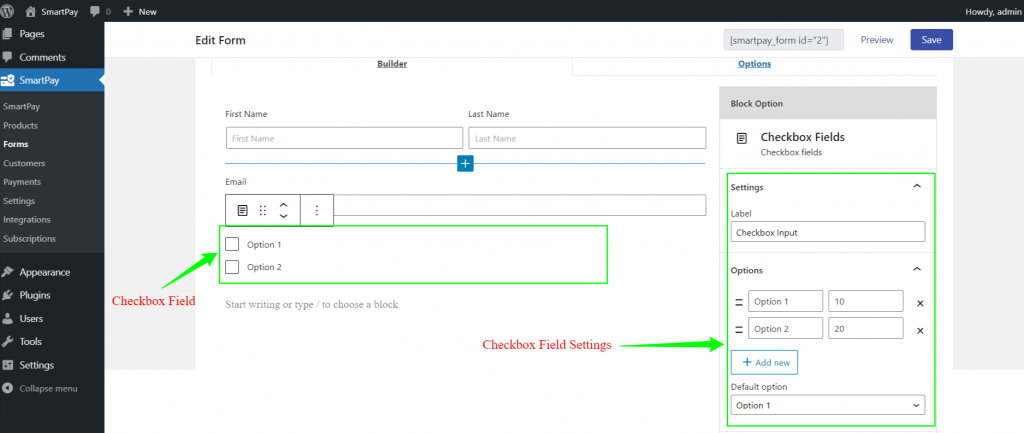
### Radio Field
Type **/radio** in builder . you will find Radio Field. Click on the **Radio Field** , **Radio Field** block will be inserted in the builder.
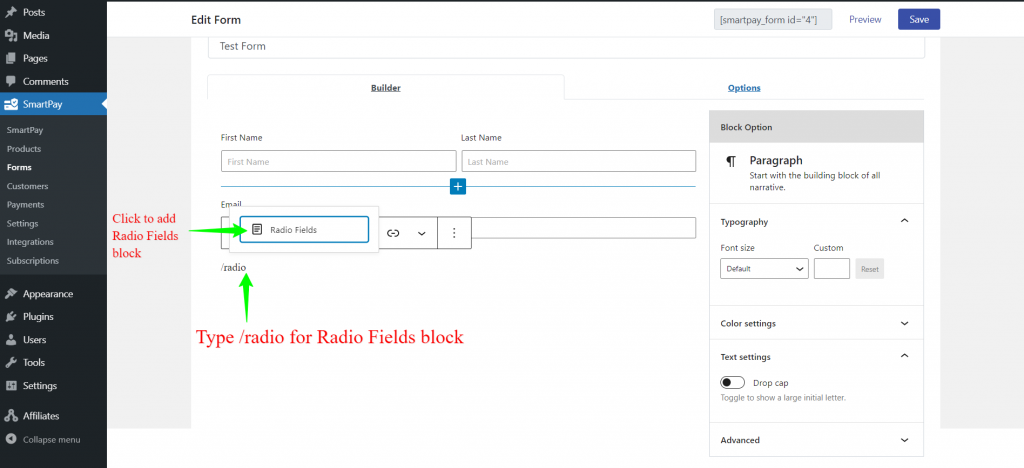
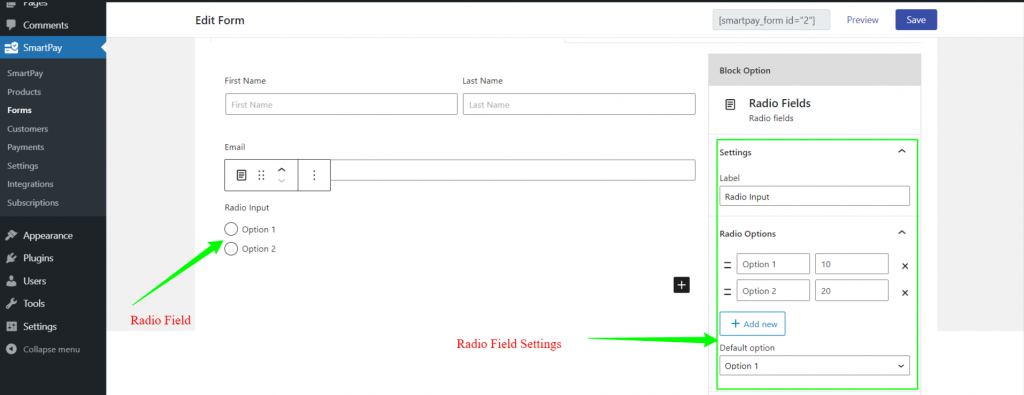
# Form Field Blocks Reference
WP SmartPay forms are built in the WordPress block editor. This reference covers every field block you can add to a payment form — what each one does, its inspector settings, and how to use the Layout Columns option to control how fields display side by side.
## Required Fields
Every new form includes two required fields that are added automatically when you use the **Guide** helper:
* **Name Field** — Collects the customer's full name. Required for all payment receipts and customer records.
* **Email** — Collects the customer's email address. Used for payment receipts and subscription notifications.
> **Note:** You can still add these fields manually from the **Guide** if they are not yet on the canvas.
## Adding Fields with the Guide
The fastest way to add fields is via the **Guide** button in the editor toolbar (top-right area of the editor).
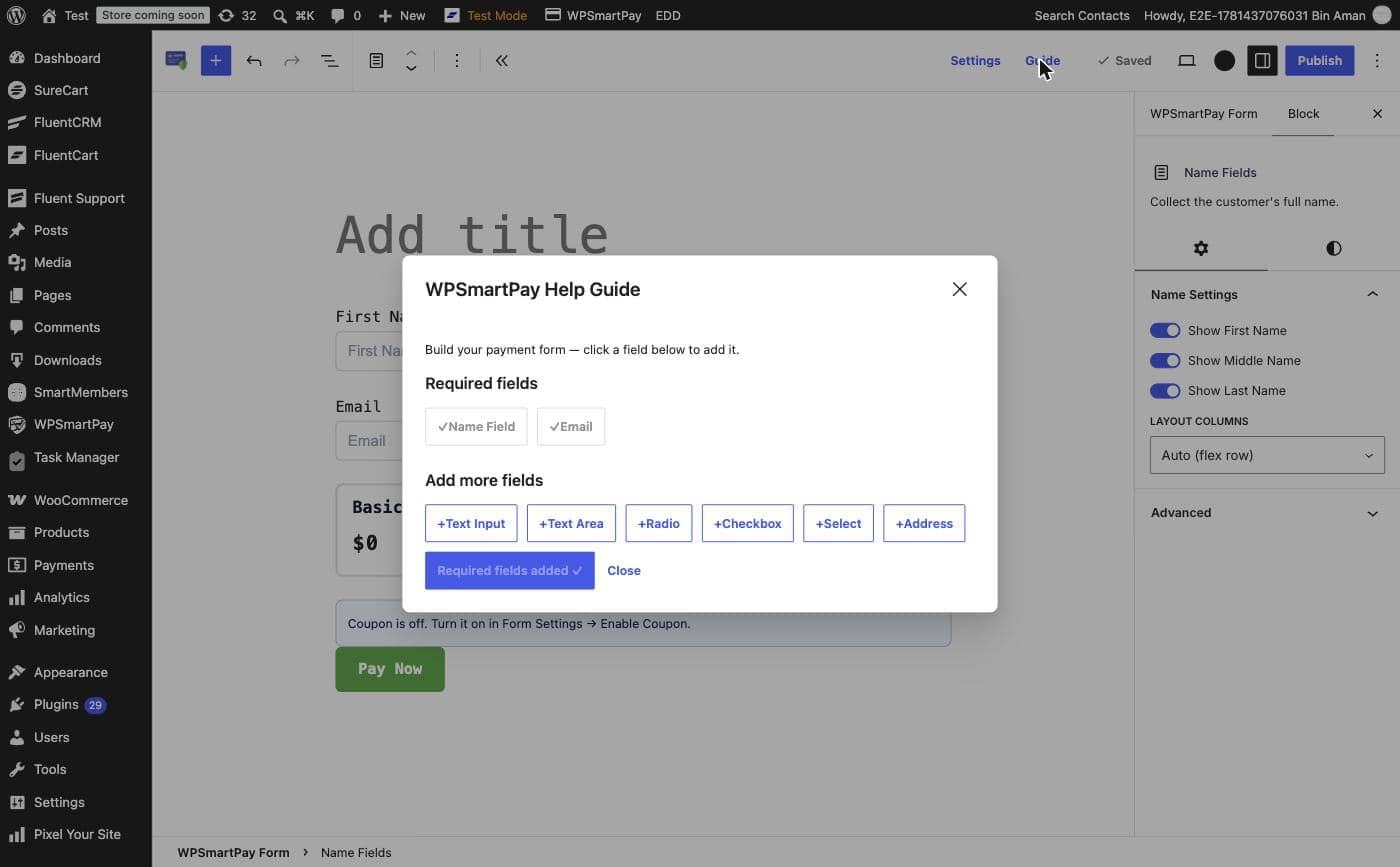The Guide modal — click any field button to insert it into the form immediately.Clicking a field button in the Guide inserts it at the end of the form canvas. The Guide stays open so you can add several fields in one pass.
## Name Fields Block
The **Name Fields** block collects the customer's full name. Select the block in the editor to open its inspector on the right.
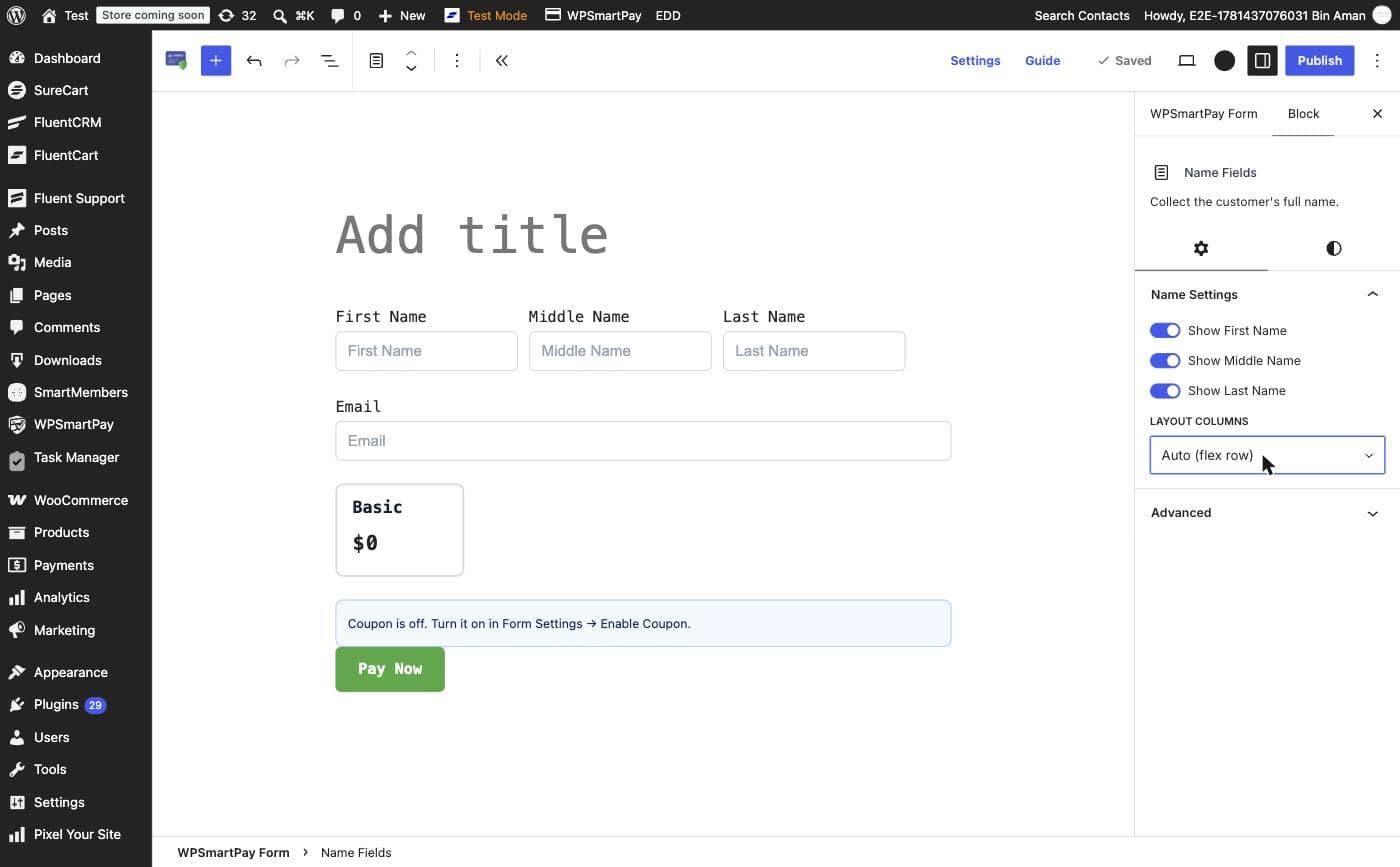Name Fields inspector — toggle which sub-fields appear and choose the column layout.### Name Settings
* **Show First Name** — Toggle to show or hide the First Name input (on by default).
* **Show Middle Name** — Toggle to show or hide the Middle Name input (off by default).
* **Show Last Name** — Toggle to show or hide the Last Name input (on by default).
### Layout Columns
The **Layout Columns** dropdown controls how the visible name sub-fields are arranged horizontally:
* **Auto (flex row)** — Sub-fields sit side by side, sharing the available width equally. Best for most forms.
* **1 Column** — Each sub-field stacks vertically. Useful on narrow embeds.
* **2 Columns** — Two sub-fields per row, third wraps to the next line.
* **3 Columns** — All three sub-fields in one row at equal widths.
## Address Fields Block
The **Address Fields** block collects a full postal address. Select the block to open its inspector.
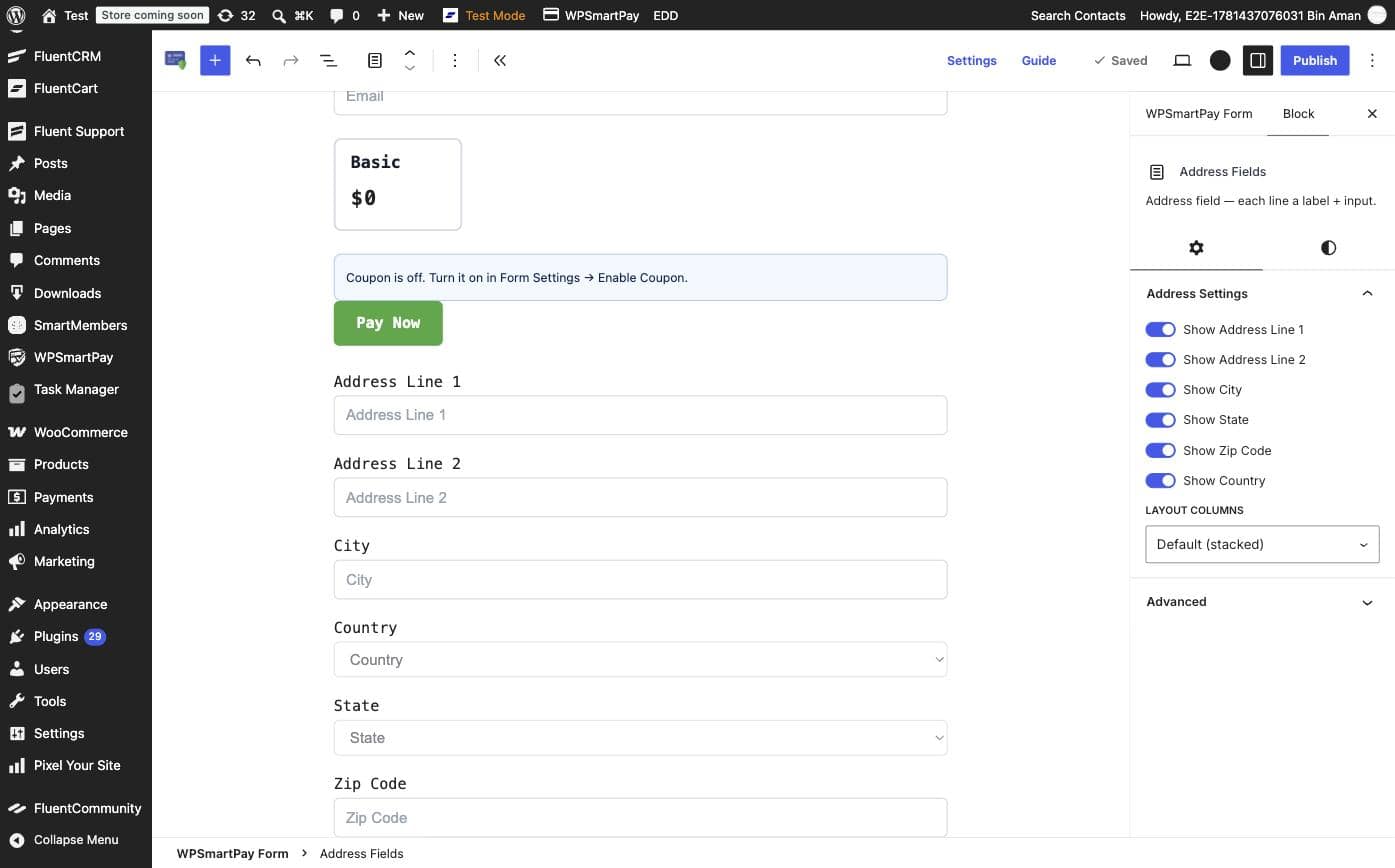Address Fields inspector — each line of the address can be shown or hidden independently.### Address Settings
* **Show Address Line 1** — Street address (on by default).
* **Show Address Line 2** — Apartment, suite, or unit (on by default).
* **Show City** — City or town field (on by default).
* **Show State** — State, province, or region (on by default).
* **Show Zip Code** — Postal or ZIP code (on by default).
* **Show Country** — Country selector (on by default).
### Layout Columns
The **Layout Columns** dropdown for Address Fields works the same as for Name Fields:
* **Default (stacked)** — Each address line on its own row. This is the default and suits most layouts.
* **Auto (flex row)** — Address fields flow into a flexible row. City, State, and Zip can sit side by side on wide screens.
* **2 Columns** / **3 Columns** — Fixed column grids for compact checkout forms.
## Additional Field Blocks
Use the Guide or the block inserter (**+** button) to add any of these optional field types:
| Field | What It Collects | Typical Use |
|---|---|---|
| **Text Input** | Single-line free text | Company name, reference number, promo code |
| **Text Area** | Multi-line free text | Order notes, delivery instructions, custom message |
| **Radio** | One choice from a list | T-shirt size, subscription tier selection |
| **Checkbox** | One or more choices from a list | Terms agreement, add-on selections |
| **Select** | One choice from a dropdown | Country, colour, quantity |
| **Address** | Full postal address (multi-field) | Physical delivery, billing address |
## Tips
* Field data collected from custom fields is stored on the payment record and visible in the Payment Detail page.
* Use the **Layout Columns** setting on Name and Address blocks to create compact, two- or three-column field rows without any custom CSS.
* If a field is not needed, toggle it off in the inspector rather than deleting the block — this preserves your block settings if you need to re-enable it later.
# Form Goals
# Form Goals
Set a revenue or quantity target on any payment form and let SmartPay track progress automatically. A goal progress bar can be embedded on your public page to create urgency, while the **Goals** tab in Reports gives you a live dashboard of every active goal across all your forms.
## What Goals Do
* Track total **revenue collected** or total **number of payments** against a target you set per form.
* Optionally display a progress bar block on the payment form page so visitors can see how close the goal is to being reached.
* Optionally stop accepting new payments once the goal is met, or display a custom message.
* Set a **stop collection date** independent of the target — useful for time-limited campaigns.
## Enabling a Goal on a Form
1. Go to **SmartPay → Forms** and open a form in the editor.
2. In the right sidebar, click the **Goal** tab.
3. Toggle **Enable Goal** on.
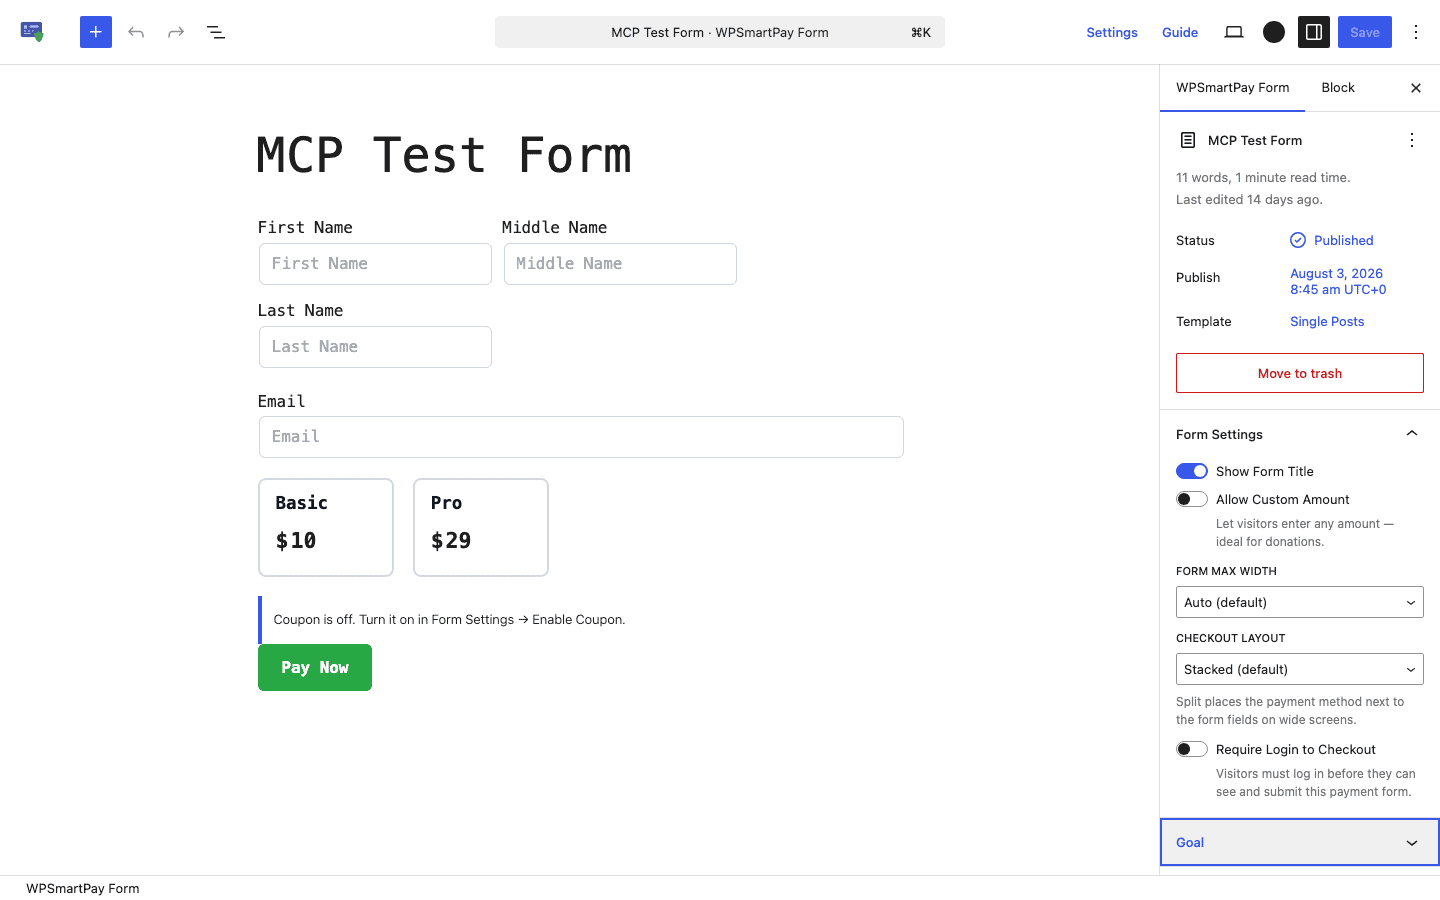Open any form, click the Goal tab in the sidebar, and toggle Enable Goal on.## Configuring the Goal
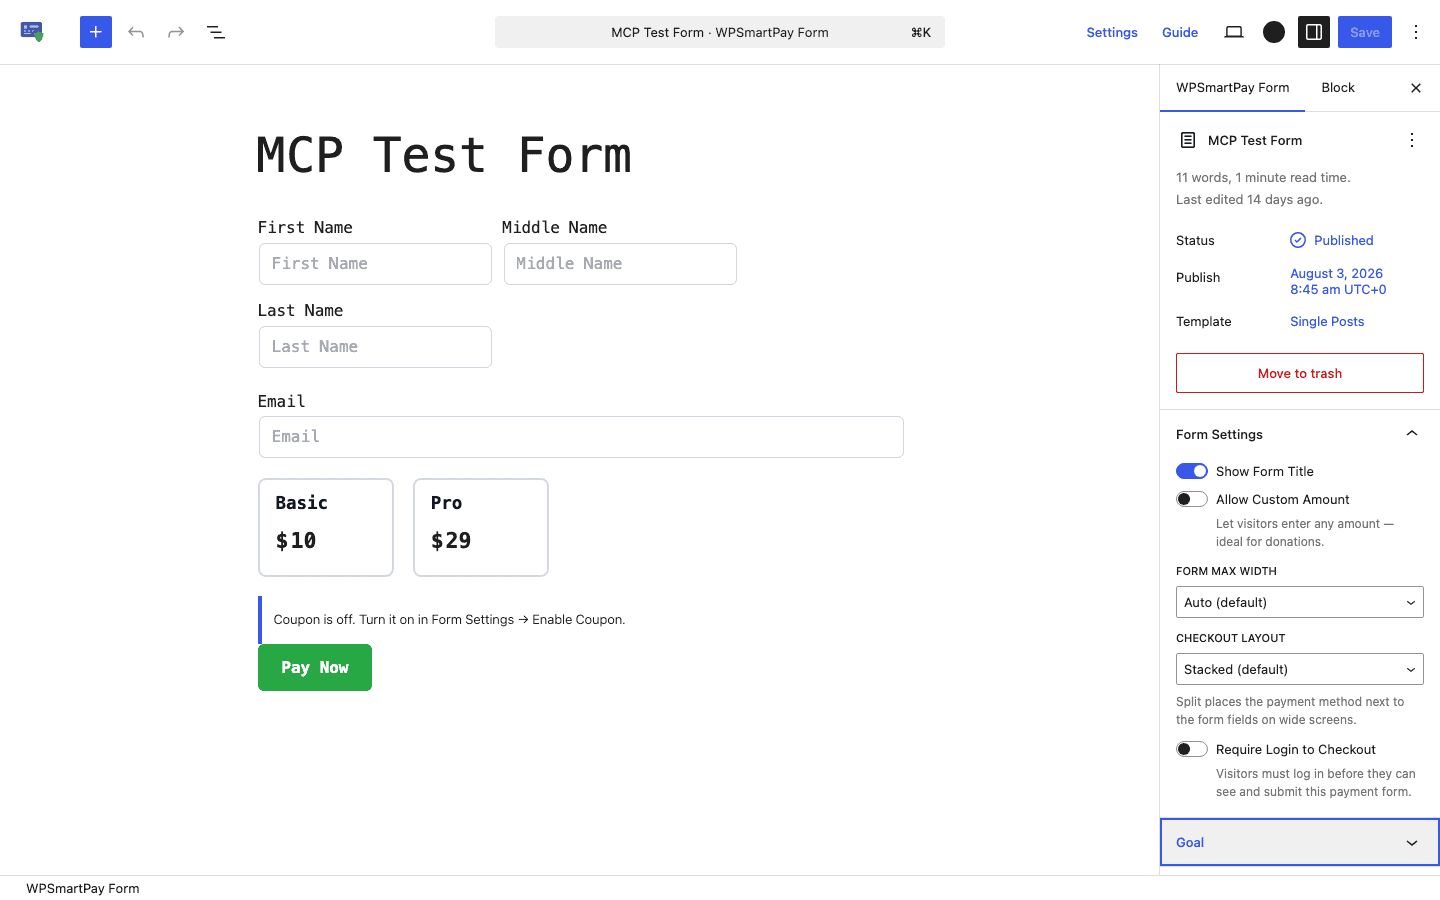Once enabled, configure the goal type, target, visibility, and what happens when the goal is reached.### Goal Type
| Type | Tracks | Example target |
|---|---|---|
| **Revenue** | Total amount collected in your default currency | $5,000 raised |
| **Quantity** | Total number of completed payments | 100 registrations |
### Target
Enter the number the goal should reach. For revenue goals this is a currency amount; for quantity goals this is a count of payments.
### Show Progress to Public
When enabled, the **Goal Progress** block added to the form canvas displays a progress bar to all site visitors. Disable it to track the goal internally without showing it on the public form page.
### When Goal Is Met
| Option | Behaviour |
|---|---|
| **Allow orders** | Form stays open and keeps accepting payments after the goal is reached |
| **Stop accepting** | Form disables the pay button and shows a "goal reached" message when the target is hit |
| **Show message** | Form shows a custom message you write but does not disable payment |
### Stop Collection Date
Set an optional date after which the form stops accepting payments regardless of whether the goal has been reached — useful for campaign end-dates (e.g. a crowdfunding round that closes on a specific day).
## Goal Progress Block
When you enable a goal, SmartPay automatically inserts a **Goal Progress** block at the top of your form canvas. The block renders a labelled progress bar showing current progress vs. the target. You can move it anywhere in the form layout — above the pricing options, below the header, or anywhere else.
> **Show Progress to Public** must be on for the block to render to site visitors. When it is off, the block is invisible on the frontend even though it remains in the editor.
## Tracking Goals in Reports
Go to **SmartPay → Reports → Goals** to see all active goals across every form at a glance.
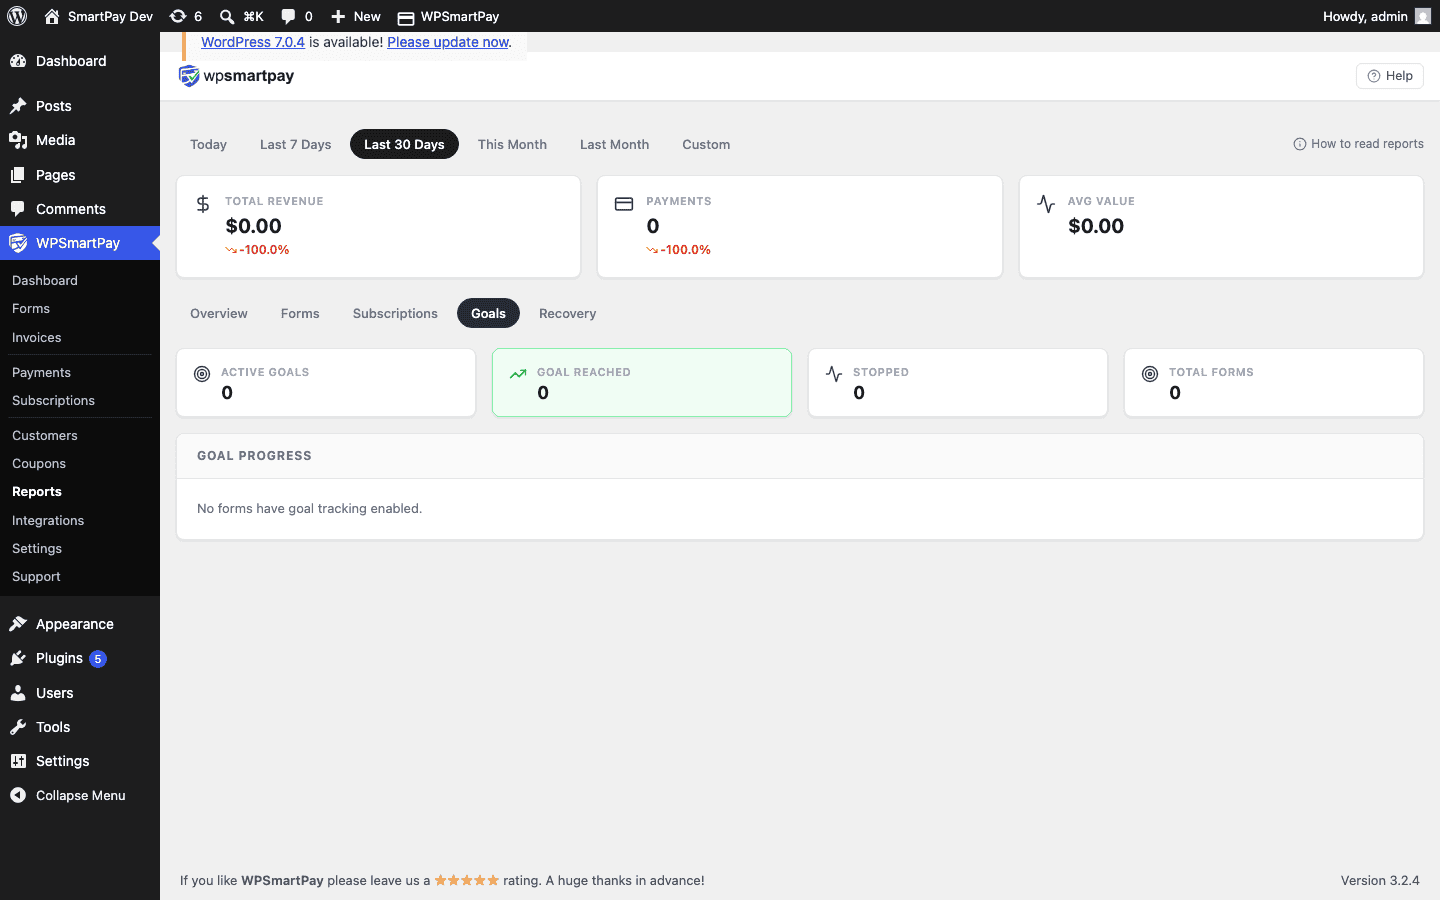The Goals tab in Reports shows summary stats and a per-form progress table with percentage and status.### Summary Stats
| Stat | What it shows |
|---|---|
| **Active Goals** | Forms with a goal enabled and still collecting |
| **Goal Reached** | Forms where the target has been met |
| **Stopped** | Forms where collection was halted (goal met + stopped, or date passed) |
| **Total Forms** | Total forms with a goal configured |
### Per-Form Table
The table shows each form's goal type, target, current amount or count, progress percentage, and status badge (**Active**, **Near Goal**, or **Goal Reached**). Click any row to open the form editor.
> **Near Goal** status appears when a form has reached 80 % or more of its target, making it easy to spot campaigns that need a final push.
# Form Pricing & Amount Options
Every WP SmartPay form has a **Pricing** panel in the editor sidebar where you control how much customers pay and how they choose their amount. You can charge a single fixed price, let visitors name their own amount, or offer a set of pre-defined donation tiers.
## Opening the Pricing Panel
Open a form in the editor (**SmartPay → Forms → Edit**), then click the **Pricing** section in the right sidebar. If the sidebar is hidden, click the gear icon in the top-right toolbar to show it.
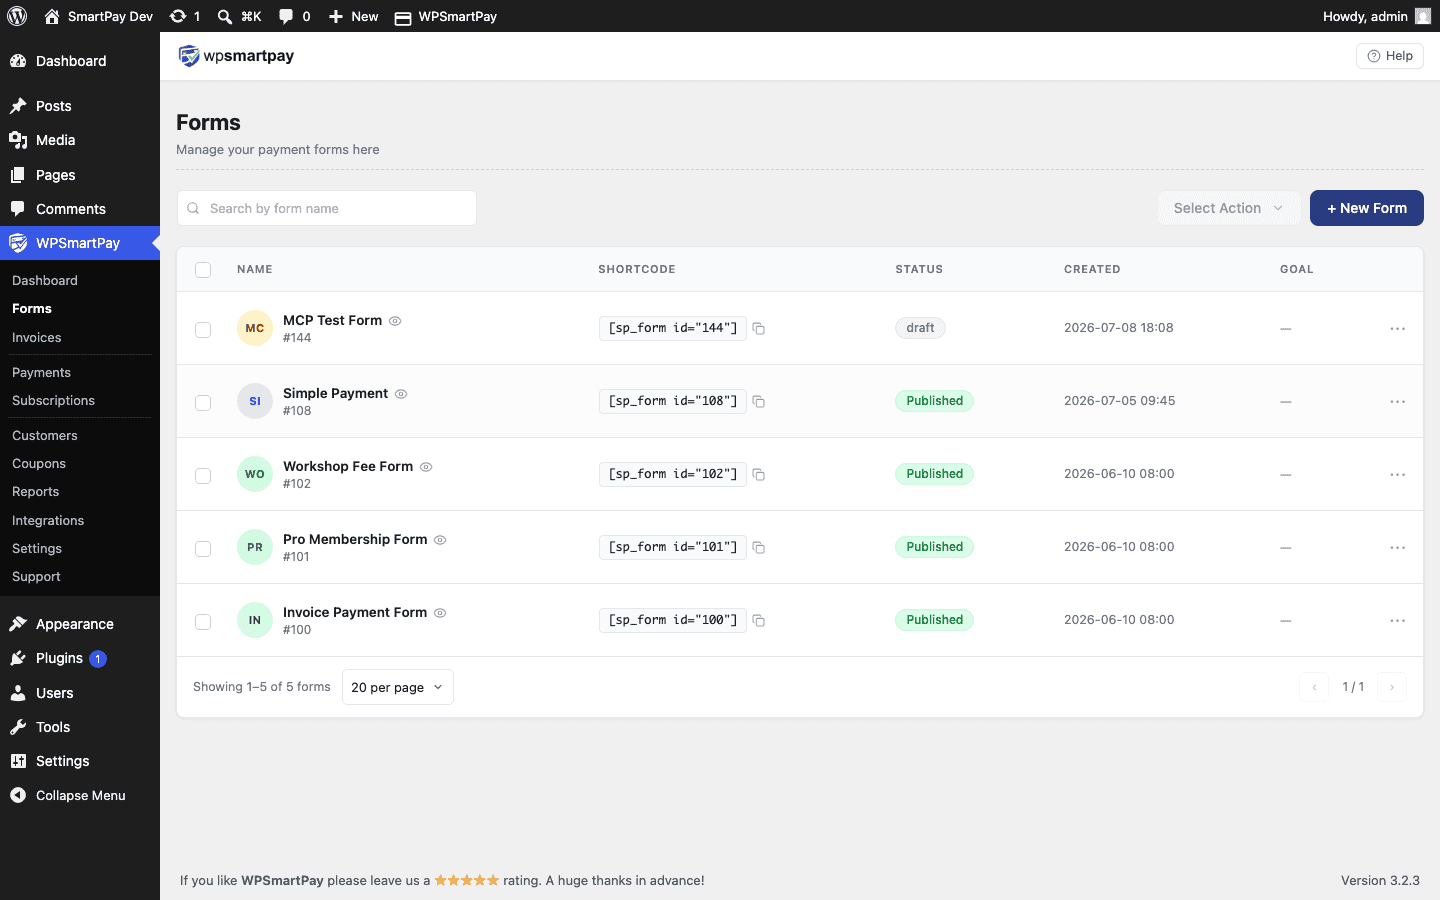 The Forms list — click a form title to open its editor and access the Pricing panel.## Pricing Types
### Fixed Amount
The customer is charged a single set amount. No input field appears on the checkout form — the amount is displayed as a read-only label.
Use fixed amounts for products, course enrolments, event tickets, and any service with a definite price.
### Custom (Open) Amount
A text input appears at checkout so the visitor can type in any amount they choose. Use this for donations, pay-what-you-want products, or flexible invoicing.
When custom amount is enabled you can also set:
* **Minimum amount** — Any value below this triggers a validation error at checkout.
* **Maximum amount** — Any value above this is rejected. Leave blank for no upper limit.
* **Default amount** — Pre-fills the input with a suggested value. The visitor can still change it.
### Amount Cards (Suggested Tiers)
You can add multiple predefined amount cards alongside a custom amount input. These appear as clickable buttons at checkout. Clicking one pre-fills the amount input; the visitor can still override it.
To add amount cards:
1. With **Custom Amount** selected, click **Add Amount** in the Pricing panel.
2. Enter the value for each card (e.g., 5, 10, 25, 50).
3. Optionally mark one card as the default — it is pre-selected when the form loads.
4. Reorder cards by dragging the handle on the left of each row.
5. Delete a card by clicking the trash icon on the right.
> **Tip:** Amount cards with a pre-selected default are the most common setup for nonprofit donation forms. They guide donors to a typical contribution while still allowing custom amounts.
## Currency Display
The currency symbol and position (before or after the number) come from **SmartPay → Settings → General → Currency**. To change the currency or its symbol position, update that setting — all forms update automatically.
## Subscription Pricing (Pro)
If you have WP SmartPay Pro and want to charge on a recurring schedule, the Pricing panel includes an additional **Subscription** tab. See [Subscription Pricing & Billing Cycles](https://docs.wpsmartpay.com/en/sp-fm-08-subscription-pricing) for a full walkthrough.
# Form Templates (Pro)
WP SmartPay Pro includes a library of ready-made payment form templates. Instead of building a form from scratch you pick a template, and it opens in the editor with blocks, pricing settings, and layout already configured — ready to customise in minutes.
## Opening the Template Picker
1. Go to **SmartPay → Forms → Add New**.
2. The **New Form** modal opens. With Pro active you will see template cards alongside the Blank Form option.
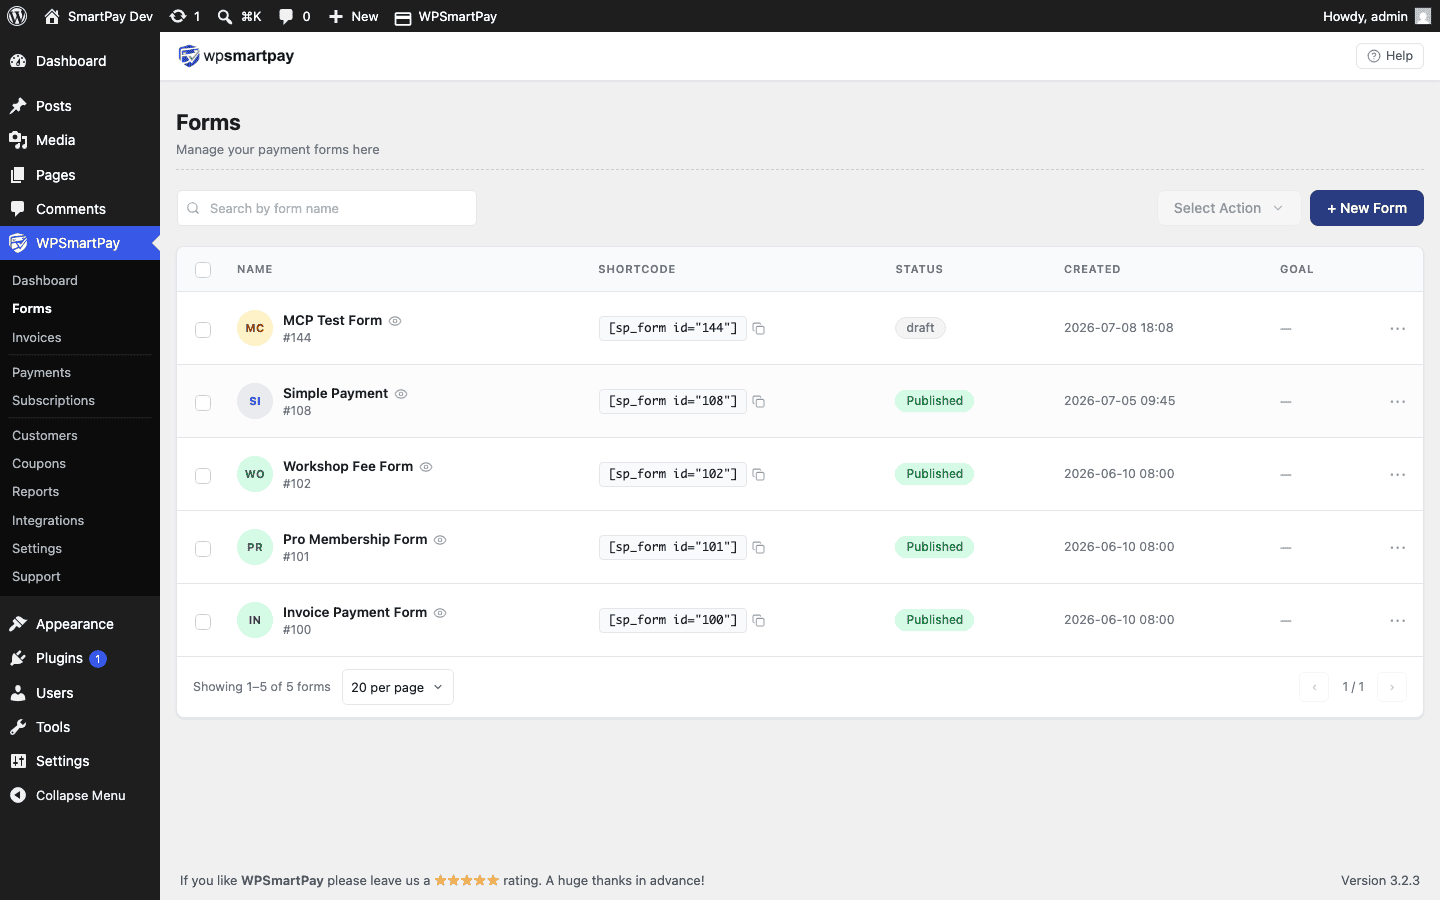 The New Form modal — Pro users see pre-built templates as well as the blank form option.## Available Templates
The template library includes designs for the most common payment use cases:
* **Donation Form** — Suggested amounts + open input + goal progress bar.
* **Event Ticket** — Fixed price with attendee name and email fields.
* **Digital Product** — Product title, image block, and fixed price.
* **Monthly Membership** — Recurring billing with subscription interval pre-set.
* **Online Course Enrolment** — Single payment with course name and description.
* **Simple Invoice** — Minimal layout for professional B2B payments.
## Selecting a Template
1. Hover over a template card to see a short description.
2. Click the card to select it.
3. Click **Create Form** (or similar confirmation button).
4. The form editor opens with the template's blocks, pricing, and options pre-filled.
## Customising After Selection
Templates are starting points — every part of them is editable:
* Change the form title in the title field at the top.
* Edit, delete, or add blocks on the canvas (headings, images, text blocks).
* Adjust pricing amounts, type, and amount cards in the **Pricing** panel.
* Switch the checkout layout in the **Options** panel.
* Select a different gateway in the **Payment** panel.
Selecting a template does not lock you into anything — treat it as a head start, not a constraint.
> **Note:** Templates require WP SmartPay Pro. With the free plugin only the **Blank Form** option appears in the New Form modal.
# Forms Report
The WP SmartPay Pro Forms report gives you a per-form performance breakdown showing how many visitors see each form, how many convert into paying customers, and how much revenue each form generates.
## Opening the Forms Report
1. Go to **SmartPay → Reports**.
2. Click the **Forms** tab.
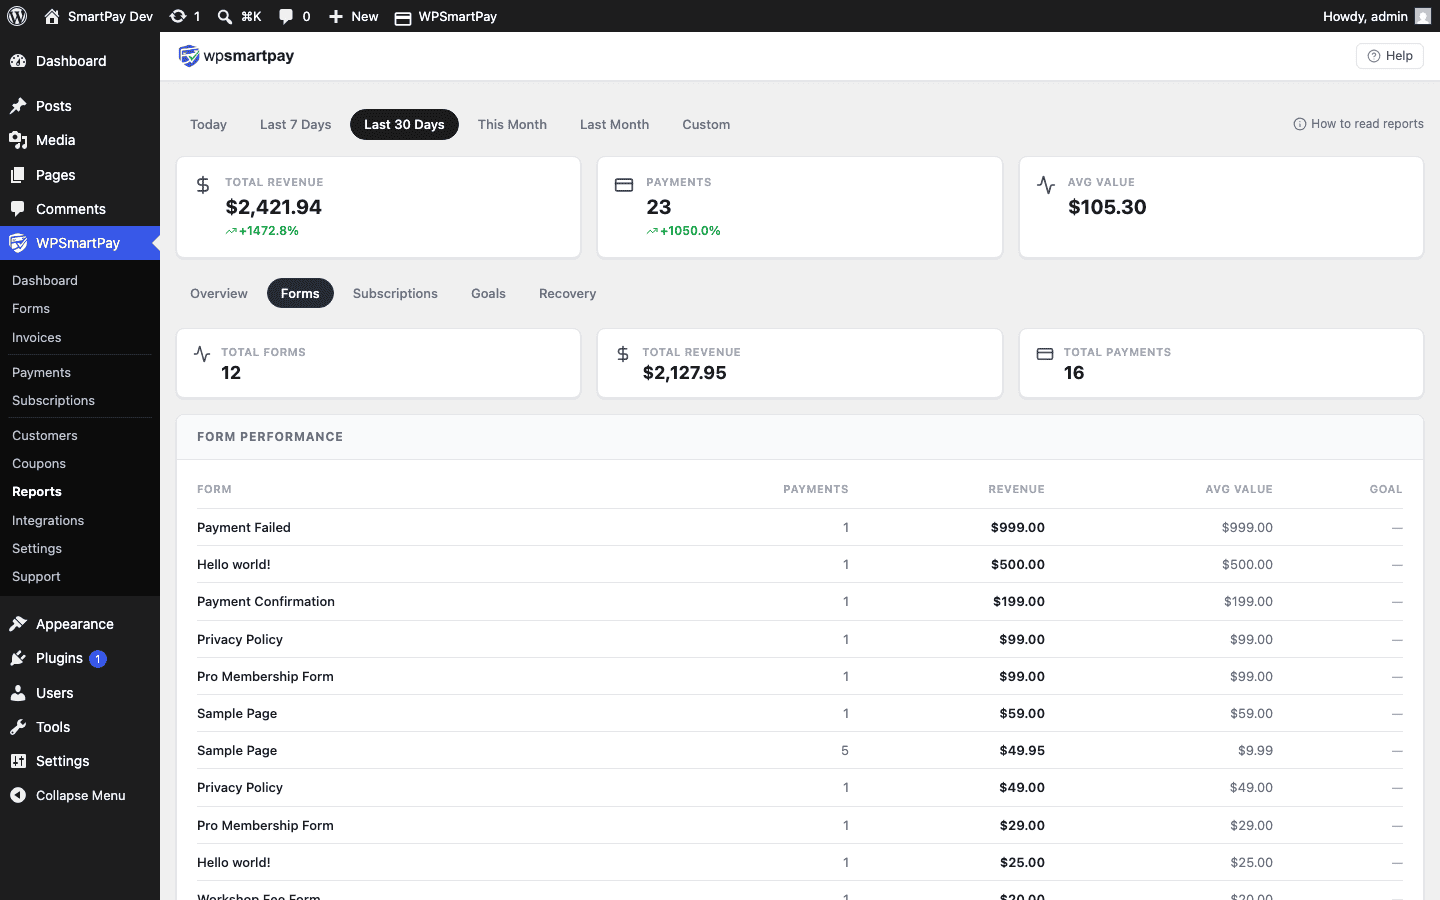 The Forms report tab with a row for each active form.## Column Reference
* **Form Name** — The title of the payment form as set in the editor.
* **Views** — Total number of times the form was loaded on a published page. Counts each page load, not unique visitors.
* **Completions** — Number of completed (successful) payments submitted through this form in the selected period.
* **Revenue** — Total amount of completed payments through this form.
* **Conversion Rate** — Completions ÷ Views × 100, expressed as a percentage.
## Sorting the Table
Click any column header to sort ascending; click again for descending. Useful sorts:
* **Revenue ↓** — Find your highest-earning form.
* **Views ↓** — Identify your most-seen forms regardless of conversion.
* **Conversion Rate ↑** — Find forms that convert poorly and may need improvement.
## Understanding Conversion Rate
The conversion rate tells you what percentage of visitors who see the form actually pay.
* **Low rate + high views** — The form is discovered often but something is stopping completion. Possible causes: price too high, confusing layout, gateway issues, or required login without a clear prompt.
* **High rate + low views** — The form converts well but gets limited traffic. Consider linking to it more prominently or embedding it on high-traffic pages.
* **Both low** — The form may be on a seldom-visited page, or it may have a friction issue at checkout.
> **Note:** Views are only tracked when the shortcode `[sp_form id="…"]` or the WP SmartPay Form block is rendered on a published, publicly-accessible page. Views from password-protected pages, editor previews, and admin-only pages are not counted.
# Gateway Settings (Currency & Test Mode)
The Gateway Settings page in WP SmartPay is where you enable payment gateways, enter API credentials, and control test vs live mode for your entire store. Every gateway available to your site is listed here.
## Opening Gateway Settings
Go to **SmartPay → Settings → Payment Gateways**.
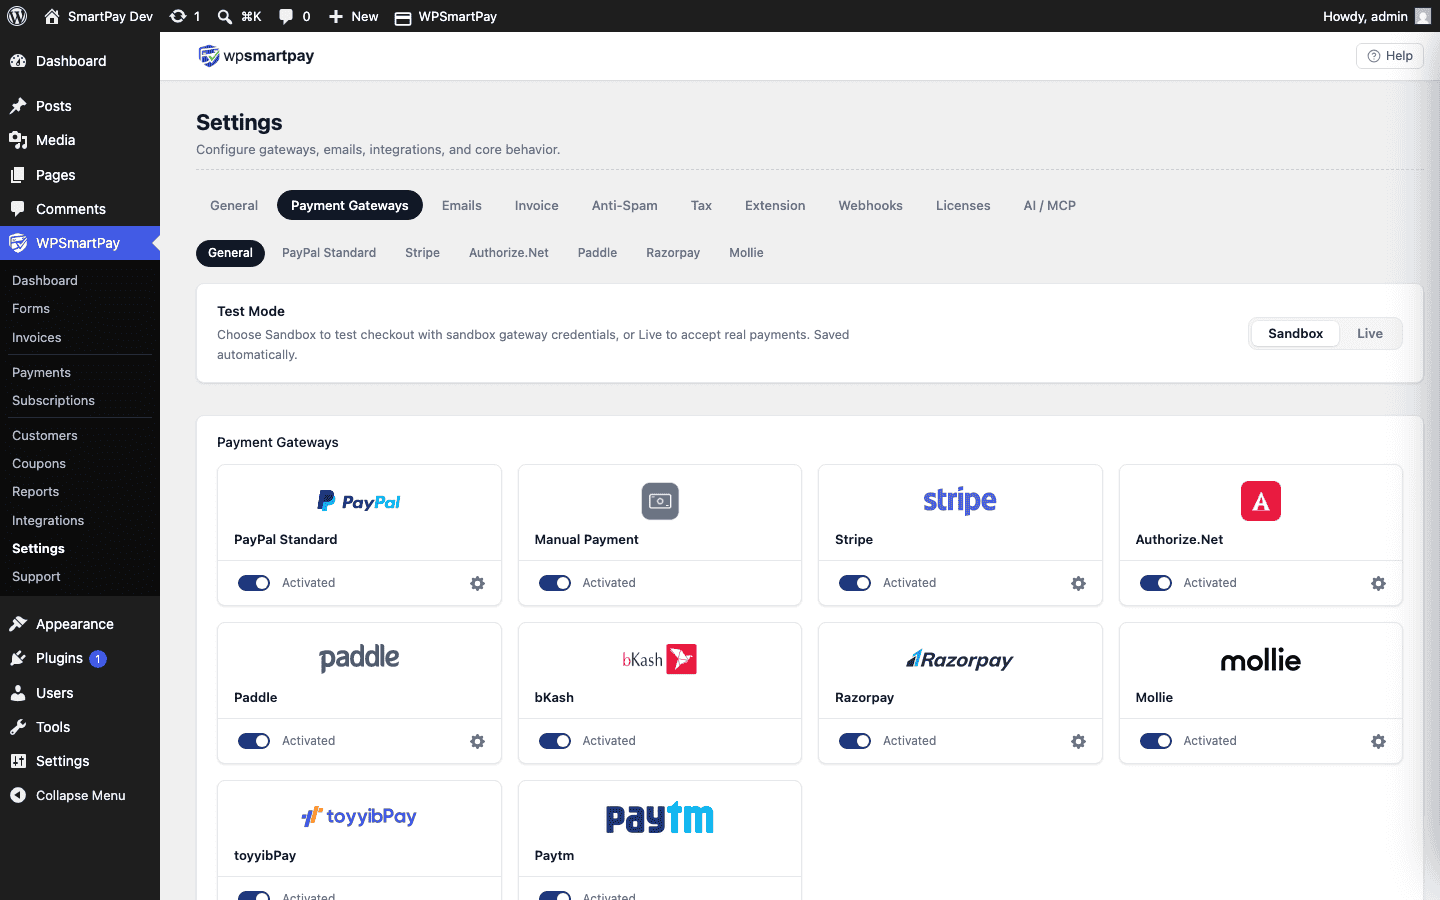 The Payment Gateways settings page — enable gateways, set credentials, and control test mode.## Test Mode Toggle
At the top of the page is the **Test Mode** toggle. When on:
* All payment forms use test/sandbox credentials.
* Payments are simulated — no real money moves.
* A yellow banner appears in the admin sidebar as a reminder.
* Payments recorded in test mode are labelled **Test** in the Payments list.
Toggle this off only when you are ready to accept real payments from customers.
## Default Gateway
The **Default Gateway** dropdown sets which gateway is pre-selected on forms that support multiple active gateways. Customers can still choose a different gateway at checkout if the form has more than one active.
## Enabling a Gateway
Each gateway has an **Enable** checkbox. Tick it to make the gateway available on payment forms and to show its configuration fields. Untick it to disable the gateway — existing payment records are not affected.
## Gateway Credentials
Below each enabled gateway's header is a section for entering API credentials. Most gateways require two sets:
* **Live credentials** — Used when Test Mode is off. Real money is processed.
* **Test credentials** — Used when Test Mode is on. Sandbox/test transactions only.
Enter both so you can switch between modes without re-entering keys. Credentials are stored encrypted in the WordPress database.
## Gateway Display Order
If multiple gateways are active on a form, the customer sees a gateway selector at checkout. Drag the gateway cards in the Gateway Settings list to set the display order. The gateway at the top of the list appears first in the selector.
## PayPal Standard (Free)
PayPal Standard is included in the free SmartPay plugin. Enter your PayPal email address in the test and live fields. No API keys are needed — PayPal uses your email to identify the receiving account.
## Stripe, Paddle, and Others (Pro)
All other gateways require WP SmartPay Pro and individual API keys from each gateway's developer dashboard. See the individual gateway setup guides for step-by-step instructions for each processor.
# Gateway-Specific Troubleshooting
Payment gateway problems usually fall into a few predictable categories: configuration errors, webhook issues, or authentication failures. This article covers the most common gateway-specific problems and how to resolve them.
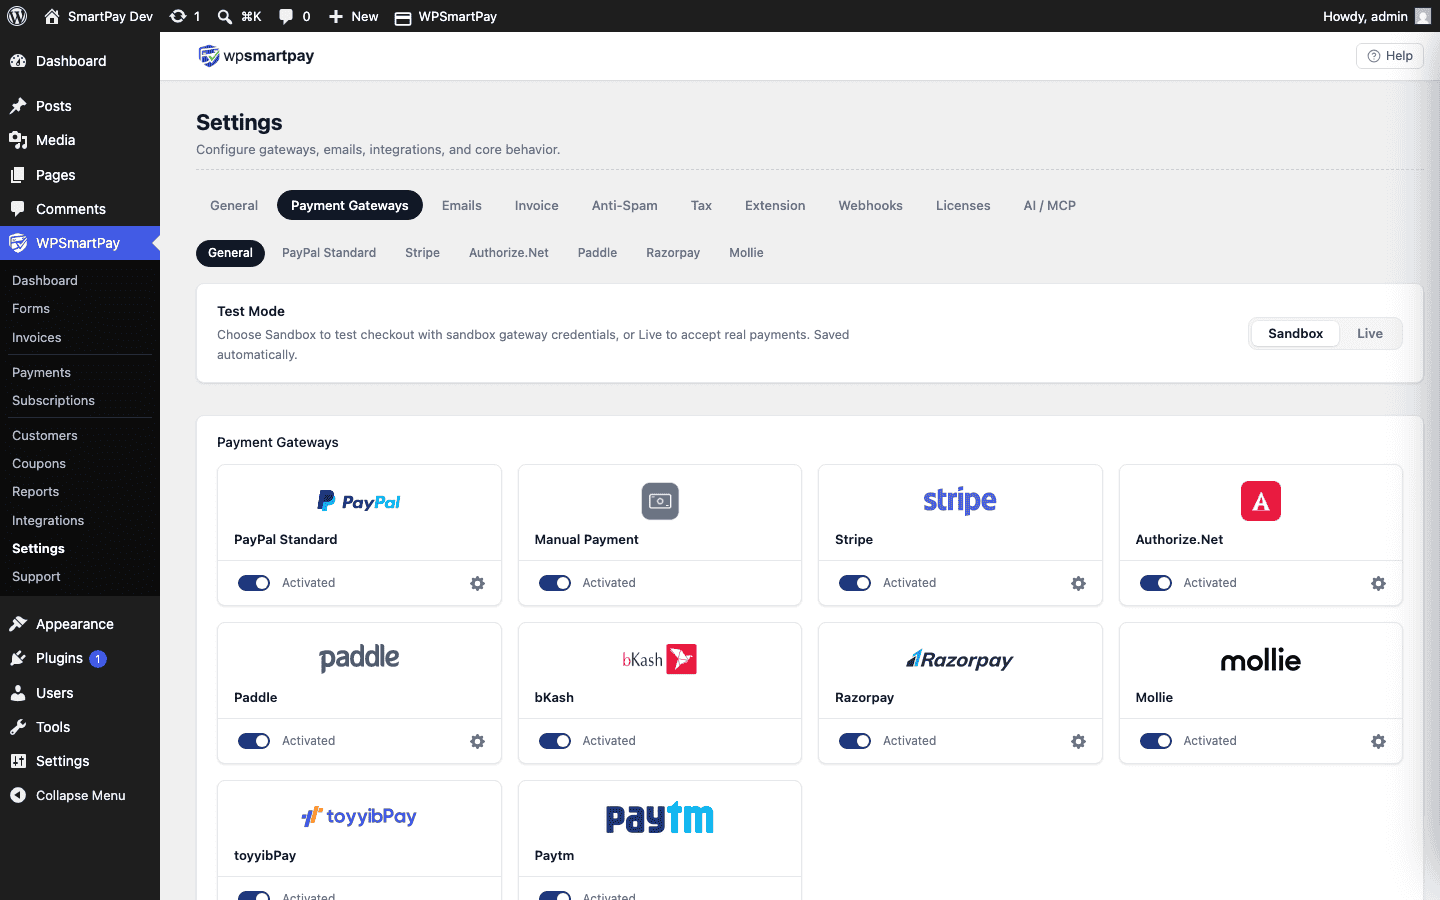## General Troubleshooting Steps
Before diving into gateway-specific issues, try these universal checks:
1. Verify the gateway is enabled in **SmartPay → Settings → Gateways** and it's the selected gateway on the form.
2. Confirm you're using the correct keys (live keys in production, test keys in test mode). Live keys start with different prefixes than test keys for each gateway.
3. Check **SmartPay → Settings → Webhooks** for any failed webhook deliveries.
4. Enable **WP\_DEBUG** and check `wp-content/debug.log` for PHP errors during checkout.
5. Open your browser console (F12) and check for JavaScript errors on the checkout page.
## Stripe
### Payment fails with "No such payment\_intent" error
**Cause:** The Stripe payment intent was created in test mode but live keys are configured (or vice versa).
**Fix:** Ensure test mode setting in SmartPay matches the type of keys entered. Test keys with live mode = error.
### Webhooks not received
**Cause:** The Stripe webhook endpoint isn't registered or the signing secret is wrong.
**Fix:**
1. Go to **Stripe Dashboard → Developers → Webhooks**.
2. Verify the endpoint URL matches `https://yoursite.com/?smartpay-listener=stripe` (or the URL shown in SmartPay Settings → Webhooks).
3. Copy the Signing Secret from Stripe and paste it into **SmartPay → Settings → Gateways → Stripe → Webhook Secret**.
4. Re-send a recent test event from Stripe Dashboard and verify it appears in SmartPay's webhook log.
### 3D Secure popup not showing
**Cause:** A CSP (Content Security Policy) header on your site is blocking the Stripe iframe.
**Fix:** Add `https://js.stripe.com` and `https://hooks.stripe.com` to your CSP's `frame-src` directive. Contact your hosting provider if you can't modify CSP headers directly.
## PayPal
### Payment completes but stays "Pending" in SmartPay
**Cause:** IPN (Instant Payment Notification) is not reaching SmartPay.
**Fix:**
1. Log into your PayPal account.
2. Go to **Account Settings → Notifications → Instant Payment Notifications**.
3. Enable IPN and set the URL to the one shown in **SmartPay → Settings → Gateways → PayPal**.
4. Go to **PayPal → IPN History** and resend the IPN for the stuck payment.
### PayPal checkout page shows "This transaction is invalid"
**Cause:** The currency set in SmartPay isn't supported by your PayPal account's country.
**Fix:** In your PayPal account, go to **Wallet → Currencies** and add the currency SmartPay is configured to use. Or change the SmartPay currency to one your PayPal account supports.
## Razorpay
### Checkout modal doesn't open
**Cause:** The Razorpay Key ID is wrong or missing.
**Fix:** Go to **Razorpay Dashboard → Settings → API Keys** and copy the Key ID (starts with `rzp_`). Paste it into **SmartPay → Settings → Gateways → Razorpay → Key ID**.
### Payment shows in Razorpay but not in SmartPay
**Cause:** Webhook not configured in Razorpay.
**Fix:** In Razorpay Dashboard → Settings → Webhooks, add the webhook URL from SmartPay and subscribe to `payment.captured` and `subscription.charged` events.
## Mollie
### Payment redirects back to site with "cancelled" status
**Cause:** Customer closed the Mollie payment page without completing. This is expected behaviour — the payment is cancelled, not failed.
**Fix:** No fix needed. The customer can try again. Ensure your form's error message is clear and offers a retry option.
### iDEAL or SEPA not showing at checkout
**Cause:** These payment methods require Mollie to have them enabled on your account.
**Fix:** Go to **Mollie Dashboard → Payments → Payment Methods** and activate iDEAL or SEPA Direct Debit. Activation may require Mollie account verification.
## bKash
### "Authentication failed" error at checkout
**Cause:** Username, password, or app key is incorrect, or the sandbox is being used with live credentials.
**Fix:** Go to your bKash merchant portal, regenerate the credentials, and paste them fresh into **SmartPay → Settings → Gateways → bKash**. Confirm test mode matches your credential type.
## Contacting Support
If the issue persists after these steps, contact SmartPay support with:
* The payment ID or order ID from your gateway dashboard
* The gateway name and whether test mode is on or off
* The error message shown (gateway error codes are especially helpful)
* A copy of any relevant `debug.log` entries from the time of the failure
* Your SmartPay version number (shown in **SmartPay → Settings → License**)
# General Settings
The General Settings page in WP SmartPay controls site-wide defaults — your business identity, currency, page assignments, and date formatting. These values appear on payment receipts, invoices, and customer emails.
## Opening General Settings
Go to **SmartPay → Settings → General**.
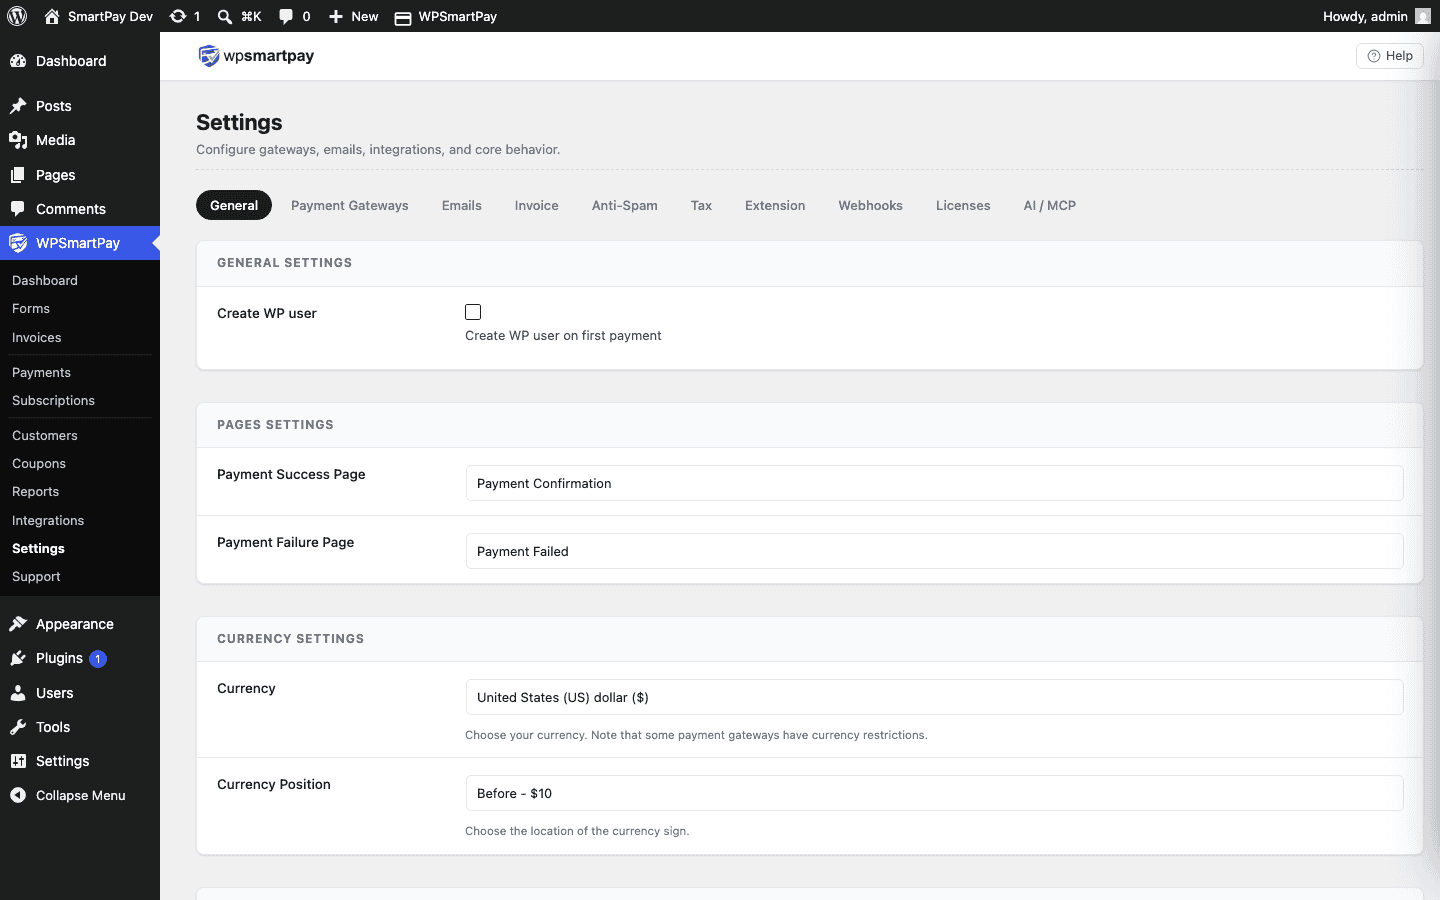 General Settings — all global plugin defaults are configured here.## Business Information
* **Business Name** — Your company or creator name. Appears on invoices (Pro) and email headers.
* **Business Logo** — Upload your logo (PNG or SVG). Displayed on invoices and the payment receipt page.
* **Support Email** — The email address shown to customers for support inquiries. This is different from the "From" address on outgoing emails — that is set in **Settings → Emails**.
## Currency
* **Currency** — Select your store currency from the dropdown. This applies to all payment forms and amount displays across the admin and frontend. Changing currency does not convert existing payment amounts — it changes the symbol only.
* **Currency Position** — Whether the currency symbol appears before (`$10`) or after the number (`10$`).
* **Thousands Separator** — Character used to separate thousands (comma or period).
* **Decimal Separator** — Character used for the decimal point.
## Page Settings
SmartPay uses several WordPress pages for frontend functionality. Assign the correct page to each here:
* **Payment Success Page** — Where customers are redirected after a successful payment. This page should contain the `[smartpay_payment_receipt]` shortcode.
* **Payment Failure Page** — Where customers land if their payment fails. Optional.
* **Login Page** — The page with the `[smartpay_user_login]` shortcode. Used by the "Require Login" form feature.
* **Registration Page** — The page with the `[smartpay_user_registration]` shortcode.
* **Customer Dashboard** — Where logged-in customers see their payment history. Should contain `[smartpay_dashboard]`.
## Date Format
* **Date Format** — Controls how dates are displayed throughout SmartPay admin pages and on receipts. Accepts PHP date format strings (e.g., `Y-m-d` for 2026-07-01, `d/m/Y` for 01/07/2026).
## Saving Settings
Click **Save Settings** at the bottom of the page to apply changes. Settings are saved immediately — no page reload is needed to see the effect in the admin.
# Generate form using AI
The **AI Form Builder** (WP SmartPay Pro) lets you generate a complete payment form from a plain-English prompt. Instead of dragging and dropping individual blocks, describe what you need and the AI assembles the form structure for you — you then review, adjust, and publish.
> **Pro feature:** The AI Form Builder requires WP SmartPay Pro with an active license and an AI Provider configured under **SmartPay → Settings → AI / MCP → AI Provider**.
## Prerequisites
* WP SmartPay Pro installed and licensed
* An AI provider API key configured — go to **SmartPay → Settings → AI / MCP** and open the **AI Provider** tab. Enter your API key (OpenAI, Anthropic, or compatible) and save.
## Opening the AI Form Builder
1. Go to **SmartPay → Forms** and open any existing form, or click **Add New** to start fresh.
2. In the form editor, look for the **Plugins** icon in the top-right toolbar area (the puzzle-piece icon, next to **Settings**).
3. Click it to open the plugin sidebar, then click **AI Form Builder** in the panel list.
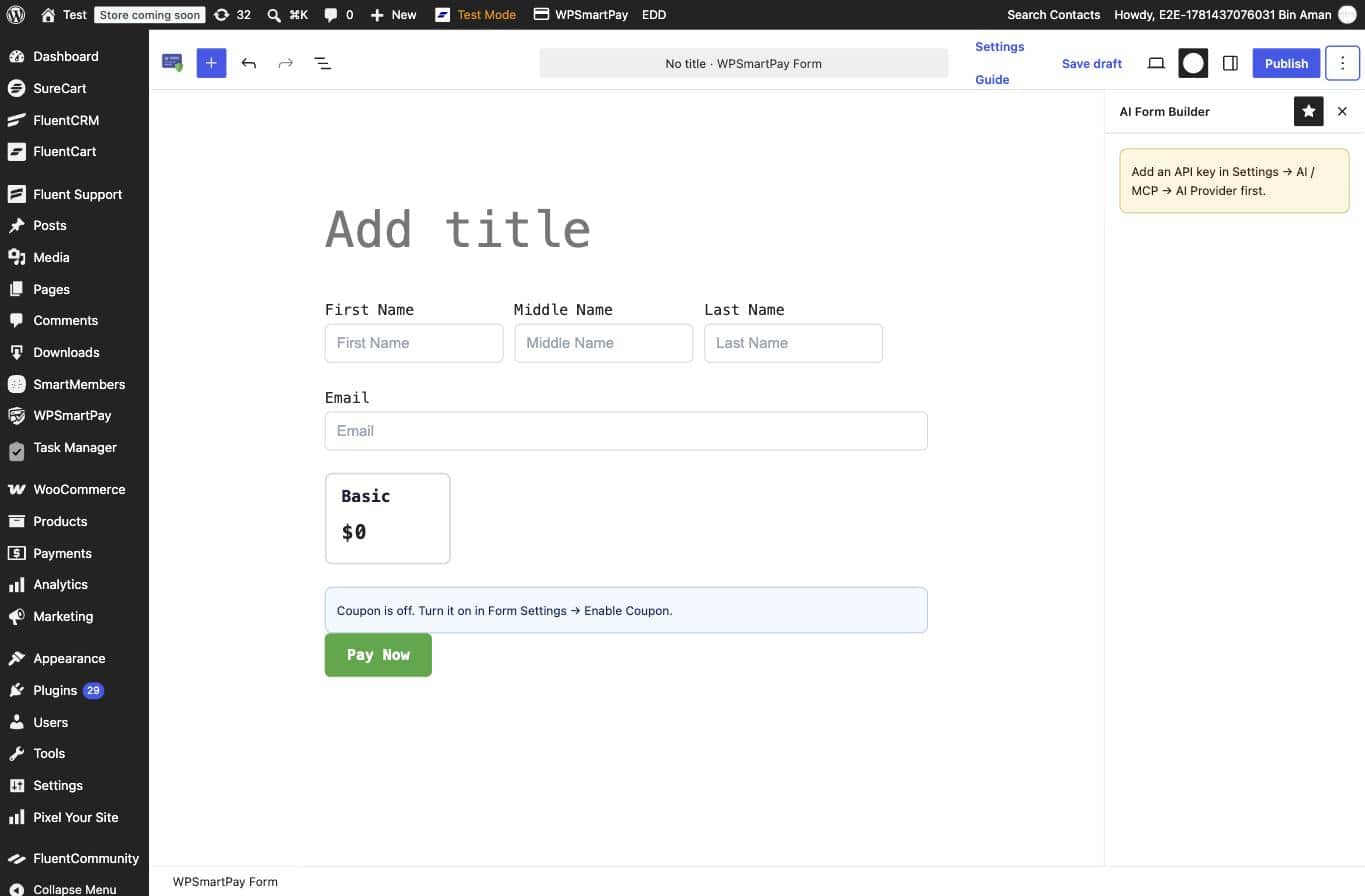The AI Form Builder panel — accessed from the ⋮ menu → Panels → AI Form Builder in the form editor toolbar.> **Note:** If the API key is not configured, the AI Form Builder panel shows a warning: "Add an API key in Settings → AI / MCP → AI Provider first." Configure the key, then return to the form editor.
## Generating a Form
1. In the **AI Form Builder** sidebar panel, type a description of the form you want in the **Describe your form** textarea. Be specific about the fields and purpose.
2. Click **Generate**.
3. The AI calls the REST endpoint and returns a list of block definitions. A preview of the blocks appears in the panel — for example "• name fields, • email, • address, • text input: Company Name".
4. Review the list. If the structure looks right, click **Insert** to add the blocks to the form canvas.
5. If you want to try again, click **Clear** and enter a revised prompt.
### Example Prompts
* "A donation form with a custom amount, donor name, and a message field."
* "A registration form for an event — collect name, email, company, and dietary requirements."
* "A simple payment form with name, email, and an address for shipping."
## Reviewing and Editing the Generated Form
After inserting, the blocks appear on the form canvas exactly as you would have placed them manually. You can:
* Select any block and adjust its settings in the inspector (e.g., toggle sub-fields on the Name block, choose Layout Columns)
* Drag blocks to reorder them
* Delete blocks you do not need
* Add additional blocks from the block inserter (**+**) or the **Guide**
## Publishing the Form
Once you are satisfied with the form, click **Publish** (or **Update** for an existing form) in the top-right corner. The shortcode appears in the Forms list and can be pasted onto any page or post.
## Tips
* The AI generates field blocks only — it does not configure pricing or gateway settings. Set those in the **WPSmartPay Form** sidebar after inserting the blocks.
* The more detail you include in your prompt, the better the result. Mention specific fields by name.
* If the API call fails, check your API key under **Settings → AI / MCP → AI Provider** and verify you have not exceeded your monthly call limit.
# Getting Started
Welcome to the Paddle for Easy Digital Downloads guide. Follow the instructions below to learn how to set up Paddle, connect with our plugin, and start selling digital products online.
## Install the Plugin
Install the Paddle for Easy Digital Downloads plugin on your WordPress store. Installing a plugin is easy, but we've prepared a [document for you](https://docs.wpsmartpay.com/en/installation-and-setup).
## Activate the license
After installing the plugin, you must activate its license to use it. [Read this guide](https://docs.wpsmartpay.com/en/license-verification-process-edd) to learn how to verify and activate the license.
## Paddle Setup
Our plugin enables you to easily connect with Paddle. Follow our [Paddle setup guide](//docs.wpsmartpay.com/en/paddle-setup) to get up and running with Paddle. We will need these credentials in the **Plugin Setup**.
## Plugin Setup
* From the **Downloads > Settings** menu, go to the **Payment** tab and enable the **Paddle** to activate the gateway.
* If you have multiple payment gateways installed and want to select Paddle as the default gateway, select **Paddle** from the **Default Gateway**.
* Then click the **Save Changes** button.
* After enabling Paddle, click the **Paddle** tab to enter the plugin setup page.
* In the setup page, paste the **Seller ID**, **API Key**, **Client-side token**, and **Notification secret key** that you have copied before.
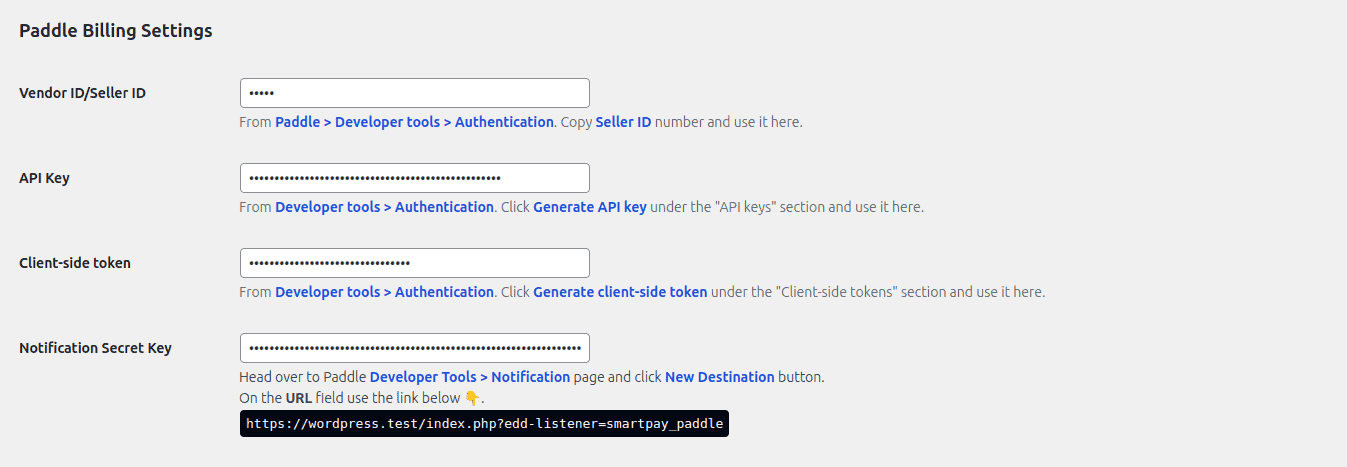* You can keep the rest of the settings as defaults or change them according to your needs.
* Finally, click the **Save changes** button to save the plugin settings.
If you are using **Paddle Classic**, you will need to turn off the **Enable Paddle Billing** option and provide **Seller ID**, **Auth Code (API Key)**, and **Public Key**.
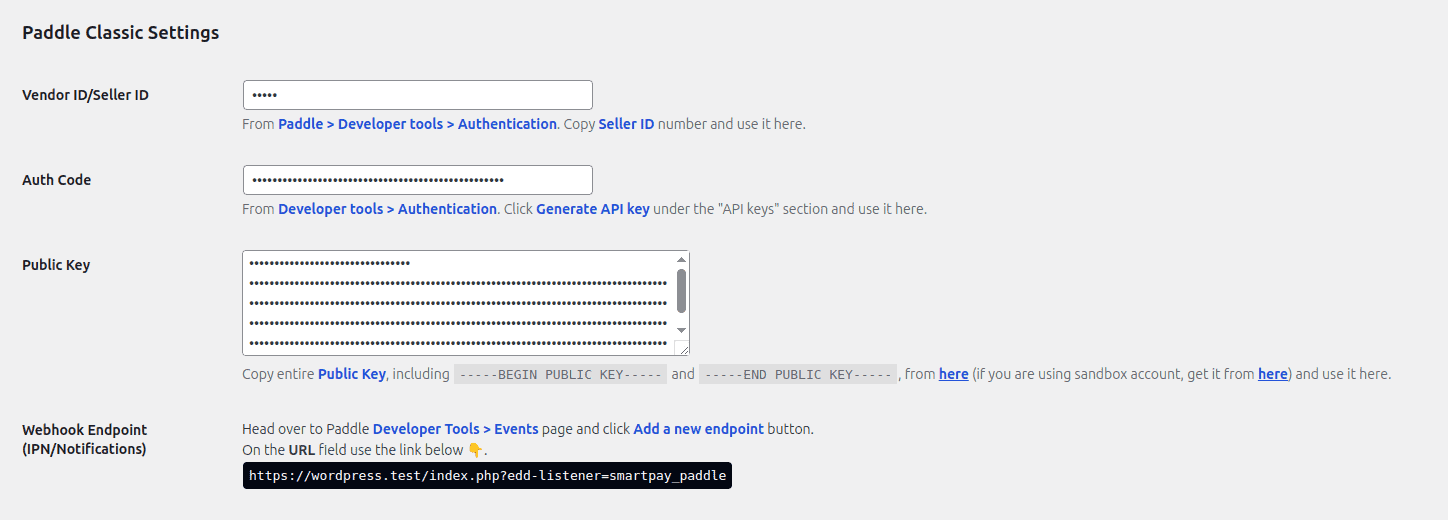## Product Syncing in Paddle
You do not need to manually sync or create a similar product in Paddle. Paddle for EDD handles this process. Your products will be synced to Paddle automatically on the first checkout.
If you manually add a product in Paddle, it will be ignored, and a new product will be created in Paddle on checkout.
# Getting Started with WP SmartPay
This guide walks you through everything you need to get WP SmartPay installed, configured, and ready to accept your first payment — from installing the plugin to going live with a gateway.
---
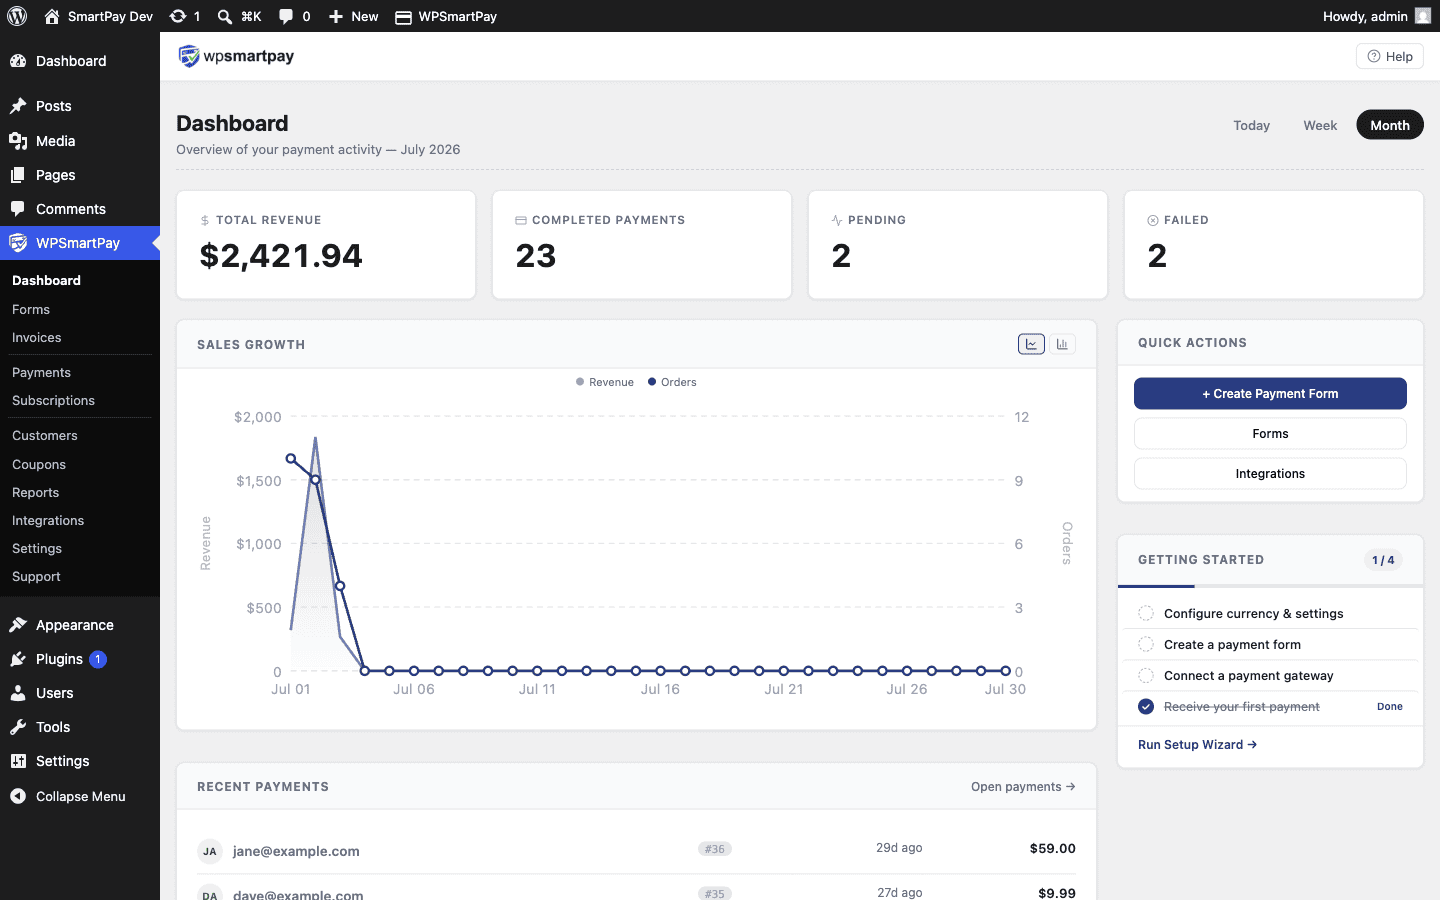## 1. What is WP SmartPay?
WP SmartPay is a WordPress payment plugin that lets you collect one-time and recurring payments directly on your site — without building a custom WooCommerce shop. It is designed for creators, nonprofits, SaaS products, and course sellers who need a simple, fast payment experience.
**Common use cases:**
* Donation forms for nonprofits and fundraisers
* Digital product and file sales
* Recurring membership or subscription billing
* Course and LMS enrollment fees
* SaaS and software license payments
* Event ticket sales and registrations
### Free vs Pro
| Feature | Free | Pro |
|---|---|---|
| Payment forms (unlimited) | ✓ | ✓ |
| PayPal Standard gateway | ✓ | ✓ |
| Stripe, Paddle, Razorpay, Mollie & more | — | ✓ |
| Subscription & recurring billing | — | ✓ |
| Invoices (auto-generated PDF) | — | ✓ |
| Coupons & discount codes | — | ✓ |
| Email marketing integrations | — | ✓ |
| Automation (Zapier, Make, n8n) | — | ✓ |
| Form templates library | — | ✓ |
| Priority support | — | ✓ |
---
## 2. Requirements & Compatibility
Before installing, confirm your hosting environment meets these minimum requirements:
* **WordPress:** 6.4 or newer
* **PHP:** 8.2 or newer
* **MySQL:** 5.7+ or MariaDB 10.3+
* **HTTPS:** Required to accept live payments. Most modern hosting includes a free SSL certificate via Let's Encrypt.
* **WP SmartPay free plugin:** Required if you are using Pro — the free plugin must be active before activating Pro.
> **Note:** Test mode does not require HTTPS. You can develop and test locally without SSL.
---
## 3. Installing the Free Plugin
Install WP SmartPay from the WordPress plugin directory in a few clicks:
1. In your WordPress admin, go to **Plugins → Add New Plugin**.
2. Search for **WP SmartPay**.
3. Click **Install Now** next to the WP SmartPay result, then click **Activate**.
On first activation the plugin automatically:
* Creates the required database tables (payments, customers, subscriptions)
* Adds a **SmartPay** menu to your WP admin sidebar
* Sets default payment settings (USD, test mode on)
> **Tip:** You can also install via ZIP. Download the free plugin from wordpress.org, then go to **Plugins → Add New → Upload Plugin**.
---
## 4. Installing & Activating Pro
WP SmartPay Pro is a separate plugin that extends the free version. The free plugin must be installed and active before activating Pro.
1. Log in to your **WP SmartPay account** and download the Pro plugin ZIP file.
2. In WordPress admin, go to **Plugins → Add New → Upload Plugin**.
3. Select the downloaded ZIP file and click **Install Now**, then **Activate Plugin**.
4. Go to **SmartPay → Settings → License**.
5. Paste your license key and click **Activate License**.
Once your license is active you will see all Pro features unlocked: Subscriptions, Invoices, Coupons, Pro gateways, and Integrations.
### License Expiry
An expired license does not disable Pro features — your site continues to work. However, you will not receive plugin updates or support until you renew. You can renew from your account dashboard.
---
## 5. Quick Start: Accept Your First Payment
Follow these steps to go from a fresh install to a working payment form in under 10 minutes.
### Step 1 — Enable a Payment Gateway
Go to **SmartPay → Settings → Payment Gateways**. Enable the gateway you want to use.
* **Test Payment** — always available, no credentials needed. Good for initial testing.
* **PayPal Standard** — included in the free plugin. Enter your PayPal email to activate.
* **Stripe** (Pro) — requires WP SmartPay Pro. Toggle it on, then enter your **Publishable Key** and **Secret Key** from your Stripe dashboard and click **Save Settings**.
> **Test mode:** At the top of the Gateways page there is a **Test Mode** toggle. Keep it on while setting up. Stripe provides test card numbers (e.g. `4242 4242 4242 4242`) that work in test mode without charging anyone.
### Step 2 — Create a Payment Form
1. Go to **SmartPay → Forms → Add New**.
2. Choose a template or start with a blank form.
3. Set the form title (e.g. "Donate Now" or "Buy Access").
4. In the **Pricing** panel on the right, set the amount — either a fixed price or allow the visitor to enter their own amount.
5. In the **Payment** panel, confirm the correct gateway is selected.
6. Click **Publish** to save the form.
### Step 3 — Embed the Form on a Page
After saving your form, copy its shortcode from the form list (e.g. `[smartpay_form id="1"]`).
1. Open any WordPress page in the editor.
2. Add a **Shortcode** block and paste the shortcode.
3. Alternatively, use the **WP SmartPay Form** Gutenberg block to select the form from a dropdown.
4. Publish or update the page.
### Step 4 — Test the Payment
1. Visit the page in a browser.
2. Fill in the checkout form using a test email address.
3. If using Stripe, enter card number `4242 4242 4242 4242`, any future expiry, and any CVC.
4. Click the pay button.
5. After success, check **SmartPay → Payments** — the payment should appear with status **Completed**.
### Step 5 — Go Live
1. Go to **SmartPay → Settings → Payment Gateways**.
2. Toggle **Test Mode** off.
3. Confirm your live API keys are entered (not test keys).
4. Click **Save Settings**.
Your form is now live and accepting real payments.
---
## 6. Plugin Settings Overview
All SmartPay settings are under **SmartPay → Settings**. Here is a quick tour of each section:
### General
Controls the store-wide defaults: business name, support email, currency, currency position, and date format. These appear on payment confirmations and invoices (Pro).
### Payment Gateways
Lists all available payment gateways. Toggle gateways on/off, set the **Default Gateway** for forms that have multiple options, and configure individual gateway credentials. The **Test Mode** toggle is also here.
### Emails
Configure automated emails sent to the buyer and admin after each payment. You can customize subject lines, message bodies, and enable or disable individual email types (payment receipt, payment failure, subscription renewal, etc.).
### License (Pro)
Enter and activate your Pro license key. Shows your current license status, plan name, and expiry date.
### Webhooks (Pro)
Configure outgoing webhooks to notify external systems when payments, subscriptions, or customer records change. Each webhook lets you select events and specify the endpoint URL.
### MCP / AI (Pro)
Enables the Model Context Protocol (MCP) server for AI-powered payment queries and automation. Advanced feature — only needed if you are integrating with an AI agent or workflow tool.
### Admin Menu Tour
The full SmartPay menu in your WordPress sidebar:
* **SmartPay** — Dashboard with revenue charts and recent activity
* **Forms** — Create and manage payment forms
* **Payments** — All payment records with search, filter, and export
* **Customers** — Customer profiles and purchase history
* **Coupons** (Pro) — Discount codes and promotional offers
* **Subscriptions** (Pro) — Recurring billing records and cancellation controls
* **Invoices** (Pro) — Auto-generated PDF invoices
* **Reports** — Revenue reports, export to CSV
* **Extensions** (Pro) — Toggle and configure integrations (Mailchimp, Zapier, ActiveCampaign, etc.)
* **Settings** — All configuration options described above
---
You are now set up and ready to accept payments. For next steps, see [Creating Your First Payment Form](https://docs.wpsmartpay.com/en/sp-fm-01-creating-a-payment-form) or explore the [Payment Gateways](https://docs.wpsmartpay.com/en/sp-gw-01-paypal-standard) guides to configure your preferred processor.
# Getting Started
Welcome to the Paddle for WooCommerce guide. Follow the instructions below to learn how to set up Paddle, connect with our plugin, and start selling digital products online.
## Install the Plugin
Install the Paddle for WooCommerce plugin on your WordPress store. Installing a plugin is easy, but we've prepared a [document for you](https://docs.wpsmartpay.com/en/installation-guide).
## Activate the license
After installing the plugin, you must activate its license to use it. [Read this guide](https://docs.wpsmartpay.com/en/license-verification-process) to learn how to verify and activate the license.
## Paddle Setup
Our plugin enables you to easily connect with Paddle. Follow our [Paddle setup guide](//docs.wpsmartpay.com/en/paddle-setup) to get up and running with Paddle. We will need these credentials in the **Plugin Setup**.
## Plugin Setup
* From the **WooCommerce > Settings** menu, go to the Payment tab and enable the Paddle gateway to activate the gateway.
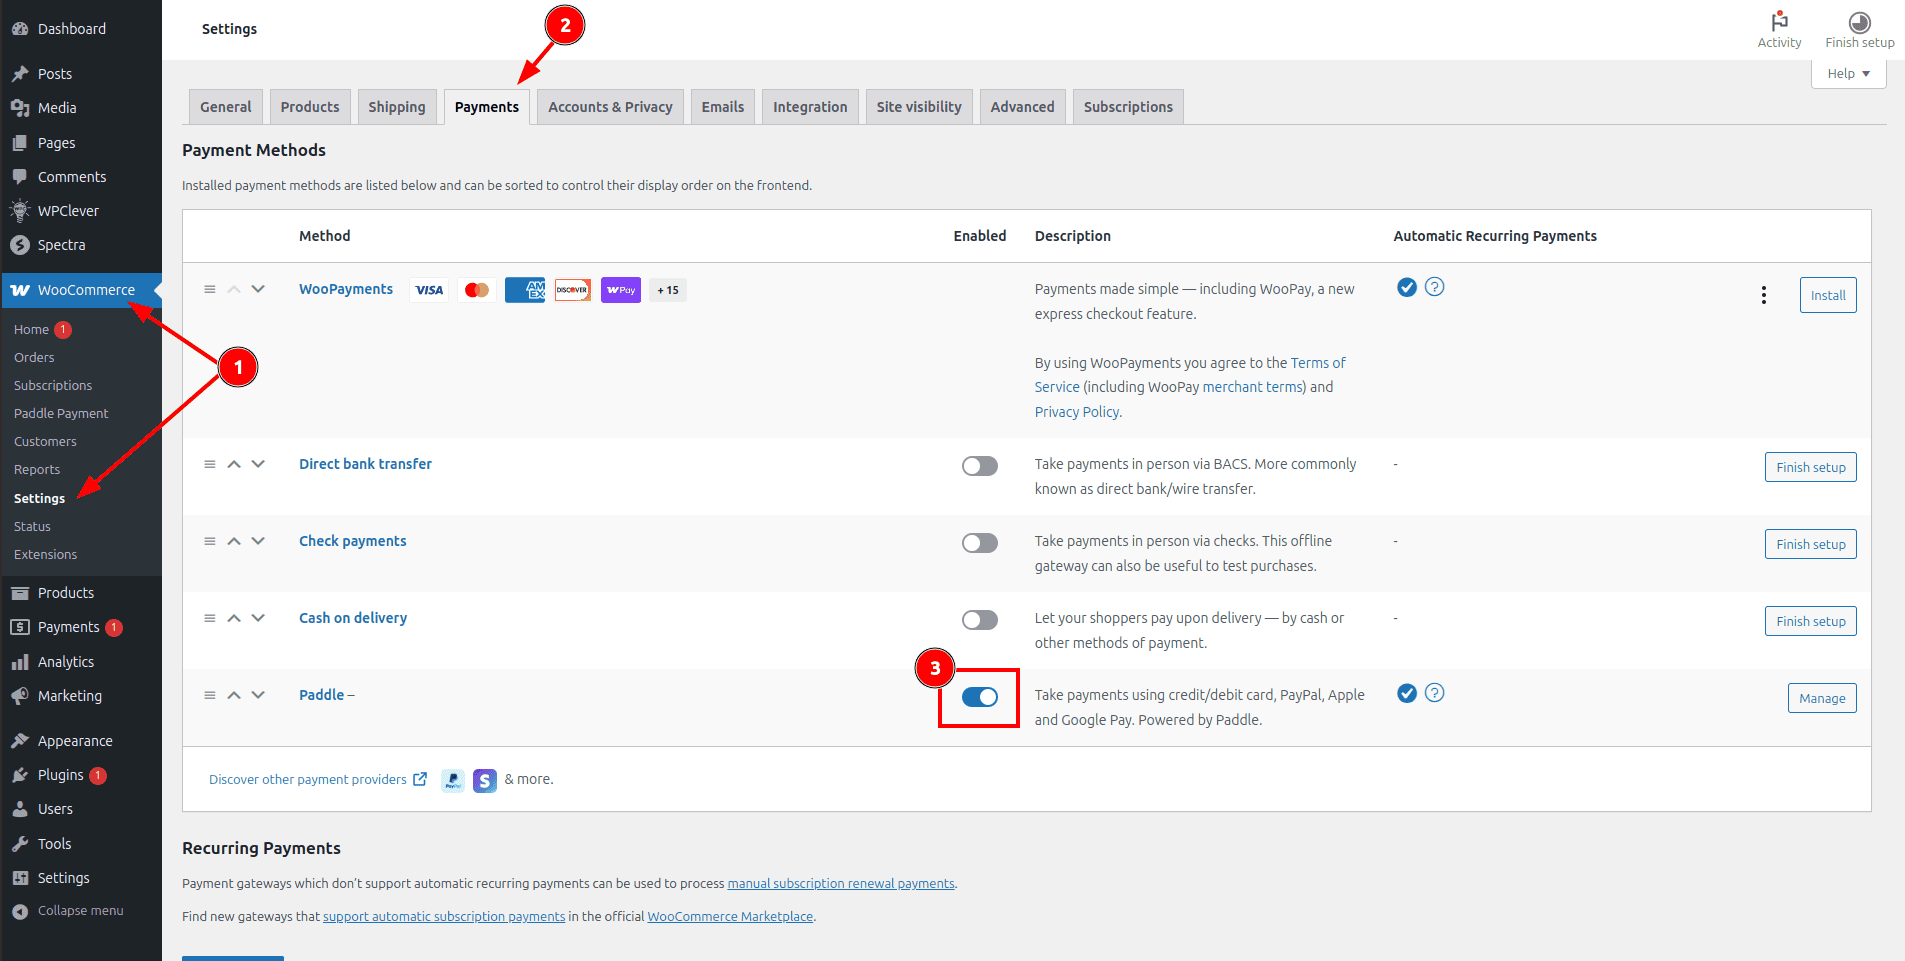* Click on the **Manage** button to enter the plugin setup page.
* In the setup page, paste the **Seller ID**, **API Key**, **Client-side token**, and **Notification secret key** that you have copied before.
* You can keep the rest of the settings as defaults or change them according to your needs.
* Finally, click the **Save changes** button to save the plugin settings.
---
Paddle Classic Only
If you are using **Paddle Classic**, you will need to turn off the **Paddle Billing** option and provide **Seller ID**, **Auth Code (API Key)**, and **Public Key**.
## Product Syncing in Paddle
You do not need to manually sync or create a similar product in Paddle. Paddle for WooCommerce handles this process. Your products will be synced to Paddle automatically on the first checkout.
If you manually add a product in Paddle, it will be ignored, and a new product will be created in Paddle on checkout.
# Google Sheet
Appends a new row to a Google Sheet each time a payment event fires — no OAuth or Google account link required. SmartPay posts to a Google Apps Script web app URL that you deploy from your own Google account, giving you full control over which columns to write.
### Getting the Apps Script URL
1. Open your Google Sheet, then go to **Extensions → Apps Script**. This opens the [Google Apps Script editor](https://developers.google.com/apps-script/guides/web).
2. Replace the default code with the template below, replacing `YOUR_SHEET_ID` with your sheet's ID (the long string between `/d/` and `/edit` in the URL).
3. Click **Deploy → New deployment → Web app**. Set **Execute as: Me** and **Who has access: Anyone**, then click **Deploy**.
4. Copy the **Web app URL** from the confirmation dialog.
```typescript
[object Object],[object Object],[object Object],[object Object],[object Object],[object Object],[object Object],[object Object],[object Object],[object Object],[object Object],[object Object],[object Object],[object Object],[object Object],[object Object],[object Object],[object Object],[object Object],[object Object],[object Object],[object Object],[object Object],[object Object],[object Object],[object Object],[object Object],[object Object],[object Object],[object Object],[object Object],[object Object],[object Object],[object Object],[object Object],[object Object],[object Object],[object Object],[object Object],[object Object],[object Object],[object Object],[object Object],[object Object],[object Object],[object Object],[object Object],[object Object],[object Object],[object Object],[object Object],[object Object],[object Object],[object Object],[object Object],[object Object],[object Object],[object Object],[object Object],[object Object],[object Object],[object Object],[object Object],[object Object],[object Object],[object Object],[object Object],[object Object],[object Object],[object Object],[object Object],[object Object],[object Object],[object Object],[object Object],[object Object],[object Object],[object Object],[object Object],[object Object],[object Object],[object Object],[object Object],[object Object],[object Object],[object Object],[object Object],[object Object],[object Object],[object Object],[object Object],[object Object],[object Object],[object Object],[object Object],[object Object],[object Object],[object Object],[object Object],[object Object],[object Object],[object Object],[object Object],[object Object],[object Object],[object Object],[object Object],[object Object],[object Object],[object Object],[object Object],[object Object],[object Object],[object Object],[object Object],[object Object],[object Object],[object Object],[object Object],[object Object],[object Object]
```
### Set up in SmartPay
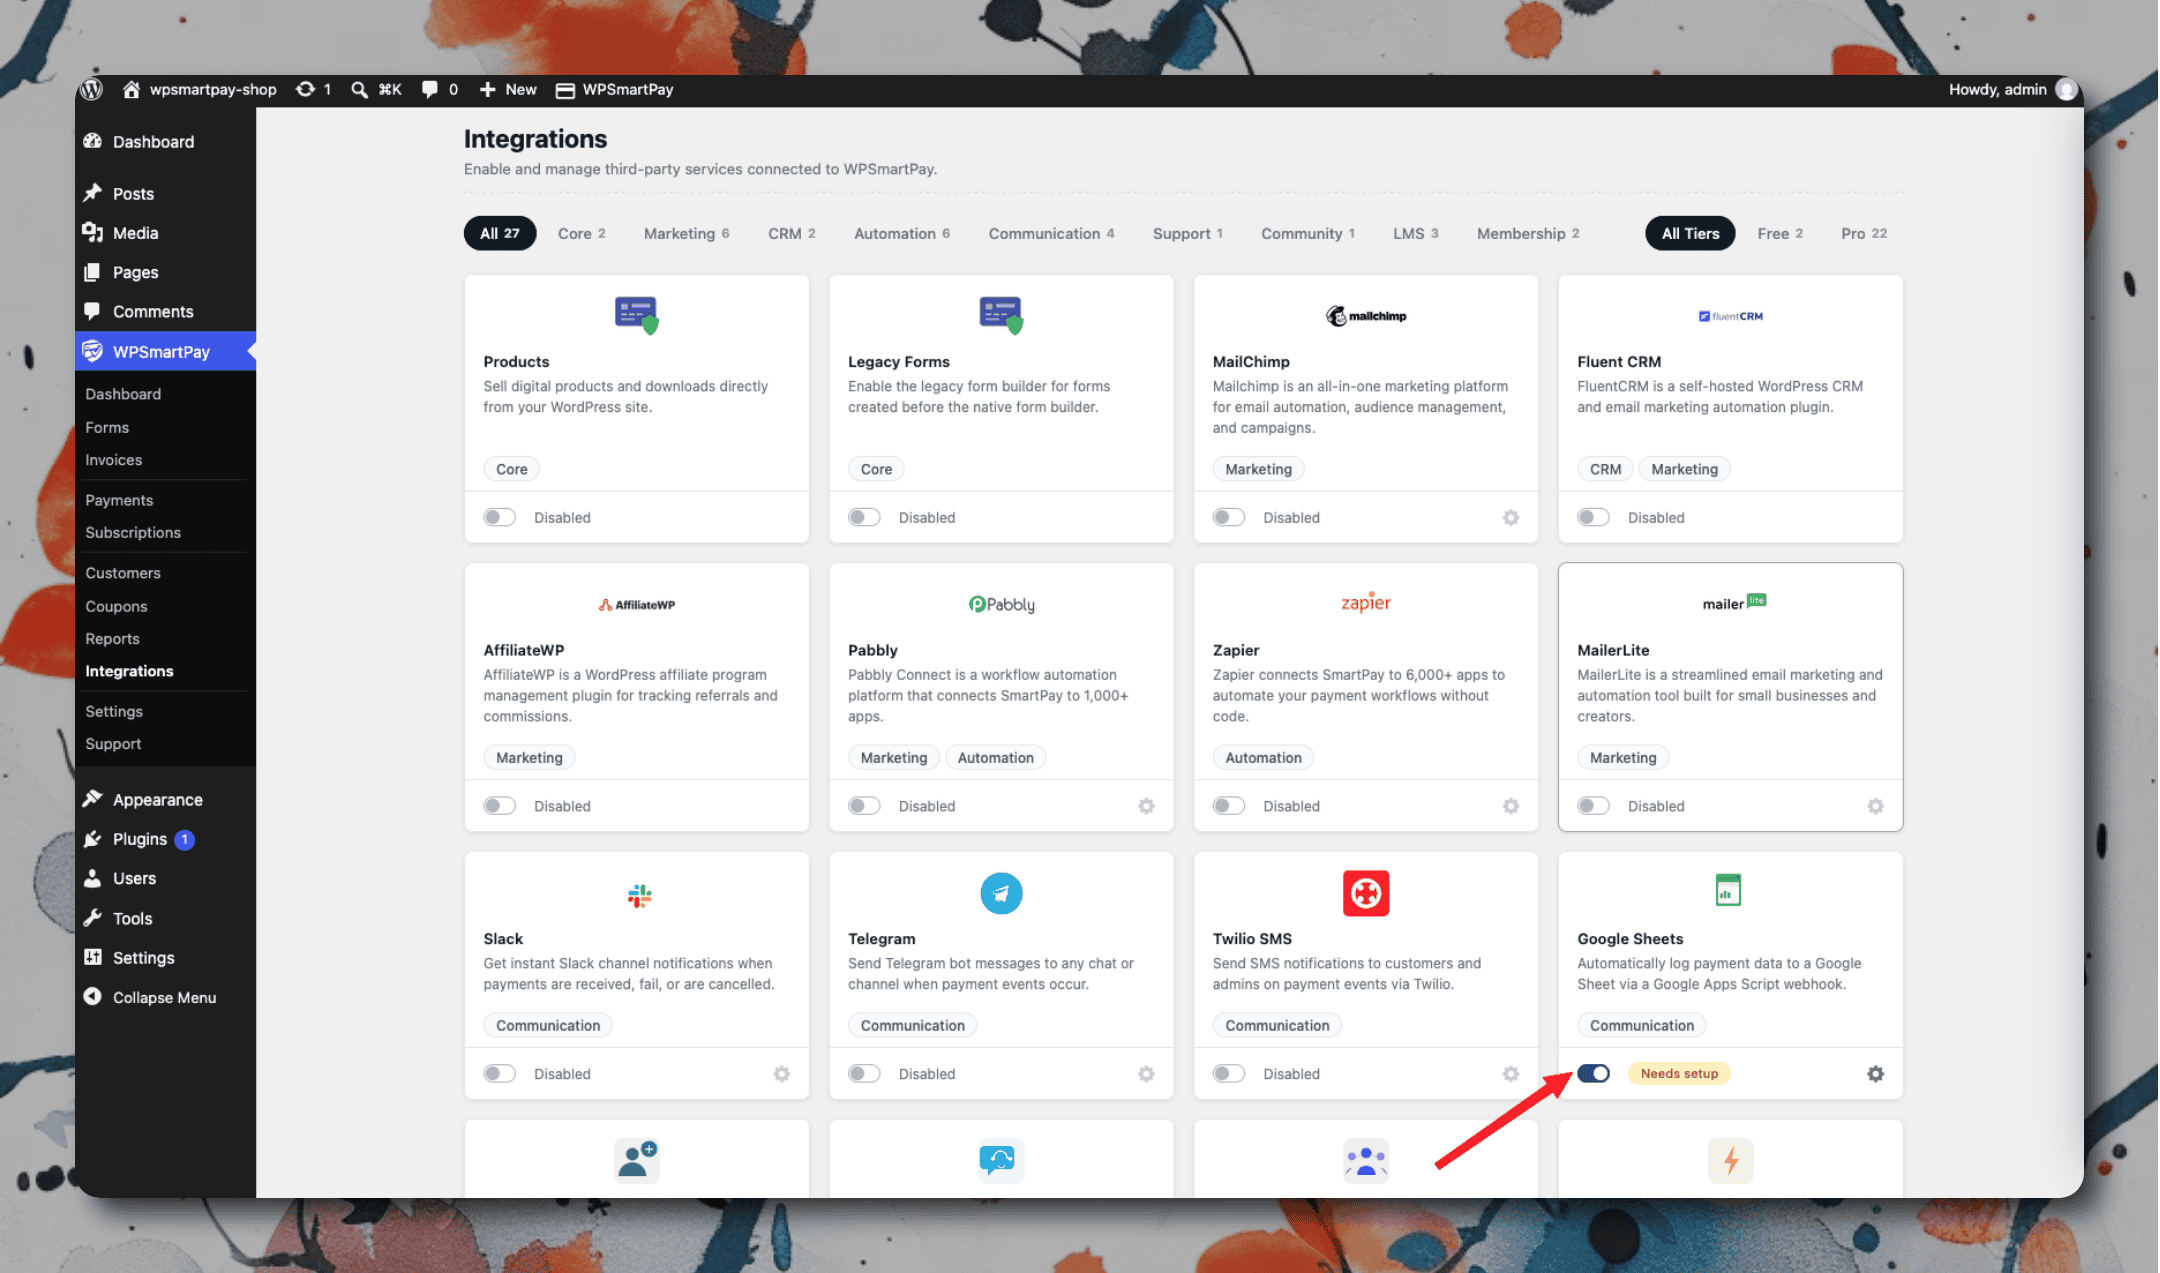1. Go to **SmartPay → Extensions** and toggle **Google Sheets** on.
2. Click the gear icon to open **Settings → Extensions → Google Sheets**.
3. Paste the Apps Script web app URL into **Apps Script Web App URL**.
4. Select which payment events (*Completed*, *Failed*, *Refunded*) should trigger a row write.
5. Click **Save Changes**.
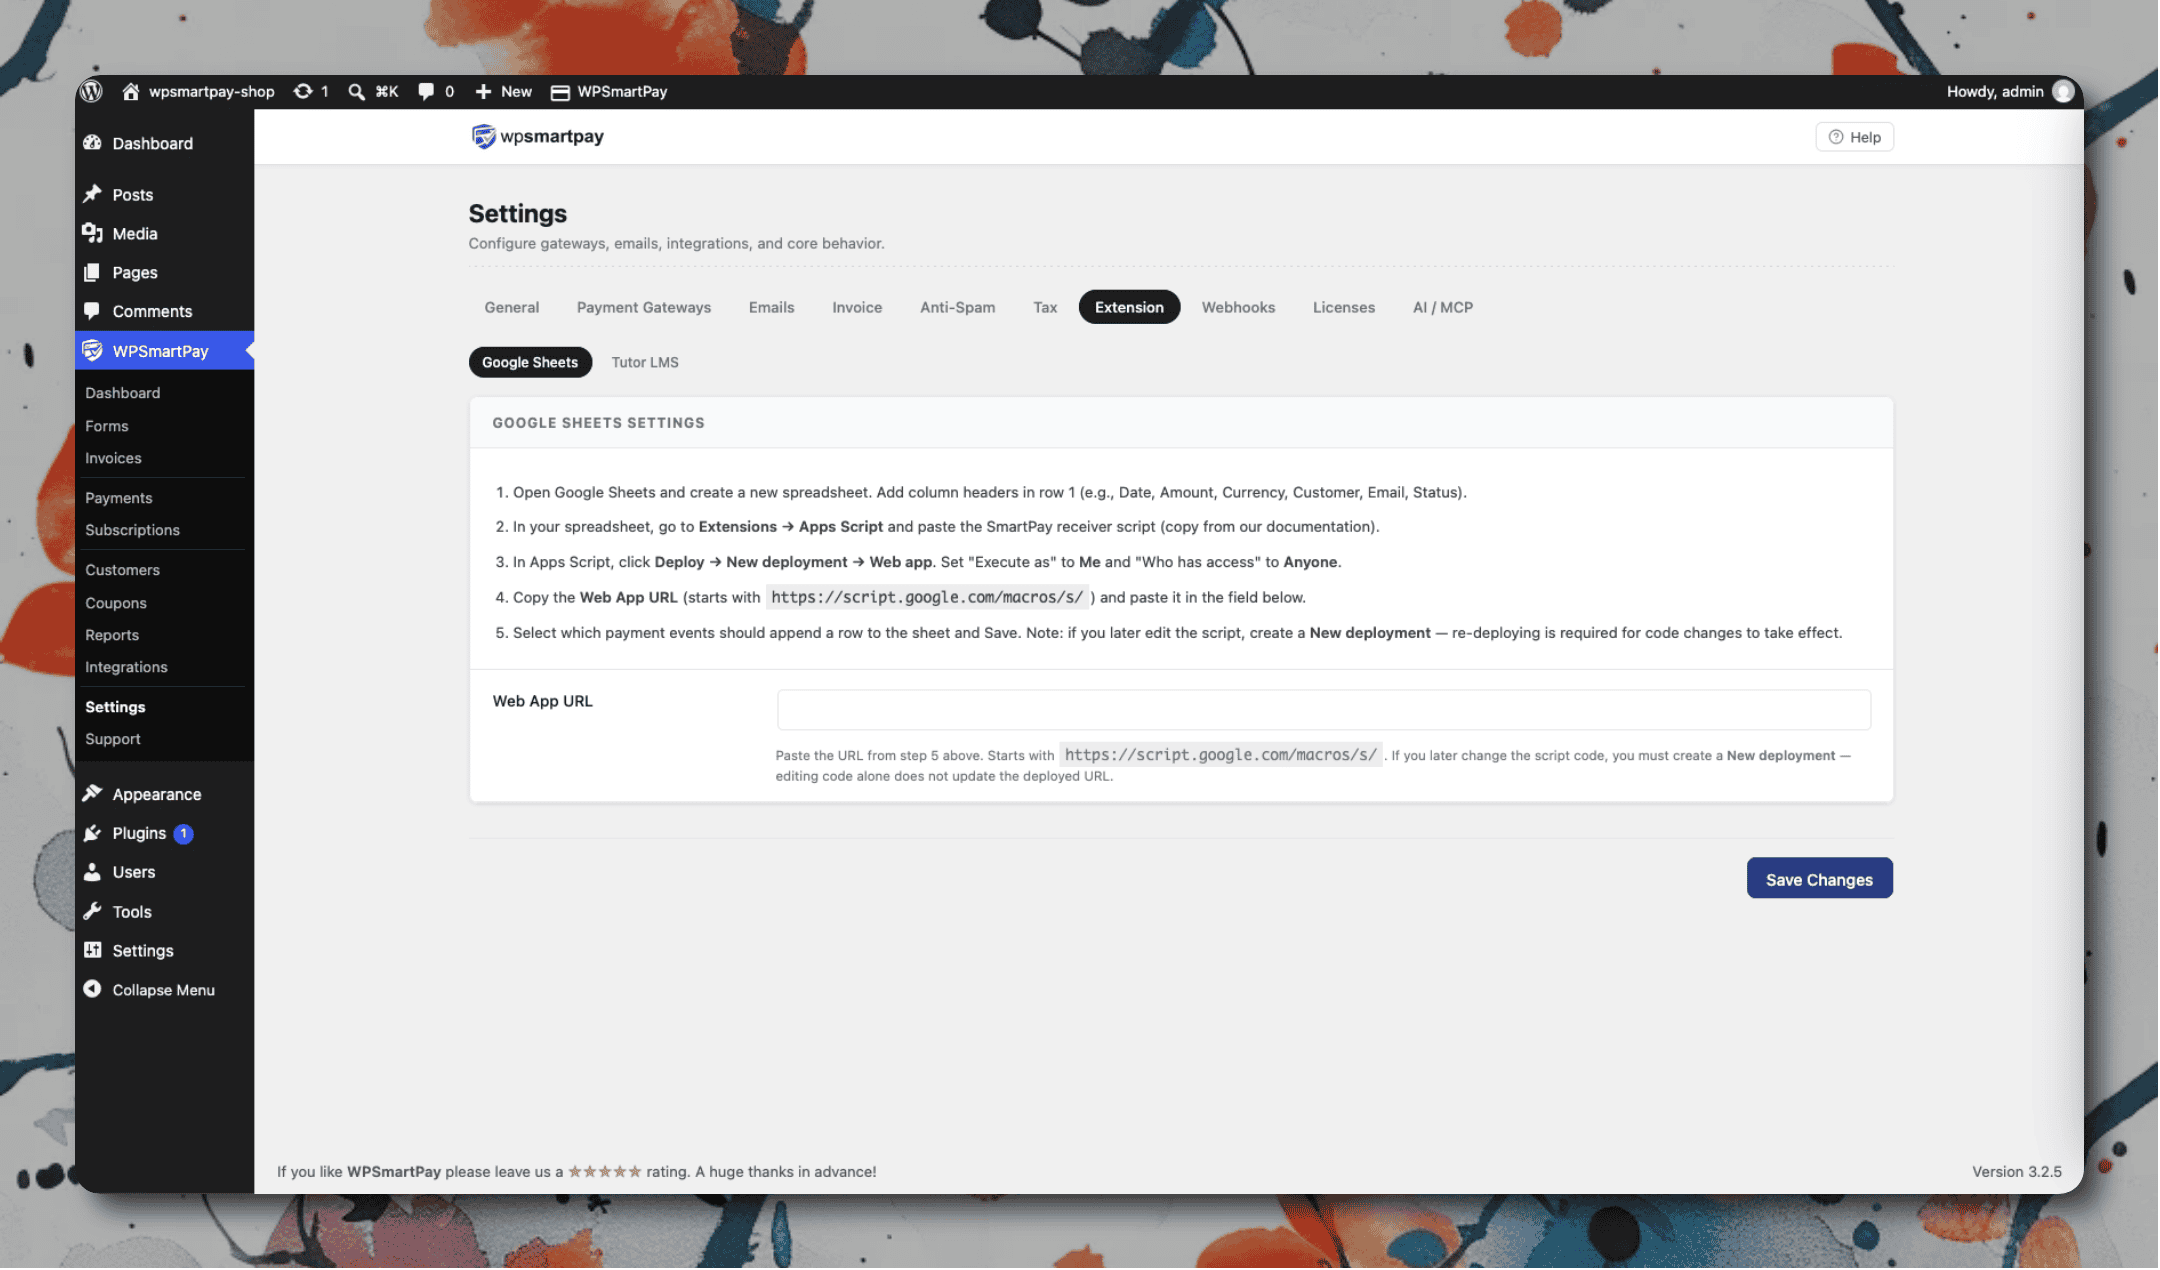
# Action Hooks & Filters Reference
WP SmartPay fires action hooks and filter hooks at every major point in the payment and subscription lifecycle. Third-party plugins, themes, and custom code can hook into these to extend behavior without modifying SmartPay's source files.
## Payment Lifecycle Hooks
### Actions
| Hook | When it fires | Parameters |
|---|---|---|
| `smartpay_payment_created` | New payment record inserted | `$payment` (Payment model) |
| `smartpay_payment_completed` | Payment status changes to completed | `$payment_id`, `$payment` |
| `smartpay_payment_failed` | Payment status changes to failed | `$payment_id`, `$payment` |
| `smartpay_payment_refunded` | A refund is issued on a payment | `$payment_id`, `$amount` |
| `smartpay_update_payment_status` | Any payment status change | `$payment_id`, `$new_status`, `$old_status` |
### Filters
| Hook | What it filters | Parameters |
|---|---|---|
| `smartpay_prepare_payment_data` | Payment data array before insert | `$payment_data`, `$raw_data` |
| `smartpay_payment_success_redirect_url` | URL to redirect to after successful payment | `$url`, `$payment_id` |
| `smartpay_payment_failure_message` | Error message shown on payment failure | `$message`, `$payment_data` |
## Subscription Lifecycle Hooks
### Actions
| Hook | When it fires | Parameters |
|---|---|---|
| `smartpay_pro_subscription_created` | New subscription created | `$subscription` |
| `smartpay_pro_subscription_renewed` | Renewal payment succeeds | `$subscription`, `$payment` |
| `smartpay_pro_subscription_cancelled` | Subscription cancelled | `$subscription` |
| `smartpay_pro_subscription_completed` | Fixed-term subscription finishes all installments | `$subscription` |
| `smartpay_pro_subscription_failing` | Renewal payment fails | `$subscription` |
## Gateway Hooks
Each gateway follows a consistent naming pattern:
| Hook pattern | Gateway slug examples | Purpose |
|---|---|---|
| `smartpay_{gateway}_ajax_process_payment` | `stripe`, `paypal`, `razorpay` | Handles AJAX form submission for that gateway |
| `smartpay_{gateway}_process_payment` | Same as above | Direct payment processing (non-AJAX) |
| `smartpay_gateways` | — | Filter to register a new gateway |
## Form / Checkout Hooks
| Hook | When it fires |
|---|---|
| `smartpay_checkout_before_form` | Before the payment form renders |
| `smartpay_checkout_after_form` | After the payment form renders |
| `smartpay_checkout_validate` | On form submission, before gateway processing — add custom validation here |
| `smartpay_form_fields` | Filter to add or remove fields from the checkout form |
## Example: Run Custom Code on Payment Completion
```
add_action( 'smartpay_payment_completed', function( $payment_id, $payment ) {
$customer_email = $payment->email;
$amount = $payment->amount; // in smallest currency unit
// Custom logic here — e.g., add to custom DB table, send third-party API call
my_plugin_handle_payment( $customer_email, $amount );
}, 10, 2 );
```
## Example: Customize the Success Redirect URL
```
add_filter( 'smartpay_payment_success_redirect_url', function( $url, $payment_id ) {
// Redirect VIP customers to a different thank-you page
$payment = smartpay_get_payment( $payment_id );
if ( $payment && $payment->amount >= 19900 ) {
return home_url( '/vip-thank-you/' );
}
return $url;
}, 10, 2 );
```
## Finding All Available Hooks
* Free plugin hooks: search `do_action(` and `apply_filters(` in `../smartpay/app/`
* Pro plugin hooks: search in `app/` — all Pro-specific hooks use the `smartpay_pro_` prefix
* Gateway-specific hooks: check each gateway's class file in `app/Gateways/`
# Installation and Setup
Installing the Paddle for Easy Digital Downloads plugin is straightforward and can be done through the WordPress admin or via FTP. Ensure your system meets the requirements and that Easy Digital Downloads is activated.
Paddle for Easy Digital Downloads is a standalone plugin that need to be purchased and install separately.
## Direct Upload
1. **Download the Plugin**: Obtain the plugin zip file from your purchase email or your account area by clicking the download link.
2. **Log into WordPress Admin**: Access the site where you want to install the plugin.
3. **Upload the Plugin**: Navigate to **Plugins > Add New** and click **Upload Plugin**.
4. **Choose File**: Select the downloaded zip file and click **Install Now**.
5. **Activate**: Once the installation is complete, click the blue button to activate the plugin.
Follow these steps to ensure a smooth installation experience.
## Manual FTP Upload
If you prefer to install the Paddle for Easy Digital Downloads(EDD) plugin manually using FTP, follow these simplified steps:
**Step 1: Download the Plugin-** Get the Paddle for EDD plugin zip file from your purchase email or your account.
**Step 2: Unzip the File-** Extract the downloaded zip file on your computer. You should see a folder named `paddle-edd`.
**Step 3: Connect via FTP-** Use an FTP program like FileZilla, Cyberduck, or Transmit to connect to your WordPress site.
**Step 4: Upload the Plugin-** Navigate to the wp-content/plugins folder on your website. And upload the paddle-edd folder to this location. If you are updating an existing plugin, delete the inside contents of the existing folder before uploading the new files.
**Step 5: Activate the Plugin-** Log in to your WordPress admin panel. Go to the “Plugins” section. Locate “Paddle for EDD” and click the "Activate" link.
**Step 6: License Activation-** After activation, activate your Paddle license key to receive updates and support. For more detailed instructions on installing plugins via FTP, refer to the relevant support documentation.
# Installation Guide
Installing the Paddle for WooCommerce plugin is straightforward and can be done through the WordPress admin or via FTP. Ensure your system meets the requirements and that WooCommerce is activated.
Paddle for WooCommerce is a standalone plugin that need to be purchased and install separately.
## Direct Upload
1. **Download the Plugin**: Obtain the plugin zip file from your purchase email or your account area by clicking the download link.
2. **Log into WordPress Admin**: Access the site where you want to install the plugin.
3. **Upload the Plugin**: Navigate to **Plugins > Add New** and click **Upload Plugin**.
4. **Choose File**: Select the downloaded zip file and click **Install Now**.
5. **Activate**: Once the installation is complete, click the blue button to activate the plugin.
Follow these steps to ensure a smooth installation experience.
# Manual FTP Upload
If you prefer to install the Paddle for WooCommerce plugin manually using FTP, follow these simplified steps:
**Step 1: Download the Plugin-** Obtain the Paddle for WooCommerce plugin zip file from your purchase email or your account.
**Step 2: Unzip the File-** Extract the downloaded zip file on your computer. You should see a folder named `paddle-woocommerce`.
**Step 3: Connect via FTP-** Use an FTP program like FileZilla, Cyberduck, or Transmit to connect to your WordPress site.
**Step 4: Upload the Plugin**
* Navigate to the `wp-content/plugins` folder on your website.
* Upload the `paddle-woocommerce` folder to this location. If you are updating an existing plugin, delete the inside contents of the existing folder before uploading the new files.
**Step 5: Activate the Plugin**
* Log in to your WordPress admin panel.
* Go to the “Plugins” section.
* Locate “Paddle for WooCommerce” and click the "Activate" link.
**Step 6: License Activation-** After activation, activate your Paddle license key to receive updates and support.
For more detailed instructions on installing plugins via FTP, refer to the relevant support documentation.
# Instant Checkout for EDD
Instant Checkout for Easy Digital Download lets you sell products anywhere on your website with a fast and easy checkout. No more long or complicated steps!
Here's a simple guide to get started:
### Download the Add-on
Log in to your account, go to the Downloads section, and download the file (**paddle-instant-checkout.zip**).
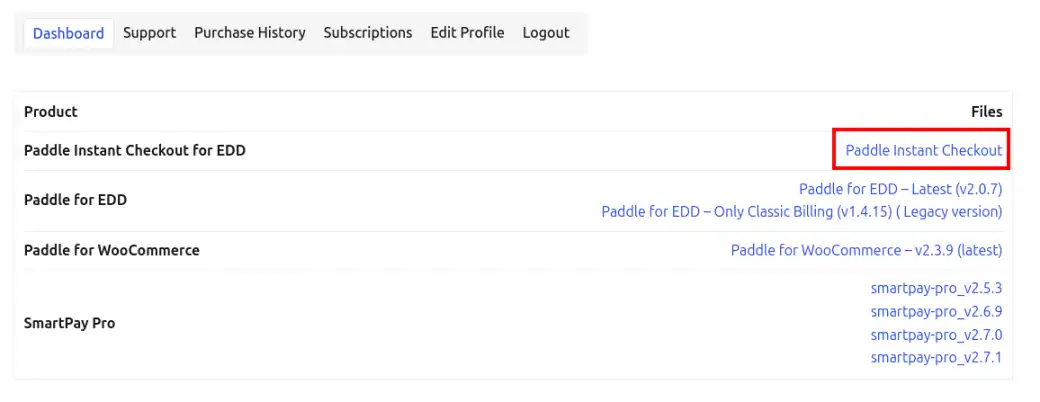### Install & Activate the Add-on
In your WordPress dashboard, navigate to **Plugins > Add New**. Click Upload Plugin, select the downloaded file, and **click Install Now**.
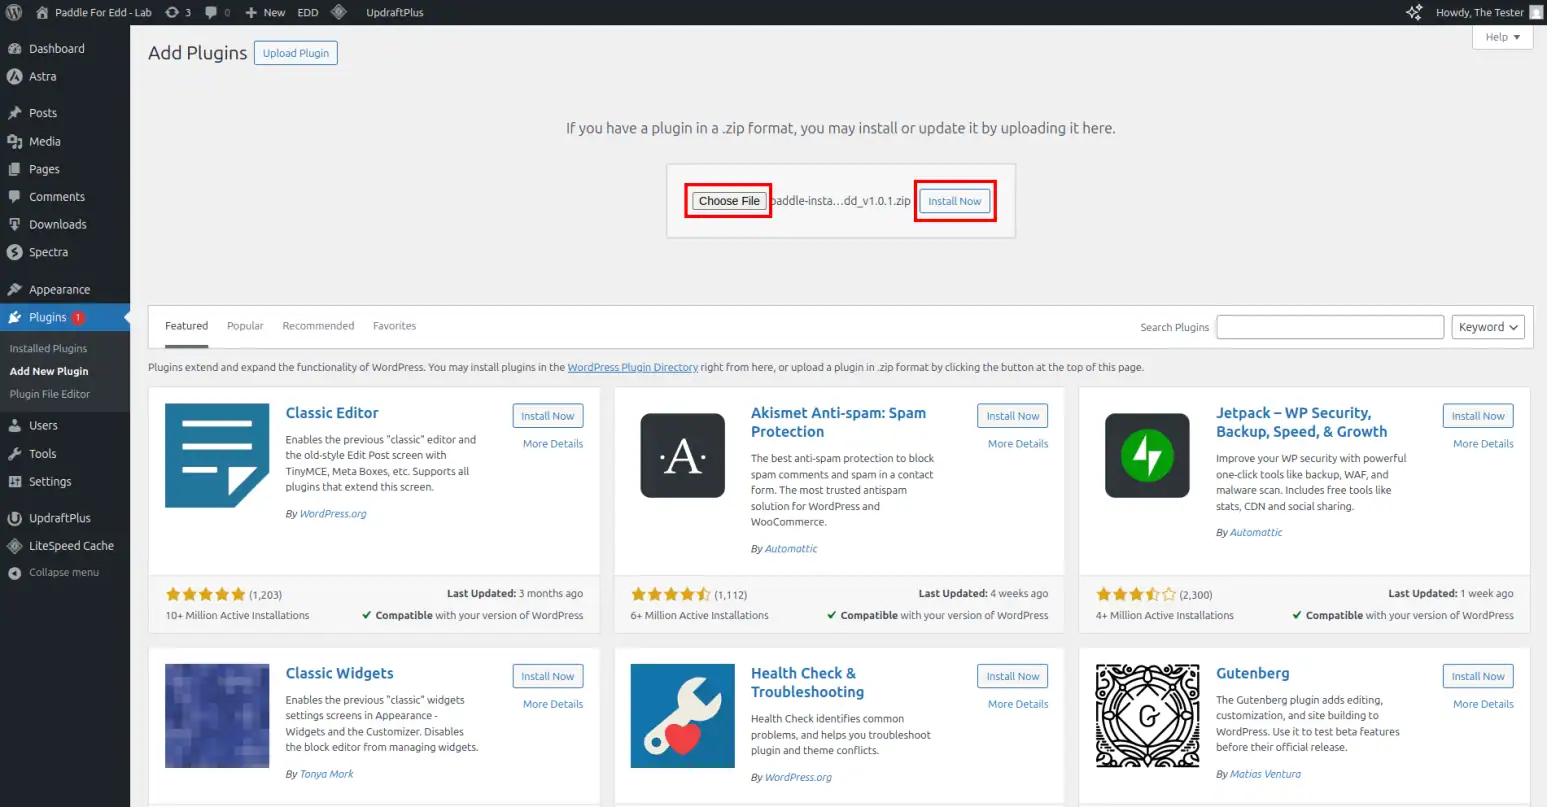Once installed, click Activate Plugin to enable Paddle Instant Checkout for your store.
### Activating the License
1. Get your license key from your WPSmartpay account.
2. In your WordPress dashboard, navigate to **Plugins > Installed Plugins**.
3. Click the **Manage License** in the **Paddle Instant Checkout** plugin.
4. Give the license key in the input field and click **Activate**.
### How to Use Instant Checkout
* **Add the Instant Checkout Block:** Open your website editor, find **Paddle Instant Checkout**, and place it anywhere you want to sell a product.
* **Choose a Product:** Open the block settings and select the product to sell.
* **Apply Discounts (Optional)**: Add a discount if available, or leave it as None.
* **Set Quantity (Optional)**: Choose how many units can be purchased.
* **Variable Product Pricing**: If you select a variable product, you will get a price selection option.
* **Customize the Button**: Change the checkout button text or keep the default.
* **Control Display Options:** Toggle settings to show/hide the button text, product name, or price.
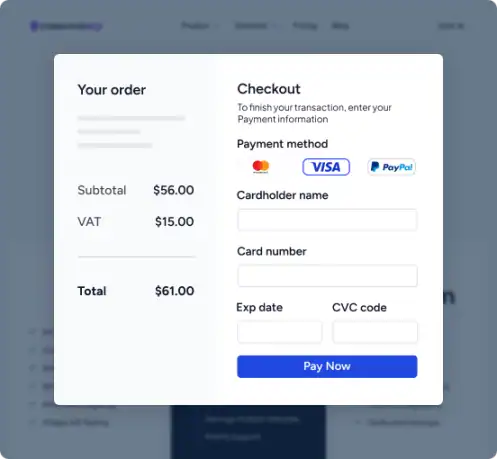Now, your customers can check out instantly with just one click. No extra steps, no hassle!
### Instant Checkout Through Shortcode for Classic Editor
To enable instant checkout using a shortcode in the Classic Editor, follow these steps:
* **Insert a Button Block** – First, add a button in your content editor.
* **Use the Shortcode as the Button Link** – Inside the button settings, use the following shortcode link, replacing the placeholders with the correct details:
```javascript
[paddle_instant_checkout product_id=PRODUCT_ID variation_id=VARIATION_ID quantity=QUANTITY coupon=COUPON_CODE]
```
* Replace **PRODUCT\_ID** with the actual product ID, **VARIATION\_ID** with the variation ID (if applicable), **QUANTITY** with the number of items (optional), and **COUPON\_CODE** with a discount code if available.
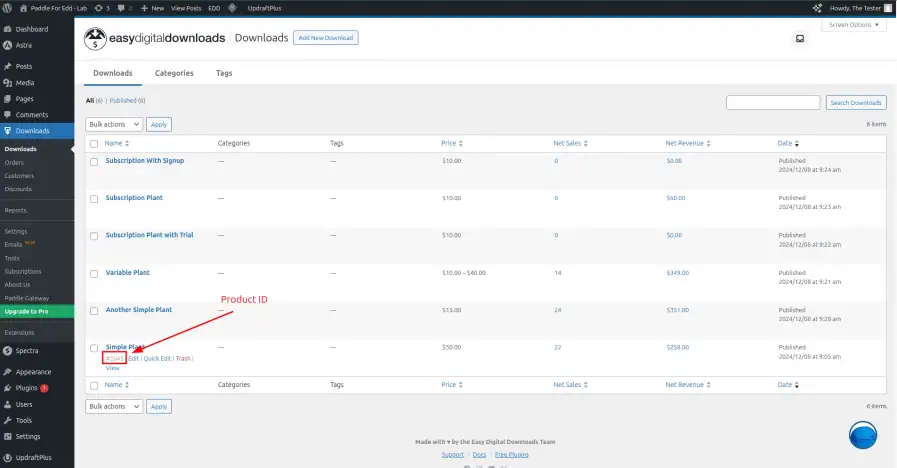product ID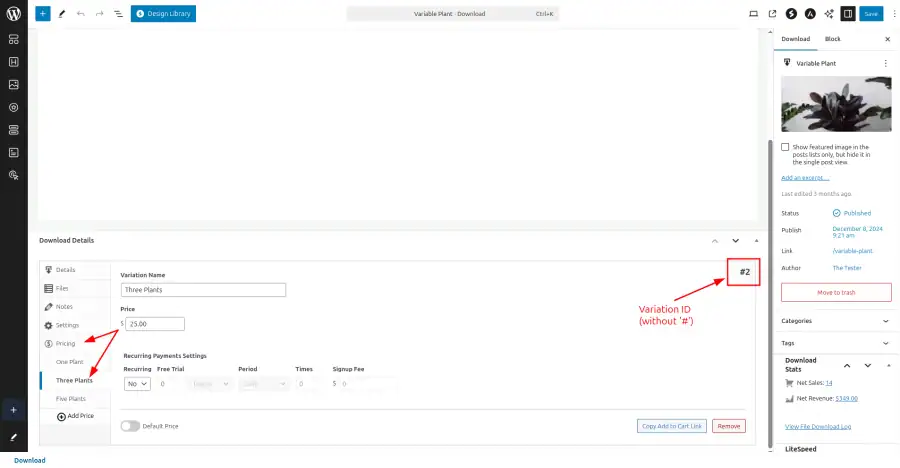variation ID* **Apply & Save** – Once the shortcode is added correctly, save your content. When users click the button, it will trigger an instant checkout.
Want to learn more? Click here to explore the [Paddle Instant Checkout for EDD](https://wpsmartpay.com/paddle-instant-checkout-for-edd/).
# Instant Checkout for Woo
Paddle Instant Checkout for WooCommerce lets you sell products anywhere on your website with a fast, seamless checkout experience. Say goodbye to long checkout processes—your customers can purchase with just one click!
Here's a simple guide to get started:
### Download the Add-on
Log in to your account, navigate to the Downloads section, and download the file (**paddle-instant-checkout.zip**).
### Install & Activate the Add-on
In your **WordPress Dashboard**, go to **Plugins > Add New**. Click **Upload Plugin**, select the downloaded file, and click **Install Now**.
Once installed, click **Activate Plugin** to enable **Instant Checkout** for your store.
### How to Use Instant Checkout
* **Add the Instant Checkout Block:** Open your website editor, find **Paddle Instant Checkout**, and place it anywhere you want to sell a product.
* **Choose a Product:** Open the block settings and select the product to sell.
* **Apply Discounts (Optional)**: Add a discount if available, or leave it as None.
* **Set Quantity (Optional)**: Choose how many units can be purchased.
* **Variable Product Pricing**: If you select a variable product, you will get a price selection option.
* **Customize the Button**: Change the checkout button text or keep the default.
* **Control Display Options:** Toggle settings to show/hide the button text, product name, or price.
Now, your customers can check out instantly with just one click. No extra steps, no hassle!
### Instant Checkout Through Shortcode for Classic Editor
To enable instant checkout using a shortcode in the Classic Editor, follow these steps:
* **Insert a Button Block** – First, add a button in your content editor.
* **Use the Shortcode as the Button Link** – Inside the button settings, use the following shortcode link, replacing the placeholders with the correct details:
```javascript
[paddle_instant_checkout product_id=PRODUCT/VARIATION_ID quantity=QUANTITY coupon=COUPON_CODE]
```
* Replace **PRODUCT/VARIATION\_ID** with the actual product ID or variation ID (if applicable), **QUANTITY** with the number of items (optional), and **COUPON\_CODE** with a discount code if available.
Product IDproduct variation* **Apply & Save** – Once the shortcode is added correctly, save your content. When users click the button, it will trigger an instant checkout.
Want to learn more? Click here to explore the Paddle Instant Checkout for WooCommerce.
# Integrate VAT ID with Paddle Billing
When using Paddle for WooCommerce, the payment form auto-fills user details such as email, address, and business name. For the Tax Identifier, you'll need to use the Billing VAT ID.
## Key Information
* **Meta ID for Billing VAT**: **\_billing\_vat\_id**
* **Developer Assistance**: If unsure about field info, share this meta ID with your developer to ensure accuracy.
By following this integration, you can smoothly incorporate VAT ID into Paddle Billing.
# Integrations Overview
# Integrations Overview
WP SmartPay Pro connects your payment system to the tools you already use — email marketing platforms, CRMs, automation workflows, LMS platforms, and membership plugins. This article explains how integrations work and how to activate them.
## How Integrations Work
SmartPay integrations listen to payment lifecycle events — *payment completed*, *subscription created*, *subscription cancelled*, *payment failed* — and take action in connected tools. No custom code required.
For example, when a payment is completed:
* A Mailchimp integration can subscribe the buyer to an audience
* A LearnDash integration can enroll the buyer in a course
* A Slack integration can post a notification to your sales channel
* A Zapier integration can trigger any workflow you've built
## Activating an Integration
1. Go to **SmartPay → Extensions**.
2. Find the integration you want to enable and click the toggle to activate it.
3. Click the gear icon to open the integration's settings.
4. Enter your API key, select your list or workspace, and save.
 The Extensions page — each integration can be toggled on or off independently. Activated integrations show a gear icon for settings.## Integration Categories
| Category | Integrations | What They Do |
|---|---|---|
| **Email Marketing** | Mailchimp, MailerLite, ActiveCampaign, FluentCRM, ConvertKit | Subscribe buyers to lists and sequences |
| **Messaging** | Slack, Telegram, Twilio | Send payment notifications to channels or SMS |
| **Automation** | Zapier, Integrately, Pabbly Connect, Uncanny Automator | Trigger workflows in any connected app |
| **LMS** | LearnDash, LifterLMS, Tutor LMS | Enroll/unenroll students based on payment status |
| **Membership** | Restrict Content Pro, WishList Member | Grant/revoke membership level based on subscription |
## Webhook-Based Integrations
Zapier, Integrately, and Pabbly Connect work via outgoing webhooks. SmartPay sends a JSON payload to your webhook URL every time a payment event fires. This lets you connect SmartPay to 5,000+ apps without native integrations.
To set up a webhook:
1. Go to **SmartPay → Settings → Webhooks**.
2. Click **Add Endpoint**.
3. Paste the webhook URL from your automation platform (Zapier, Integrately, etc.).
4. Select which events to send (payment.completed, subscription.created, etc.).
5. Save. SmartPay will ping the URL each time the selected events fire.
## Integration Alert States
The Extensions page uses visual badges to communicate each integration's current status at a glance.
 Integration cards show yellow "Needs setup" badges when required configuration is missing.### Badge States
* **No badge** — The integration is either inactive (toggle off) or fully configured and working.
* **Needs setup** (yellow badge) — The integration is activated but required settings are missing. For example: the API key field is empty, or a required list or workspace has not been selected. Click the gear icon on the card to open the integration settings and complete the configuration.
### Top Alert Banner
When one or more activated integrations have incomplete configuration, a banner also appears at the top of the Extensions page — "X integration(s) need setup." This draws attention to any incomplete integrations even if they are scrolled out of view. Completing the settings for each integration clears both the badge and the banner.
> **Note:** Integrations with a **Needs setup** badge are activated but will not fire — they need the missing configuration before they can respond to payment events. Completing the setup does not require re-activating the toggle.
## Troubleshooting Integration Issues
* **Integration not triggering:** Verify the integration is *activated* (not just installed) and that the API key is correct. Test with a live payment in Test Mode first.
* **Wrong list / audience:** Open the integration settings and confirm the target audience or sequence is selected.
* **Webhook not firing:** Check **Settings → Webhooks** for delivery failures. Most webhook UIs show a retry button.
* **Duplicate contacts in Mailchimp:** SmartPay uses the email address as the identifier. If a buyer already exists in the list, they are not duplicated — their tags/groups are updated.
# Invoice Statuses & Lifecycle
Every WP SmartPay invoice moves through a defined lifecycle from creation to payment. Understanding the statuses helps you track outstanding invoices, follow up with customers, and keep your records accurate.
## Status Reference
### Draft
The invoice has been created but not yet sent to the customer. The customer cannot see it. Use Draft status when you want to prepare an invoice in advance and review it before sending.
### Sent
The invoice has been emailed to the customer (or the shareable link has been shared manually). The customer can view the invoice and pay through it.
### Paid
The customer has completed payment through the invoice's payment link, or an admin has manually marked the invoice as paid. A linked **Payment** record exists in SmartPay → Payments for this invoice.
### Overdue
The invoice due date has passed and payment has not been received. SmartPay automatically moves invoices to Overdue status at midnight on the day after the due date. No automated follow-up email is sent — you need to follow up manually.
### Cancelled
The invoice has been voided. A cancelled invoice cannot be paid. Use Cancelled when a project falls through or the billing arrangement changes after the invoice was sent.
## Auto-Mark Paid
When a payment completes through an invoice's pay button, SmartPay automatically:
1. Creates a Payment record with status Completed.
2. Updates the invoice status to **Paid**.
3. Links the payment to the invoice in both records.
No manual action is needed — the lifecycle completes itself once the customer pays.
## Manually Updating Status
Open the invoice detail page (**SmartPay → Invoices → click an invoice**) and use the status dropdown or action buttons to change status manually. Common manual updates:
* Draft → Sent: when you share the link manually without using the Send Invoice email.
* Sent → Paid: when payment was received outside SmartPay (e.g., bank transfer) and you want to mark the invoice settled.
* Sent → Cancelled: when the service is no longer needed.
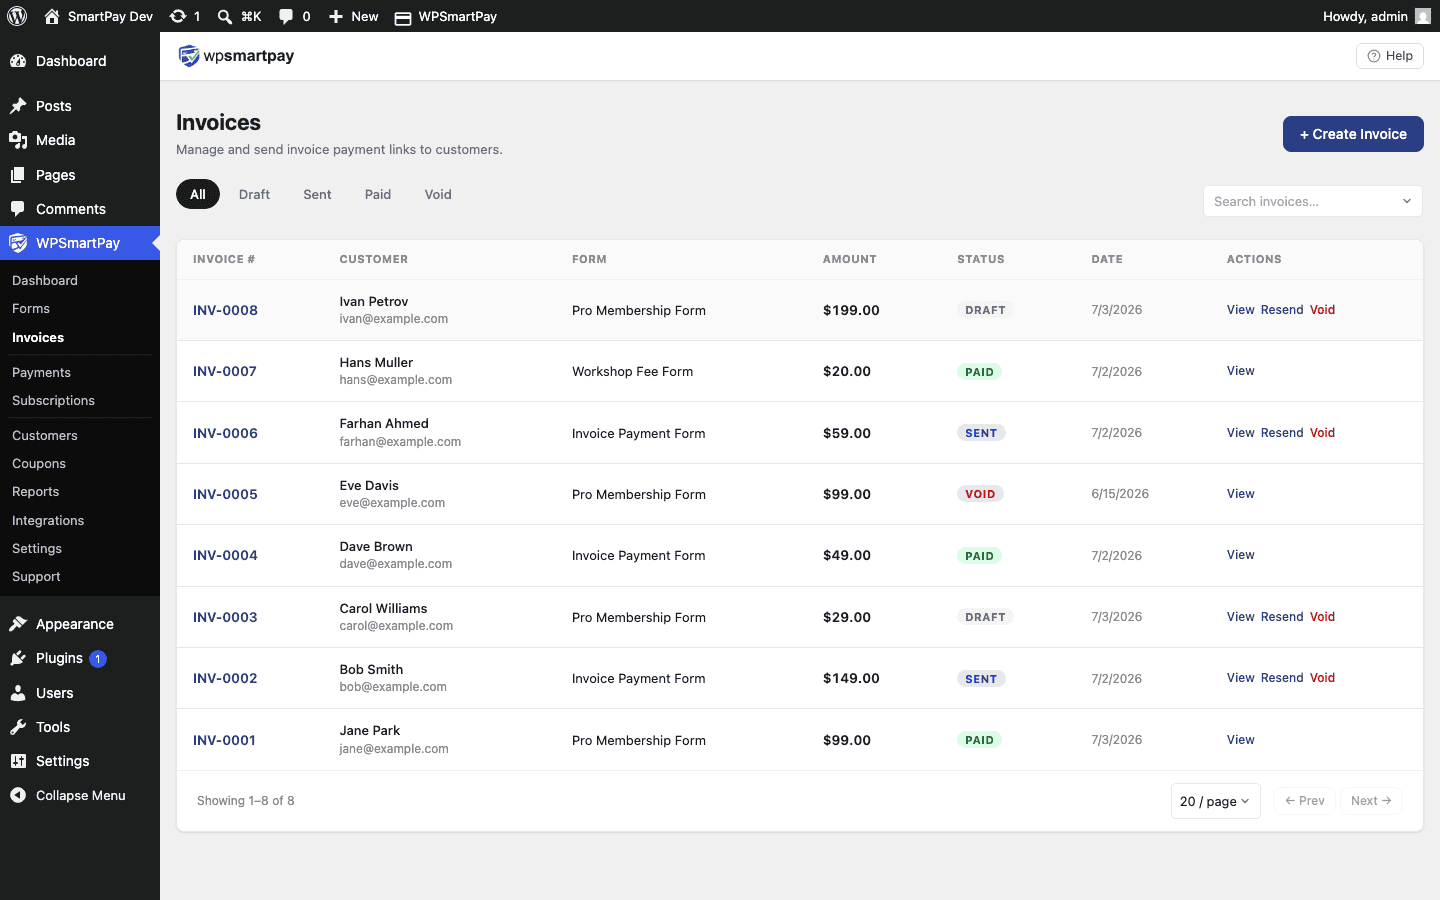 Invoice statuses are shown as colour-coded badges in the list — green for Paid, yellow for Sent, red for Overdue.
# Invoices Overview
WP SmartPay Pro includes a built-in invoice system. Invoices are professional billing documents that you can send to customers manually or that are generated automatically when a payment is completed.
## Invoice vs Payment Receipt
SmartPay has two different document types for completed transactions — it is worth understanding the difference:
| Document | Purpose | When Generated |
|---|---|---|
| **Payment Receipt** | Confirms a transaction was completed. Customer-facing confirmation page. | Automatically, immediately after every successful payment. |
| **Invoice** (Pro) | Formal billing document with line items, tax, your business details, and a due date. Suitable for accounting and B2B billing. | Automatically on payment completion (if enabled) or manually from the Invoices screen. |
## Where Invoices Live
Go to **SmartPay → Invoices** to see all invoice records.
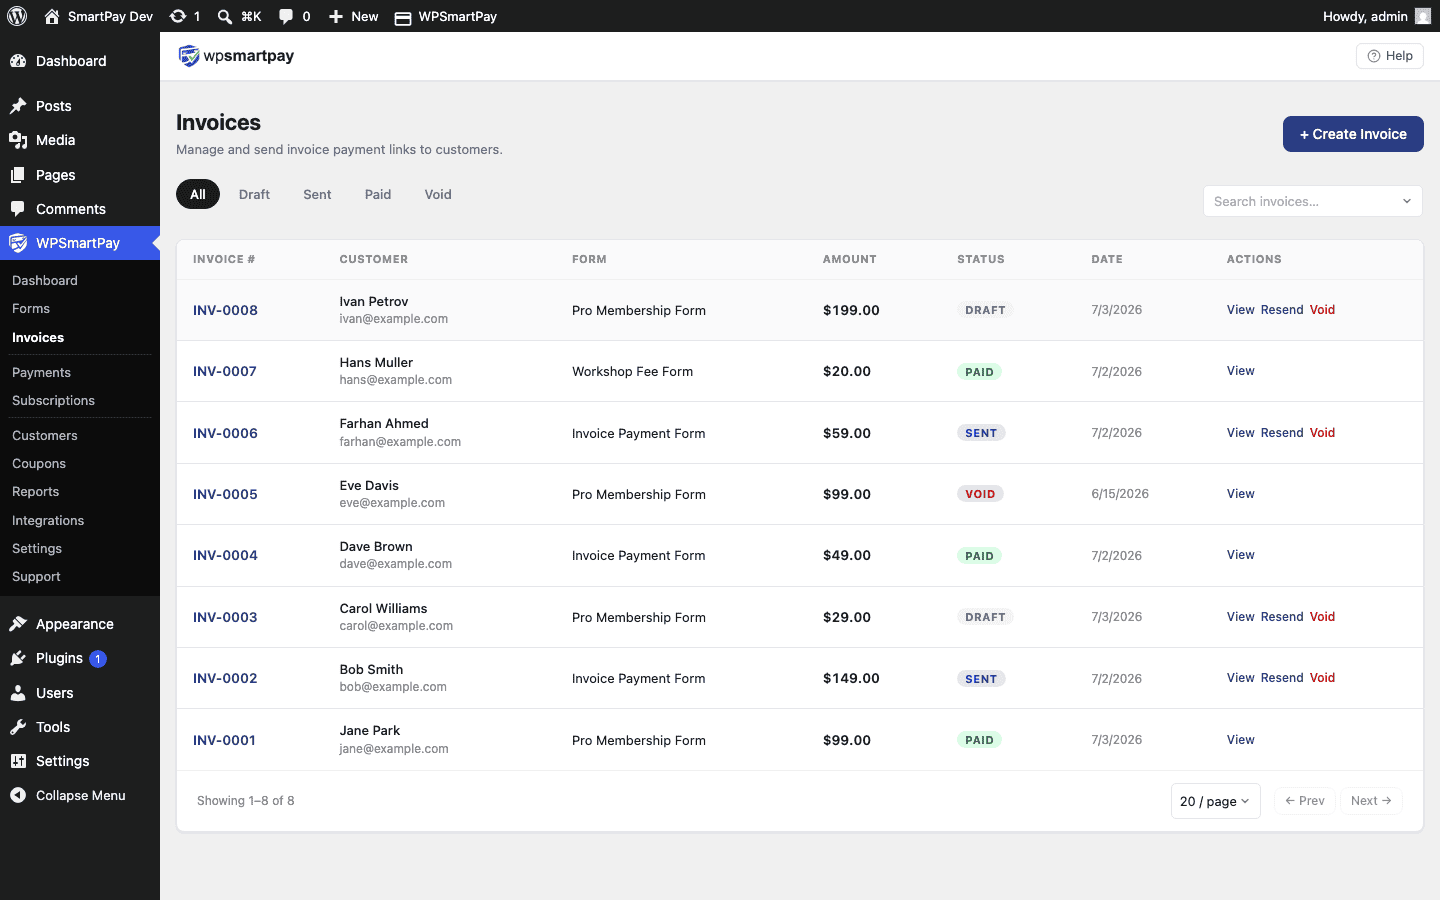 The Invoices list showing all invoice records with status, amount, and due date.## Auto-Generated vs Manual Invoices
**Auto-generated:** When a payment completes through a SmartPay form, an invoice is automatically created and linked to that payment. This happens silently in the background — you do not need to take any action. The invoice is available to view and send from **SmartPay → Invoices**.
**Manual:** You can also create invoices proactively from **SmartPay → Invoices → Create Invoice**. Send the invoice to the customer before they pay. When they pay through the invoice's payment link, the invoice is marked Paid automatically.
## Invoice Contents
Every SmartPay invoice includes:
* Your business name, logo, and contact info (from General Settings)
* Invoice number with your configured prefix
* Issue date and due date
* Customer name and email
* Line items (form/product, description, quantity, unit price)
* Tax (if configured on the form)
* Additional charges (if configured)
* Subtotal and total
* Payment status badge
# LearnDash Integration
LearnDash integration for WPSmartPay lets you sell courses directly without a heavy e-commerce plugin. By linking your payment forms straight to your LMS, you can completely automate student enrollment.
The moment a payment succeeds, students get immediate access to their courses or groups, creating a fast, frictionless checkout experience.
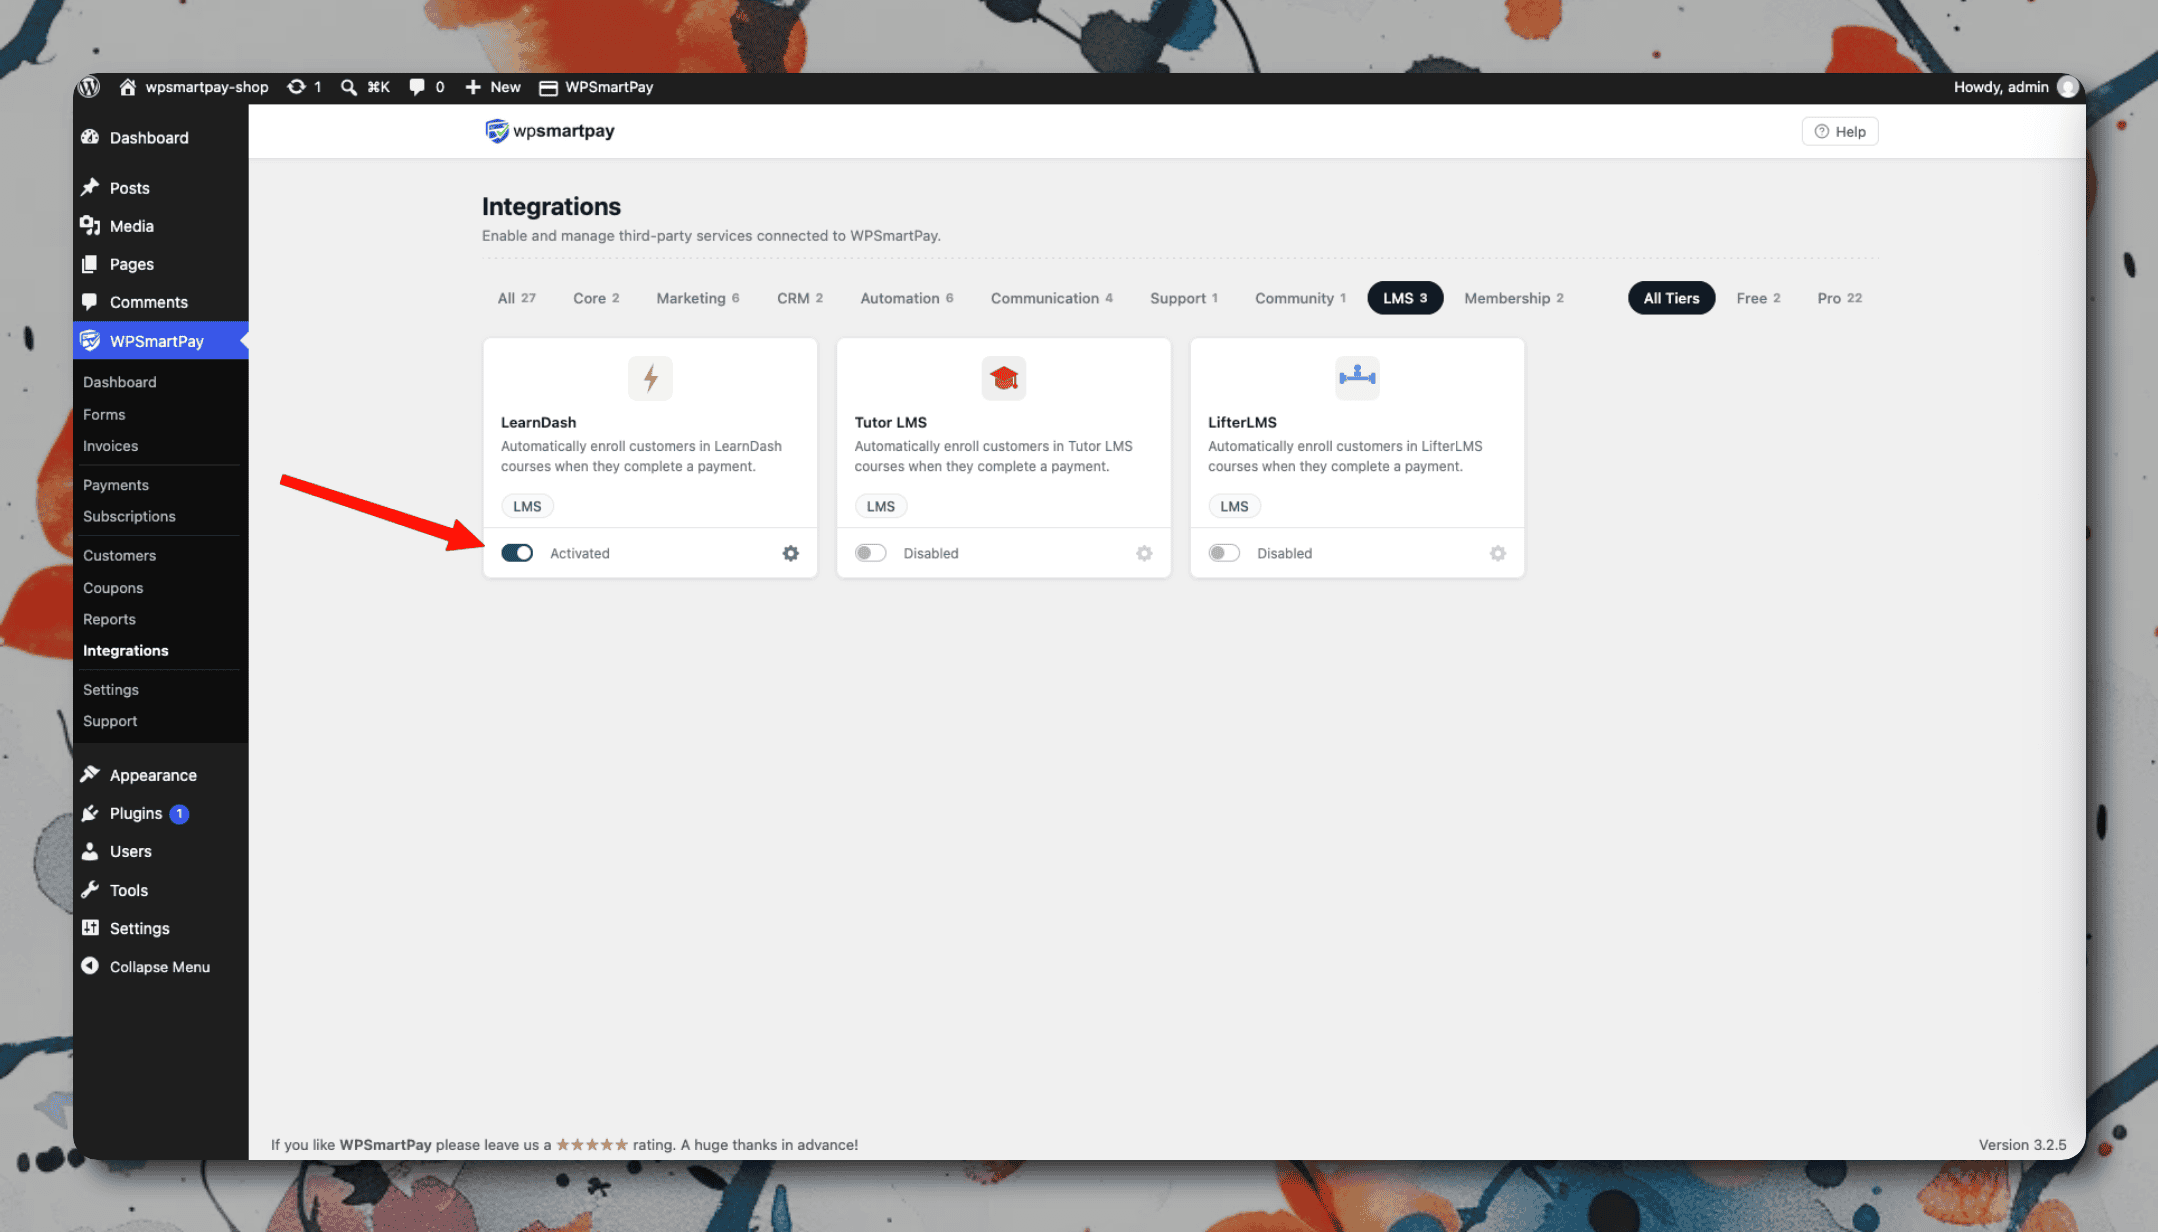### Setup
1. Go to **SmartPay → Extensions → LearnDash → Settings** and activate the integration.
2. In LearnDash, create a Group that contains the courses you want to sell.
3. In SmartPay, open each payment form and go to the **Integrations** tab.
4. Under LearnDash, select the Group to enroll the buyer into.
5. Save the form.
### How Access Is Managed
| Event | LearnDash action |
|---|---|
| One-time payment completed | User added to Group (permanent access) |
| Subscription created | User added to Group |
| Subscription renewed | Access continues (no change needed) |
| Subscription cancelled | User removed from Group |
| Subscription payment failed | User removed from Group (Failing status) |
| Refund issued | User removed from Group |
# License Settings (Pro)
WP SmartPay Pro requires a valid license key to receive plugin updates and access Pro features. You enter and manage your license from **SmartPay → Settings → License**.
## Opening License Settings
Go to **SmartPay → Settings → License**.
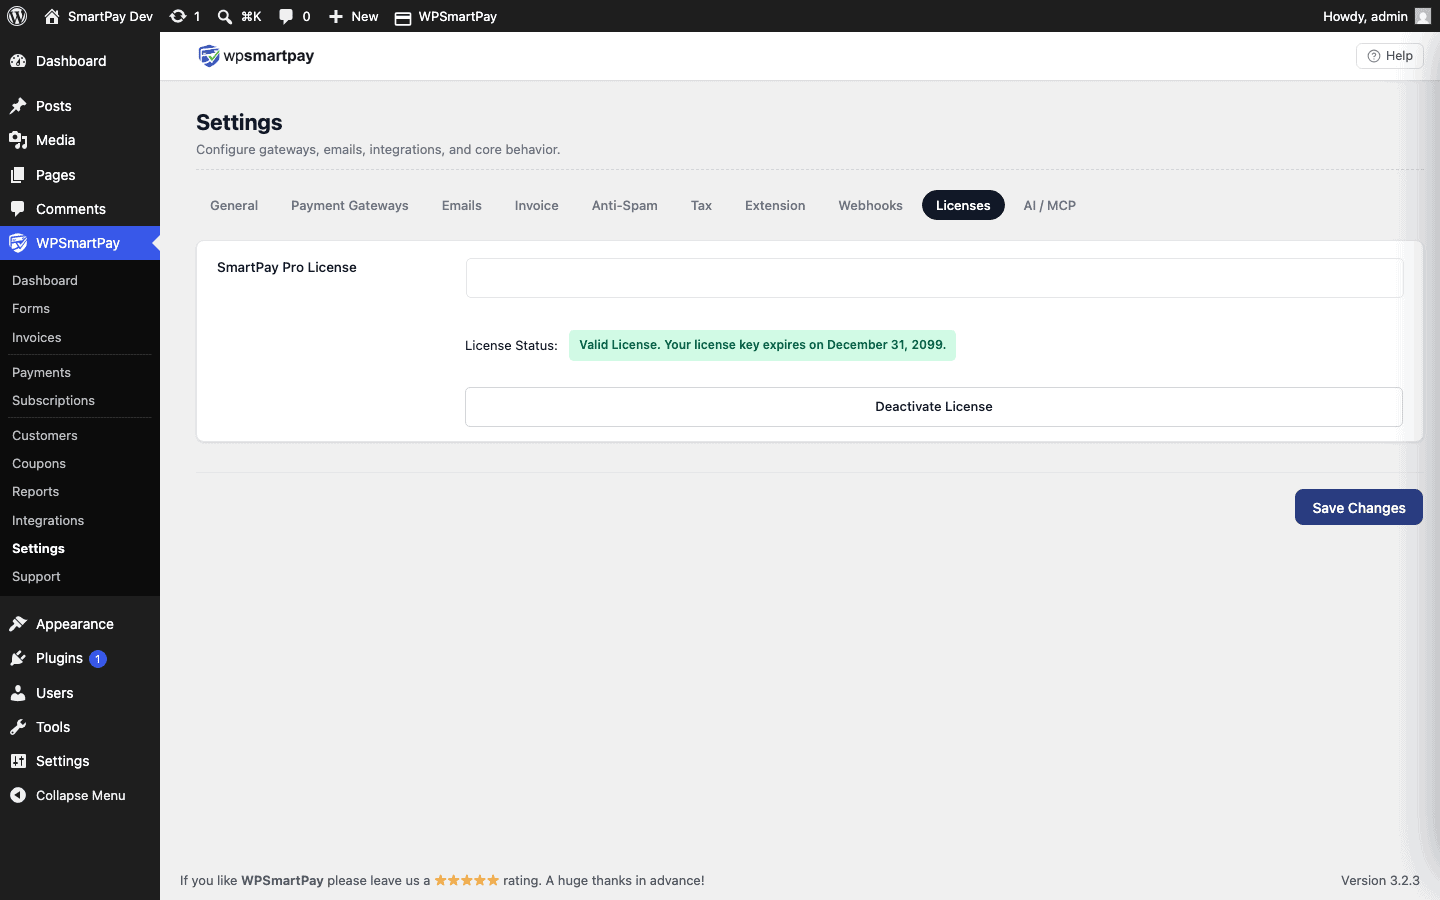 The License settings page — enter your key and check your activation status here.## Entering Your License Key
1. Log in to your WP SmartPay account at [wpsmartpay.com](https://wpsmartpay.com) and copy your license key.
2. Go to **SmartPay → Settings → License**.
3. Paste the key into the **License Key** field.
4. Click **Activate License**.
SmartPay sends an activation request to the licensing server. Within a few seconds the page refreshes and shows your license status.
## License Status Values
* **Valid** — License is active and in good standing. All Pro features are available and you receive updates.
* **Expired** — Your license has expired. Pro features continue to work but you no longer receive plugin updates or support. Renew to restore updates.
* **Inactive** — The license key was entered but not activated on this site, or activation failed. Click **Activate License** to try again.
* **Invalid** — The key is not recognised. Double-check you copied the full key with no extra spaces.
* **Disabled** — The license has been disabled by the seller (contact support if you believe this is an error).
## Activating on Multiple Sites
License activation limits depend on your plan (e.g., single site, 3 sites, unlimited). If you need to activate on an additional site, deactivate the license on a site you are no longer using, then activate on the new one.
## Deactivating a License
1. Go to **SmartPay → Settings → License** on the site you want to remove.
2. Click **Deactivate License**.
3. The activation slot is freed and can be used on another site.
## What Happens When a License Expires
An expired license does not disable Pro features — your payment forms, subscriptions, invoices, and integrations continue to operate normally. However:
* Plugin update notifications stop appearing.
* Support tickets may be declined for expired license holders.
* Some advanced features tied to a specific plan tier may be restricted.
To renew, visit your account at wpsmartpay.com and complete the renewal checkout. After renewal, return to **Settings → License** and click **Activate License** to refresh your key status.
# License Verification Process
Follow these simplified steps to verify the Paddle for WooCommerce plugin license.
## Step 1: Redirect to License Activation Page
* After activation, you should be redirected to the Paddle Payment page.
* If not redirected, manually go to **WooCommerce > Paddle Payment**.
## Step 2: Enter the License Key
* **Locate License Activation Section**: Find the License Activation area on the Paddle Payment page.
* **Enter License Key**: Input your valid license key in the provided field.
* **Activate the License**: Click the **Activate License** button.
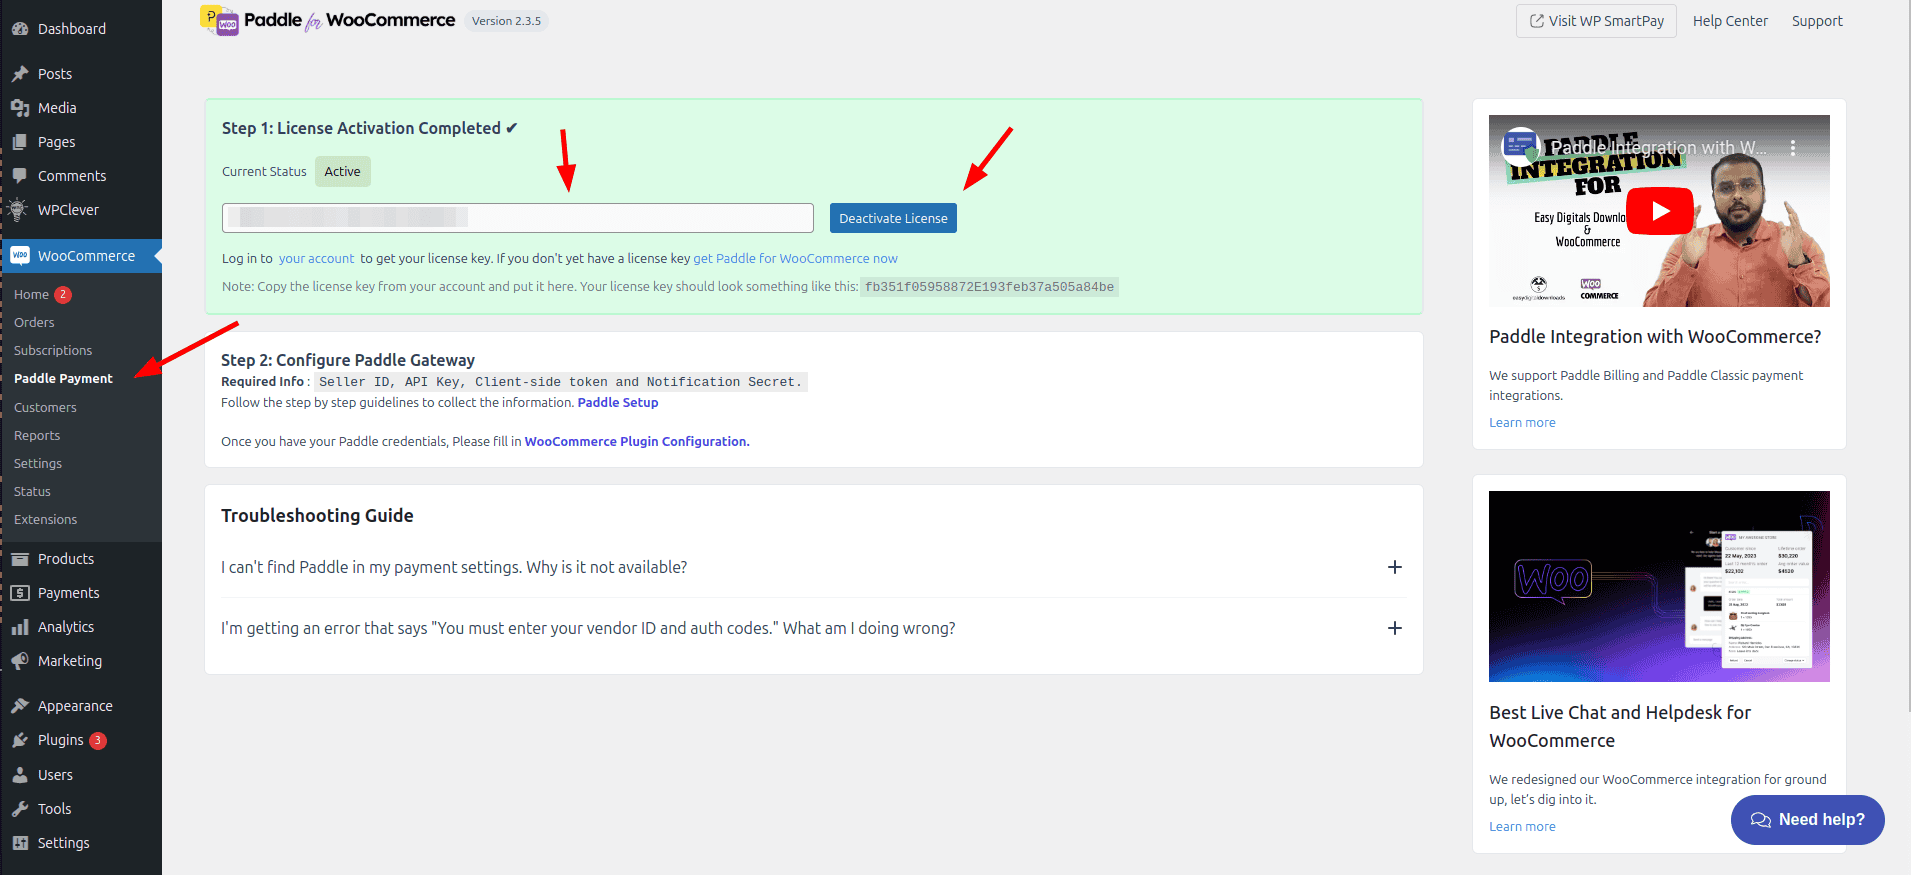## Step 3: Verify License Status
* **If Valid**: The section will turn green and display "Active."
* **If Invalid**: An error message will appear, and the status will not change to Active.
## Additional Notes
* Ensure you have an active internet connection for license verification.
* If activation fails, double-check the license key for accuracy.
* For assistance, refer to the plugin documentation or contact support.
# License Verification Process
Using Paddle for Easy Digital Downloads (EDD) is straightforward. Follow these simple steps to verify your plugin license.
## Step 1: Redirect to License Activation Page
* **Automatic Redirection**: After installing the plugin, you should be redirected to the Paddle Payment page automatically.
* **Manual Redirection**: If you are not redirected, go to your WordPress dashboard and navigate to: **Downloads > Paddle Payment**
## Step 2: Access License Activation
* **Locate License Activation Section**: On the Paddle Payment page, find the License Activation section.
* **Manage License**: Click the **Manage your license here** link to open the EDD License Management page.
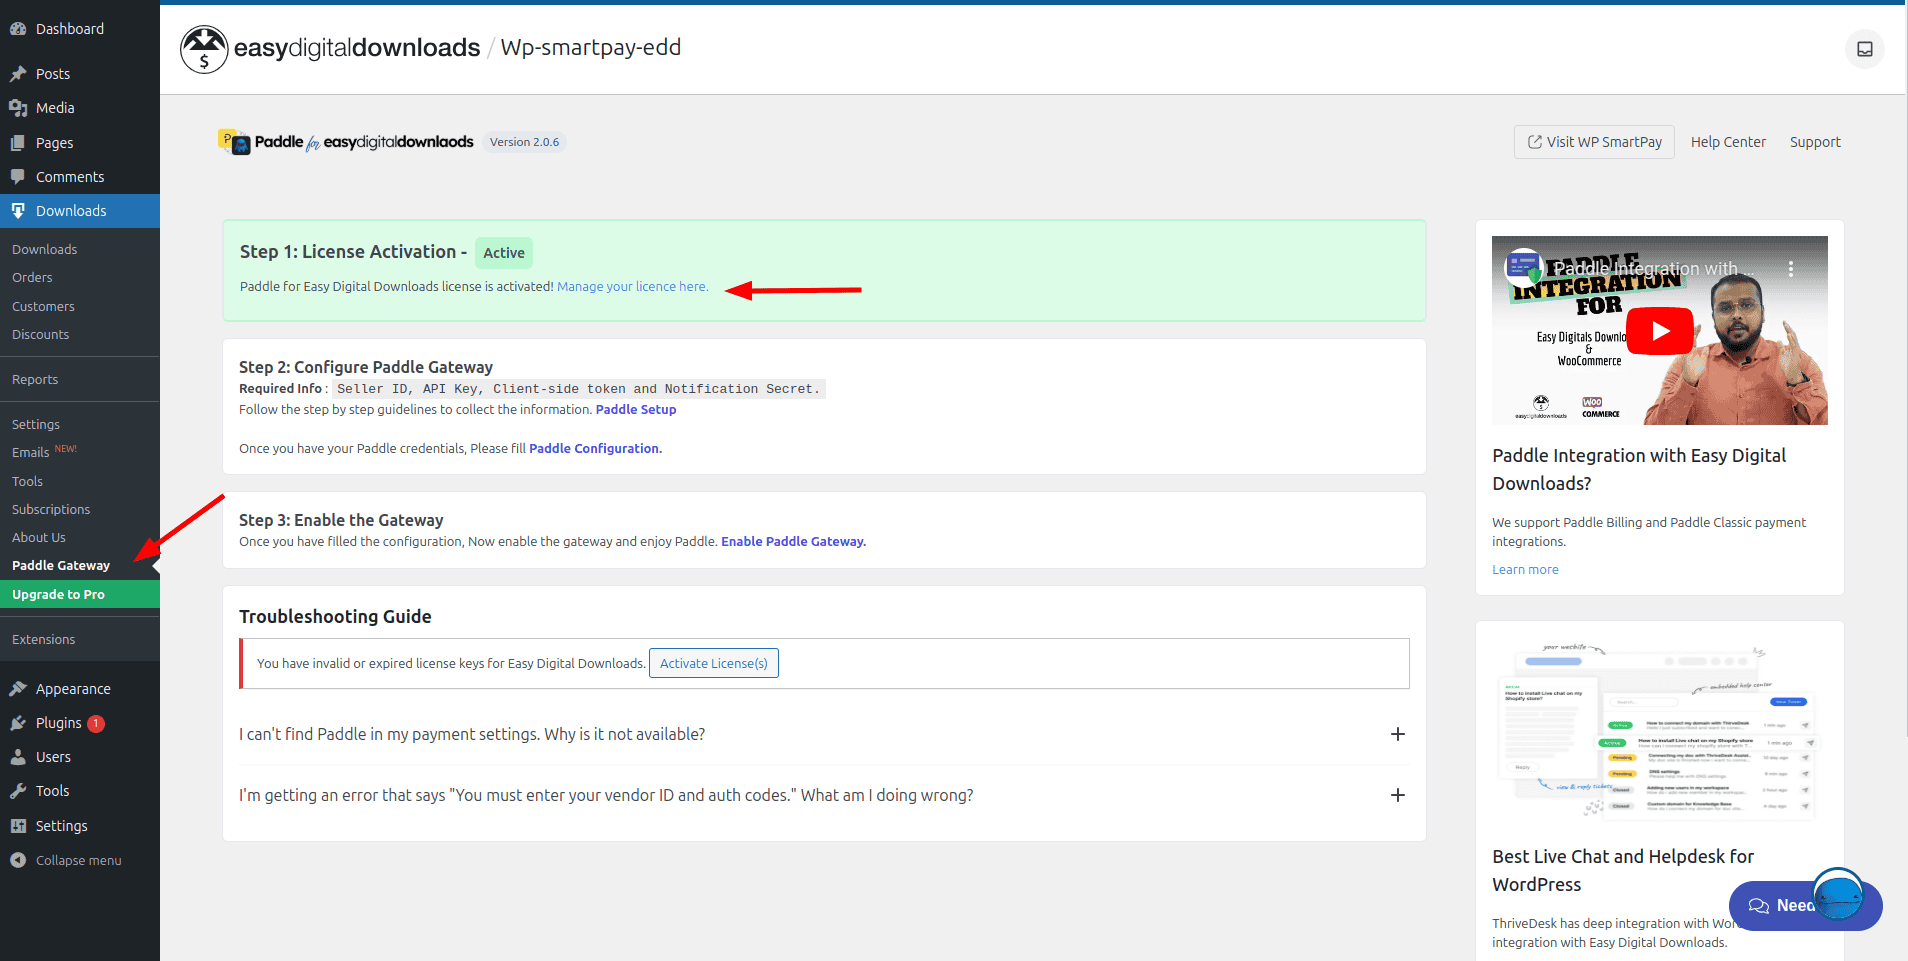## Step 3: Enter Your License Key
* **Find EDD Settings**: In the EDD Settings, look for the field labeled **Paddle for Easy Digital Downloads**.
* **Enter License Key**: Input your valid license key in the designated field.
* **Activate License**: Click the **Activate** button.
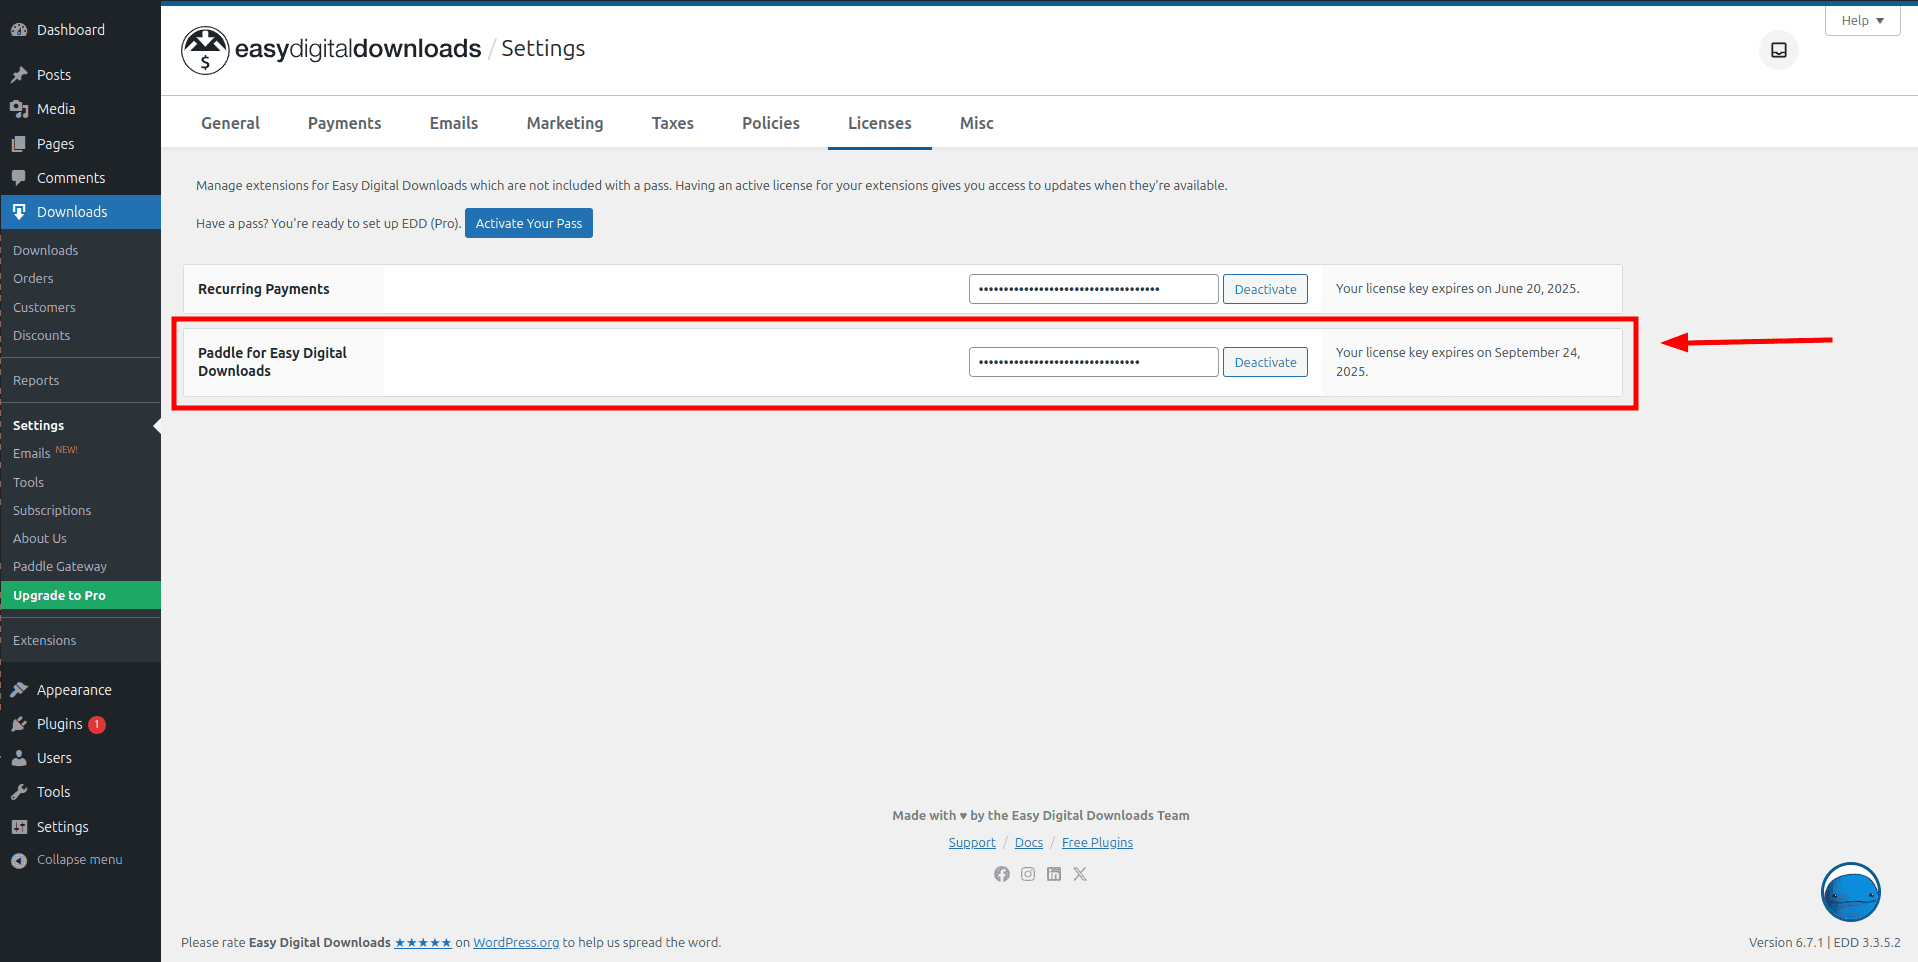## Step 4: Check License Status
* **Valid License Confirmation**: If the license key is valid: The section color will change to green. And the status will show Active.
* **Invalid License Notification**: If the license key is invalid or has expired: The status will indicate an **error** and the license status will **not** update to Active.
## Additional Notes
* **Check Internet Connection**: Ensure your website is connected to the internet for successful license verification.
* **Troubleshooting**: If activation fails, recheck the license key for accuracy.
* **Support**: For assistance, consult the documentation or contact support.
Following these steps will help ensure smooth management of your Paddle plugin license.
# LifterLMS Integration
LifterLMS integration for WPSmartPay lets you sell courses and memberships directly without relying on a heavy e-commerce plugin. By connecting your payment forms straight to your LMS, you completely automate student enrollment.
The moment a transaction succeeds, students unlock immediate access to their LifterLMS courses or memberships, delivering a fast and frictionless checkout experience.
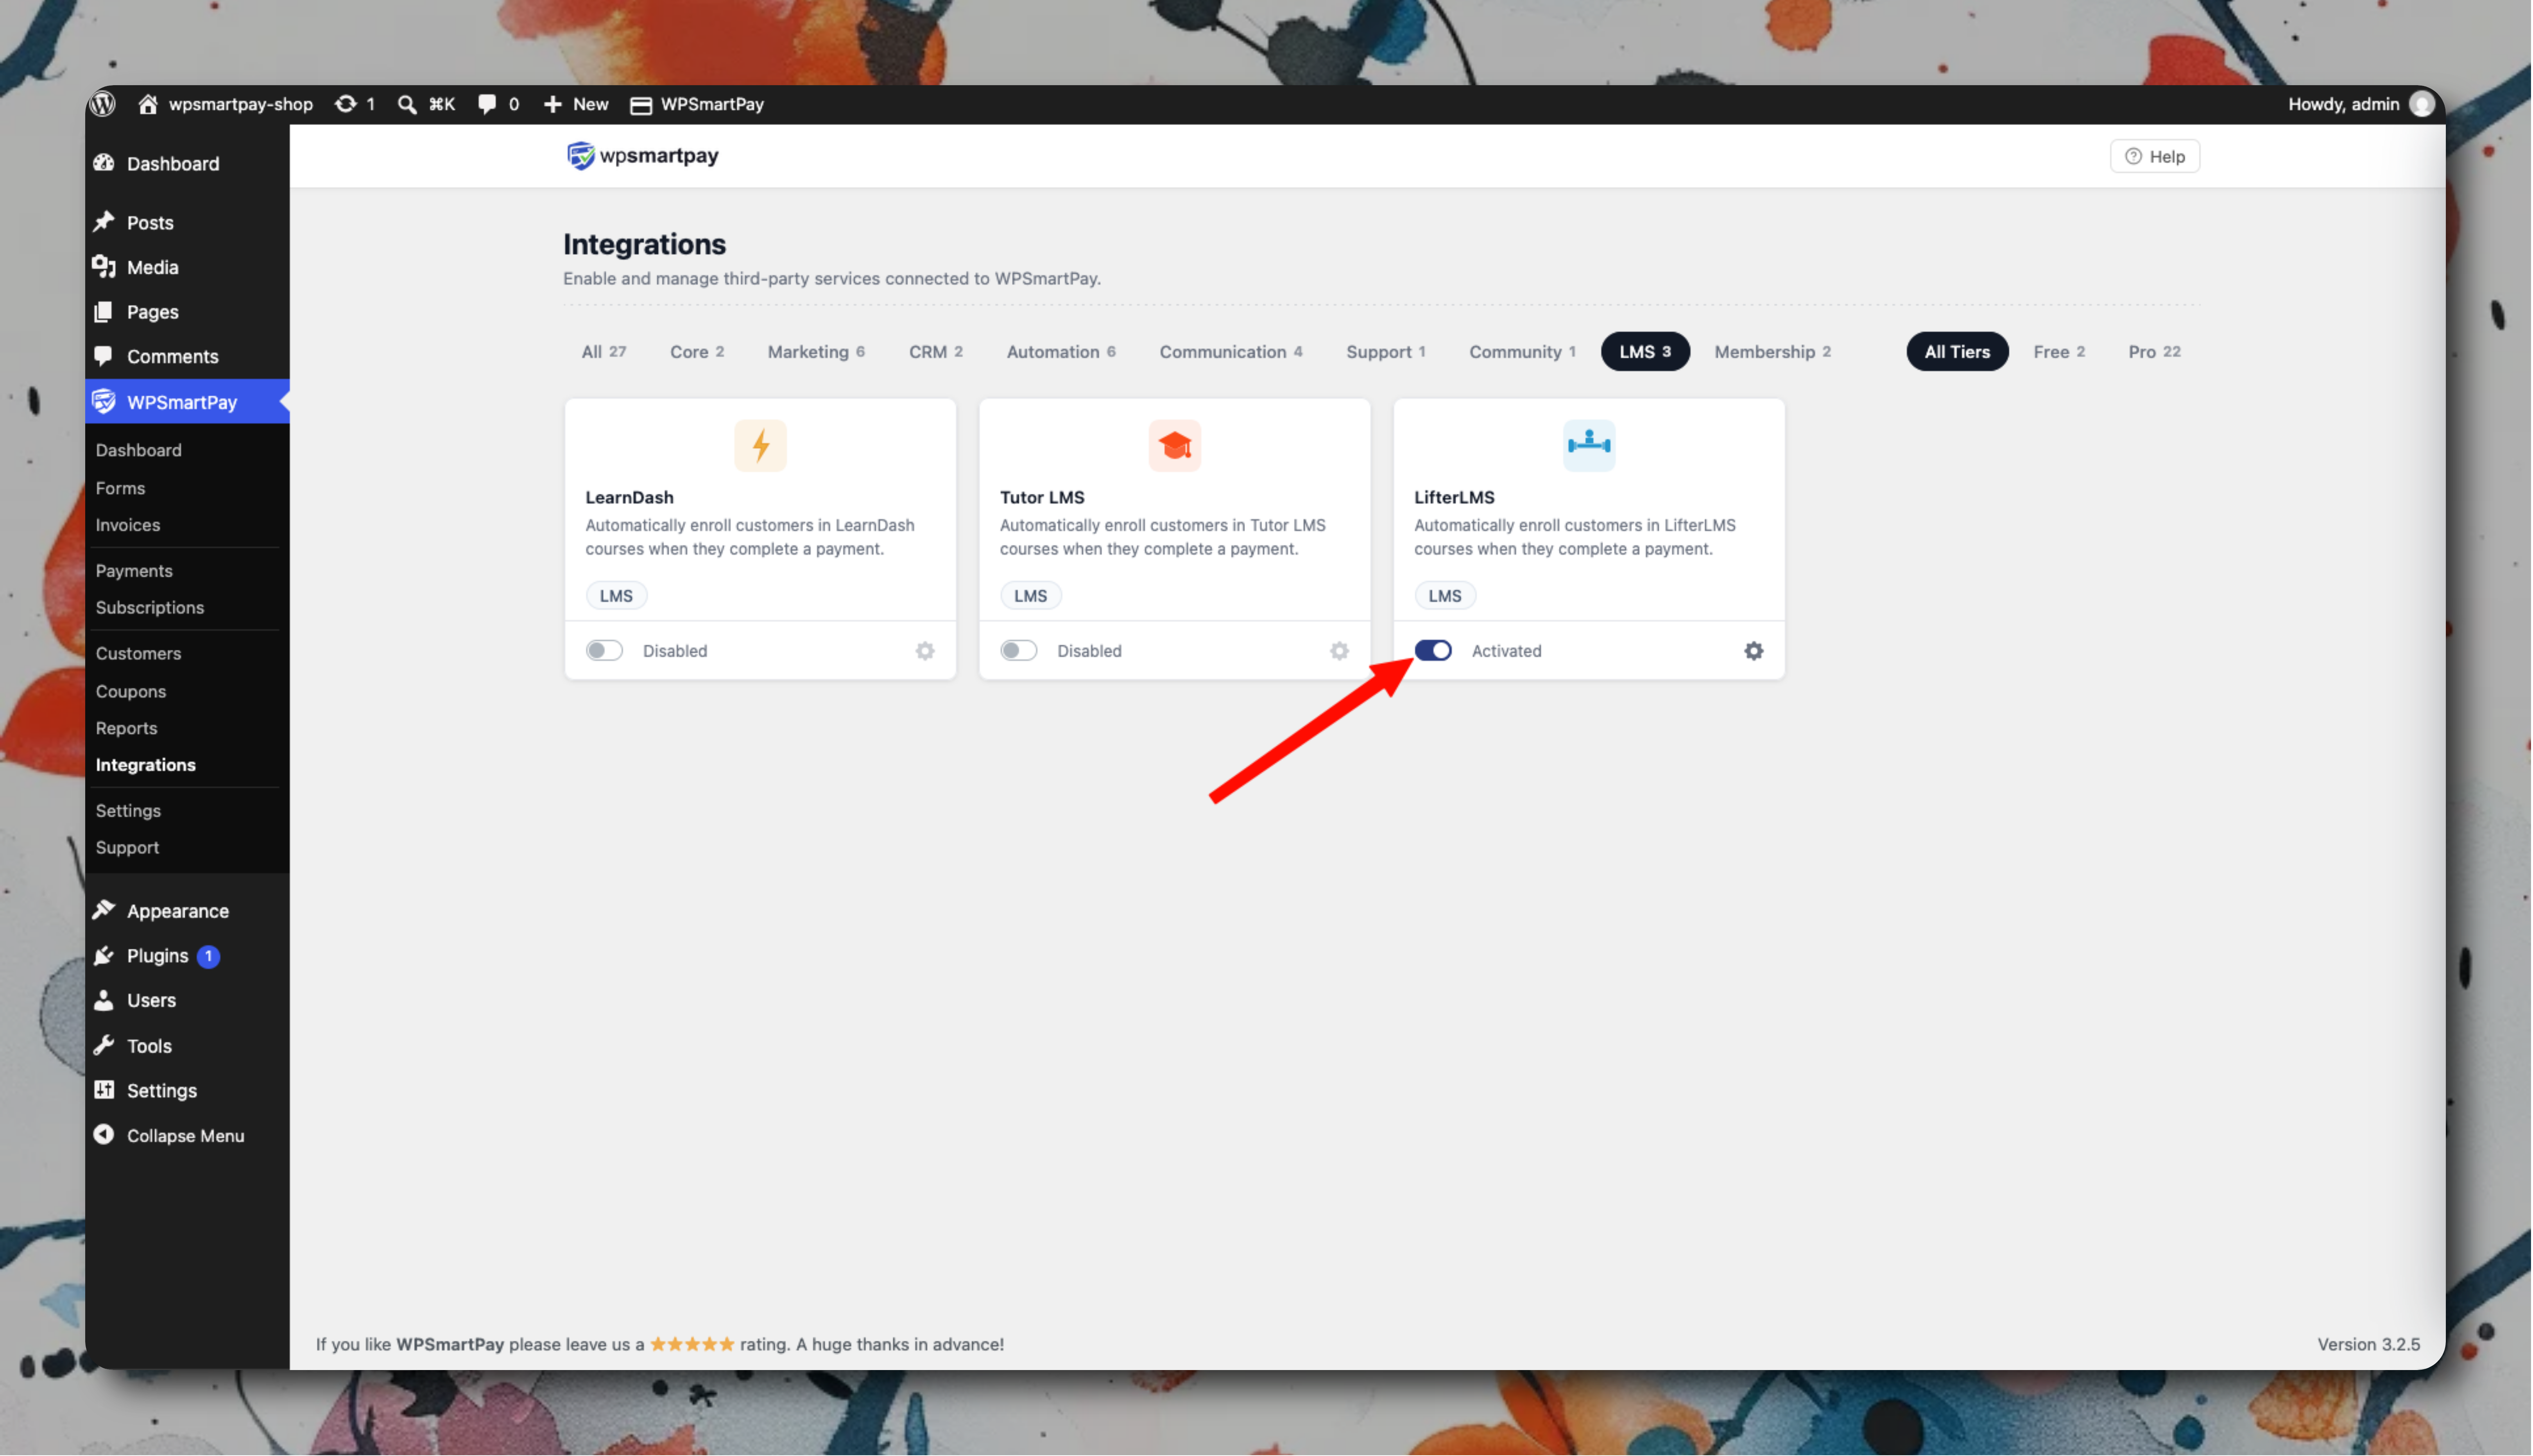### Setup
1. Go to **SmartPay → Extensions → LifterLMS → Settings** and activate.
2. In LifterLMS, create a Membership that includes your courses.
3. In each SmartPay payment form, under the **Integrations** tab, select the LifterLMS Membership to grant.
4. Save.
### How Access Is Managed
| Event | LifterLMS Action |
|---|---|
| One-time payment completed | Order status changes to completed |
| Subscription created | Order status becomes active |
| Subscription renewed | Order status remains active |
| Subscription cancelled | Order status changes to Pending cancellation |
| Subscription payment failed | Order status changes to Failed |
| Refund issued | Order status changes to refunded |
For one-time product purchases (not memberships), you can link directly to a LifterLMS Course instead of a Membership.
# M-Pesa - Daraja Integrations
M-Pesa lets your Kenyan customers pay straight from their phone. They type their Safaricom number on your checkout form, a PIN prompt appears on their handset, and the order completes the moment they confirm — no card, and no redirect away from your site. This guide covers getting a Daraja account, connecting it to WP SmartPay Pro, testing in sandbox, and going live.
## Prerequisites
* A [Safaricom Daraja](https://developer.safaricom.co.ke/) developer account (free to create).
* A Safaricom **Paybill** or **Buy Goods (Till)** number for live payments, with **Lipa na M-Pesa Online** enabled on it.
* WP SmartPay Pro active with a valid license.
* Your store currency set to **KES** — M-Pesa settles only in Kenyan Shillings.
* HTTPS on your site, on the standard port 443. Safaricom will not deliver payment results to an `http://` address.
> **Note:** M-Pesa charges whole shillings only — an amount like `KES 10.50` is rounded to `KES 11` before it is sent to Safaricom.
## Step 1 — Create a Daraja App
1. Log in to the [Daraja portal](https://developer.safaricom.co.ke/).
2. Go to **My Apps** and click **Add a New App**.
3. Give it a name and tick the **Lipa Na M-Pesa Sandbox** product.
4. Open the app and copy its **Consumer Key** and **Consumer Secret**.
You now have the two keys that authenticate SmartPay with Safaricom. You still need a shortcode and a passkey, which come from the next step.
### Sandbox shortcode and passkey
For testing, Safaricom publishes a shared test shortcode and passkey on the Daraja portal under **APIs → M-Pesa Express → Simulate**:
| Field | Sandbox value |
|---|---|
| Shortcode | `174379` |
| Passkey | Shown on the M-Pesa Express Simulate page — copy it from there |
### Live shortcode and passkey
For live payments you use your own numbers:
* **Shortcode** — your Paybill number, or for a Till account, your head-office store number.
* **Passkey** — Safaricom emails this to you when Lipa na M-Pesa Online is activated on your shortcode. If you do not have it, ask Safaricom business support to resend it.
Live keys also require a **Go Live** request in the Daraja portal, which links your production app to your shortcode. Approval usually takes a few business days.
## Step 2 — Connect M-Pesa in SmartPay
1. Go to **SmartPay → Settings → Payment Gateways** and open the **M-Pesa** section.
2. Use the **Sandbox / Live** switch at the top right to choose which set of keys you are entering. This is the same switch as the store's global payment mode, so flipping it changes how the whole store takes payments.
3. Fill in the **Consumer Key**, **Consumer Secret**, **Shortcode** and **Passkey**.
4. Click **Verify & connect**. SmartPay asks Safaricom for an access token using those keys and only saves the connection if Safaricom accepts them.
5. Turn on the toggle beside the M-Pesa name to show it at checkout, then click **Save Changes**.
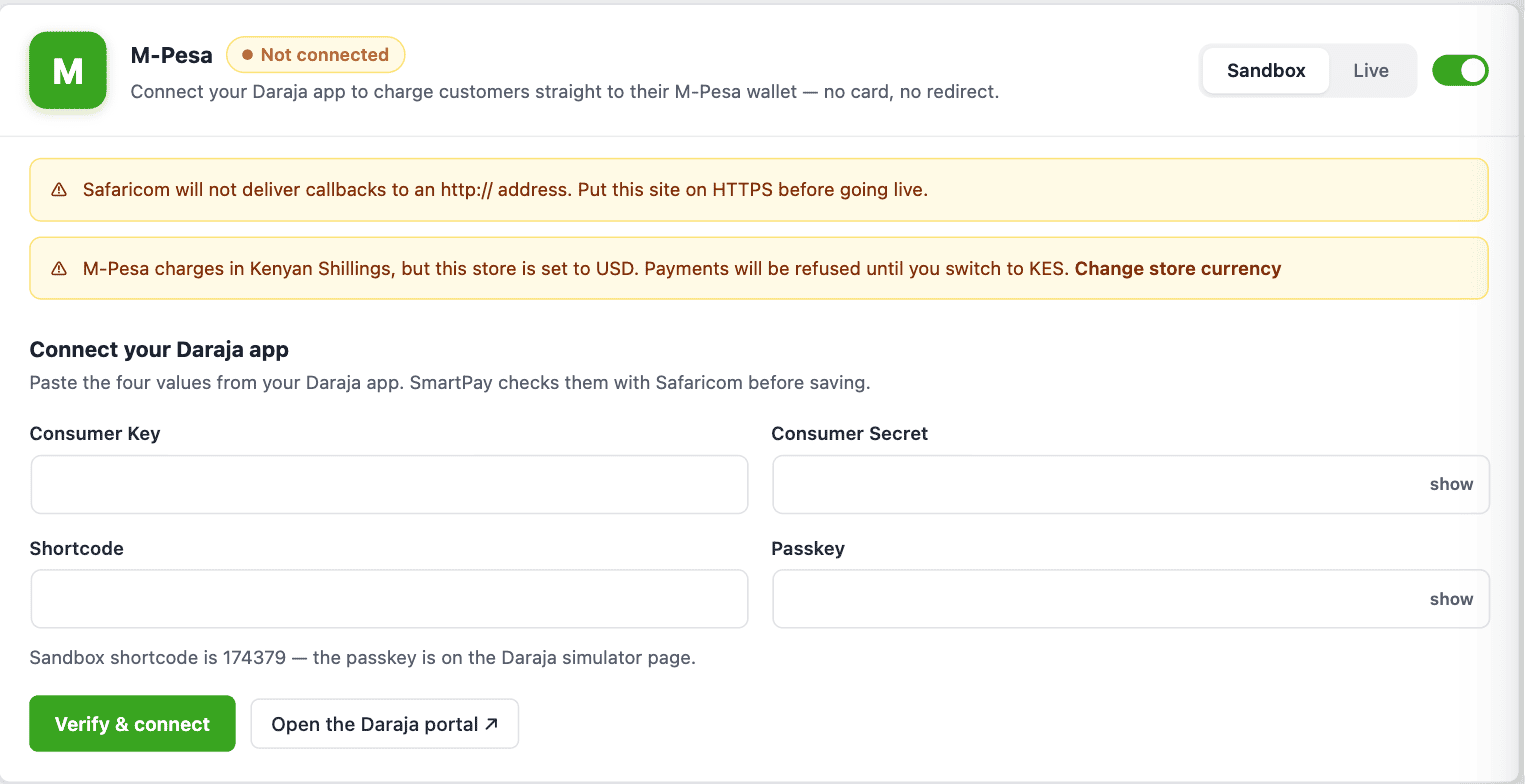 Enter the four values from your Daraja app, then click Verify & connect. The rest of the settings unlock once Safaricom confirms the keys. > **Note:** The Business Account, Checkout, Refunds and Callbacks cards stay locked until the connection verifies — that is expected, not a bug.
## Step 3 — Set Your Business Account Type
In the **Business Account** card, tell SmartPay how customers pay you:
| Setting | What it does |
|---|---|
| **Paybill** | Customers pay a Paybill number against an account reference. Use this if you have a Paybill. |
| **Buy Goods (Till)** | Customers pay a Till number with no account reference. Also fill in the **Till Number** field. |
| **Account reference** | What the customer sees as the account they paid, up to 12 characters. Leave it empty and SmartPay uses the order number (for example `SP123`), which makes reconciliation on your M-Pesa statement much easier. |
## Step 4 — Give Safaricom Your Callback URL
Safaricom reports the outcome of every payment to a URL on your site. Without it, orders stay Pending until SmartPay's hourly reconciliation catches up.
The **Callbacks & Security** card lists three URLs, each with a copy button:
| URL | Used for |
|---|---|
| **STK Push result** | The outcome of a checkout payment. This is the one that matters for normal orders. |
| **C2B confirmation** | Payments customers make to your Paybill directly from their handset, outside your checkout. |
| **C2B validation** | Asked before Safaricom accepts a direct Paybill payment, if external validation is enabled on your shortcode. |
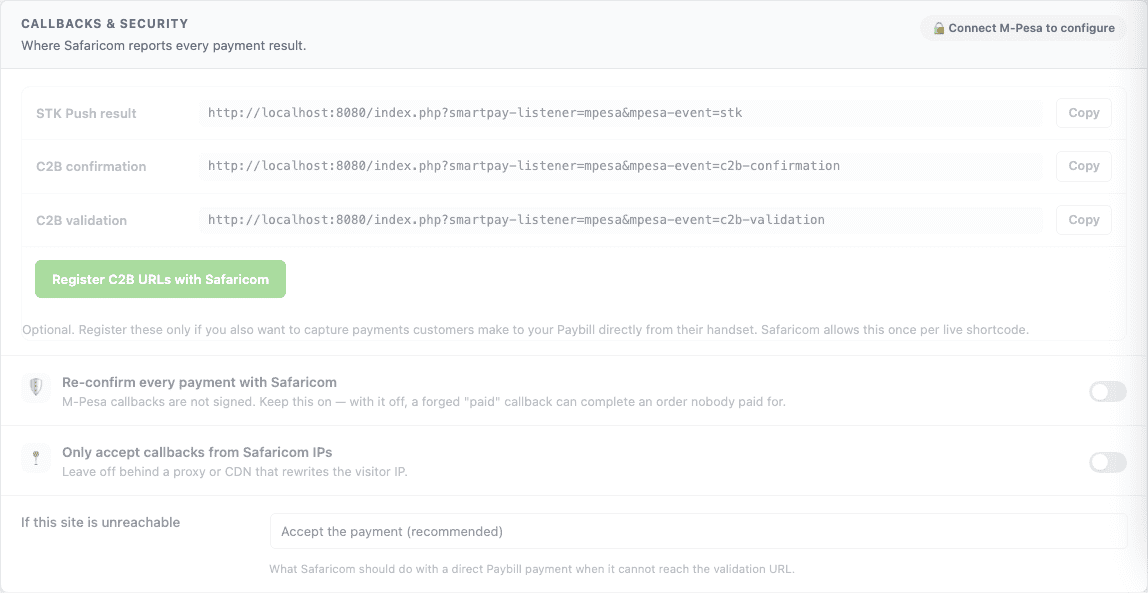 Copy the STK Push result URL into your Daraja app. The C2B URLs are optional — register them only if you also take direct Paybill payments. The STK Push result URL is sent to Safaricom automatically with every payment request, so there is nothing to paste for normal checkout payments. Some Daraja apps also ask for a default callback URL in the portal — if yours does, use the same STK Push result URL.
### Registering the C2B URLs (optional)
If you also want SmartPay to see payments customers make to your Paybill straight from their phone, click **Register C2B URLs with Safaricom** in the same card.
> **Note:** Safaricom allows C2B URLs to be registered only once per live shortcode. Changing them later means contacting Safaricom support, so register from your final production domain — not a staging site.
## Step 5 — Test in Sandbox
With the Sandbox switch on and sandbox keys saved:
1. Open a page with a SmartPay payment form.
2. Choose **M-Pesa** and enter a Safaricom test number in the phone field — Daraja's sandbox test number is `254708374149`.
3. Click **Pay**. SmartPay shows a "Check your phone" panel with a countdown while it waits.
4. Sandbox does not ring a real handset. Confirm the request from the Daraja portal's **M-Pesa Express Simulate** page, or wait for the sandbox to auto-resolve it.
5. The payment appears under **SmartPay → Payments** with the M-Pesa receipt number as its transaction ID.
The phone field accepts any format a Kenyan customer is likely to type — `0712345678`, `+254 712 345 678`, or `254712345678` all work. A number that is not a Safaricom line is rejected in the browser before an order is created.
## What the Customer Sees
1. They pick M-Pesa and type their phone number.
2. They press Pay, and a PIN prompt appears on their handset within a few seconds.
3. Your checkout shows "Check your phone" with the amount and a countdown.
4. They enter their M-Pesa PIN. The checkout confirms the payment and sends them to your receipt page.
If the prompt never arrives, the panel tells them to dial `*334#` and pay manually. If they cancel, run out of balance, or enter the wrong PIN, they see the exact reason and a **Try again** button rather than a generic failure.
## Settings Reference
| Setting | What it does |
|---|---|
| **How long to wait** | How long the checkout waits for the customer to enter their PIN before offering a retry. 90 seconds suits most stores. |
| **Checkout instructions** | Replaces the default wording shown under the phone-number field. |
| **Refund through M-Pesa** | When a payment is marked Refunded in SmartPay, request an M-Pesa reversal automatically. Off by default. See Refunds below. |
| **Re-confirm every payment with Safaricom** | M-Pesa does not sign its callbacks, so SmartPay asks Safaricom to confirm a payment before completing the order. **Keep this on** — see the warning below. |
| **Only accept callbacks from Safaricom IPs** | Extra hardening. Leave it off if your site sits behind a proxy or CDN that rewrites the visitor IP, or genuine callbacks will be dropped. |
| **If this site is unreachable** | What Safaricom should do with a direct Paybill payment when it cannot reach your validation URL. Accepting is recommended — rejecting bounces the customer's money. |
> **Why "Re-confirm every payment" matters:** Safaricom does not sign its callbacks, and the id that identifies a payment is handed to the customer's own browser. Re-confirmation is therefore the only thing separating a real payment from a forged one. With the setting off, anyone who can reach your site can post a fake "paid" callback and complete an order nobody paid for.
>
> Turning it off does not make slow or unreliable hosting safer, either. If SmartPay cannot reach Safaricom, the payment simply stays *Pending* and the hourly reconciliation settles it once Safaricom answers — a delay of up to an hour, not a lost sale.
## Refunds
M-Pesa has no refund button. The equivalent is a **Reversal**, which is a privileged operation that needs extra credentials. You have two options.
### Refund manually (simplest)
Leave **Refund through M-Pesa** off, reverse the transaction in your M-Pesa Org portal, then mark the payment Refunded in **SmartPay → Payments** to keep your records straight.
### Refund from SmartPay
To have SmartPay request the reversal for you, fill in the **Refunds** card:
1. **Initiator Name** — the API operator username created in your M-Pesa Org portal. In sandbox this is `testapi`.
2. **Initiator Password** — that operator's password. SmartPay encrypts it with Safaricom's certificate before sending; it is never transmitted as-is.
3. **Certificate** — download `SandboxCertificate.cer` or `ProductionCertificate.cer` from the Daraja portal and paste its contents here.
4. Turn on **Refund through M-Pesa** and save.
Marking a payment Refunded now sends a reversal request to Safaricom. Reversals are asynchronous — Safaricom accepts the request first and reports the real outcome minutes later, so check your M-Pesa statement to confirm the money actually moved.
## Supported Currency
M-Pesa charges in **KES** only. If your store currency is anything else, the M-Pesa settings screen warns you and payments are refused. Change the currency under **SmartPay → Settings → General**.
## Limits
| Limit | Value |
|---|---|
| Minimum payment | KES 1 |
| Maximum per transaction | KES 250,000 |
| Account reference length | 12 characters |
## Subscriptions
SmartPay does not take recurring M-Pesa payments yet. The checkout uses STK Push, where every charge needs the customer to enter their PIN on their handset — so your store cannot charge them again on a schedule the way it can with a saved card.
A subscription checkout on M-Pesa is therefore refused with a message asking the customer to pick another payment method. Enable a card gateway such as [Stripe](https://docs.wpsmartpay.com/en/stripe) alongside M-Pesa if you sell subscriptions. One-off payments work normally.
Safaricom does have a recurring product — **M-Pesa Ratiba**, the Standing Order API — but it works differently from a card subscription, and support for it is not built into SmartPay:
| | Card subscription | M-Pesa Ratiba |
|---|---|---|
| Who starts each payment | Your store, when the renewal is due | Safaricom, on the customer's standing order |
| Amount | Can change — upgrades, proration, usage | Fixed when the standing order is set up |
| Schedule | Any billing period you define | Daily, weekly, monthly or yearly |
| Cancelling | You or the customer, and your store is told | The customer can cancel it from their M-Pesa menu |
| Availability | Any account | A commercial API — needs separate Safaricom approval |
> **Note:** If you need M-Pesa standing orders, contact about M-Pesa Ratiba access, and let us know — it is on the roadmap and merchant demand decides when it gets built.
## Common Errors & Fixes
* **"M-Pesa rejected these API credentials"** — the Consumer Key and Secret do not match, or they belong to the other environment. Sandbox keys never work in live mode and vice versa.
* **Payments stay Pending** — either Safaricom could not reach your callback URL, or it arrived but SmartPay could not re-confirm it with Safaricom (an unconfirmed payment is deliberately left pending rather than completed). Check that your site is on HTTPS on port 443, is publicly reachable, and is not behind a maintenance-mode plugin or IP allowlist; then check the debug log for a failed STK Query, which points at outbound connections from your host rather than inbound ones. Either way SmartPay reconciles pending payments hourly, so they correct themselves — the callback is what makes it instant.
* **"That does not look like a Safaricom number"** — the number is not a Kenyan mobile line. Safaricom numbers start `07` or `01` after the leading zero.
* **"We could not reach your phone"** (result 1037) — the handset was off, out of coverage, or the customer ignored the prompt. They can retry.
* **"You have another M-Pesa transaction in progress"** (result 1001) — the customer has an unfinished M-Pesa session. They should finish or cancel it, then retry.
* **"M-Pesa rejected the request payload"** — usually a wrong Shortcode or Passkey pairing, or Account Type set to Till without a Till number. Re-check the Business Account card.
* **Callbacks are being dropped** — if you turned on **Only accept callbacks from Safaricom IPs** and your site is behind Cloudflare or a load balancer, the source IP SmartPay sees is the proxy's, not Safaricom's. Turn the setting off.
## Where to Look When Something Goes Wrong
* **SmartPay → Payments** — the payment's status and its M-Pesa receipt number.
* The debug log — every M-Pesa request, callback and reconciliation is recorded there. See [Using the Debug Log](https://docs.wpsmartpay.com/en/debug-log).
* The Daraja portal's **API Logs** — Safaricom's own record of what it sent you and what your site answered.
# Manual / Offline Payments
The Manual / Offline gateway in WP SmartPay lets customers submit a payment form without any real-time card processing. Instead, the form collects their details and signals intent to pay — you then collect payment separately (bank transfer, cash, cheque, etc.) and mark the payment completed in the admin.
## When to Use Manual Payments
* Bank transfer or wire payment acceptance
* Cash on delivery arrangements
* Cheque payments by mail
* Purchase order (PO) workflows where invoicing comes before payment
* Internal recording of offline transactions
## Enabling Manual Payments
1. Go to **SmartPay → Settings → Payment Gateways**.
2. Find **Manual / Offline** and tick **Enable**.
3. Enter an **Instructions** message — this is displayed to the customer at checkout and on their payment receipt. Use it to tell them how to send payment (e.g., "Please transfer to Bank Account: IBAN XX00 … Reference: Your Order ID").
4. Click **Save Settings**.
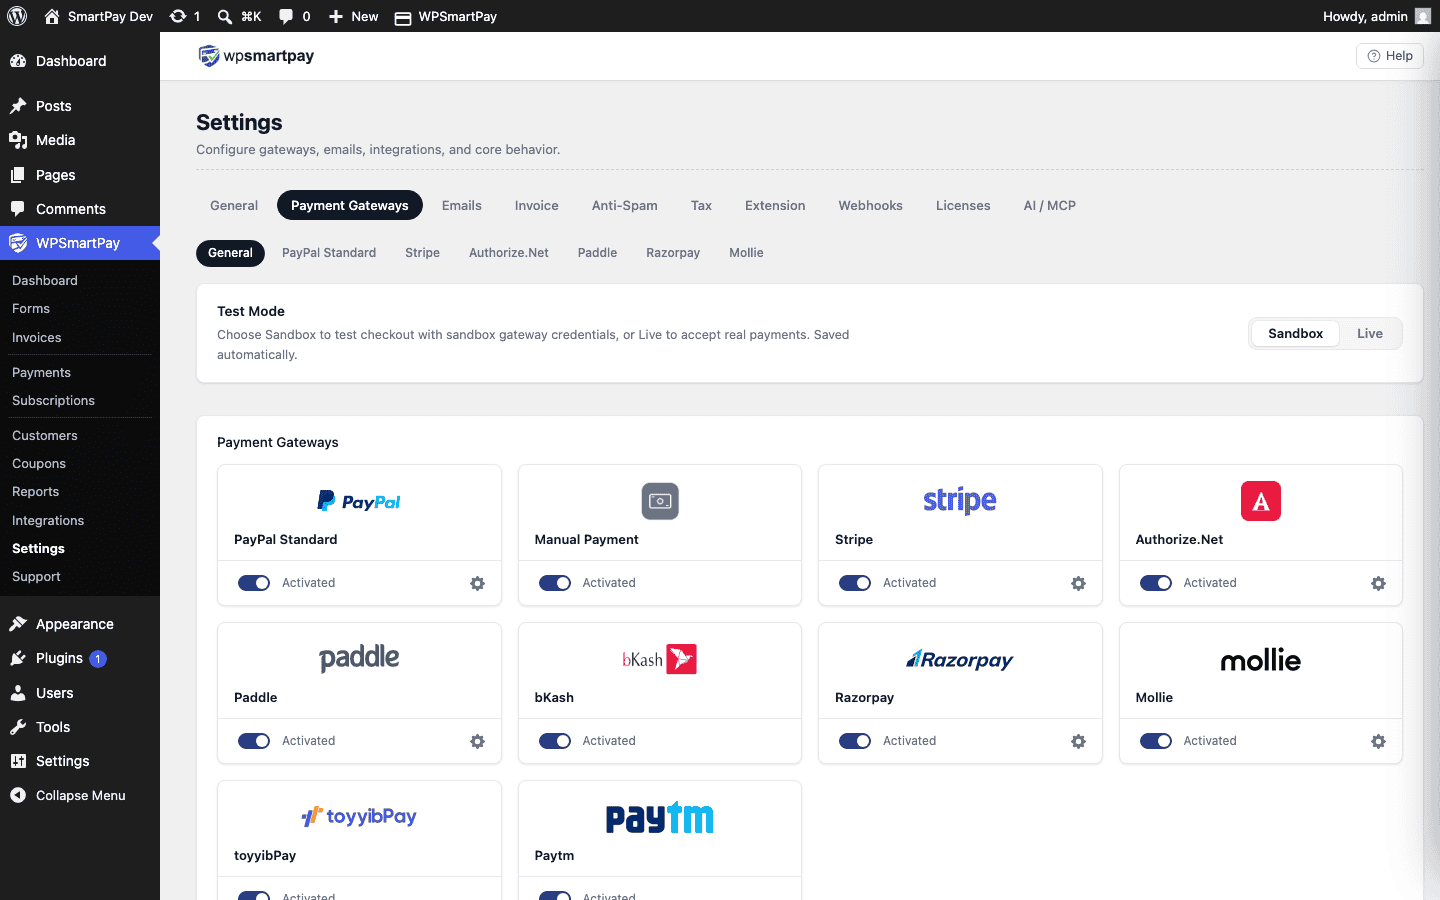 Enable Manual/Offline in Gateway Settings and add payment instructions for your customers.## Customer Experience
1. The customer fills in their name and email on the payment form.
2. They click the pay button.
3. SmartPay creates a payment record with status **Pending**.
4. The customer sees the instructions you entered — telling them how to send payment.
5. They receive a receipt email with the same instructions.
## Completing the Payment
Once you confirm payment has been received outside SmartPay:
1. Go to **SmartPay → Payments** and find the pending payment.
2. Open the payment detail page.
3. Click **Mark as Completed**.
The payment status changes to Completed. Any integrations tied to the payment (LMS enrolment, email sync, invoice, webhook) fire at this point — not when the form was submitted.
## No API Keys Required
The Manual gateway requires no API credentials. It is available in both the free and Pro versions of WP SmartPay. Pro adds the ability to create manual payments directly from the admin (**SmartPay → Payments → New Payment**) without requiring a customer to submit a form.
> **Tip:** Use Manual payments with the Pro Invoice feature — create an invoice, send it to the customer, and let them pay via bank transfer. When you receive payment, mark the invoice Paid and the SmartPay payment status updates automatically.
# Manually Creating a Payment (Pro)
WP SmartPay Pro lets you record payments that were collected outside the normal checkout flow — cash payments, bank transfers, cheques, or any arrangement where the customer paid you directly and you want a record in SmartPay.
## When to Use Manual Payments
* Cash or bank transfer payments you receive offline.
* Payments negotiated directly with a customer at an event.
* Migrating historical payment records from another system.
* Creating a record so the associated integrations (invoice, email, LMS enrolment) fire automatically.
## Creating a Manual Payment
1. Go to **SmartPay → Payments**.
2. Click **New Payment** (top right of the list).
3. A panel or modal opens for entering payment details.
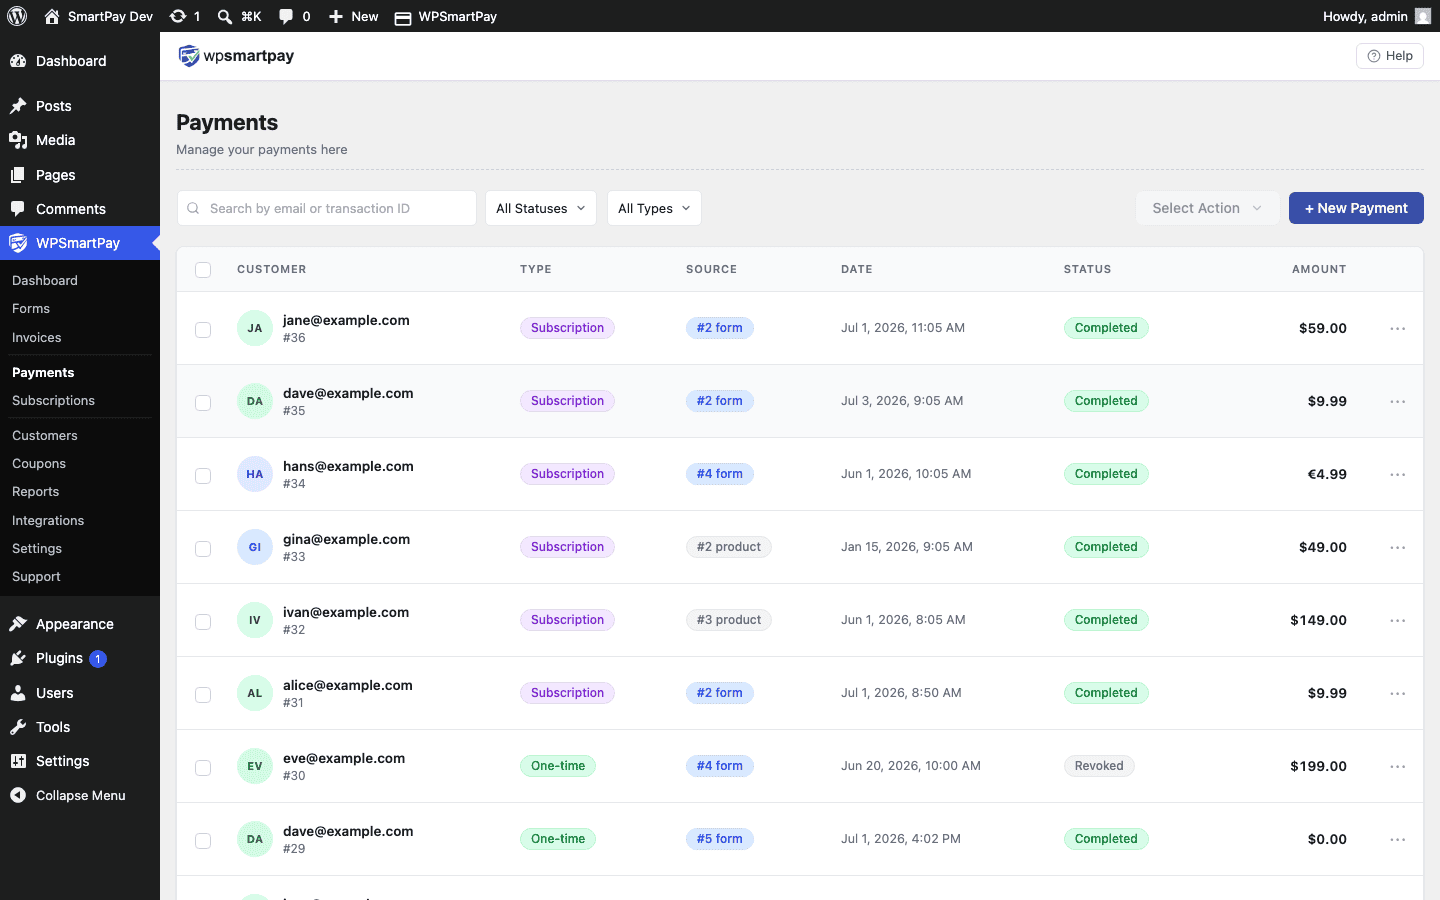 The Payments list — click New Payment to record an offline or manual transaction.## Required Fields
* **Customer** — Search for an existing customer by email or name, or enter a new email to create a customer record on the fly.
* **Form** — Select the payment form this payment is associated with. The form determines which integrations fire after the payment is saved (enrolment, email, invoice).
* **Amount** — The total amount received.
* **Gateway** — Select **Manual / Offline** (available in all SmartPay installs for exactly this purpose).
* **Status** — Usually set to **Completed** immediately since you already received the money.
* **Date** — When the payment was actually received (can be backdated).
## After Saving
Once you click **Save Payment**:
* The payment appears in the Payments list with status Completed.
* Customer revenue totals are updated.
* If the form has integrations (LMS enrolment, email marketing sync, etc.), those fire just as they would for an online checkout.
* A payment receipt is generated and can be viewed from the payment detail page.
> **Note:** Manual payments use the **Manual / Offline** gateway internally. No money moves through a payment processor — you are simply creating an administrative record of a payment you have already received.
# Installing the MCP Adapter Plugin
The **MCP Adapter** is a free WordPress plugin from the official WordPress GitHub organization that exposes WP SmartPay's 15 AI abilities over HTTP, making them available to AI assistants like Claude. WP SmartPay Pro registers the abilities; the MCP Adapter is the bridge that lets AI clients discover and call them.
> **Note:** The MCP Adapter is not on the WordPress.org plugin directory. It lives at [github.com/WordPress/mcp-adapter](https://github.com/WordPress/mcp-adapter). You can install it in one click from the SmartPay settings page, or manually from the GitHub release.
## Before You Start
* WP SmartPay Pro installed and licensed
* WordPress 6.5 or later
* PHP 8.1 or later
## Method 1 — One-Click Install from SmartPay Settings
This is the fastest path. SmartPay downloads and activates the MCP Adapter for you directly from the settings page.
1. Go to **WPSmartPay → Settings → AI / MCP**.
2. On the **MCP Connection** tab, look at the **Connection Status** card. If the MCP Adapter is not yet installed, you will see a gray dot labeled *"MCP Adapter not installed"* and an **Install MCP Adapter** button.
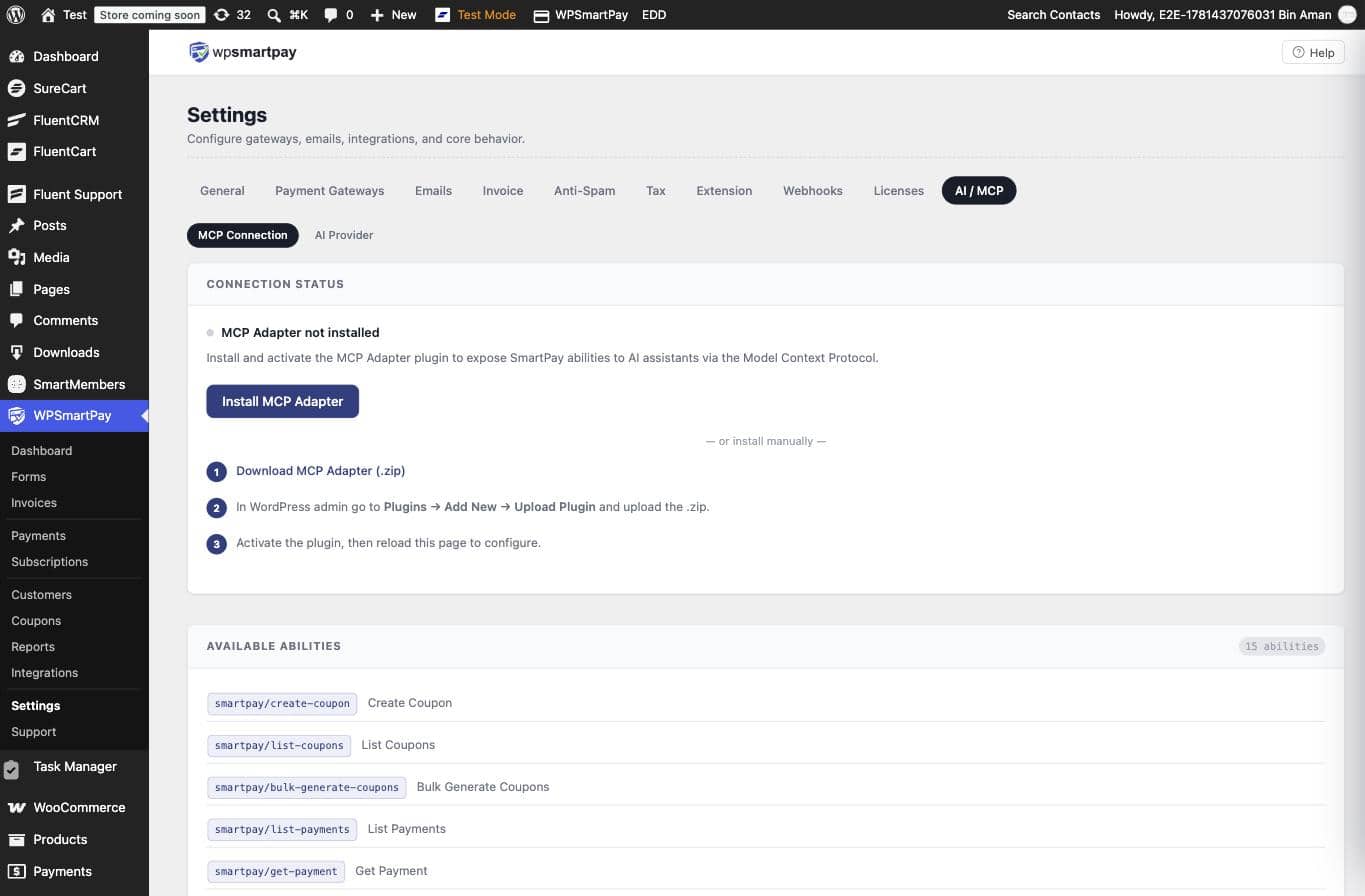The Connection Status card when the MCP Adapter is not installed. Click Install MCP Adapter to install and activate in one step.1. Click **Install MCP Adapter**. SmartPay downloads the latest release from GitHub, installs, and activates the plugin automatically.
2. The page refreshes. The Connection Status card now shows a green dot: *"MCP Adapter active"*. Your MCP endpoint URL is displayed in the card — copy it for use in Claude Code or Claude Desktop.
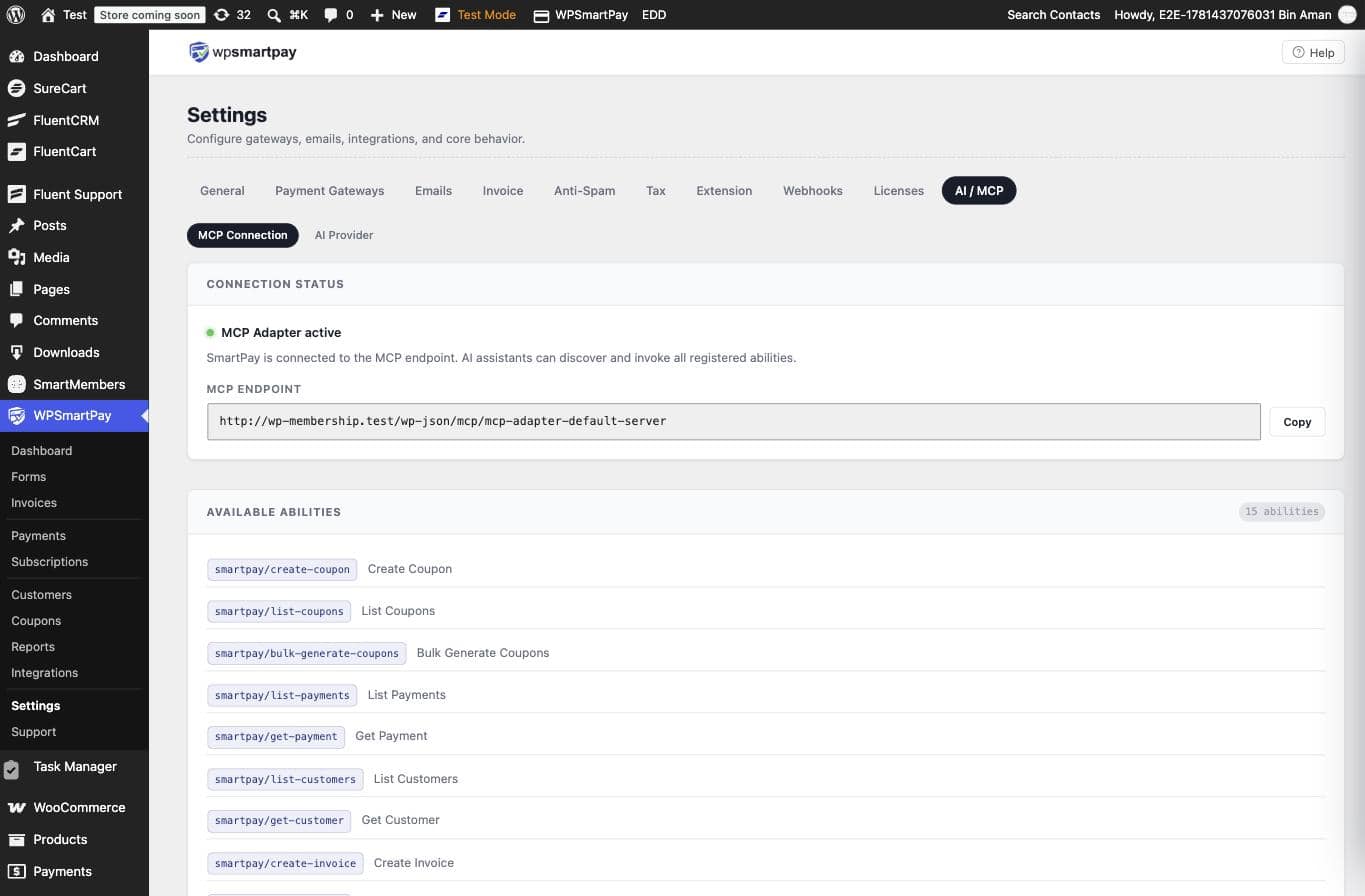After installation — green dot confirms the MCP Adapter is active and all 15 abilities are available. Copy the endpoint URL from this card.## Method 2 — Manual Install from GitHub
Use this method if your server cannot reach external URLs, or if you prefer to install plugins manually.
1. Go to **WPSmartPay → Settings → AI / MCP → MCP Connection**. In the Connection Status card, click **Download MCP Adapter (.zip)**. This links directly to the latest release ZIP on GitHub: `https://github.com/WordPress/mcp-adapter/releases/latest.`
2. In your WordPress admin, go to **Plugins → Add New Plugin**, then click **Upload Plugin** at the top of the page.
The WordPress plugin upload page — click Choose File, select the downloaded mcp-adapter.zip, then click Install Now.1. Click **Choose File**, select the `mcp-adapter.zip` you downloaded, then click **Install Now**.
2. After installation completes, click **Activate Plugin**.
3. Return to **WPSmartPay → Settings → AI / MCP**. The Connection Status card now shows the green dot and your MCP endpoint URL.
## After Installation
Once the MCP Adapter is active, the **Connection Status** card shows:
* A **green dot** labeled *"MCP Adapter active"*
* Your **MCP Endpoint URL** — the address AI clients use to discover and invoke SmartPay abilities
The **Available Abilities** card below it lists all 15 registered abilities. Copy the endpoint URL and follow the [MCP Integration guide](https://docs.wpsmartpay.com/en/mcp-integration-sp) to connect Claude Code or Claude Desktop to your store.
## Keeping the Plugin Updated
The MCP Adapter is hosted on GitHub, not WordPress.org, so it does not appear in the standard WordPress plugin update flow. To update it:
* **One-click (recommended):** Go to **Settings → AI / MCP** and use the **Install MCP Adapter** button — it always fetches the latest release and overwrites the existing version.
* **Manual:** Download the latest ZIP from [github.com/WordPress/mcp-adapter/releases/latest](https://github.com/WordPress/mcp-adapter/releases/latest) and upload via **Plugins → Add New → Upload Plugin**. WordPress will prompt you to overwrite the existing plugin.
## Frequently Asked Questions
### Why is the MCP Adapter a separate plugin?
The MCP Adapter is a shared transport layer maintained by the WordPress project. Keeping it separate means any plugin can register abilities with it — not just SmartPay — and updates to the transport do not require SmartPay Pro to release a new version.
### The Install button shows an error. What do I do?
The one-click installer requires your server to fetch files from `github.com`. If that is blocked by a firewall or restrictive hosting, use Method 2 (manual install) instead: download the ZIP on your local machine and upload it through WordPress.
### Is the MCP Adapter free?
Yes — it is an open-source plugin published by the WordPress project at [github.com/WordPress/mcp-adapter](https://github.com/WordPress/mcp-adapter) under an open-source license. There is no cost to install or use it.
### Can I use the MCP Adapter with other plugins?
Yes. The MCP Adapter exposes any abilities registered via the WordPress Abilities API — other plugins can register their own. Installing it for SmartPay does not prevent other plugins from using it at the same time.
### Will the MCP Adapter appear in my plugin update list?
No. WordPress checks for updates via the wp.org directory; GitHub-hosted plugins are not checked automatically. Use the Install button in SmartPay settings or check the GitHub releases page to stay up to date.
# AI / MCP Settings
WP SmartPay Pro integrates with the **Model Context Protocol (MCP)** — an open standard that lets AI assistants like Claude read and act on your payment data. Once connected, you can ask questions in plain English: "Show me this week's payments over $100", "Create a 20% off coupon expiring July 31", or "Cancel subscription #42".
## How It Works
SmartPay Pro registers 15 AI abilities using the WordPress Abilities API. A separate plugin — the **MCP Adapter** — exposes those abilities to AI clients over an HTTP endpoint. Authentication uses a standard **WordPress Application Password**, so no extra API keys or tokens are needed.
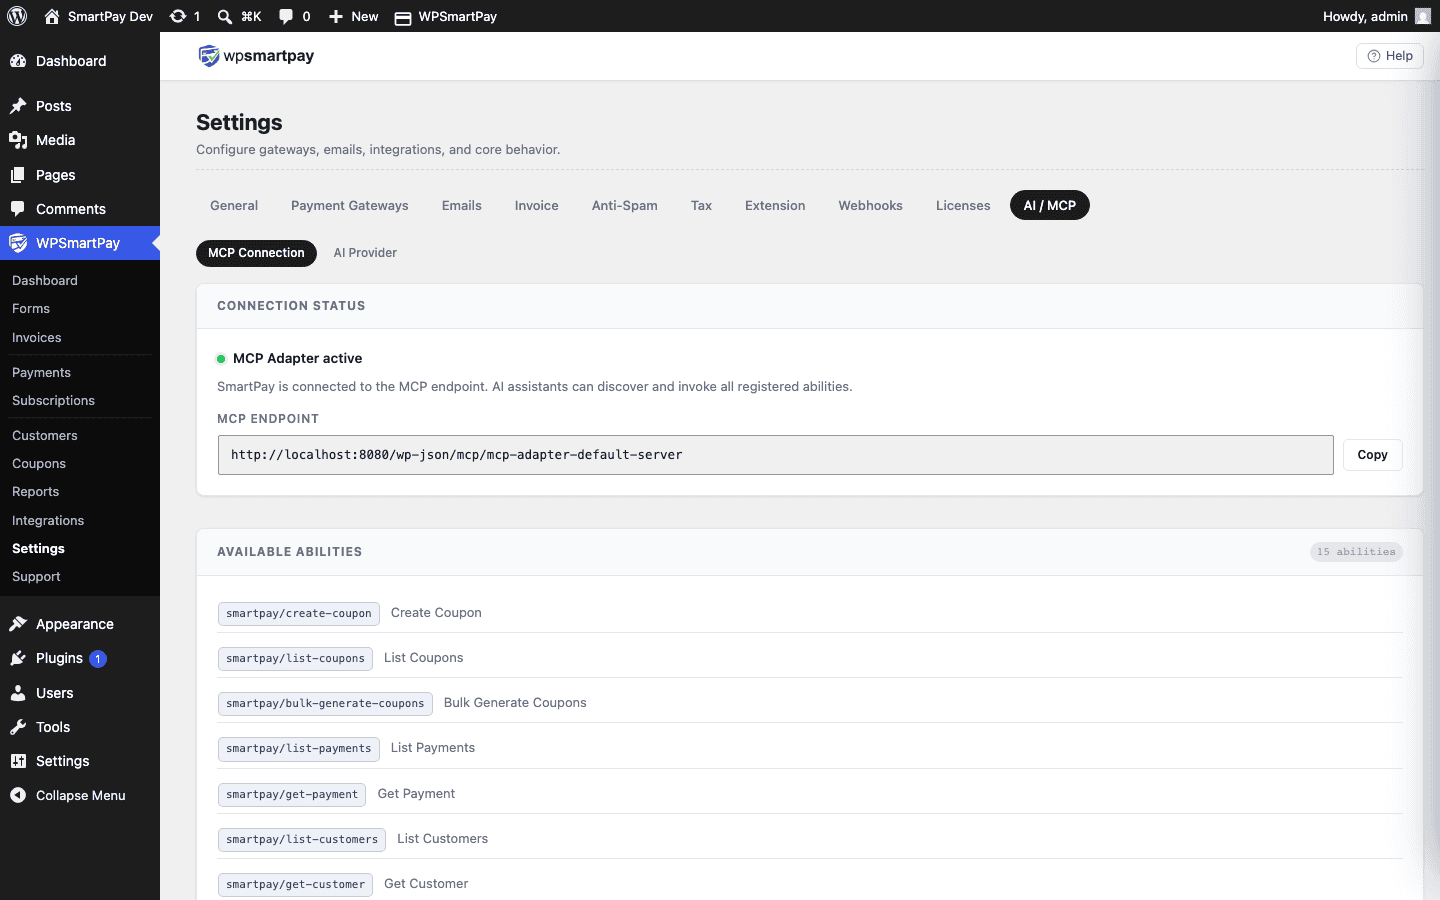The AI / MCP settings page showing the connection status, endpoint URL, and the 15 available abilities.## Step 1 — Install the MCP Adapter
Go to **SmartPay → Settings → AI / MCP**. If the MCP Adapter is not yet installed, the Connection Status card shows a red dot and an **Install MCP Adapter** button.
1. Click **Install MCP Adapter**. SmartPay downloads and activates the plugin automatically.
2. The page reloads. The status dot turns green — **MCP Adapter active** — and the endpoint URL appears.
> **Manual install:** If the one-click installer fails, download the plugin from [GitHub](https://github.com/WordPress/mcp-adapter/releases/latest/download/mcp-adapter.zip), then go to **Plugins → Add New → Upload Plugin** and upload the .zip.
## Step 2 — Create an Application Password
The MCP endpoint uses a **WordPress Application Password** for authentication — no separate API token required.
1. Go to **Users → Profile** (or **Users → All Users** → click your admin account).
2. Scroll to the **Application Passwords** section.
3. Enter a name (e.g. `Claude MCP`) and click **Add New Application Password**.
4. Copy the generated password — it is shown only once.
> **Note:** Application Passwords require HTTPS on your site. If your site runs on HTTP, Application Passwords are disabled by WordPress.
## Step 3 — Connect Your AI Client
Copy the **MCP Endpoint URL** from the Connection Status card. It looks like:
```typescript
https://yoursite.com/wp-json/mcp/mcp-adapter-default-server
```
### Claude Code (terminal)
Run the one-liner shown on the settings page. Replace the URL with your endpoint, then enter your WordPress username and Application Password when prompted for authentication:
```typescript
claude mcp add smartpay --transport http "https://yoursite.com/wp-json/mcp/mcp-adapter-default-server"
```
Claude Code stores the server and it is available in every project on that machine.
### Claude Desktop
1. Open Claude Desktop and go to **Settings → Developer → Edit Config**. This opens `claude_desktop_config.json` in your editor.
2. Copy the config snippet from the settings page and paste it into the file:
```typescript
{
"mcpServers": {
"smartpay": {
"url": "https://yoursite.com/wp-json/mcp/mcp-adapter-default-server",
"type": "streamable-http"
}
}
}
```
1. Add your WordPress Application Password as a bearer token in the `headers` field, or enter it when Claude Desktop prompts for credentials.
2. Save the file and restart Claude Desktop.
## Available Abilities
SmartPay registers 15 abilities that your AI assistant can call. All abilities are read-only except where noted.
| Ability | What it does |
|---|---|
| `smartpay/list-payments` | List payments with filters (status, gateway, search by email/name) |
| `smartpay/get-payment` | Get full details of a single payment by ID |
| `smartpay/list-customers` | List customers with optional search |
| `smartpay/get-customer` | Get a customer profile and their recent payments |
| `smartpay/list-subscriptions` | List subscriptions with status filter |
| `smartpay/cancel-subscription` | Cancel an active subscription **(write)** |
| `smartpay/list-invoices` | List invoices with status filter |
| `smartpay/create-invoice` | Create a draft invoice for a customer **(write)** |
| `smartpay/send-invoice` | Send a draft invoice to the customer by email **(write)** |
| `smartpay/list-coupons` | List coupons with usage data |
| `smartpay/create-coupon` | Create a single coupon code **(write)** |
| `smartpay/bulk-generate-coupons` | Generate multiple unique coupon codes at once **(write)** |
| `smartpay/list-forms` | List all payment forms |
| `smartpay/get-form` | Get a single form by ID |
| `smartpay/create-form` | Create a new payment form with pricing options **(write)** |
## Example Prompts
Once connected, try these in Claude:
* "Show me all failed payments this month."
* "Who are my top 5 customers by total amount paid?"
* "Create a 20% off coupon called SUMMER2026 with no expiry."
* "List all active subscriptions."
* "Cancel subscription ID 42."
* "Create a draft invoice for john@example.com for $299."
* "List all payment forms and their IDs."
## Security
The MCP endpoint is protected by your WordPress Application Password — the same credential system WordPress uses for its REST API. Keep it secure:
* Use a dedicated Application Password for MCP (not your login password).
* If a password is compromised, revoke it from your user profile — only that password is affected.
* Write abilities (create coupon, cancel subscription, etc.) require the same admin permissions as doing those actions in the WordPress dashboard.
* The endpoint only works over HTTPS — plain HTTP requests are rejected by WordPress.
## Troubleshooting
### Status dot stays red after install
Hard-reload the settings page (Ctrl+Shift+R / Cmd+Shift+R). If the dot is still red, go to **Plugins** and confirm that **MCP Adapter** is listed and active.
### AI client shows "Unauthorized"
Your Application Password may be wrong or the user may lack the `manage_options` capability. Regenerate the password, and make sure you are using an Administrator-level account.
### Abilities not appearing in Claude
Restart the AI client after adding the MCP server. In Claude Desktop, a full quit-and-reopen is required. In Claude Code, run `claude mcp list` to confirm the server is registered.
### HTTPS required
WordPress Application Passwords are disabled on sites without HTTPS. Install an SSL certificate and ensure your site URL in **Settings → General** starts with `https://`.
# MCP Integration — Connect AI Assistants to Your Store
WP SmartPay Pro includes built-in support for the **Model Context Protocol (MCP)** — an open standard that lets AI assistants like Claude read and act on your store data securely. Once connected, Claude can create coupons, query payments, manage invoices, and more — in plain English, directly from the chat.
## Prerequisites
You need the following before connecting an AI assistant to your store:
* **WP SmartPay Pro** with an active license
* **MCP Adapter plugin** — a free WordPress plugin that exposes SmartPay abilities over HTTP. Install it from the WordPress plugin directory.
* **WordPress Application Password** — used as the bearer token for authentication. No separate API key needed.
* **Claude Code or Claude Desktop** — the AI client you connect to the endpoint
> **Note:** SmartPay registers all 15 abilities but cannot expose them over HTTP on its own. You must install and activate the **MCP Adapter** plugin. The Settings page will show a "Find MCP Adapter" button if the plugin is not detected.
## Settings Page
Navigate to **WPSmartPay → Settings → AI / MCP** to find the four configuration cards.
The AI / MCP settings page with four cards: Connection Status, Available Abilities, Connect Claude Code, and Connect Claude Desktop.### Connection Status
Shows whether the MCP Adapter plugin is active. A gray dot means the plugin is not installed; a green dot means it is connected and ready. Click **Find MCP Adapter** to search the WordPress plugin directory and install it in one step.
### Available Abilities
Lists all 15 registered abilities with their `smartpay/`-namespaced identifiers. The count badge confirms how many are active. This card is always visible — even before the MCP Adapter is installed.
### Connect Claude Code and Connect Claude Desktop
Both cards provide ready-to-paste commands pre-filled with your site's MCP endpoint URL. See the connection sections below for step-by-step instructions.
## Available Abilities
All 15 abilities use the `smartpay/` namespace. They are always registered — the MCP Adapter exposes them over HTTP once installed.
### Coupons
| Ability | What it does | Required | Optional |
|---|---|---|---|
| `smartpay/create-coupon` | Create a single discount coupon code | code, discount\_type, discount\_amount | expiry\_date, description |
| `smartpay/list-coupons` | List coupons with optional filters. Paginated. | — | search, type, page, per\_page |
| `smartpay/bulk-generate-coupons` | Generate 1–500 unique coupon codes at once | quantity, discount\_type, discount\_amount | prefix, suffix, code\_length, expiry\_date, usage\_limit |
### Payments
| Ability | What it does | Required | Optional |
|---|---|---|---|
| `smartpay/list-payments` | List payments with status, gateway, and search filters. Paginated. | — | status, gateway, search, page, per\_page |
| `smartpay/get-payment` | Retrieve a single payment record with full details | id | — |
### Customers
| Ability | What it does | Required | Optional |
|---|---|---|---|
| `smartpay/list-customers` | List customers with optional search by email or name. Paginated. | — | search, page, per\_page |
| `smartpay/get-customer` | Retrieve a customer profile plus their last 20 payments | id | — |
### Invoices
| Ability | What it does | Required | Optional |
|---|---|---|---|
| `smartpay/create-invoice` | Create a draft invoice. Returns ID, number, and shareable public URL. | customer\_id, amount | due\_date, notes |
| `smartpay/send-invoice` | Mark a draft invoice as sent and email it to the customer | invoice\_id | — |
| `smartpay/list-invoices` | List invoices filtered by status. Paginated. | — | status (draft\|sent\|paid\|void), page, per\_page |
### Subscriptions
| Ability | What it does | Required | Optional |
|---|---|---|---|
| `smartpay/list-subscriptions` | List subscriptions filtered by status (pending, active, cancelled, expired, trialling, failing, completed, suspended). | — | status, page, per\_page |
| `smartpay/cancel-subscription` | Cancel an active subscription | subscription\_id | — |
### Forms
| Ability | What it does | Required | Optional |
|---|---|---|---|
| `smartpay/create-form` | Create a new payment form with one or more pricing amounts | title, amounts\[\] | status (publish\|draft), pay\_label |
| `smartpay/list-forms` | List payment forms with search and status filter. Paginated. | — | search, status, page, per\_page |
| `smartpay/get-form` | Retrieve a form — returns title, status, shortcode, edit URL, and amounts | id | — |
## Connect Claude Code
Claude Code is Anthropic's CLI tool. Run the command from the *Connect Claude Code* card in your terminal — Claude Code discovers all 15 abilities automatically.
1. **Install MCP Adapter.** Go to Settings → AI / MCP and click *Find MCP Adapter*. Install and activate the plugin.
2. **Create a WordPress Application Password.** Go to Users → Your Profile → Application Passwords. Name it "Claude Code" and copy the generated value.
3. **Run the command shown in the settings card:**
```typescript
claude mcp add smartpay --transport http "https://your-site.com/wp-json/mcp/mcp-adapter-default-server"
```
1. **Provide your Application Password as a bearer token** when prompted for authentication headers.
## Connect Claude Desktop
1. Open **Claude Desktop → Settings → Developer → Edit Config**.
2. Paste the snippet from the *Connect Claude Desktop* card into `claude_desktop_config.json`:
```typescript
{
"mcpServers": {
"smartpay": {
"url": "https://your-site.com/wp-json/mcp/mcp-adapter-default-server",
"type": "streamable-http"
}
}
}
```
1. Add your WordPress **Application Password** as a bearer token, then restart Claude Desktop.
## Example Prompts
| What you say to Claude | Ability used |
|---|---|
| *"Create a 20% coupon called SUMMER20, valid until August 31"* | `smartpay/create-coupon` |
| *"Generate 100 unique codes with a PROMO- prefix, 15% off, one use each"* | `smartpay/bulk-generate-coupons` |
| *"Show all Stripe payments from last month"* | `smartpay/list-payments` |
| *"Who is customer #42 and what have they bought?"* | `smartpay/get-customer` |
| *"Create a $150 invoice for customer #12, due in 30 days, and send it"* | `smartpay/create-invoice` + `smartpay/send-invoice` |
| *"List all failing subscriptions"* | `smartpay/list-subscriptions` |
| *"Cancel subscription #88"* | `smartpay/cancel-subscription` |
| *"Create a form called 'Conference Ticket' with $50 and $100 tiers"* | `smartpay/create-form` |
## Authentication
The MCP endpoint uses WordPress **Application Passwords** — available since WordPress 5.6, no extra setup required.
1. Go to **WordPress Admin → Users → Your Profile → Application Passwords**.
2. Enter a name (e.g. "Claude") and click **Add New Application Password**.
3. Copy the generated password — it is shown only once.
4. Use it as the bearer token or HTTP Basic Auth value in your AI client configuration.
> **Security note:** Consider creating a dedicated WordPress user with the minimum required role (e.g. Editor) for AI connections, rather than using your main admin account.
## Frequently Asked Questions
### Do I need an Anthropic API key in SmartPay?
No. SmartPay acts as an MCP server. The AI client handles the Anthropic connection. No API key is stored in SmartPay settings.
### Can I use AI clients other than Claude?
Yes — any MCP-compatible client can connect. The Model Context Protocol is open and not Claude-specific.
### Where is the MCP endpoint URL?
It is pre-filled in both connection cards. Format: `https://your-site.com/wp-json/mcp/mcp-adapter-default-server`
### Why can I see the 15 abilities without the MCP Adapter installed?
SmartPay always registers its abilities so you can preview them. The MCP Adapter plugin exposes them over HTTP — it is not bundled with SmartPay Pro.
### Can the AI delete payments or customer records?
No. The built-in abilities cover create, list, read, cancel subscription, and send invoice only. There is no delete ability.
### How do I disconnect the AI?
Delete or revoke the Application Password from your WordPress user profile. All connections using that credential are immediately invalidated.
# How to Gate Content Behind a Membership Payment
Selling access to premium content — a members-only area, a private course community, or exclusive resources — requires two things: a way to collect recurring payments, and a way to restrict who sees what. WP SmartPay Pro handles the payment side; WordPress membership plugins handle the access side. Together they form a clean membership system without custom code.
## Scenario
A fitness coach offers a monthly membership ($29/month) that grants access to a private workout library and weekly live session replays. New members sign up via a payment form, gain immediate access, and lose it if their subscription is cancelled or payment fails.
## What You Need
* WP SmartPay Pro (subscription billing + webhooks)
* A membership plugin: **Restrict Content Pro**, **WishList Member**, or **LearnDash** (all have SmartPay integrations)
* A gateway that supports recurring billing: Stripe, Mollie, or Paddle
## Step 1: Create the Membership Level
In your membership plugin, create a membership level (e.g., "Fitness Pro Member"). Assign restricted content — pages, posts, course modules — to this level.
## Step 2: Build a Subscription Payment Form
1. Go to **SmartPay → Forms → Add New**.
2. Set the price to $29 with a **Monthly** billing period.
3. Optionally add a 7-day free trial to reduce sign-up friction.
4. Publish the form and embed it on a "Join" or "Pricing" page.
## Step 3: Connect SmartPay to Your Membership Plugin
1. Go to **SmartPay → Extensions**.
2. Find your membership plugin (Restrict Content Pro, WishList Member, etc.) and click **Settings**.
3. Map the SmartPay subscription form to the membership level you created in Step 1.
4. Save settings.
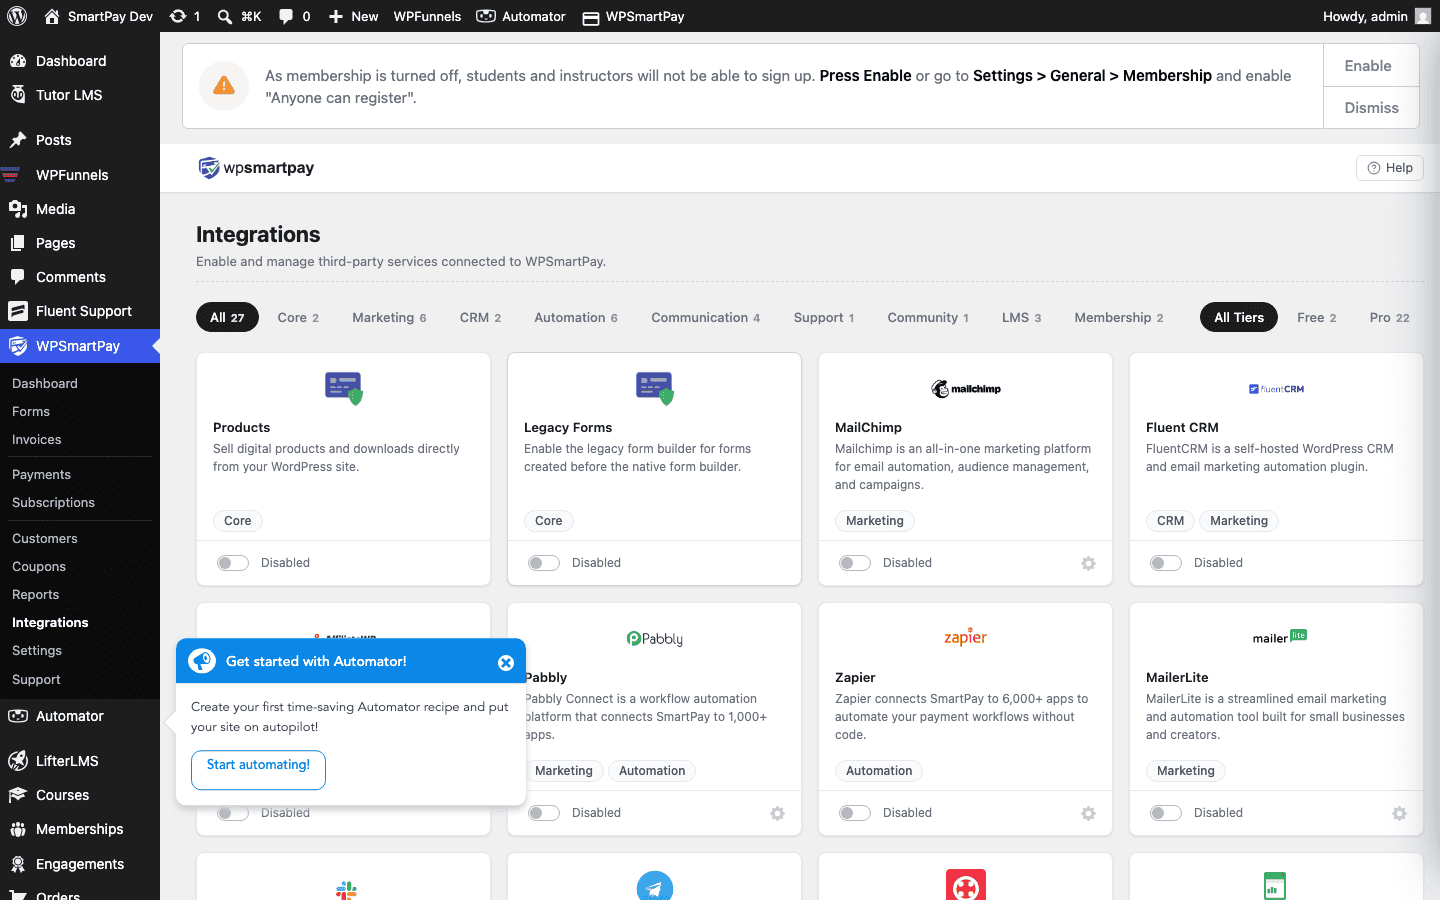 The Extensions page shows all available integrations — activate the one that matches your membership plugin.## Step 4: Test the Flow
1. Enable **Test Mode** in SmartPay General Settings.
2. Submit the form using a test card.
3. Verify the new subscriber appears in **SmartPay → Subscriptions** with Active status.
4. Verify the user gains access to restricted content in your membership plugin.
5. In SmartPay, cancel the test subscription and verify access is revoked.
## How Access Changes Are Handled
| Event | SmartPay action | Membership result |
|---|---|---|
| First payment succeeds | Subscription created (Active) | Access granted |
| Monthly renewal succeeds | Subscription renewed | Access continues |
| Renewal payment fails | Subscription → Failing | Membership plugin suspends access |
| Member cancels | Subscription → Cancelled | Access revoked at period end |
## Result
When a customer submits the payment form, SmartPay creates a subscription and fires the `smartpay_subscription_created` hook. The membership integration listens to this hook and grants the correct membership level. No manual admin work is needed — access follows the subscription status automatically.
## Tips
* Use SmartPay's **Payment Recovery** feature (Reports → Recovery) to automatically retry failed renewal charges and send reminder emails before cancelling access.
* Offer annual membership at a discount using SmartPay coupons — create a coupon for 2 months free and share it on your landing page.
* Add the `[smartpay_subscription_status]` shortcode to a members-only page so logged-in users can see their next billing date.
# Membership Plugin Integrations
WP SmartPay Pro works with dedicated WordPress membership plugins — Restrict Content Pro and WishList Member — to gate any content on your site behind a SmartPay payment or subscription. Unlike LMS integrations, these membership plugins work with any content type: pages, posts, custom post types, and even entire menus.
## Restrict Content Pro
### Setup
1. Install and activate **Restrict Content Pro**.
2. In RCP, go to **Restrict → Membership Levels → Add New** and create your membership level (e.g., "Premium Member").
3. In WordPress, go to **SmartPay → Extensions → Restrict Content Pro → Settings** and activate the integration.
4. Open a SmartPay payment form, go to the **Integrations** tab, and select the RCP Membership Level to grant.
5. Save the form.
### How Content Restriction Works
1. Create or edit a post/page.
2. In the **Restrict Content** meta box (added by RCP), set the access level to "Premium Member".
3. Non-members see a locked message with a link to your payment form.
4. After payment, SmartPay grants the RCP membership level and the user sees the content immediately.
### Subscription Lifecycle Mapping
| SmartPay event | RCP action |
|---|---|
| Subscription created | RCP membership activated |
| Subscription renewed | RCP expiry date extended |
| Subscription cancelled | RCP membership cancelled |
| Subscription failing (payment failed) | RCP membership suspended |
| Refund issued | RCP membership cancelled |
## WishList Member
### Setup
1. Install and activate **WishList Member**.
2. In WishList Member, go to **Setup → Levels** and create a membership level (e.g., "Gold Member").
3. In WordPress, go to **SmartPay → Extensions → WishList Member → Settings** and activate the integration.
4. Open a SmartPay payment form, go to the **Integrations** tab, and select the WishList Member Level to grant.
5. Save the form.
### Restricting Content with WishList Member
1. Edit any post or page.
2. In the **WishList Member** meta box, enable restriction and select the levels with access.
3. Non-members see a customizable "access denied" message.
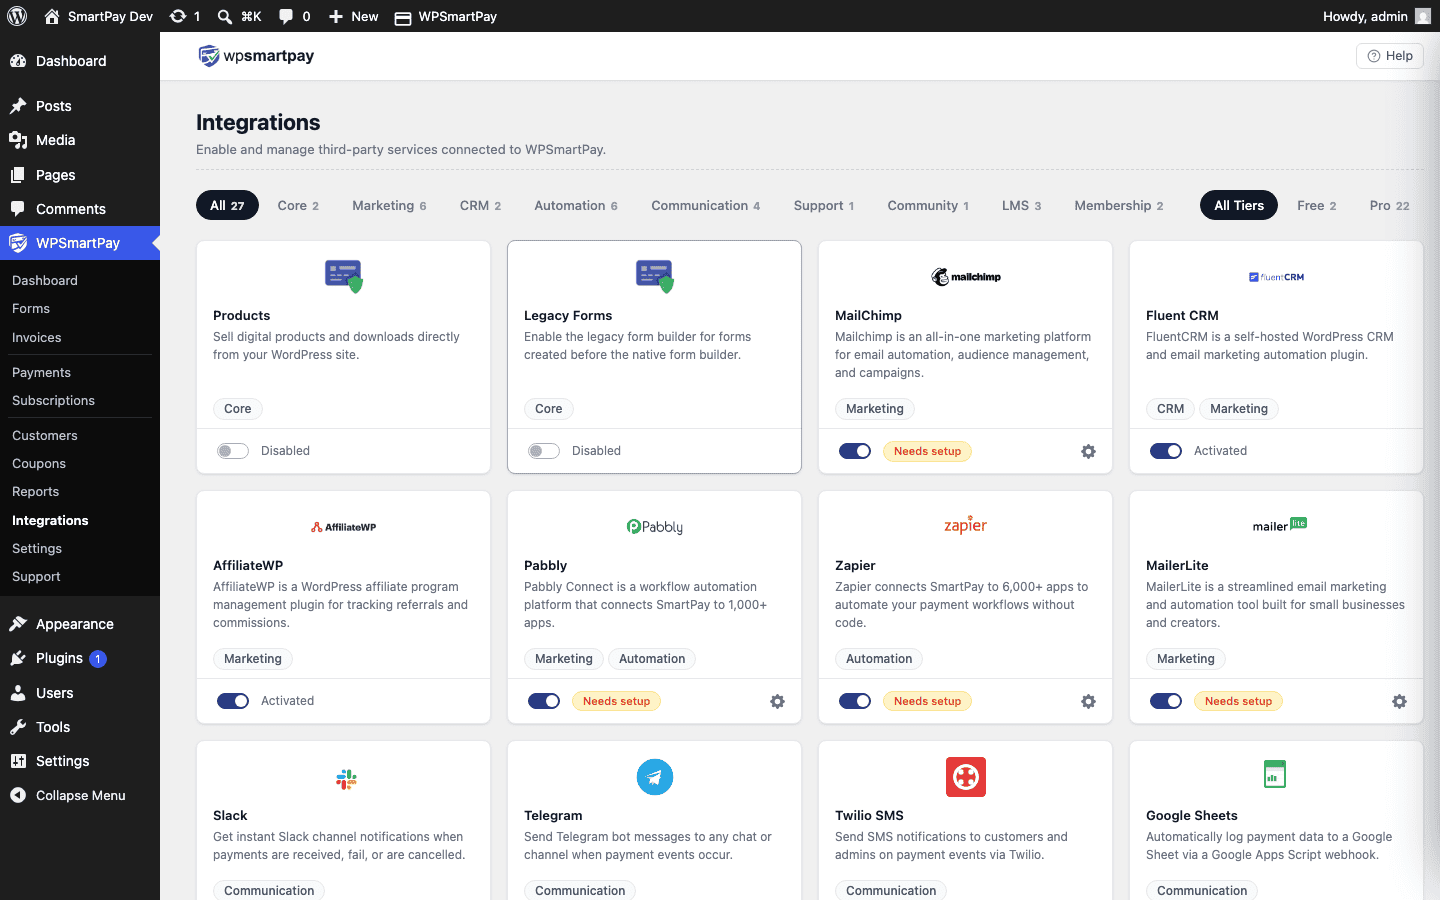 Activate the membership plugin integration from the Extensions page, then link each SmartPay form to a membership level.## Tips
* **Combine LMS + Membership:** You can activate both a LearnDash integration and a Restrict Content Pro integration on the same SmartPay form — the buyer gets enrolled in LearnDash courses AND gains RCP membership access with a single purchase.
* **Grandfathering existing members:** If you already have members on a different payment system, use your membership plugin's bulk-import or admin tools to set their membership level manually — SmartPay only fires hooks for new payments made through SmartPay forms.
* **Access on first payment vs. all renewals:** By default, membership access is granted on the first subscription payment and maintained as long as renewals succeed. You do not need to configure anything special for renewals — the subscription status drives access automatically.
# Mollie
Mollie is a European payment gateway that supports a wide range of local and international payment methods through a single integration. It is especially popular in the Netherlands, Belgium, and Germany. WP SmartPay Pro integrates Mollie using the Mollie Checkout overlay.
## Prerequisites
* A [Mollie account](https://www.mollie.com). Account verification is required to go live.
* Your Mollie API key from the Mollie Dashboard.
* WP SmartPay Pro with a valid license.
## Country Availability
Mollie is available to businesses in the European Economic Area (EEA). It accepts payments from customers worldwide.
## Finding Your Mollie API Key
1. Log in to your [Mollie Dashboard](https://www.mollie.com/dashboard).
2. Go to **Developers → API Keys**.
3. Copy the **Live API key** (starts with `live_`) and the **Test API key** (starts with `test_`).
## Connecting Mollie in SmartPay
1. Go to **SmartPay → Settings → Payment Gateways**.
2. Find **Mollie** and tick **Enable**.
3. Enter your **Live API Key** and **Test API Key**.
4. Click **Save Settings**.
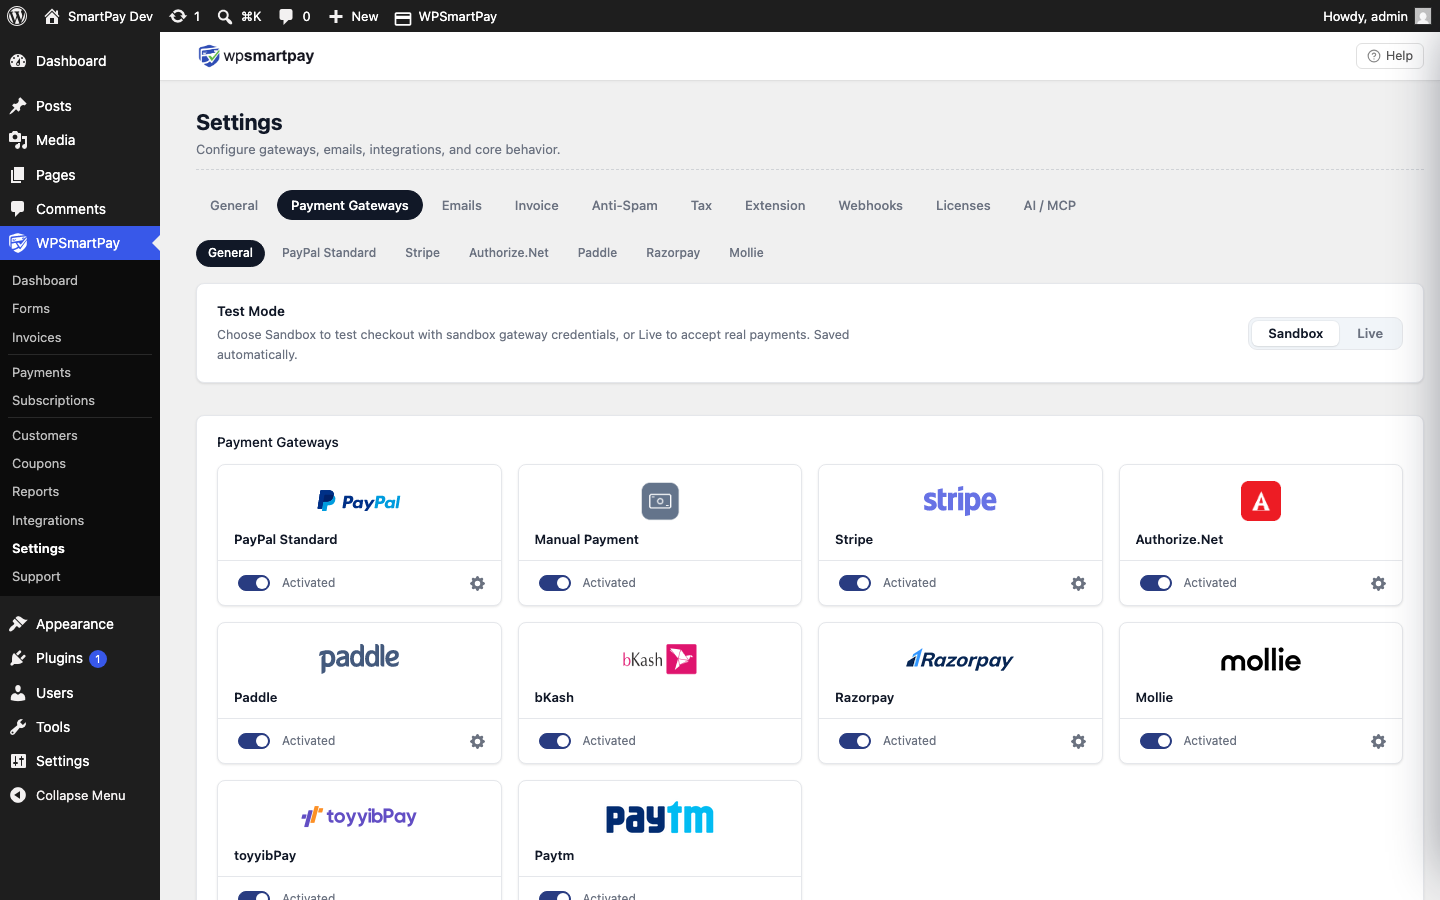 The Gateway Settings page — enable Mollie and enter your API keys.## Setting Up Mollie Webhooks
Mollie sends webhooks automatically to SmartPay's webhook endpoint — no manual webhook URL configuration is required in the Mollie Dashboard. SmartPay passes the webhook URL to Mollie when creating each payment.
If payments are stuck at Pending, confirm that your site is publicly accessible at a valid HTTPS URL (Mollie cannot send webhooks to localhost or sites behind a VPN).
## Supported Payment Methods
* iDEAL (Netherlands)
* Bancontact (Belgium)
* SOFORT (Germany, Austria)
* Klarna (Pay Now, Pay Later)
* Visa, Mastercard, American Express
* PayPal
* Apple Pay
* SEPA Direct Debit
* Giropay (Germany)
* EPS (Austria)
## Supported Currencies
EUR is the primary currency. USD, GBP, and other currencies are accepted depending on the payment method and your Mollie account configuration.
## Test Mode Configuration
Toggle **Test Mode** in SmartPay. Mollie's test environment simulates all payment methods — no real money moves. On the Mollie test checkout you can choose the payment result (success, failed, cancelled) from a dropdown to test different flows.
## Common Errors & Fixes
* **"The API key is invalid"** — Confirm you are using a live key (starts with `live_`) in live mode and a test key (`test_`) in test mode.
* **Payment method not appearing** — Enable the payment method in your Mollie Dashboard → Payments → Manage payment methods.
* **Payment stuck at Pending** — Webhook not reaching your site. Confirm HTTPS, no firewall blocking, and no "coming soon" plugin active.
# Paddle Billing
Paddle Billing is Paddle's modern payment infrastructure, replacing Paddle Classic for new accounts. It includes built-in subscription management, tax handling, and a hosted checkout overlay — all within the merchant-of-record model where Paddle manages VAT and sales tax compliance globally.
## Prerequisites
* A Paddle Billing account at [paddle.com](https://www.paddle.com). (New Paddle signups since 2024 are on Paddle Billing by default.)
* Your Paddle API key and webhook secret from the Paddle Dashboard.
* WP SmartPay Pro with a valid license.
## Finding Your Paddle Billing API Key
1. Log in to your Paddle Dashboard.
2. Go to **Developer → Authentication**.
3. Click **Generate API Key** and copy the key.
4. For sandbox: switch to the Sandbox environment in Paddle (top-left toggle) and generate a separate sandbox API key.
## Connecting Paddle Billing in SmartPay
1. Go to **SmartPay → Settings → Payment Gateways**.
2. Find **Paddle Billing** and tick **Enable**.
3. Enter your **Live API Key** and **Sandbox API Key**.
4. Click **Save Settings**.
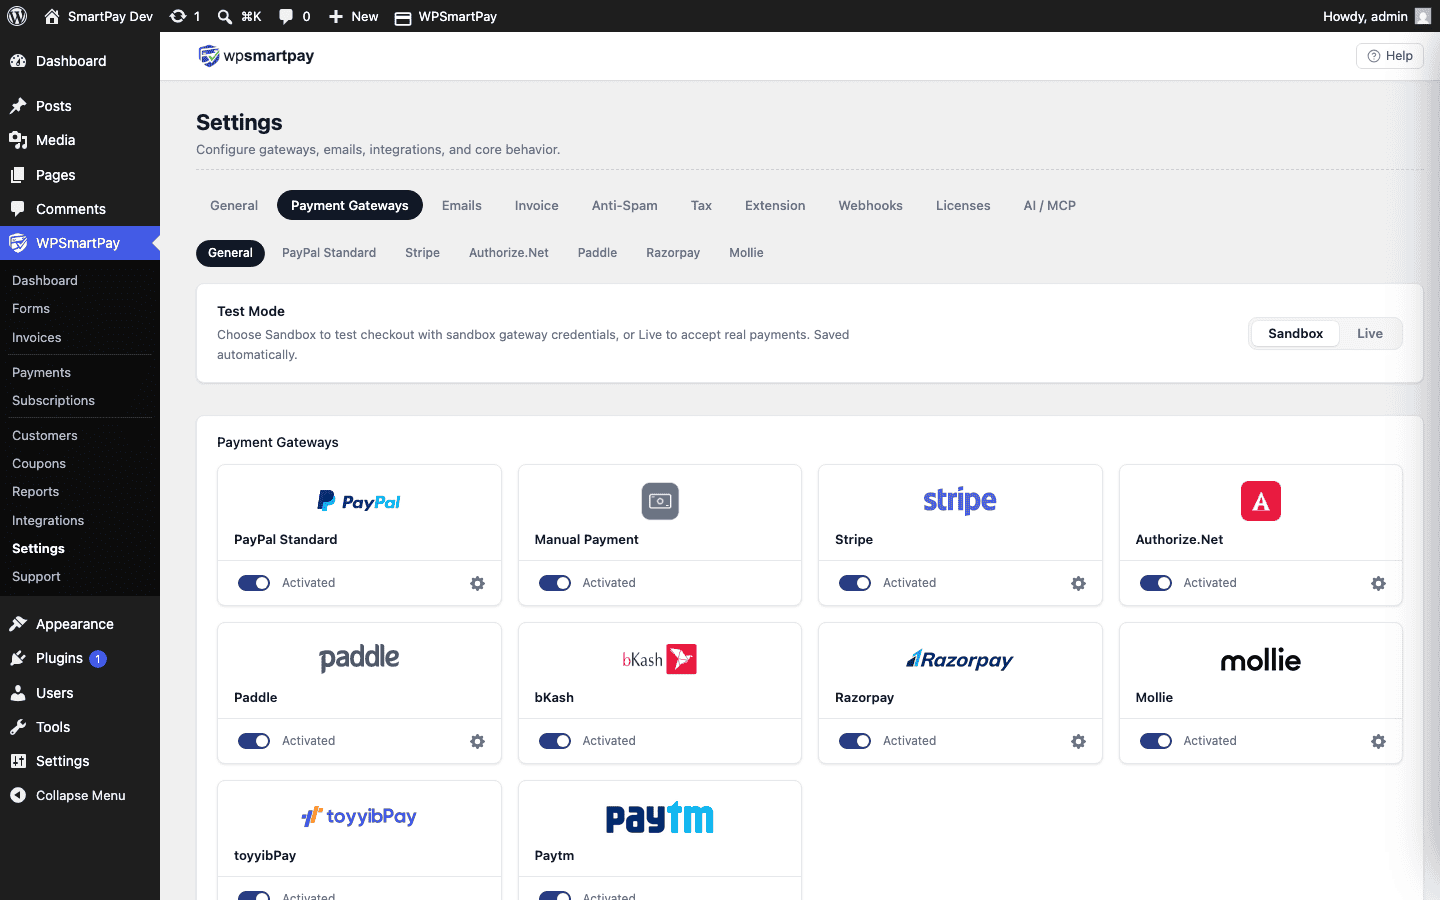 Paddle Billing settings — enter your live and sandbox API keys.## Setting Up Paddle Billing Webhooks
1. In your Paddle Dashboard, go to **Developer → Notifications**.
2. Click **New destination** → **Webhook**.
3. Enter your SmartPay webhook URL: `https://yoursite.com/?smartpay-listener=paddle_billing`
4. Select events: **transaction.completed**, **transaction.payment\_failed**, **subscription.cancelled**, **subscription.updated**.
5. Save and copy the **Secret key** shown after saving.
6. Paste the secret key into SmartPay's Paddle Billing webhook secret field and save.
## Subscription Support
Paddle Billing has native subscription management. When a customer subscribes through a SmartPay form using Paddle Billing:
* Paddle manages the billing schedule and renewals on its end.
* Each renewal triggers a `transaction.completed` webhook to SmartPay.
* SmartPay creates a new Payment record for each renewal.
## Supported Payment Methods
Visa, Mastercard, Apple Pay, Google Pay, PayPal, plus local payment methods based on customer location (iDEAL, Bancontact, etc.).
## Tax Handling
As with Paddle Classic, Paddle Billing collects and remits VAT and sales tax globally on your behalf. You receive net revenue after taxes — no separate tax service needed.
## Common Errors & Fixes
* **"Invalid API key"** — Confirm you are using the correct environment (live vs sandbox) key in SmartPay.
* **Webhook signature failure** — Webhook secret in SmartPay must match exactly what Paddle shows in the Notification destination detail.
# Paddle Classic
Paddle Classic (also known as Paddle Vendor) is a merchant-of-record payment platform where Paddle handles tax collection, invoicing, and compliance on your behalf. Customers are redirected to Paddle's hosted checkout to complete payment.
> **Note:** Paddle has two separate products: **Paddle Classic** (legacy) and **Paddle Billing** (new). This article covers Paddle Classic. If you are creating a new Paddle account today, Paddle will typically direct you to Paddle Billing — see the [Paddle Billing](https://docs.wpsmartpay.com/en/sp-gw-04-paddle-billing) guide instead.
## Prerequisites
* A Paddle Classic account at [paddle.com](https://www.paddle.com).
* Your Paddle Vendor ID and Vendor Auth Code from the Paddle Dashboard.
* WP SmartPay Pro with a valid license.
## Finding Your Paddle Classic Credentials
1. Log in to your Paddle Dashboard.
2. Go to **Developer Tools → Authentication**.
3. Copy your **Vendor ID** and **Vendor Auth Code**.
## Connecting Paddle Classic in SmartPay
1. Go to **SmartPay → Settings → Payment Gateways**.
2. Find **Paddle Classic** and tick **Enable**.
3. Enter your **Vendor ID** and **Vendor Auth Code** in the live fields.
4. For test mode, toggle **Sandbox** in Paddle and use the sandbox credentials.
5. Click **Save Settings**.
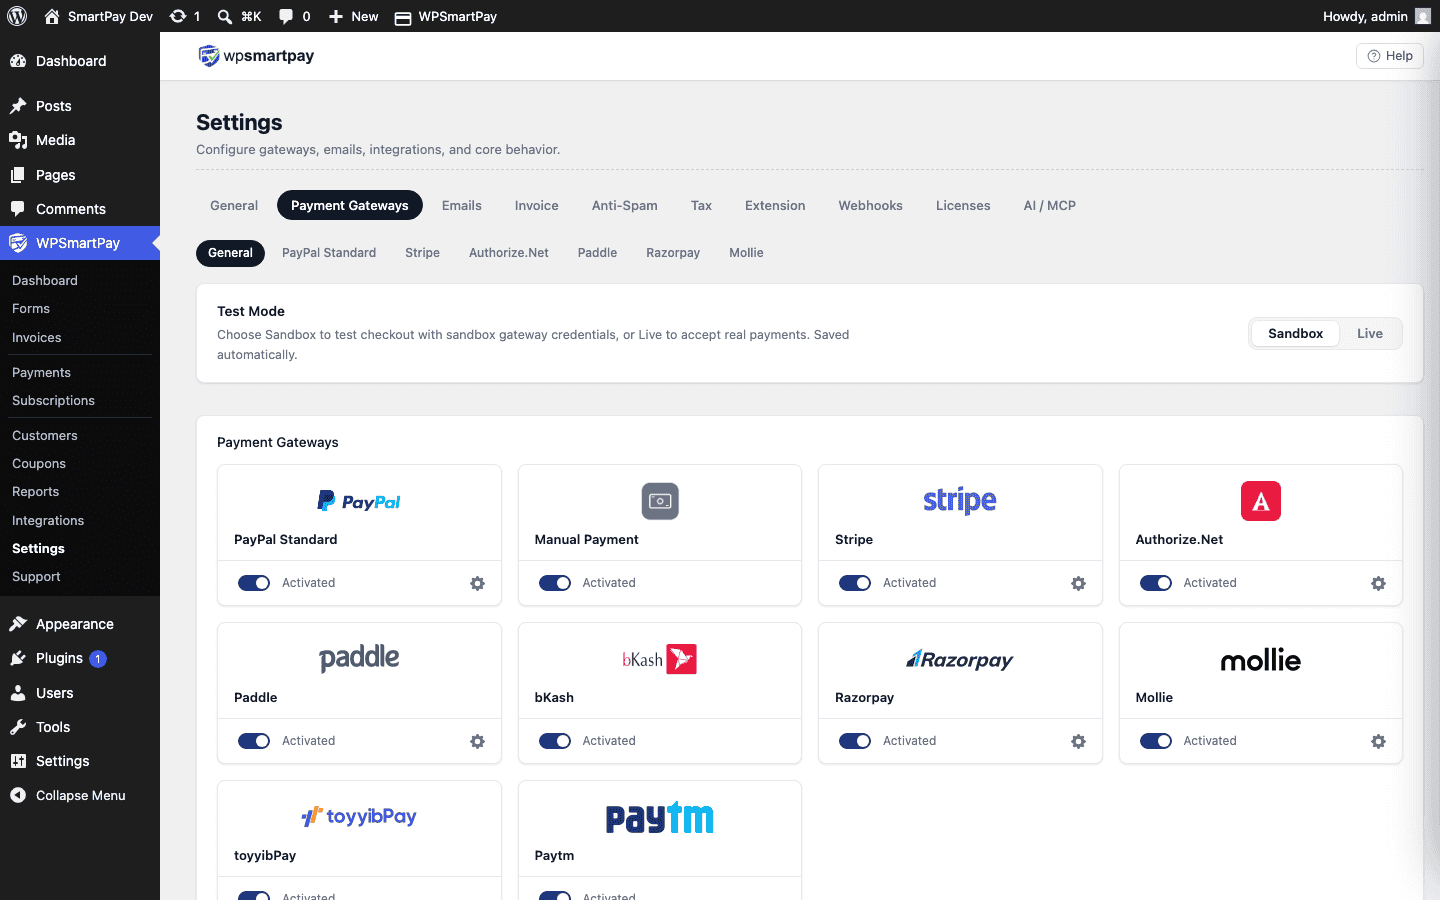 Paddle Classic settings — enter your Vendor ID and Auth Code.## Setting Up Paddle Webhooks
1. In your Paddle Dashboard, go to **Developer Tools → Alerts / Webhooks**.
2. Set the webhook URL to: `https://yoursite.com/?smartpay-listener=paddle`
3. Enable at minimum: **Payment succeeded**, **Payment refunded**, **Subscription cancelled**.
4. Save the webhook configuration.
## Supported Payment Methods
Paddle Classic handles payment method availability by region. Common options include Visa, Mastercard, PayPal, Apple Pay, and various local payment methods depending on the customer's country.
## Tax Handling
As a merchant of record, Paddle automatically calculates and collects the correct VAT/sales tax for each customer based on their location. You receive net revenue after taxes. This is Paddle's main advantage for digital product sellers who need EU VAT compliance without managing it themselves.
## Common Errors & Fixes
* **"Invalid vendor credentials"** — Double-check your Vendor ID and Auth Code are from the correct Paddle environment (live vs sandbox).
* **Payments stuck at Pending** — Webhook URL not configured or incorrect. Verify the URL in Paddle Dashboard webhooks.
# Paddle Setup
Before you start, make sure you have a verified Paddle account. If you don’t have one, go to [Paddle's sign-up page](https://www.paddle.com/get-started) to create and verify it. You can use [Paddle's sandbox account](https://sandbox-vendors.paddle.com/) to test payments without using any real money. You can learn more about test payments [here](https://developer.paddle.com/concepts/payment-methods/credit-debit-card).
If you are looking to configure **Paddle Classic**, please follow the [Paddle Classic setup here](https://docs.wpsmartpay.com/en/paddle-setup-paddle-classic).
---
## Configuring Paddle
### Step 1: Paddle Credentials
**Seller ID:**
1. Log in to your [Paddle dashboard](https://vendors.paddle.com/). If you are using Paddle Sandbox, log in [here](https://sandbox-vendors.paddle.com/).
2. Click the three-dot button in the upper left part of the dashboard and copy the **Seller ID**. Please refer to the following image for a better understanding.
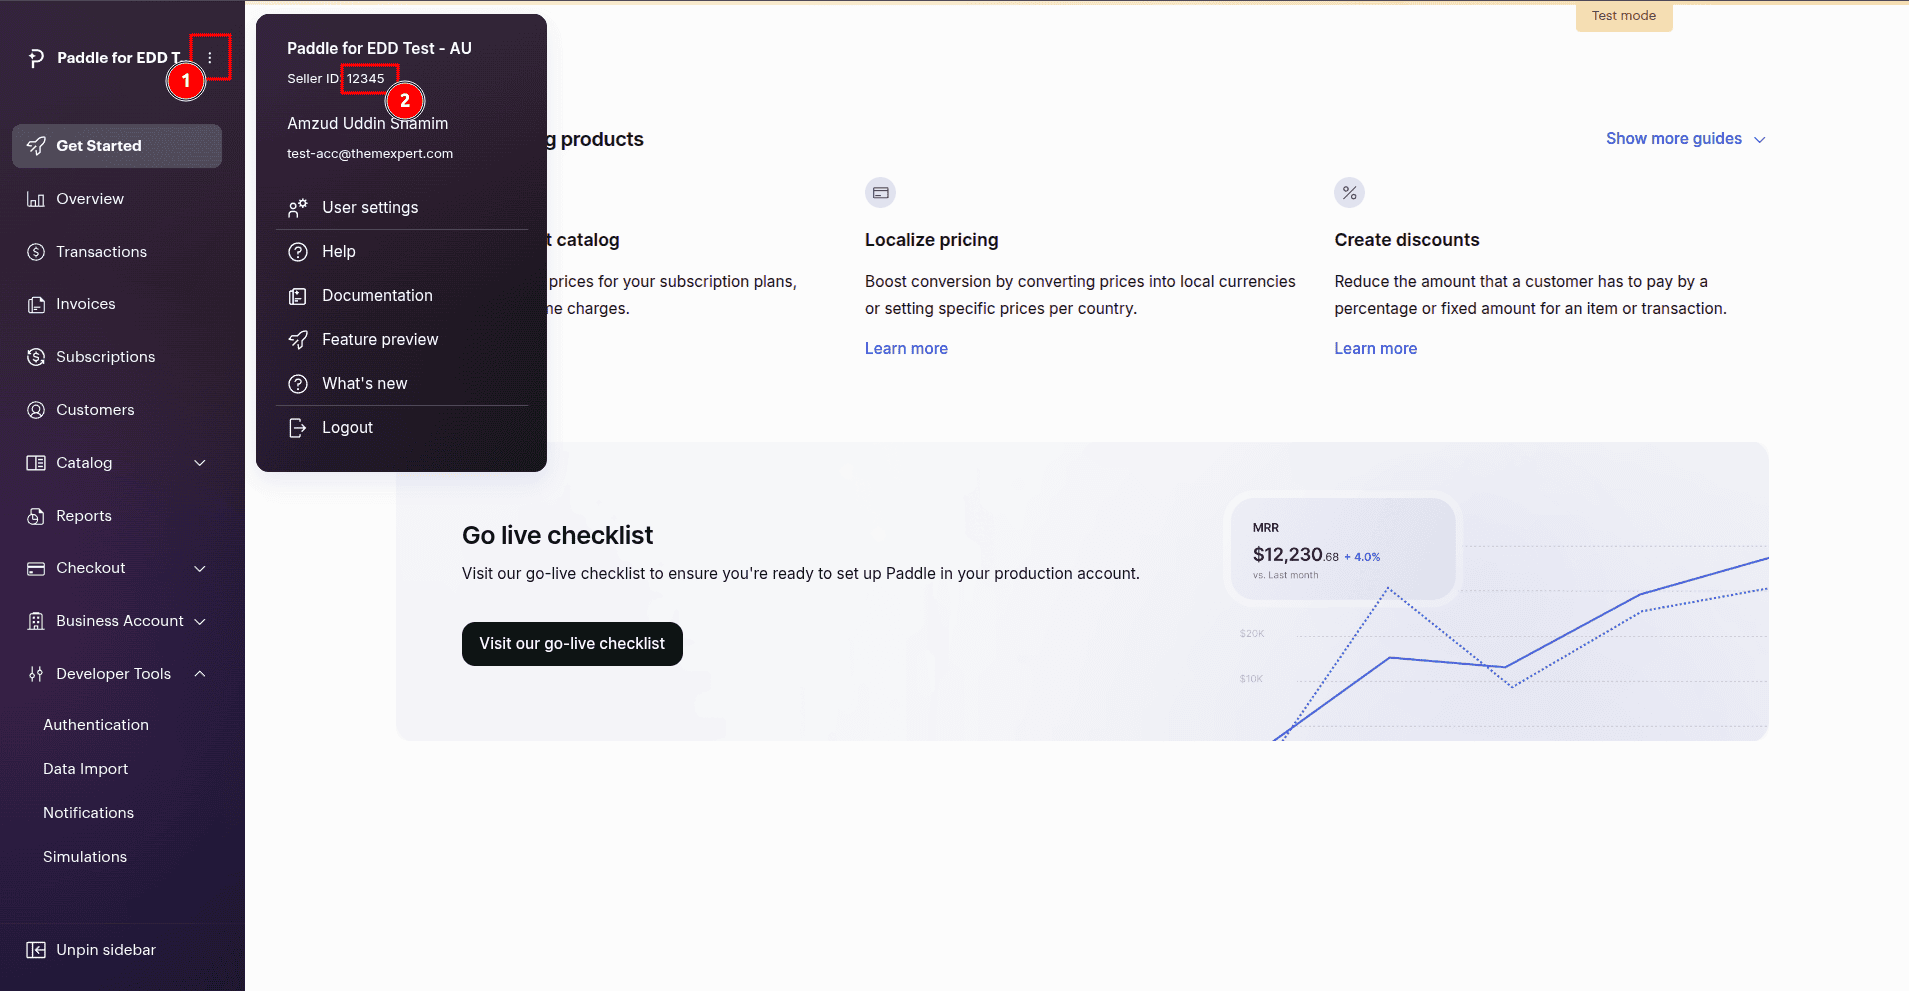**API Key:**
1. Go to **Developer Tools > Authentication > API Keys** and click the **New API Key** button, and fill in the following information.
* In the **Name** field, provide a name for the API key.
* In the **Description** field, provide a short description.
* Click on **Expires at** and check **Never Expires**.
* In Permissions, check **All** for both **Read** and **Write**.
2. Click the **Save** button.
3. You will get an **API Key**. Copy it, you will need this in the plugin settings.
*(Once you close the window, you will not be able to view it again. So, make sure to copy before closing the pop-up.)*
**Client-side Token:**
1. Go to **Developer Tools > Authentication > Client-side tokens** and click the **New Client-side token** button, and fill in the following information.
* In the **Name** field, provide a name for the token.
* In the **Description** field, provide a short description.
2. Click the **Save** button.
3. Click the three-dot button next to the newly created token entry, then click **Copy token**. You will need this in the plugin settings.
**Add Credentials to the plugin:**
Now paste the copied **Seller ID**, **API Key**, and **Client-side token** into their respective fields in the plugin settings, then click the **Save changes** button.
### Step 2: **Instant Notification (INS) Setup**
1. Go to the Paddle plugin settings. Copy the **URL** provided in the **Notification Secret Key** section.
2. Log in to your [Paddle dashboard](https://vendors.paddle.com/). If you are using Paddle Sandbox, log in [here](https://sandbox-vendors.paddle.com/).
3. Go to **Developer Tools > Notifications** and click the **New destination** button, and fill in the following information.
* In the **Description** field, provide a short description.
* In the **Notification type** selection, select **Webhook**.
* In the **URL** field, paste the URL you got from the plugin settings page's **Notification Secret Key** section.
* In the **Usage type** selection, select **Platform only**.
* In the **Events** section, check **Select all events**.
* Click the **Save destination** button.
* Now, click the three-dot button next to the newly created destination and click **Edit destination**.
* Copy the **Secret key**.
4. Now, paste the copied **Secret key** in the Notification Secret Key field in the plugin settings.
5. Click **Save changes** button.
### Step 3: **Approve Your Website Domain**
1. In your Paddle dashboard, go to **Checkout > Website Approval**.
2. Click the **Add a new domain** button.
3. Enter your website **Domain** and click the **Submit for Approval** button.
Please refer to the following image for a better understanding.
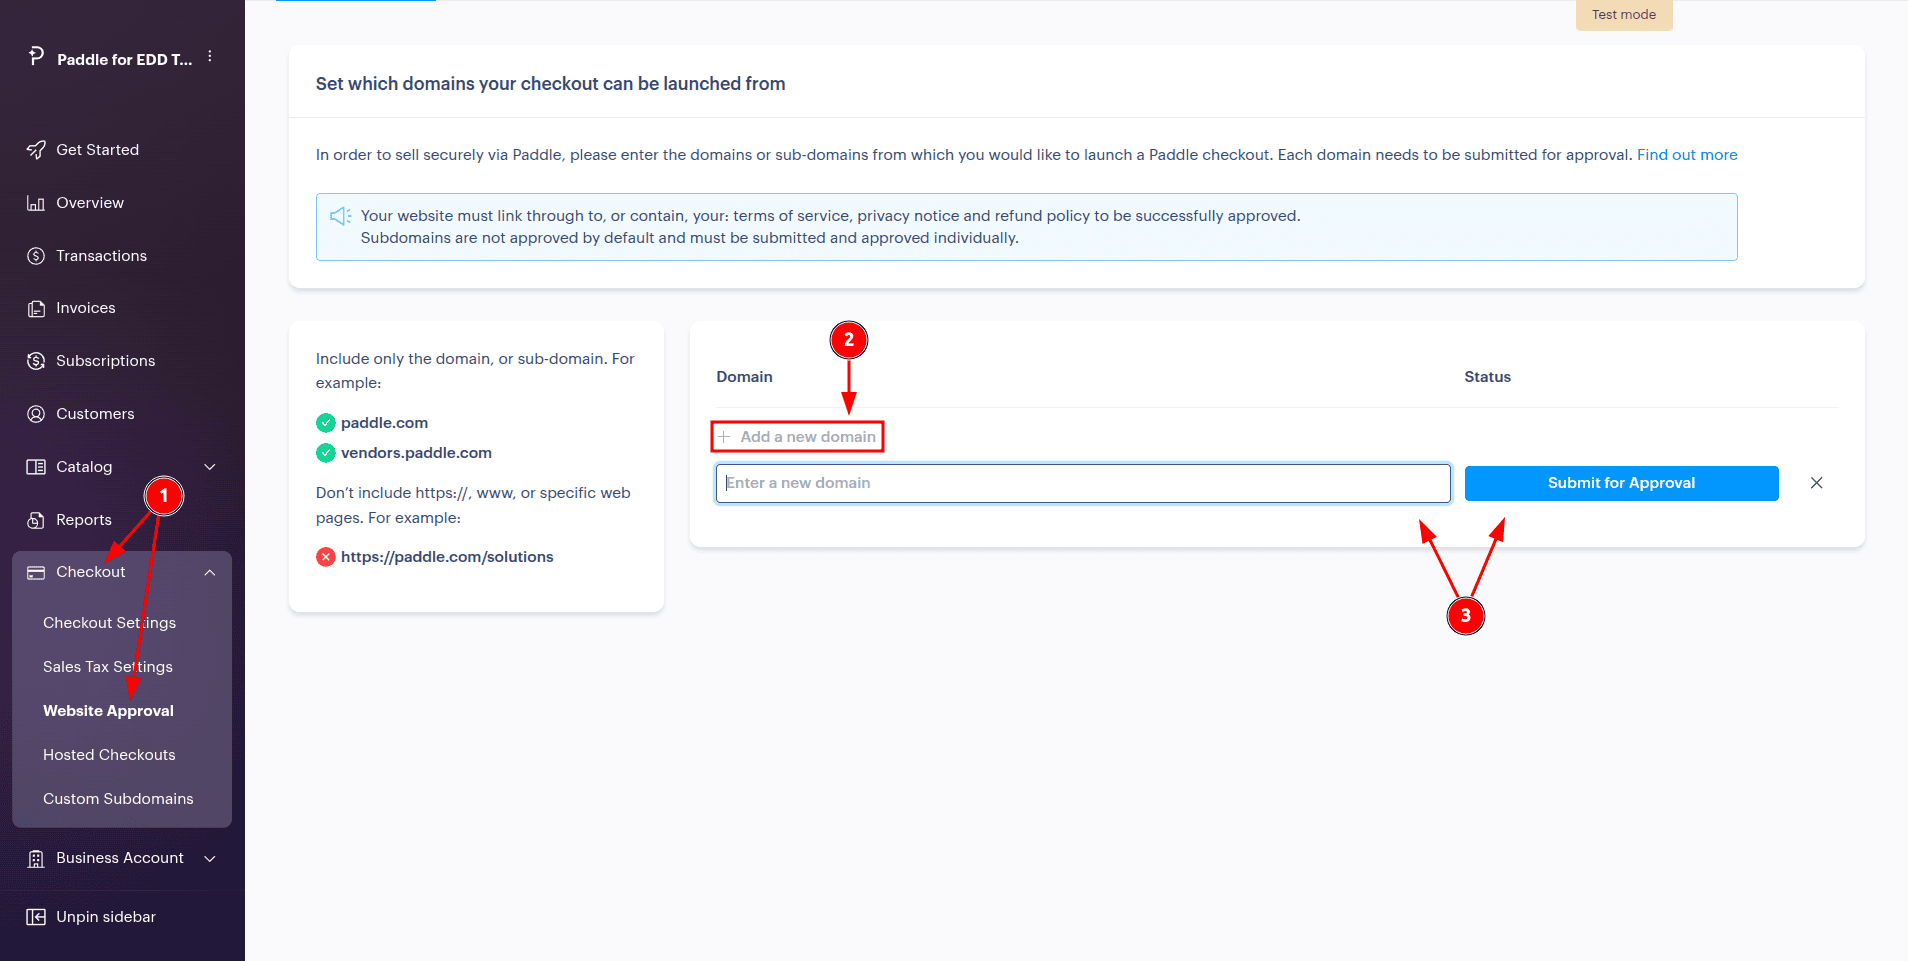### Step 4: **Add the Default Payment Link**
1. In your Paddle dashboard, go to **Checkout > Checkout Settings**.
2. Enter your **Homepage URL** in the **Default payment link**.
Please refer to the following image for a better understanding.
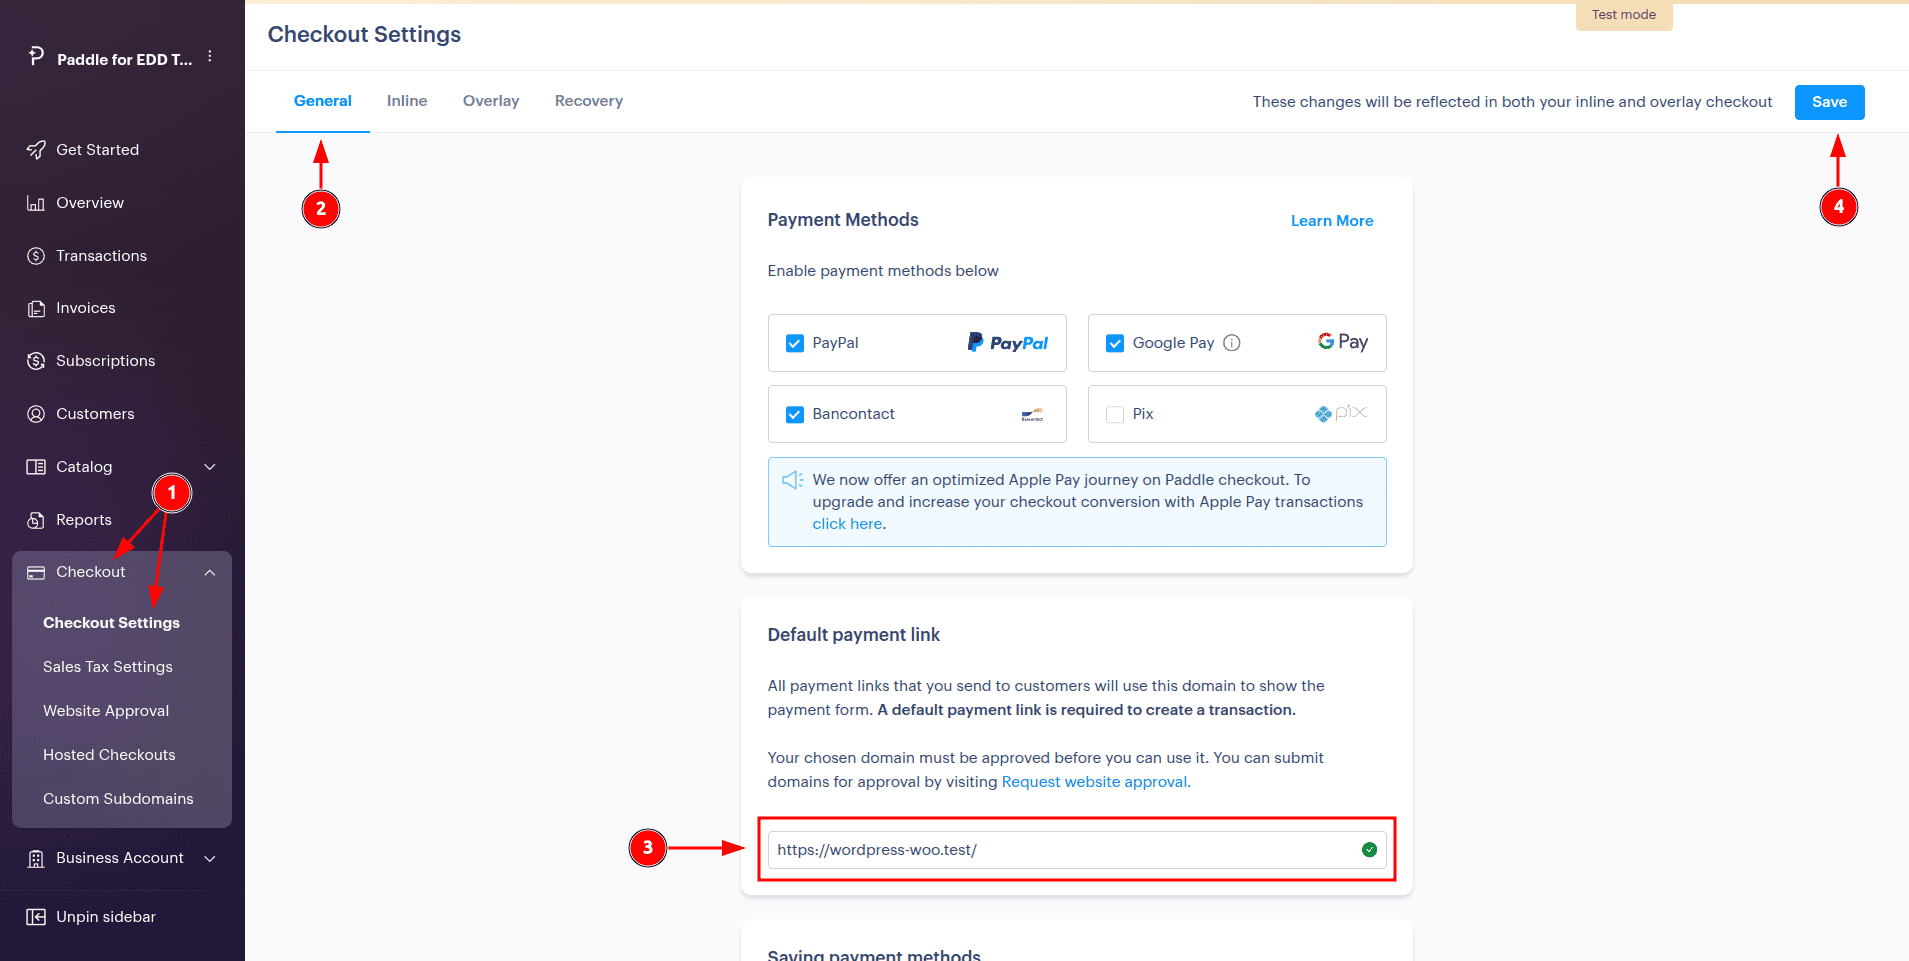
# Paddle Setup (Paddle Classic)
Deprecated. Please use **[Paddle Billing](https://docs.wpsmartpay.com/en/paddle-setup)** for new accounts.
Before you start, make sure you have a verified Paddle account. If you don’t have one, go to [Paddle's sign-up page](https://www.paddle.com/get-started) to create and verify it.
## Login and Auth Code Creation
1. **Login**: Access your [Paddle account](https://vendors.paddle.com/).
2. **Get Vendor ID**: Navigate to [Developer > Authentication](https://vendors.paddle.com/authentication) and copy your **vendor\_id**.
3. **Create Auth Code:** Click on **Generate Ke**y, name it for future reference, and copy the key after **revealing** it.
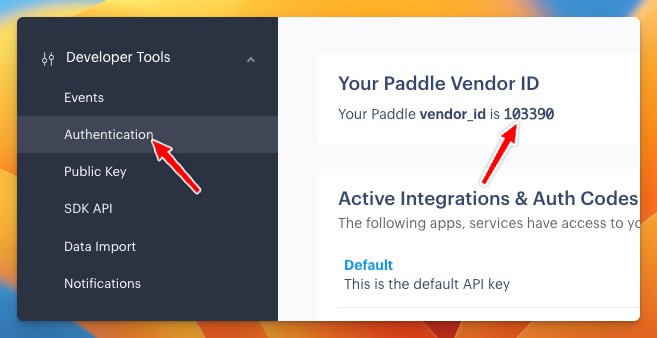### Retrieve Public Key
* **Copy Public Key**: Go to the Public Key page and copy the full public key, including the lines:
```
\-----BEGIN PUBLIC KEY-----
...
\-----END PUBLIC KEY-----
```
* All the new accounts use Paddle Billing API and It doesn't have a **Public Key** page but you can access it from [here](https://vendors.paddle.com/public-key). Copy the Public Key from that page.
## Instant Notification System (INS) setup (Paddle Classic)
This is the most important part; without this, your order and automatic renewal won't work. Please ensure you set it up correctly.
* Navigate to Events: Go to Developer Tools > Events.
* Set INS URL: Paste the INS URL you received from the plugin under URLs for receiving webhooks.
* Enable Webhook Events: Check all relevant webhook events for **Subscription** and **One-off purchases,** and click Save.
# Paddle VAT Invoice Add-on
The **Paddle VAT Invoice Add-on for Easy Digital Downloads** makes it simple to generate VAT-compliant invoices automatically.
Follow this quick guide to set it up:
### Download the Add-on
Log in to your account, navigate to the Downloads section, and download the file (**paddle-invoice-edd.zip**).
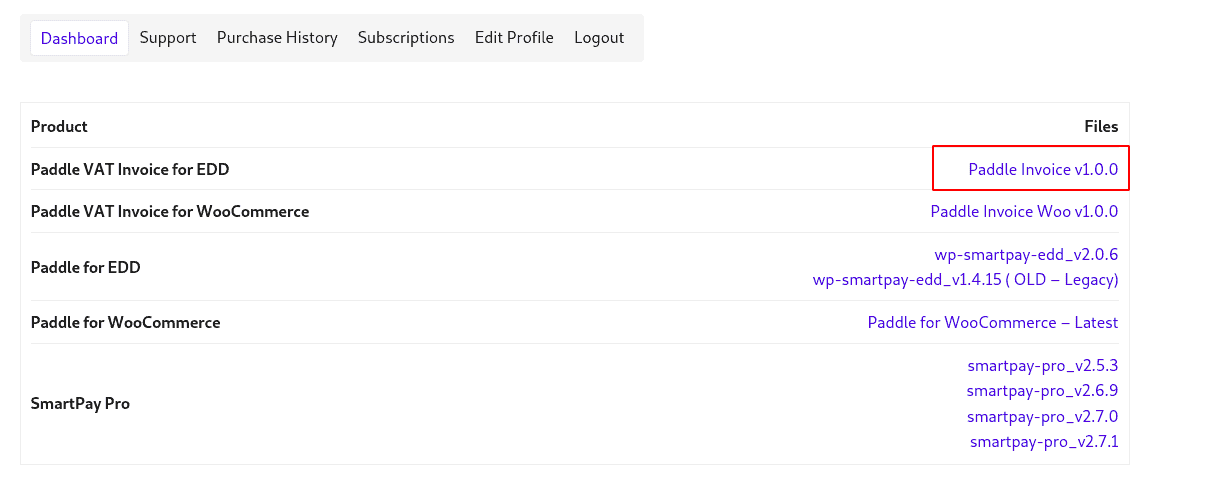### Install the Add-on
In your WordPress dashboard, go to **Plugins > Add New**. Click **Upload Plugin**, select the downloaded file, and click **Install Now**.
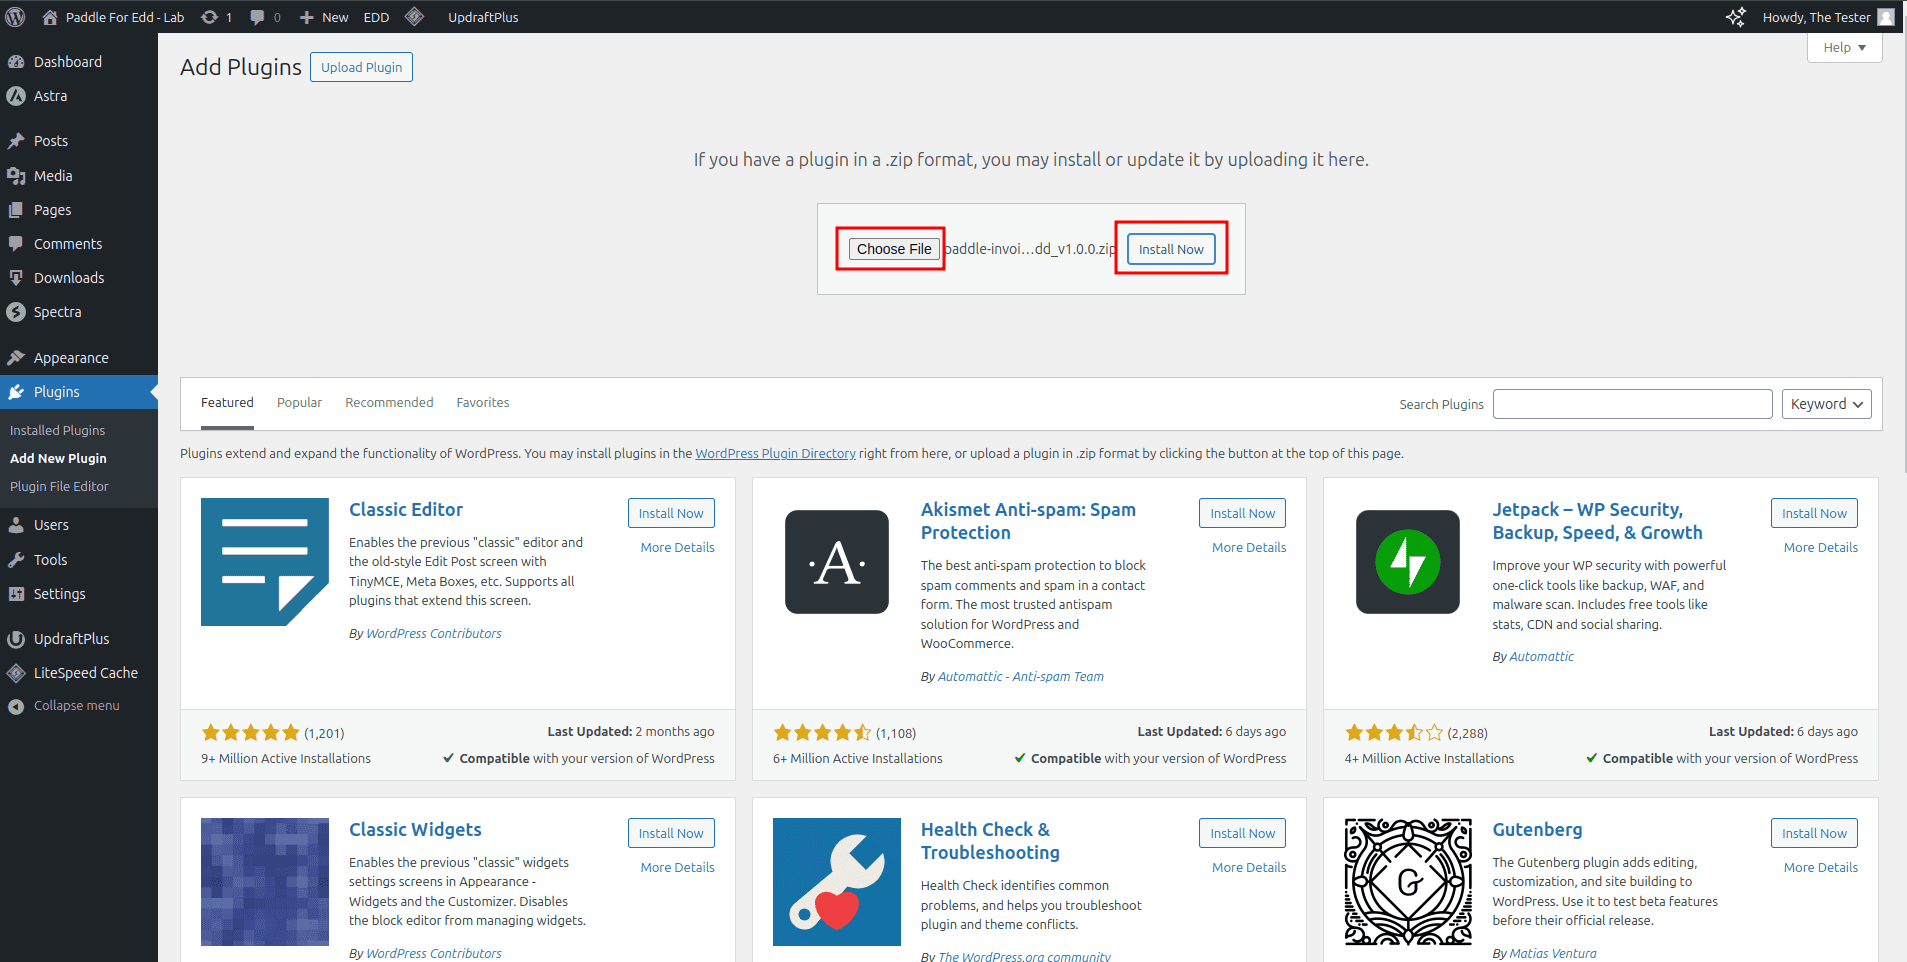### Activate the Add-on
After installation, click **Activate Plugin** to enable VAT invoicing for your store.
### Activating the License
1. Get your license key from your WPSmartpay account.
2. In your WordPress dashboard, navigate to **Plugins > Installed Plugins**.
3. Click the **Manage License** in the **Paddle Invoice** plugin.
4. Give the license key in the input field and click **Activate**.
### Generate VAT Invoices Automatically
Once activated, the add-on will automatically generate **VAT-compliant invoices** for all transactions processed through Paddle for Easy Digital Downloads, no manual setup required!
Here’s an example of a VAT invoice generated using this add-on:
Want to learn more? Click here to explore the [Paddle VAT Invoice Add-on for EDD](https://wpsmartpay.com/paddle-vat-invoice-add-on-edd/).
# Payment Detail Page
Clicking any payment in the SmartPay list opens its detail page — a full view of everything associated with that transaction: the amount, customer, form metadata, gateway reference, and activity history.
## Opening a Payment
Go to **SmartPay → Payments**, then click the payment ID or customer name to open the detail page.
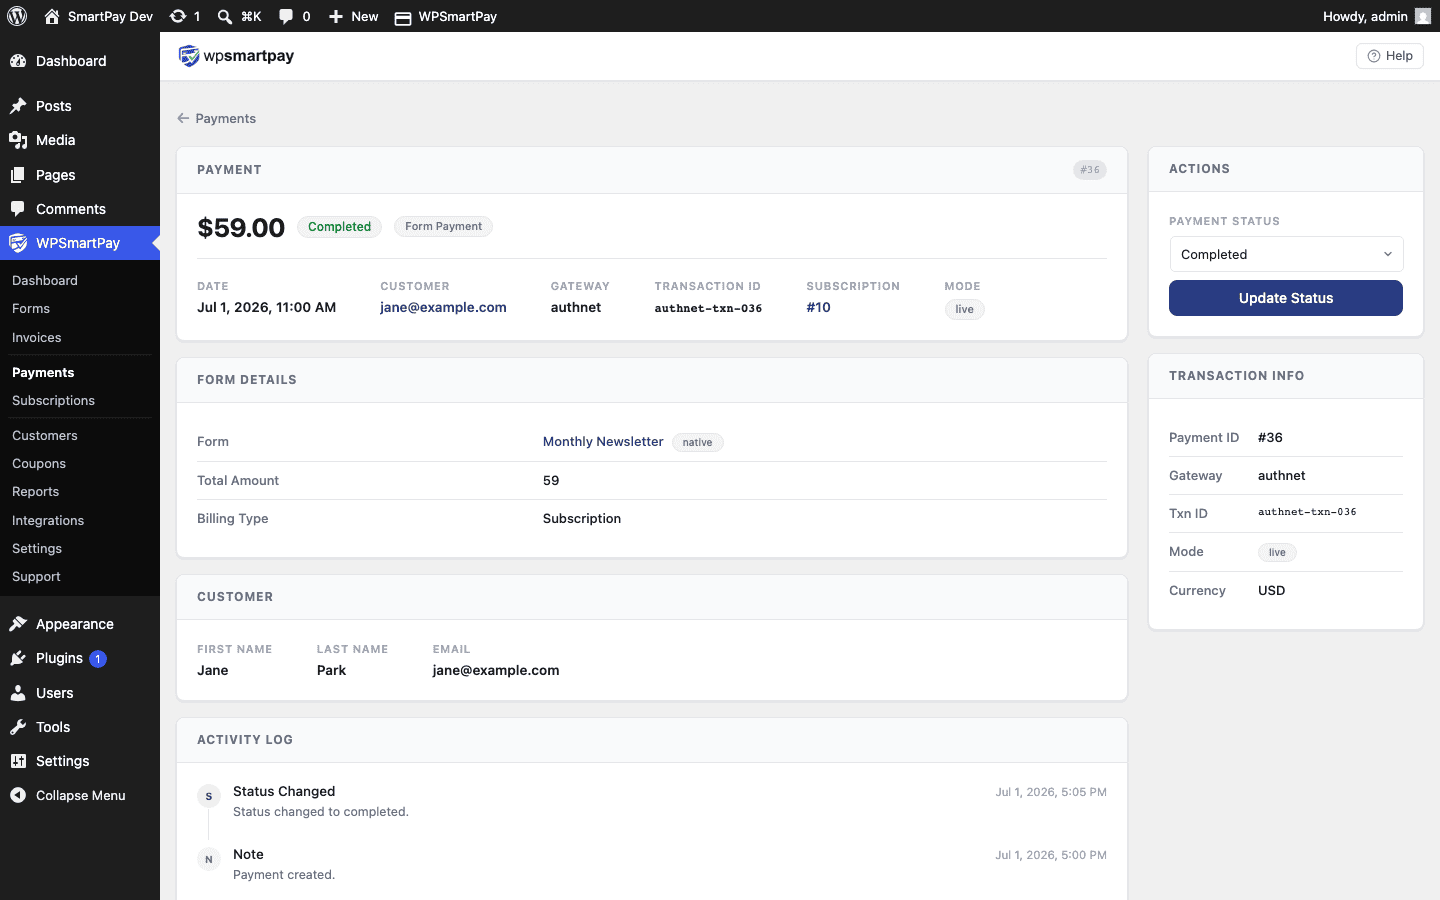 The payment detail page shows every piece of information about a single transaction.## Hero Section
The top of the page displays the most important facts at a glance:
* **Amount** — Total charged, in the payment currency.
* **Status badge** — Colour-coded current status (green = Completed, yellow = Pending, red = Failed, etc.).
* **Gateway badge** — Which payment processor handled the transaction.
* **Mode badge** — Live or Test.
* **Date** — When the payment was created.
## Customer Info Panel
The customer card shows:
* Name and email address (links to the customer detail page).
* Customer's total lifetime payment count and revenue.
## Form / Product Metadata
A panel shows which form or digital product generated the payment, along with the form ID and any custom field values captured at checkout.
## Gateway Transaction Details
The gateway panel shows the processor-side transaction ID (e.g., Stripe charge ID `ch_…` or PayPal transaction ID). Copy this ID when contacting your gateway's support or reconciling payments in your gateway dashboard.
## Activity Log
The timeline at the bottom of the page shows every event in this payment's history, newest first:
* Status changes (Pending → Completed, Completed → Refunded).
* Emails sent (receipt, admin notification).
* Webhook events received from the gateway.
* Manual admin actions (notes, status updates).
## Available Actions
From the payment detail page you can:
* **View Receipt** — Opens the public-facing payment receipt page for this transaction.
* **Refund** — For gateways that support automatic refunds (Stripe, Paddle), initiates the refund immediately. For others, displays instructions for manual refund in the gateway dashboard.
* **Add Note** — Appends a private admin note to the activity log (not visible to the customer).
# Payment Not Completing
Payments stuck in Pending status after the customer has entered their details and clicked Pay are almost always caused by missing or misconfigured webhooks. This guide gives you a step-by-step diagnostic checklist.
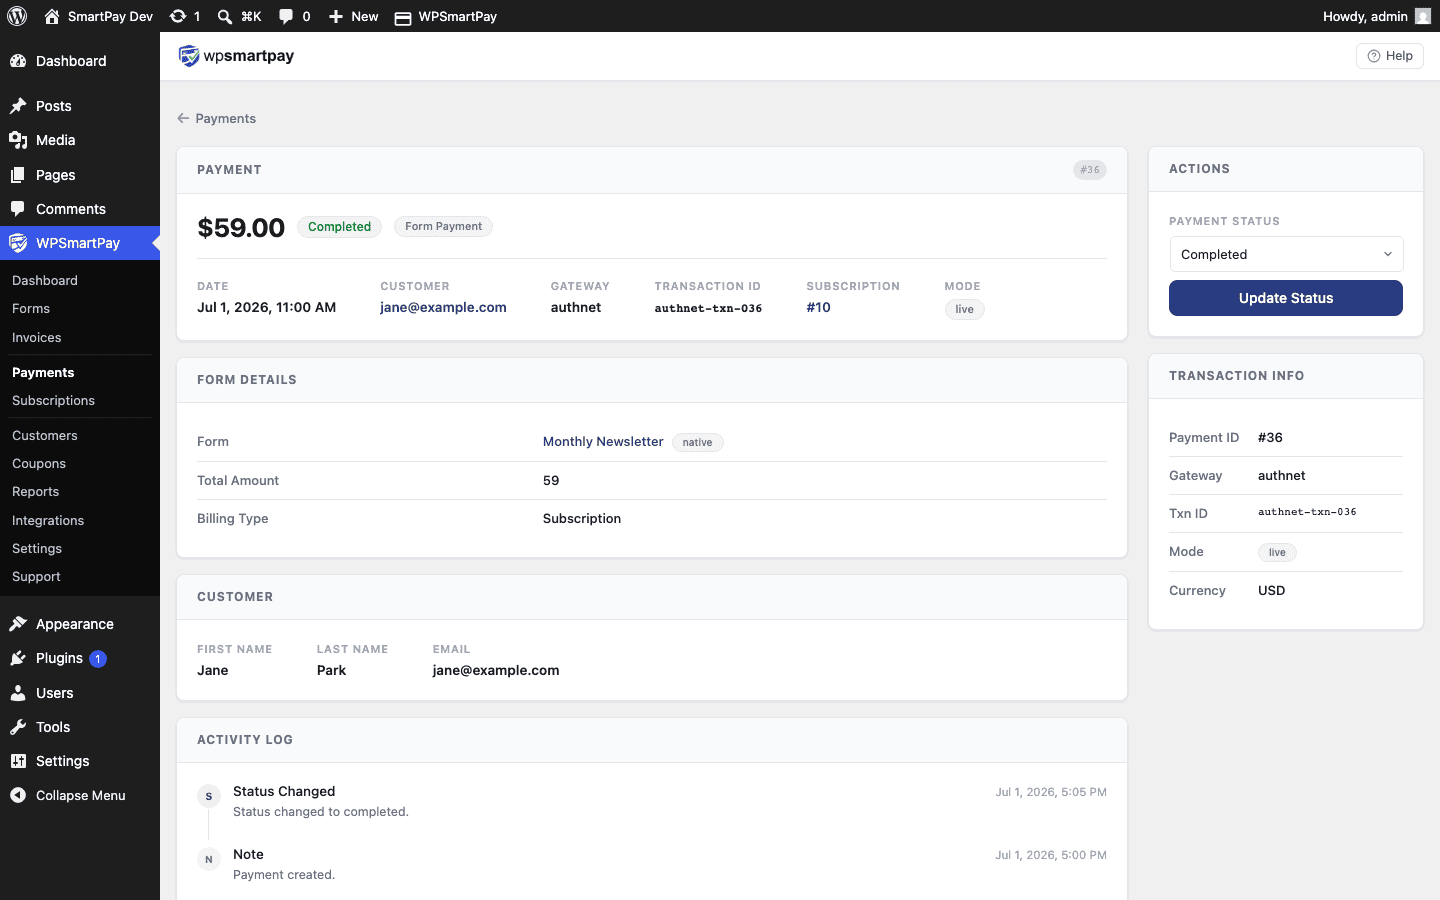## Step 1 — Check Your Credentials
The most common mistake is entering credentials from the wrong environment (test keys in live mode or vice versa).
1. Go to **SmartPay → Settings → Payment Gateways**.
2. Check that Test Mode matches the credentials entered:
* Test Mode **ON** → Test credentials should be filled in.
* Test Mode **OFF** → Live credentials should be filled in.
3. Retype or re-paste the credentials to eliminate a copy-paste error.
## Step 2 — Verify Webhook Configuration
Payment gateways confirm payments via webhooks. If your site cannot receive them, payments stay Pending.
### Stripe
1. Log in to your Stripe Dashboard → **Developers → Webhooks**.
2. Confirm an endpoint exists with URL `https://yoursite.com/?smartpay-listener=stripe`.
3. Click the endpoint and check the **Recent Deliveries** tab. Were any webhooks delivered? If you see delivery attempts with a non-200 response code, your site returned an error.
4. Confirm the **Webhook Signing Secret** in SmartPay matches the one shown in the endpoint details.
### PayPal
1. Log in to your PayPal account → **Account Settings → Notifications → Instant Payment Notifications**.
2. Confirm IPN is enabled and the notification URL is your site's URL.
3. SmartPay handles IPN automatically at `/?smartpay-listener=paypal`. Confirm this URL is accessible publicly.
## Step 3 — Check Test Mode
In Test Mode, real card numbers will not work and no real payment is processed. Confirm you are using the correct test credentials and test card numbers.
For Stripe test mode, use card `4242 4242 4242 4242` with any future expiry.
## Step 4 — Check the Debug Log
1. Enable `define('SMARTPAY_DEBUG', true);` in wp-config.php.
2. Attempt a payment.
3. Go to **SmartPay → Support → Debug Log** and look for ERROR entries related to the payment.
The log often shows the exact error message returned by the gateway, which tells you what went wrong.
## Step 5 — Confirm Your Site Is Publicly Accessible
If your site is on a local development server (localhost, .local domains, Ngrok-style tunnels), gateways cannot send webhooks to it. Payments will always stay Pending on local environments unless you use a webhook forwarding tool.
For local development use the **Test Payment** gateway — it never needs webhooks and always completes immediately.
## Step 6 — Check for Plugin Conflicts
Some security plugins (Wordfence, iThemes Security) block webhook requests that look like external POST requests with no session cookie. Add your gateway's IP range to the firewall whitelist, or add the webhook URL as an exception.
## Confirming Payment in the Gateway Dashboard
If SmartPay shows Pending but you want to confirm whether the payment was actually charged:
* **Stripe:** Check **Payments** in your Stripe Dashboard. If the charge shows as Succeeded in Stripe but Pending in SmartPay, it's a webhook issue.
* **PayPal:** Check your PayPal transaction history. Completed PayPal transactions that are Pending in SmartPay indicate an IPN delivery failure.
> **Important:** Never issue a refund for a payment based solely on SmartPay showing Pending. Check the gateway dashboard first — the charge may have succeeded and the customer was billed.
# Payment Receipts
After every successful payment, WP SmartPay redirects the customer to a receipt page that confirms the transaction details. This article covers how to set up the receipt page and what it displays.
## What the Receipt Shows
The receipt page, powered by the `[smartpay_payment_receipt]` shortcode, displays:
* Payment confirmation message
* Payment amount and currency
* Payment date and reference number
* Customer name and email
* Form or product name that was purchased
* Gateway used
## Setting Up the Receipt Page
1. Create a new WordPress page called "Payment Receipt" (or any name you prefer).
2. Add the shortcode `[smartpay_payment_receipt]` to the page body.
3. Publish the page.
4. Go to **SmartPay → Settings → General**.
5. Set the **Payment Success Page** field to the page you just created.
6. Save settings.
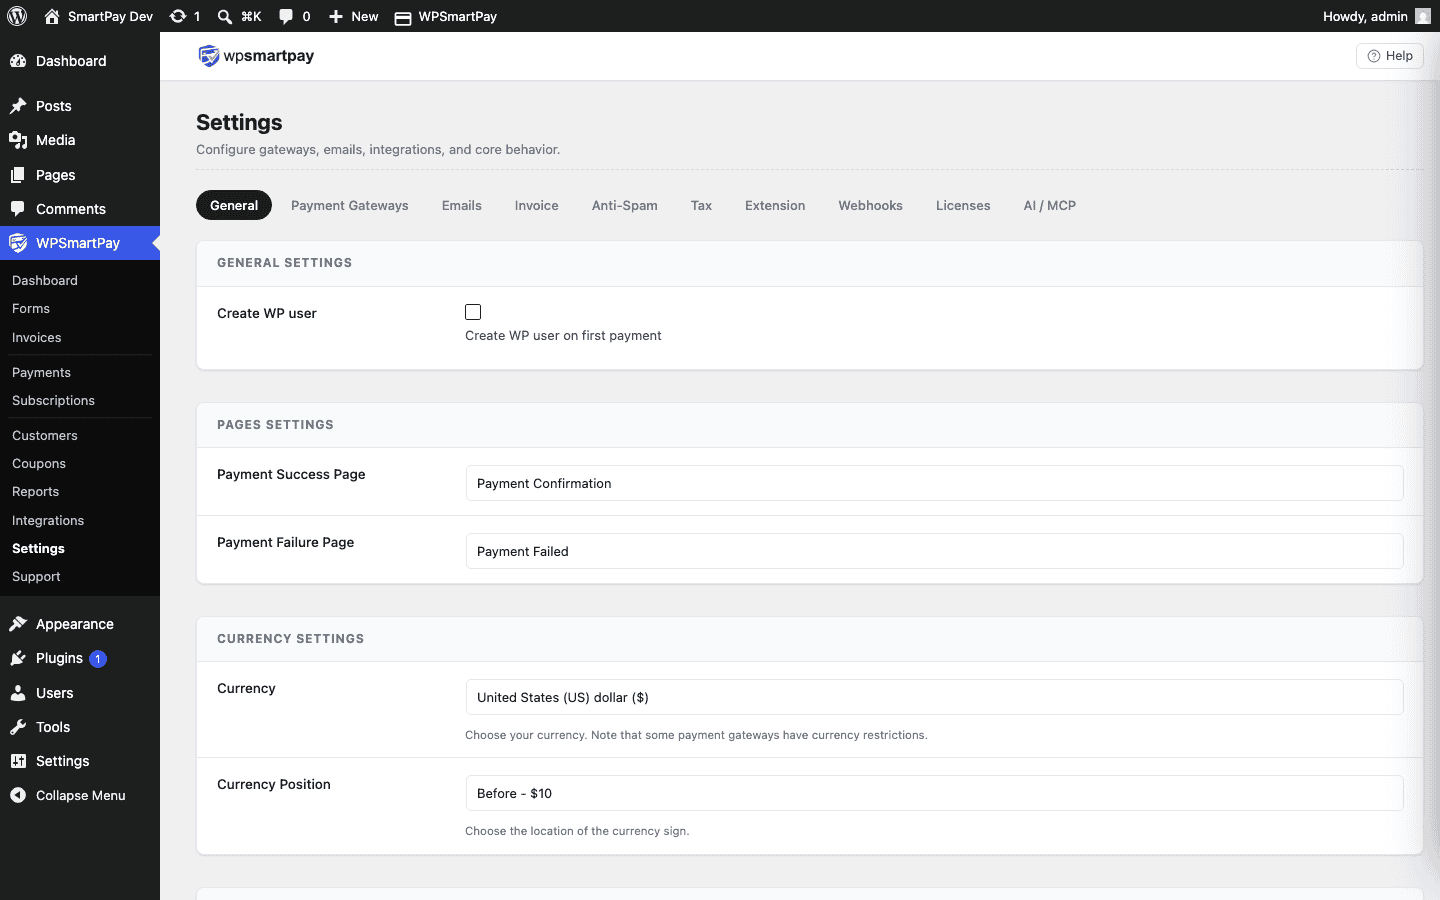 Set the Payment Success Page in General Settings — this is where customers land after checkout.## Customising the Receipt Page
You can add any content around the shortcode — a thank-you heading, your logo, next steps, social sharing links, or a call to action. The shortcode outputs the payment data only; everything else on the page is yours to design.
Example page layout:
```
Thank you for your payment!
Your receipt is below. You will also receive a confirmation email shortly.
[smartpay_payment_receipt]
Questions? Contact us.
```
## Viewing a Receipt from the Admin
To view the receipt for any past payment, open the payment detail page (**SmartPay → Payments → click a payment**) and click **View Receipt**. This opens the public receipt URL with the transaction pre-loaded.
## Receipt Email
SmartPay also sends an automated receipt email to the customer after each successful payment. To customise the email subject, sender name, and body, go to **SmartPay → Settings → Emails**.
# Payment Statuses Explained
Every payment in WP SmartPay has a status that describes where it is in the payment lifecycle. Understanding each status helps you identify which payments need attention and how money has flowed through your site.
## Status Reference
### Pending
The payment has been created but not yet confirmed by the gateway. This is the initial state for almost all payments immediately after checkout submission. Most gateways resolve Pending to Completed in seconds via a webhook.
**What triggers it:** Customer clicks the pay button; SmartPay creates the payment record and sends it to the gateway.
### Processing
The gateway has accepted the payment request and is actively verifying it. Less common than Pending; seen with bank-based gateways that have an intermediate processing step (e.g., ACH transfers, certain regional gateways).
### Completed
The payment was successful. The customer's card or account was charged, the gateway confirmed the funds, and the payment lifecycle is complete. This is the status that increments your revenue stats.
**What triggers it:** Gateway webhook (payment.succeeded, payment\_intent.succeeded, PAYMENT.SALE.COMPLETED, etc.) received and verified by SmartPay.
### Failed
The payment was declined or encountered an error. Common causes: insufficient funds, expired card, incorrect CVC, gateway timeout, or fraud rules.
**What triggers it:** Gateway returns a failed event or charge attempt returns an error code.
### Cancelled
The payment was stopped before processing completed — either by the customer closing the checkout, by an admin marking it cancelled, or by the gateway voiding the transaction.
### Refunded
The payment was completed and then partially or fully reversed. The customer received their money back. A refunded payment stays in your records for accounting purposes.
**What triggers it:** Refund initiated from SmartPay's payment detail page, or a refund webhook received from the gateway.
### Abandoned
The customer started checkout but did not complete it. SmartPay creates a payment record when the form is submitted so that potential customers can be recovered; if no completion webhook arrives within the timeout window, the status is set to Abandoned.
## Status Transitions
The typical lifecycle for a successful payment:
```
Pending → Completed
```
Common alternative paths:
```
Pending → Failed
Pending → Cancelled
Completed → Refunded
```
## Viewing Status History
Every status change is recorded in the activity log on the payment detail page with a timestamp. Open any payment and scroll to the **Activity** section to see the full history, including which event triggered each transition.
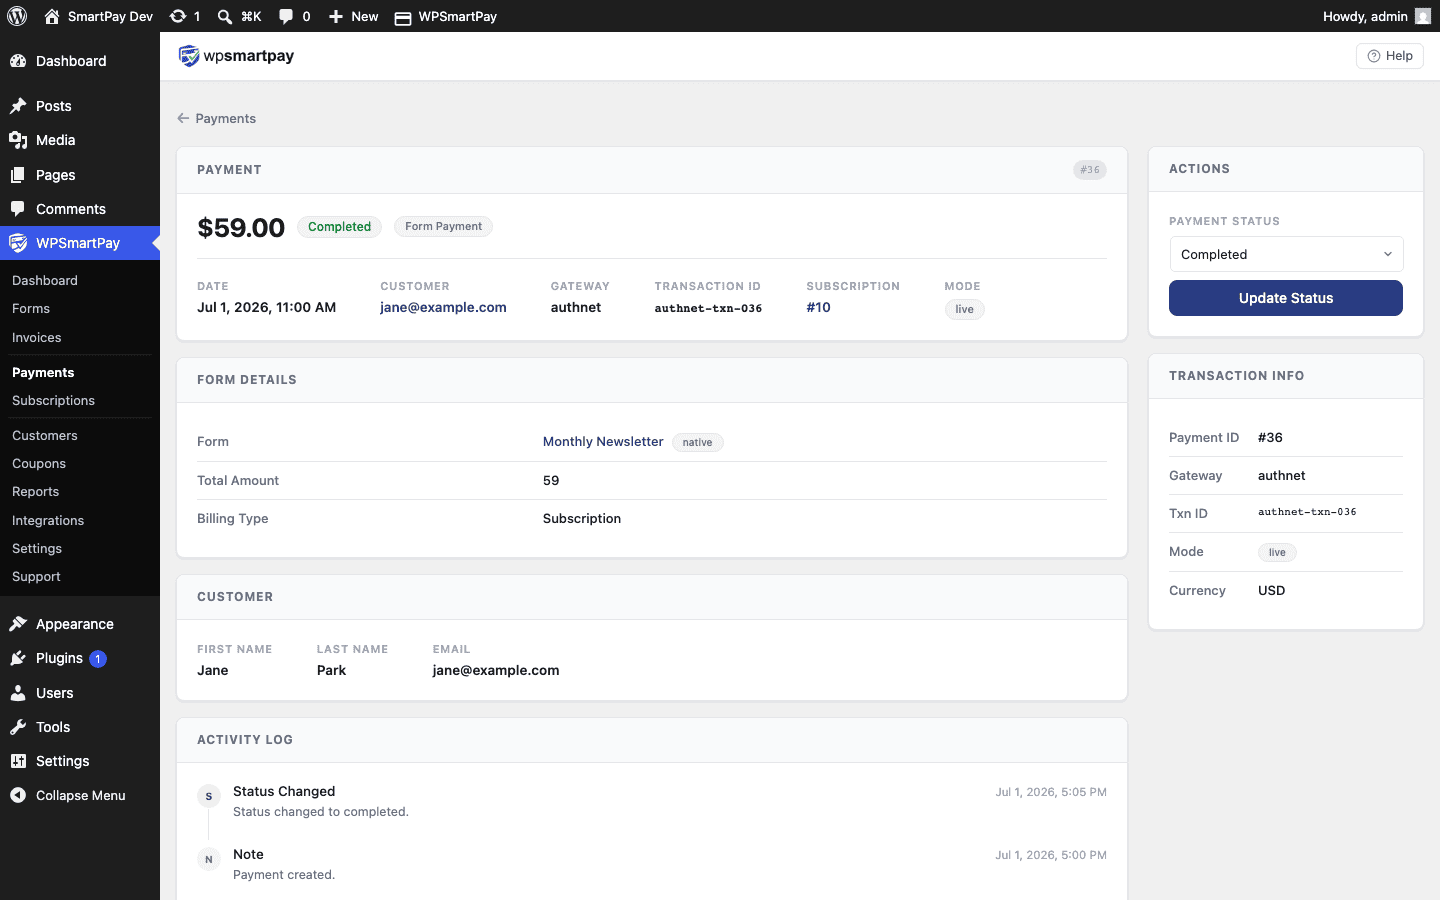 The status badge and activity log on the payment detail page.
# Payments List & Filtering
The WP SmartPay payments list is your central ledger for every payment record on the site. You can search, filter, and export records from one screen without writing any SQL or digging through WordPress posts.
## Opening the Payments List
Go to **SmartPay → Payments** in your WordPress admin sidebar.
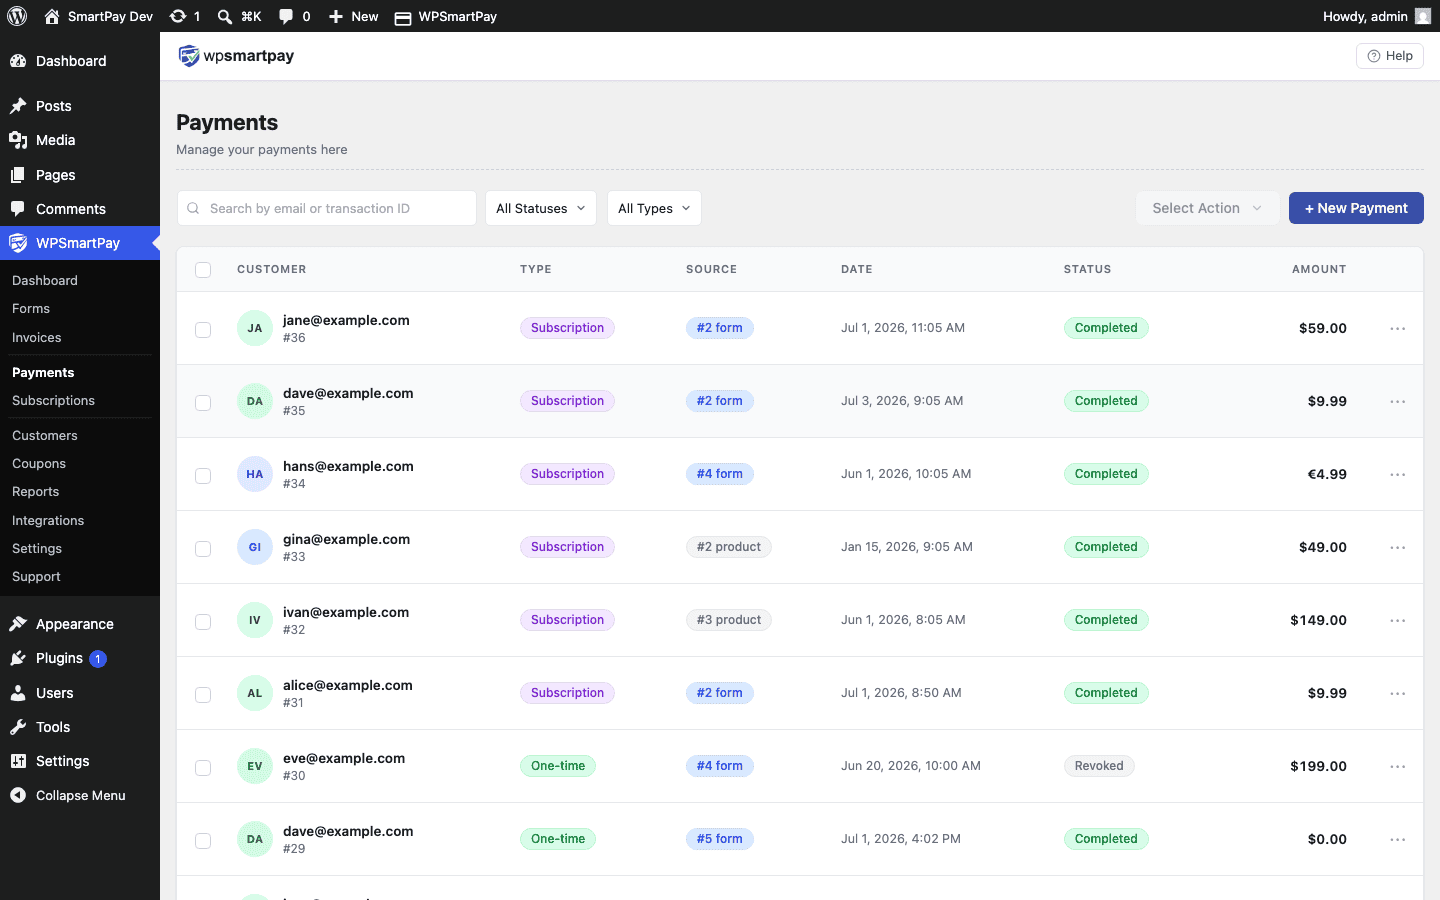 The Payments list with status tabs, search, and filter controls at the top.## Column Overview
* **ID** — Unique payment number (e.g., PAY-0042). Click to open the payment detail page.
* **Customer** — Customer name and email. Click the name to open the customer detail page.
* **Form / Product** — The payment form or digital product that generated this payment.
* **Gateway** — The payment gateway used (Stripe, PayPal, etc.).
* **Amount** — The total charged, in your store currency.
* **Status** — Current payment status badge (Completed, Pending, Failed, etc.).
* **Date** — The date and time the payment was created.
## Searching Payments
The search bar at the top accepts any of these:
* Customer email address
* Customer name (partial match)
* Payment ID (e.g., PAY-0042)
Results update as you type; no need to press Enter.
## Filtering by Status
Tabs across the top of the list let you filter by payment status with one click:
* **All** — Every payment regardless of status.
* **Completed** — Successful payments.
* **Pending** — Awaiting confirmation from the gateway.
* **Failed** — Gateway declined or errored.
* **Refunded** — Payment has been refunded.
* **Cancelled** — Customer or admin cancelled before completion.
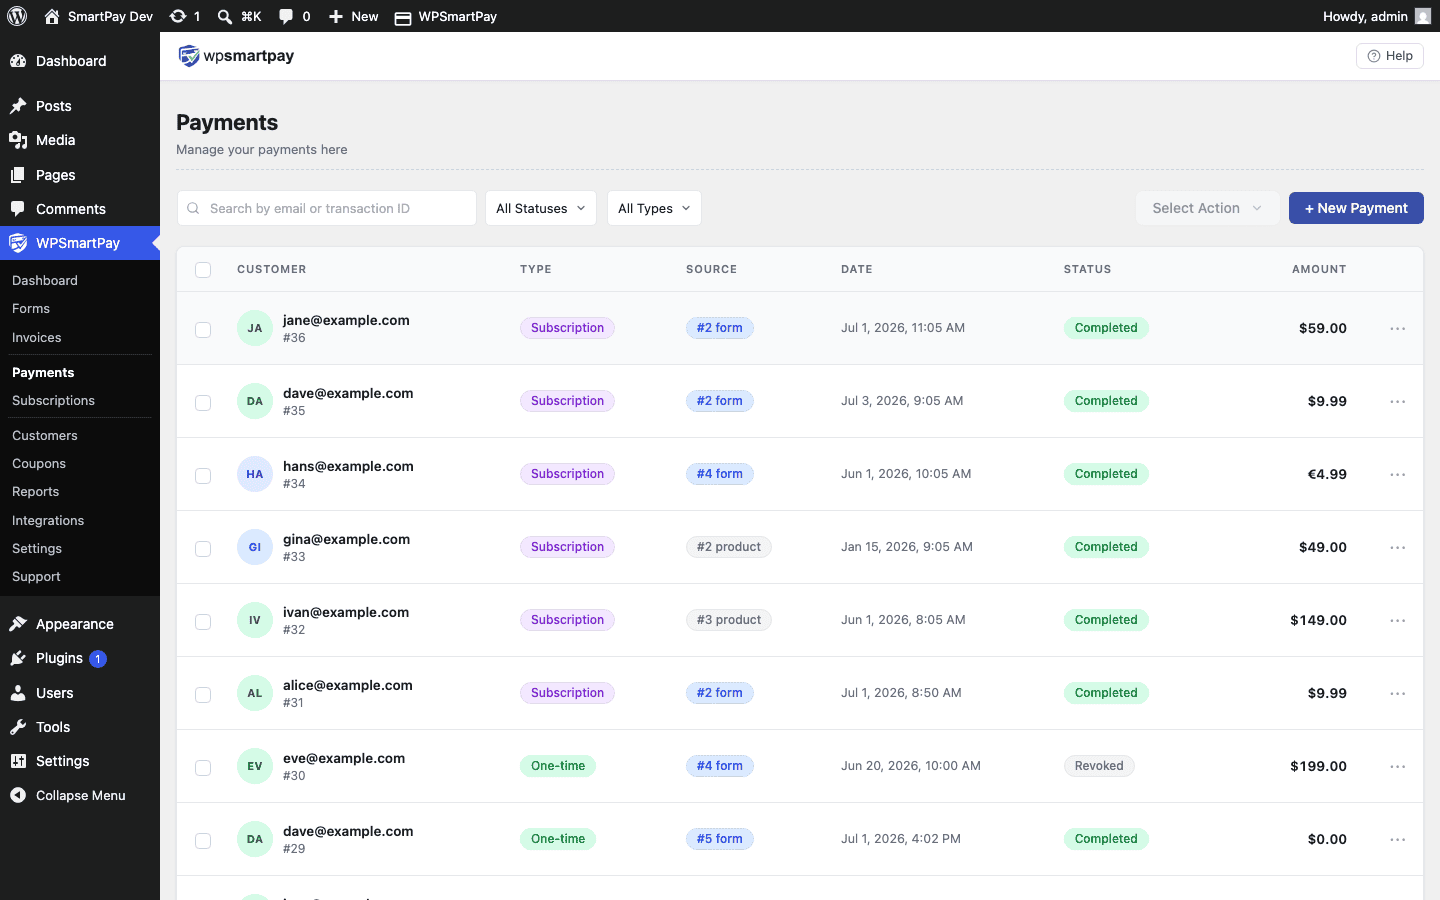 Click a status tab to filter payments — the count badge shows how many records match.## Additional Filters
A filter dropdown or date picker (depending on your version) lets you narrow results by:
* **Date range** — Start and end date.
* **Gateway** — Show payments from a specific processor only.
* **Mode** — Filter between **Live** and **Test** payments.
## Sorting
Click any column header to sort the list. Click again to reverse direction. Sorting by Amount and limiting to Completed payments is an easy way to find your largest single transactions.
# PayPal Standard
PayPal Standard is the built-in payment gateway in the free WP SmartPay plugin. Customers are redirected to PayPal's hosted checkout to complete payment, then returned to your site. No PayPal developer account is needed — just a PayPal Business account and your PayPal email.
## Prerequisites
* A [PayPal Business account](https://www.paypal.com/us/webapps/mpp/accept-payments-online) (free to create; personal accounts cannot receive business payments in all countries).
* HTTPS on your site for live payments (not required for test mode).
* WP SmartPay free plugin active.
## Country Availability
PayPal Standard is available in most countries where PayPal operates. Check [PayPal's country availability list](https://www.paypal.com/us/webapps/mpp/country-worldwide) to confirm support in your region.
## Connecting PayPal Standard
1. Go to **SmartPay → Settings → Payment Gateways**.
2. Find **PayPal Standard** and tick **Enable**.
3. Enter your **PayPal Email** (the email address of your PayPal Business account) in the **Live Email** field.
4. For test mode, enter your PayPal Sandbox email in the **Test Email** field.
5. Click **Save Settings**.
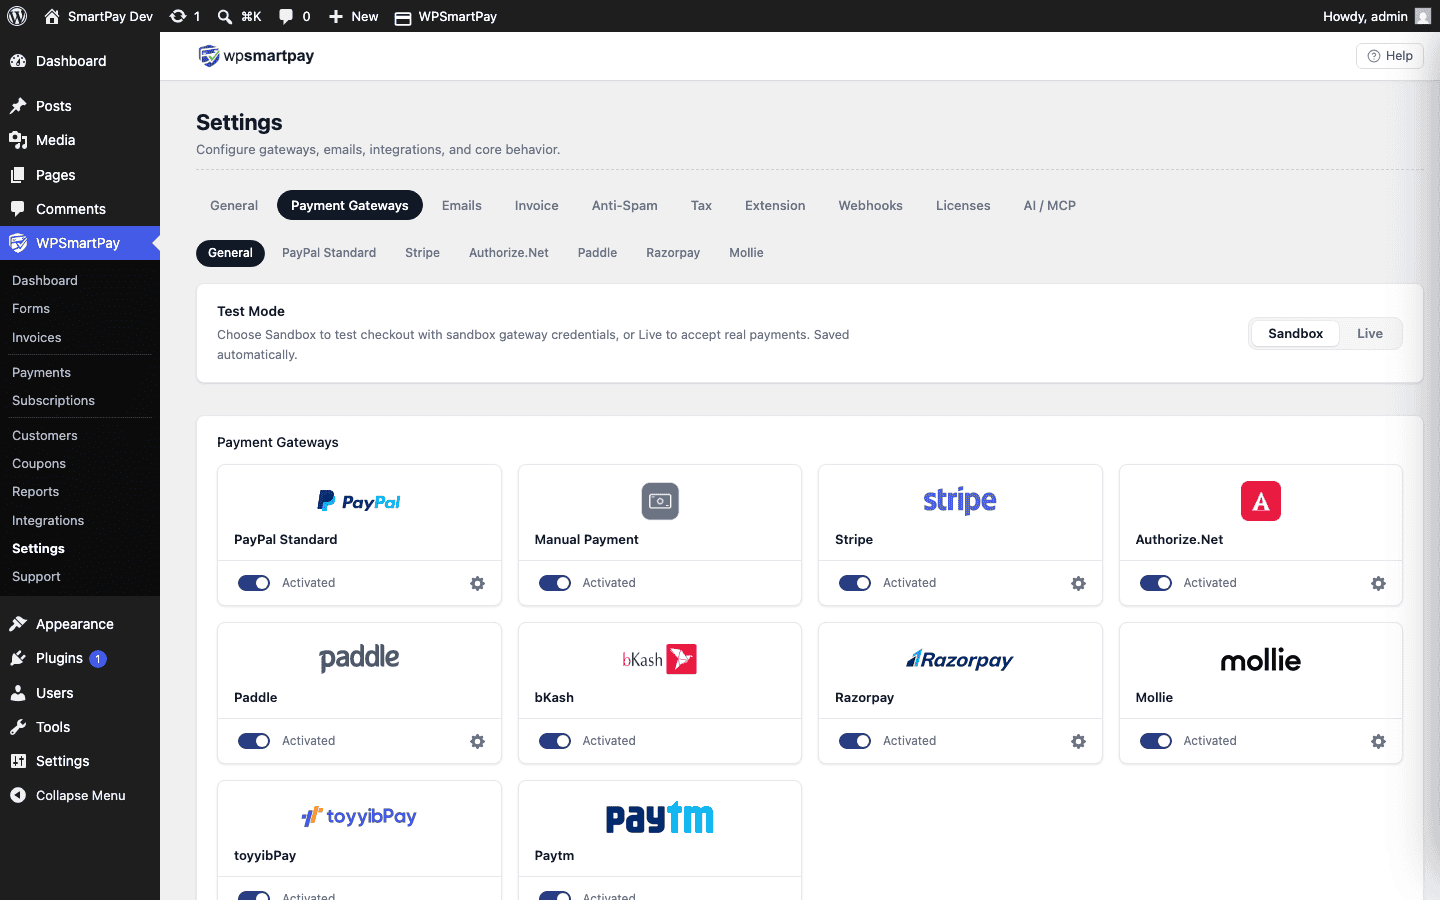 Enable PayPal Standard and enter your PayPal email in the Gateway Settings.## Test Mode Configuration
1. Create a [PayPal Sandbox account](https://developer.paypal.com/tools/sandbox/) at developer.paypal.com.
2. In the sandbox, create a Business account (seller) and a Personal account (buyer) for testing.
3. Enter the sandbox Business email in the **Test Email** field in SmartPay.
4. Toggle **Test Mode** on in Gateway Settings.
5. Test a payment using the sandbox buyer account credentials.
## PayPal IPN (Instant Payment Notification)
SmartPay uses PayPal IPN to receive payment confirmation. PayPal automatically sends an IPN notification to your site after each payment. SmartPay listens at a specific URL and updates the payment status when the IPN arrives.
SmartPay configures the IPN return URL automatically — no action required from you. If payments are stuck at Pending, check that your site is accessible from the internet (IPN cannot reach sites on localhost without a tunnel).
## Supported Payment Methods
* PayPal account balance
* Credit and debit cards (via PayPal's hosted page)
* Pay Later / Buy Now Pay Later (where available in PayPal's checkout)
## Supported Currencies
PayPal Standard supports most major currencies. See [PayPal's supported currency list](https://developer.paypal.com/docs/reports/reference/paypal-supported-currencies/). If your store currency is not supported, customers will see a currency conversion prompt on PayPal's checkout page.
## Common Errors & Fixes
* **Payment stuck at Pending** — IPN is not reaching your site. Confirm the site is live, HTTPS, and not behind a VPN or local tunnel. Also check PayPal's IPN settings in your PayPal dashboard.
* **"The merchant's PayPal account is not configured to accept payments"** — The PayPal email in SmartPay does not match a Business account, or the account is not verified.
* **Test payments not working** — Confirm Test Mode is on and the Test Email matches the sandbox Business account email, not the sandbox buyer email.
# Paytm
Paytm is one of India's largest digital payment platforms, with over 350 million users. WP SmartPay Pro integrates Paytm's Payment Gateway, allowing Indian businesses to accept UPI, wallet, card, and net banking payments through Paytm's checkout.
## Prerequisites
* A [Paytm for Business](https://business.paytm.com) account. KYC verification is required for live payments.
* Your Paytm Merchant ID (MID) and Merchant Key from the Paytm Dashboard.
* WP SmartPay Pro with a valid license.
* HTTPS on your site.
## Country Availability
Paytm is available to businesses registered in India. International payments are available on select card types if enabled on your Paytm account.
## Finding Your Paytm Credentials
1. Log in to your [Paytm Dashboard](https://dashboard.paytm.com).
2. Go to **Developer → API Details**.
3. Copy your **Merchant ID (MID)** and **Merchant Key**.
4. For sandbox: use the test credentials provided in Paytm's developer documentation.
## Connecting Paytm in SmartPay
1. Go to **SmartPay → Settings → Payment Gateways**.
2. Find **Paytm** and tick **Enable**.
3. Enter your **Live Merchant ID** and **Live Merchant Key**.
4. Enter your **Test Merchant ID** and **Test Merchant Key**.
5. Click **Save Settings**.
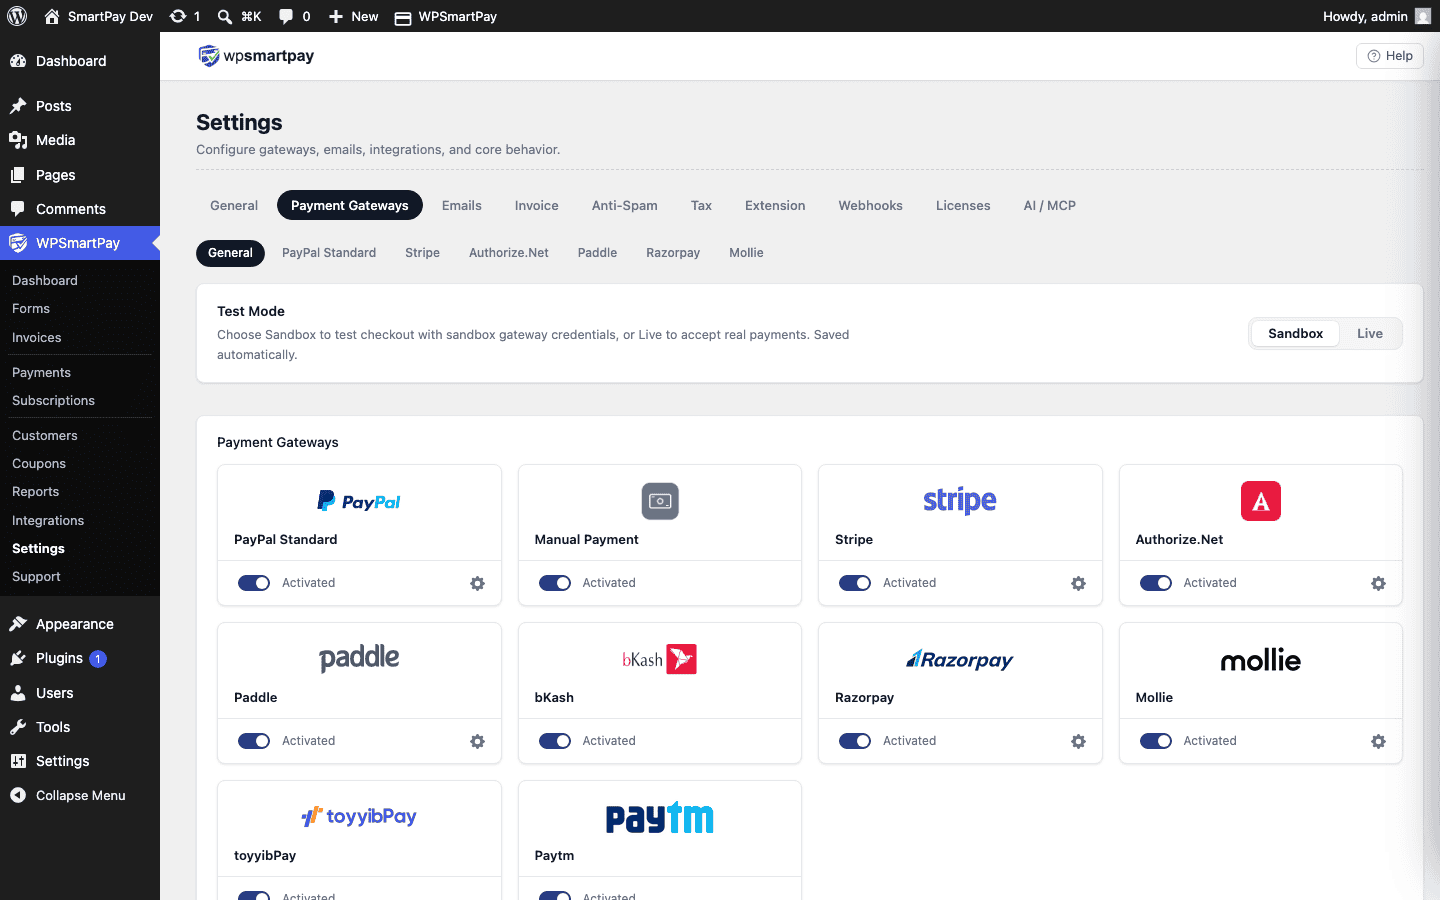 Paytm settings — enter your Merchant ID and Merchant Key for live and test environments.## Test Mode Configuration
Toggle **Test Mode** in SmartPay. Paytm provides a staging environment with test credentials. Use Paytm's test card numbers from the developer documentation to simulate payments in staging.
## Supported Payment Methods
* Paytm Wallet
* UPI (all UPI apps)
* Net Banking (100+ Indian banks)
* Visa, Mastercard, RuPay (credit/debit cards)
* EMI
## Supported Currencies
Indian Rupee (INR) for domestic payments.
## Common Errors & Fixes
* **"Checksum mismatch"** — The Merchant Key is incorrect. Paytm generates a checksum from the transaction data using this key — any mismatch causes rejection. Re-copy the key exactly.
* **"Invalid merchant"** — Merchant ID (MID) does not exist or is for a different environment (staging vs production).
* **Payment stuck at Pending** — Paytm's payment status callback is not reaching your site. Confirm HTTPS and that your site is publicly accessible.
# Product Configuration
In WordPress admin, go to **Smartpay > Products**. You will find all the products. Click **Add New** to create new Product.
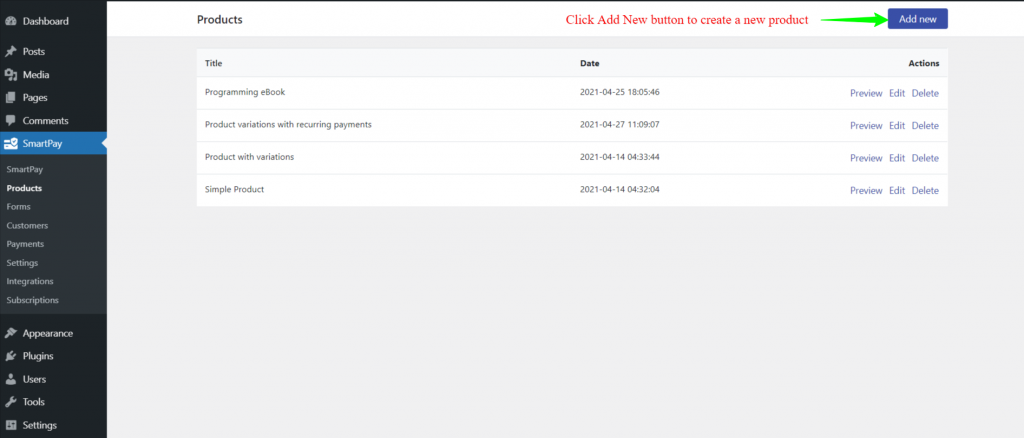
Set **Product title, Cover Image, Product description** and **files**.
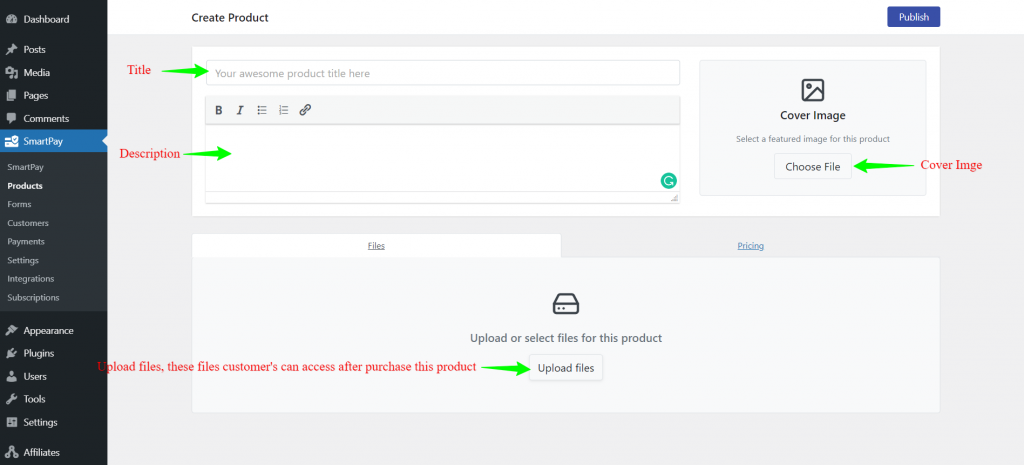
Next, click on **Pricing tab**.
Available options for product price are given below:
1. **Billing Type**: Set Product billing type. Option are **One Time** and **Subscription**.
2. **Base Price**: Set the base price of a product.
3. **Sales price**: Set the sale price of a product.
4. **Variations**: If you want to set multiple variation for a product, then click **Add Variations** button.
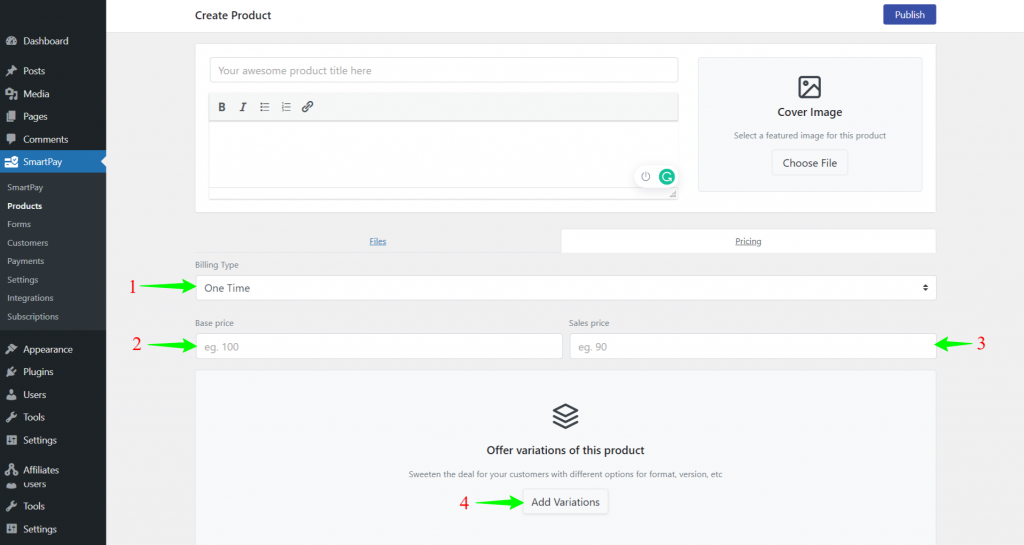
```
Note: Subscription billing option is only available in Smartpay Pro Plugin
```
## Product Variation
1. **Option Name**: Name of that variation product.
2. **Billing Type**: Billing type of that variation product. Options are One Time and Subscription.
3. **Base Price**: Base price of variation product.
4. **Sale price**: Set the sale price of a variation product.
5. **Description**: Description of that variation product.
6. **Files**: Files of that variation product a customer will get after purchasing.
7. **Add Option**: If you want to add more variation, then click **Add option** button.
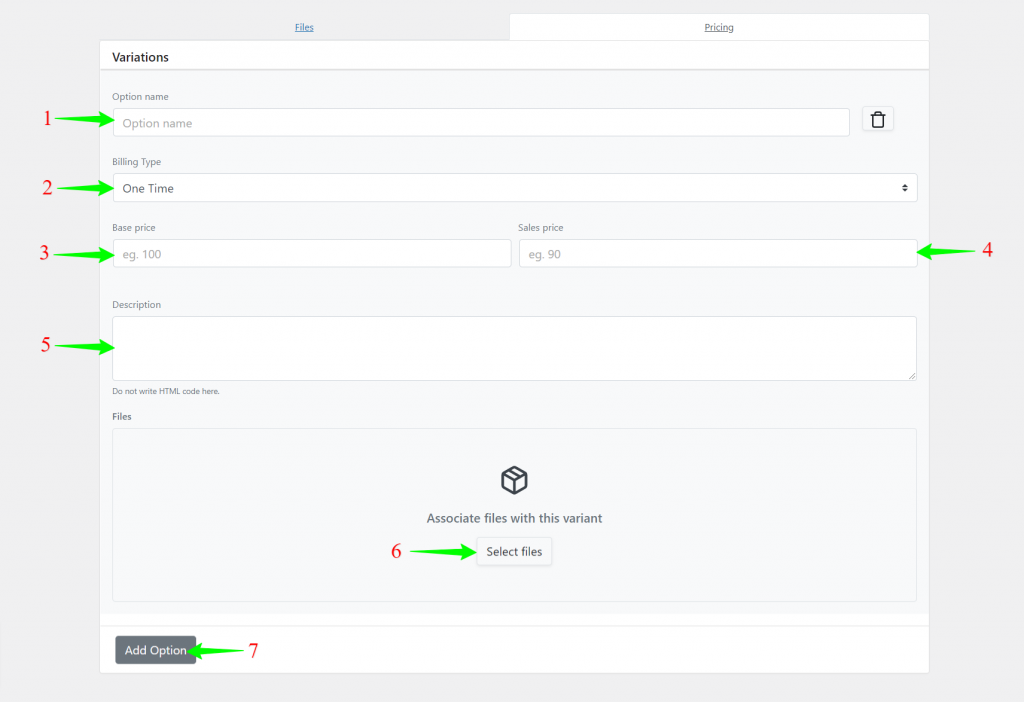
After giving all the information of a product, click **Publish** button. Then you will find **Preview** button. Click on **Preview** Button. This will take you to frontend of that product.
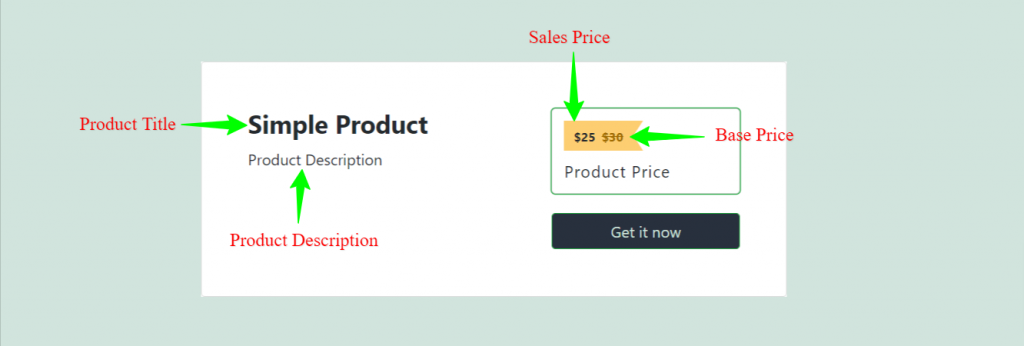
Now you can provide this **Product URL** to customer and start receiving payments from customer.
## Product Example
### Simple Product Backend
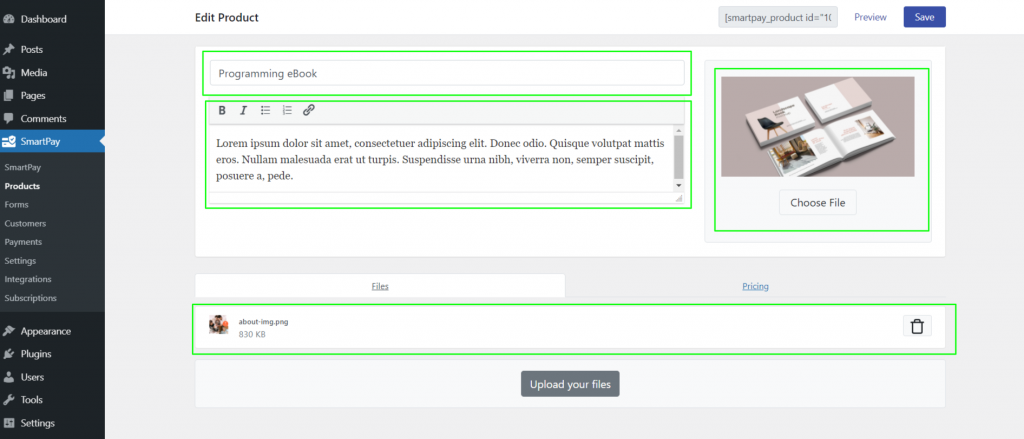
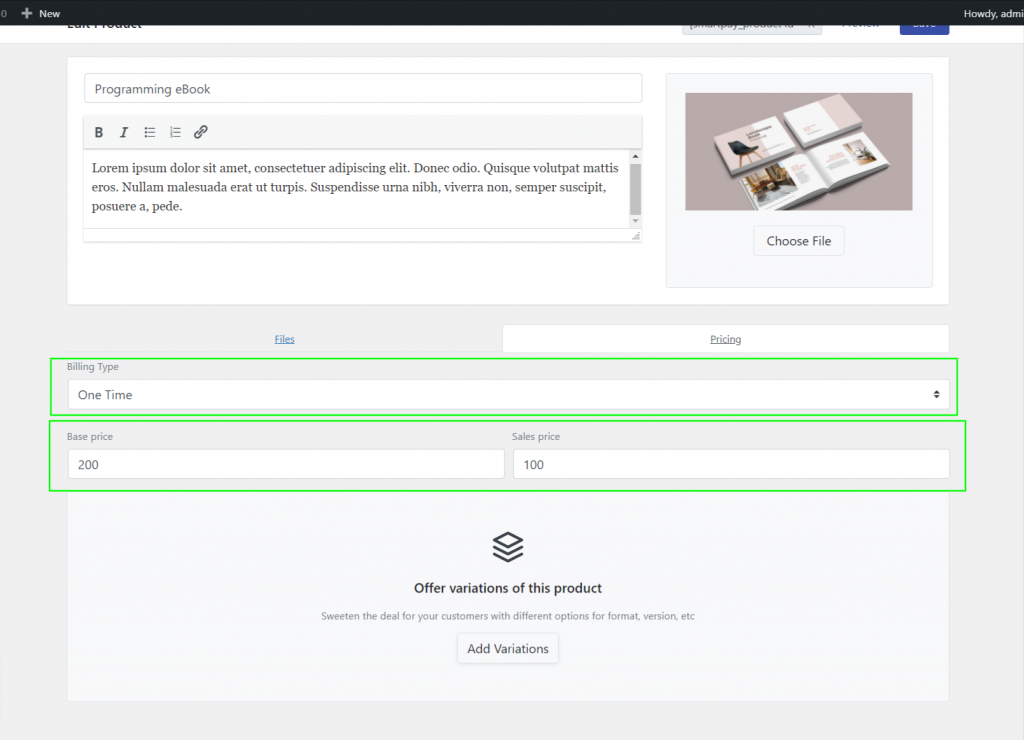
### Simple product frontend
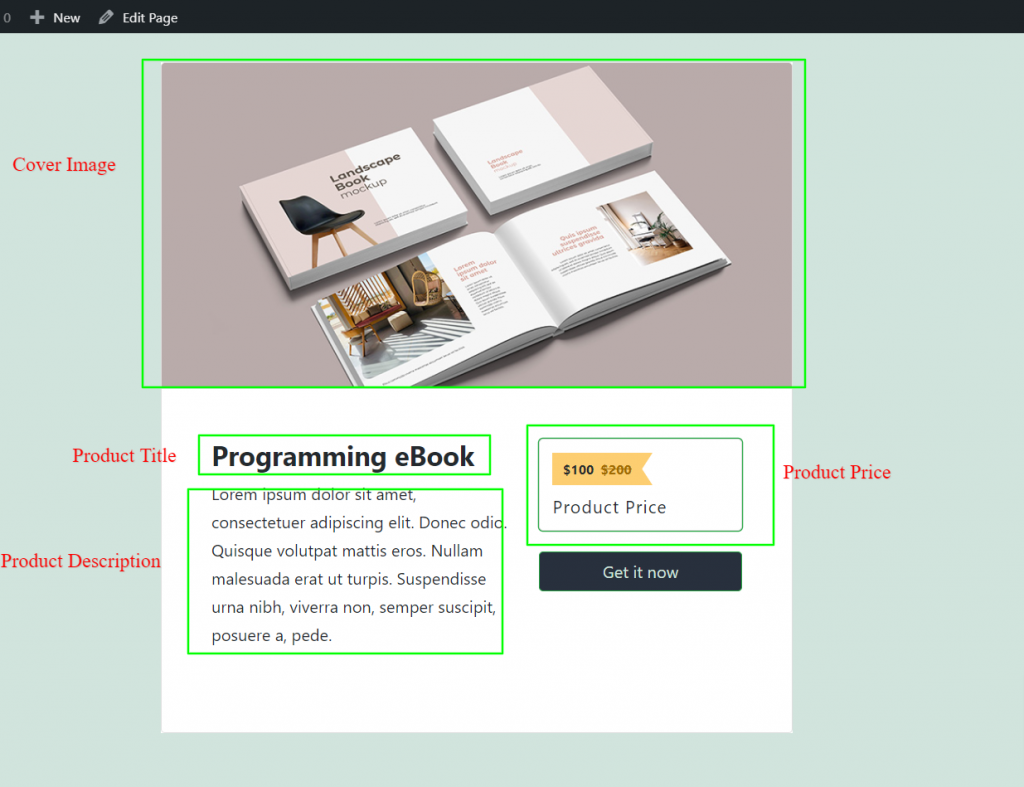
### Product variations with recurring payments backend
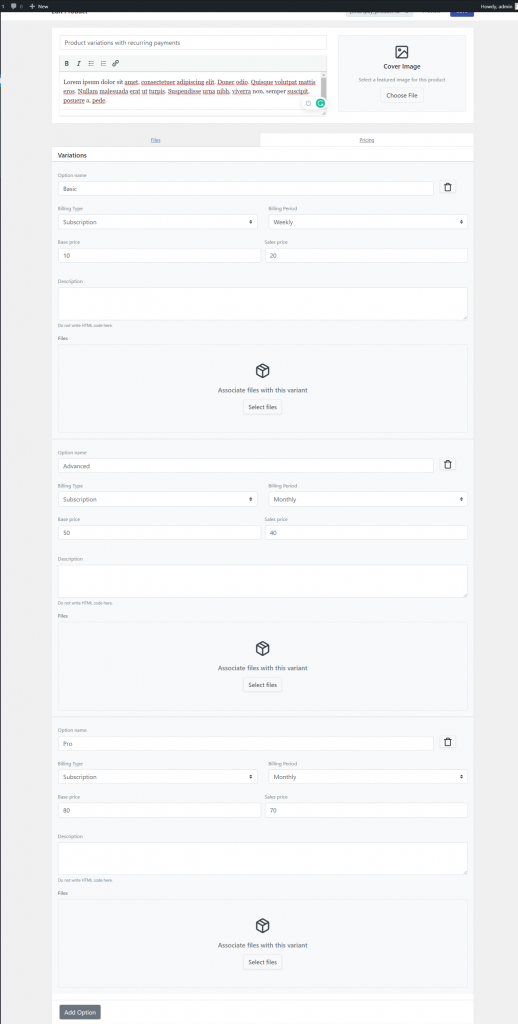
### Product variations with recurring payments frontend
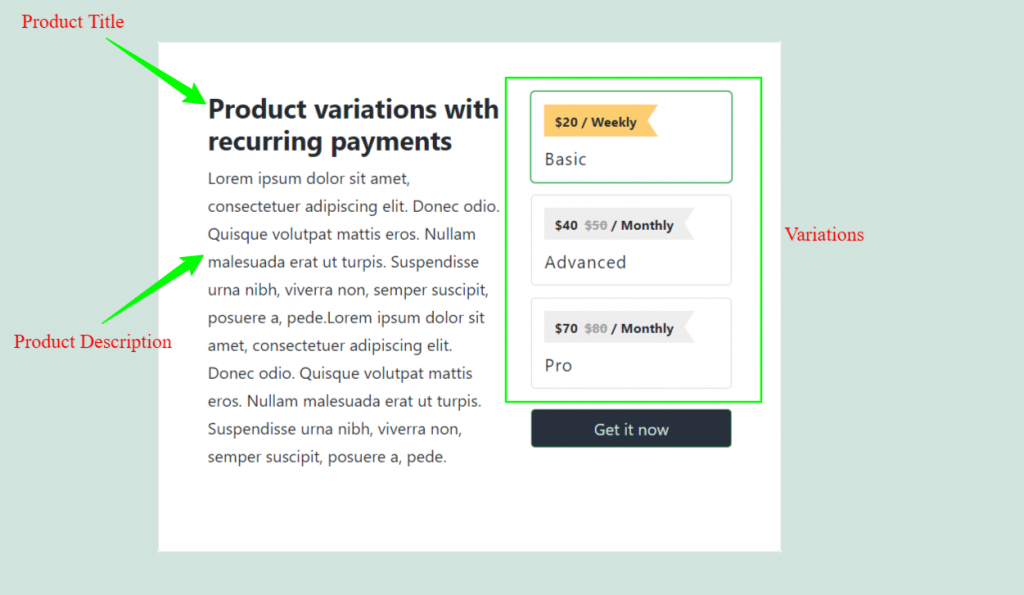
# Razorpay
Razorpay is a popular payment gateway for businesses in India. It supports credit/debit cards, UPI, net banking, wallets, and EMI — covering all major payment methods used by Indian customers. WP SmartPay Pro integrates Razorpay with its hosted checkout modal.
## Prerequisites
* A [Razorpay account](https://razorpay.com). Business verification is required to go live.
* Your Razorpay Key ID and Key Secret from the Razorpay Dashboard.
* WP SmartPay Pro with a valid license.
* HTTPS on your site (required for live payments).
## Country Availability
Razorpay is available to businesses registered in India. International customers can pay via card if you enable international payments in your Razorpay account settings.
## Finding Your Razorpay API Keys
1. Log in to your [Razorpay Dashboard](https://dashboard.razorpay.com).
2. Go to **Settings → API Keys**.
3. Click **Generate Test Key** (for test keys) or **Generate Key** (for live keys — only available after account activation).
4. Copy the **Key ID** and **Key Secret**.
## Connecting Razorpay in SmartPay
1. Go to **SmartPay → Settings → Payment Gateways**.
2. Find **Razorpay** and tick **Enable**.
3. Enter your **Live Key ID** and **Live Key Secret**.
4. Enter your **Test Key ID** and **Test Key Secret**.
5. Click **Save Settings**.
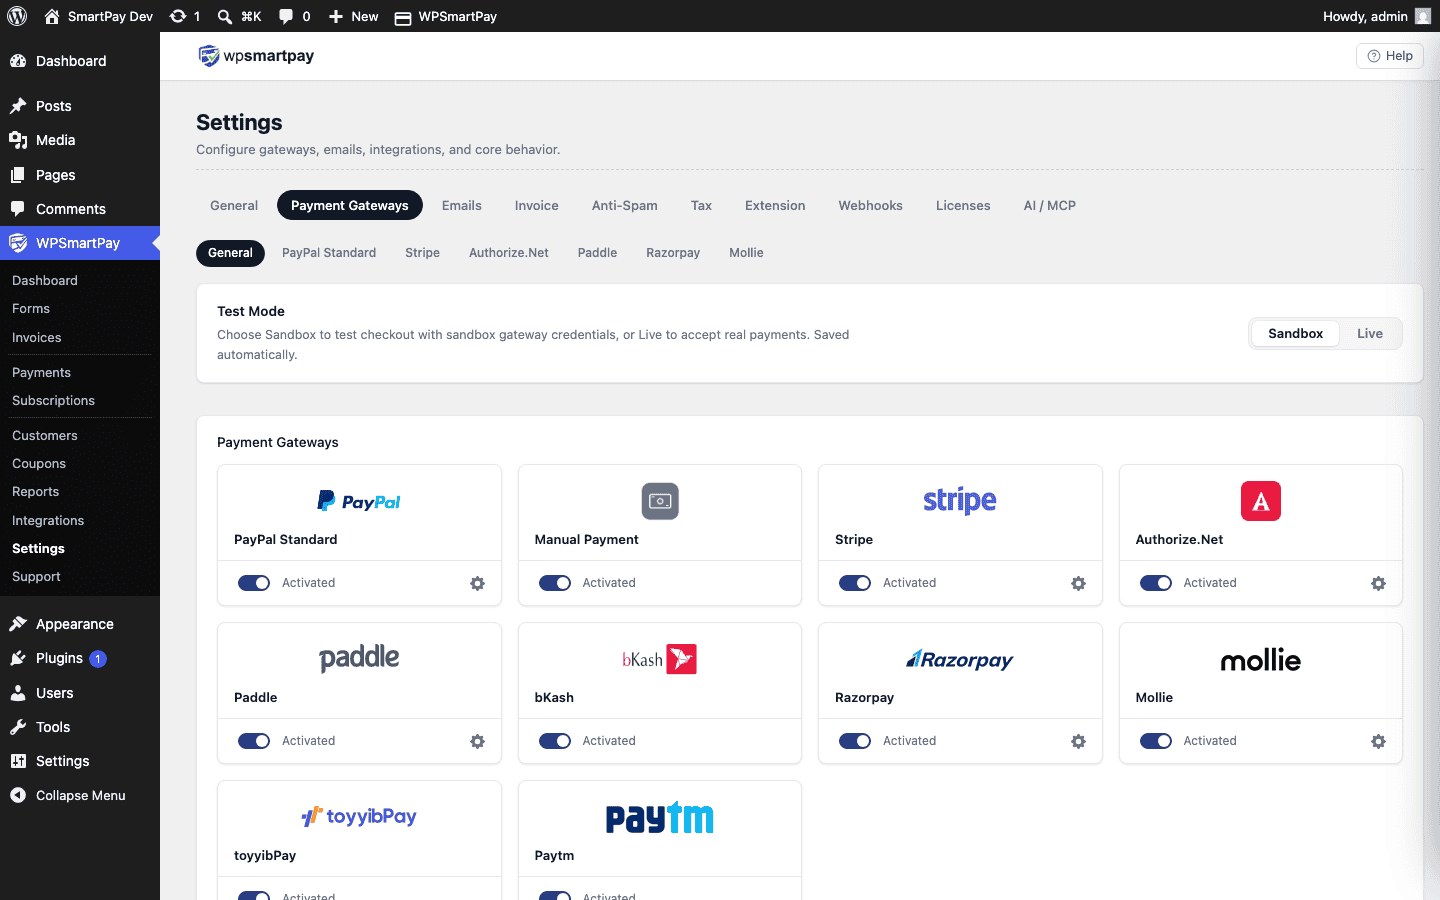 Razorpay settings — enter your Key ID and Key Secret for both live and test environments.## Setting Up Razorpay Webhooks
1. In your Razorpay Dashboard, go to **Settings → Webhooks**.
2. Click **Add New Webhook**.
3. Enter the URL: `https://yoursite.com/?smartpay-listener=razorpay`
4. Enter a **Secret** and copy it for SmartPay settings.
5. Select events: **payment.captured**, **payment.failed**, **refund.created**.
6. Save the webhook.
## Supported Payment Methods
* Visa, Mastercard, RuPay (credit/debit cards)
* UPI (Google Pay, PhonePe, Paytm, and all UPI apps)
* Net banking (50+ Indian banks)
* Wallets (Paytm, Mobikwik, Freecharge, Airtel)
* EMI (credit card EMI and cardless EMI)
## Supported Currencies
Indian Rupee (INR) for domestic payments. International card payments in USD, EUR, GBP, and other major currencies (requires enabling international payments in Razorpay).
## Test Mode Configuration
Toggle **Test Mode** on in SmartPay. Use Razorpay's test credentials and the following test card:
* Card: `4111 1111 1111 1111` | Expiry: any future date | CVV: any 3 digits
* For UPI test: use success (`success@razorpay`) or failure (`failure@razorpay`) virtual UPI IDs.
## Common Errors & Fixes
* **"Key authentication failed"** — Key ID or Secret is incorrect or from the wrong environment (test vs live).
* **Order not created** — Check that your Razorpay account is fully verified and activated.
* **Payment stuck at Pending** — Webhook not configured or secret mismatch.
# Payment Recovery Report
The WP SmartPay Pro Recovery report tracks failed and abandoned payments — and shows how much revenue was recovered through gateway retries or follow-up actions. Use it to identify customers whose billing is failing and quantify the revenue impact.
## Opening the Recovery Report
1. Go to **SmartPay → Reports**.
2. Click the **Recovery** tab.
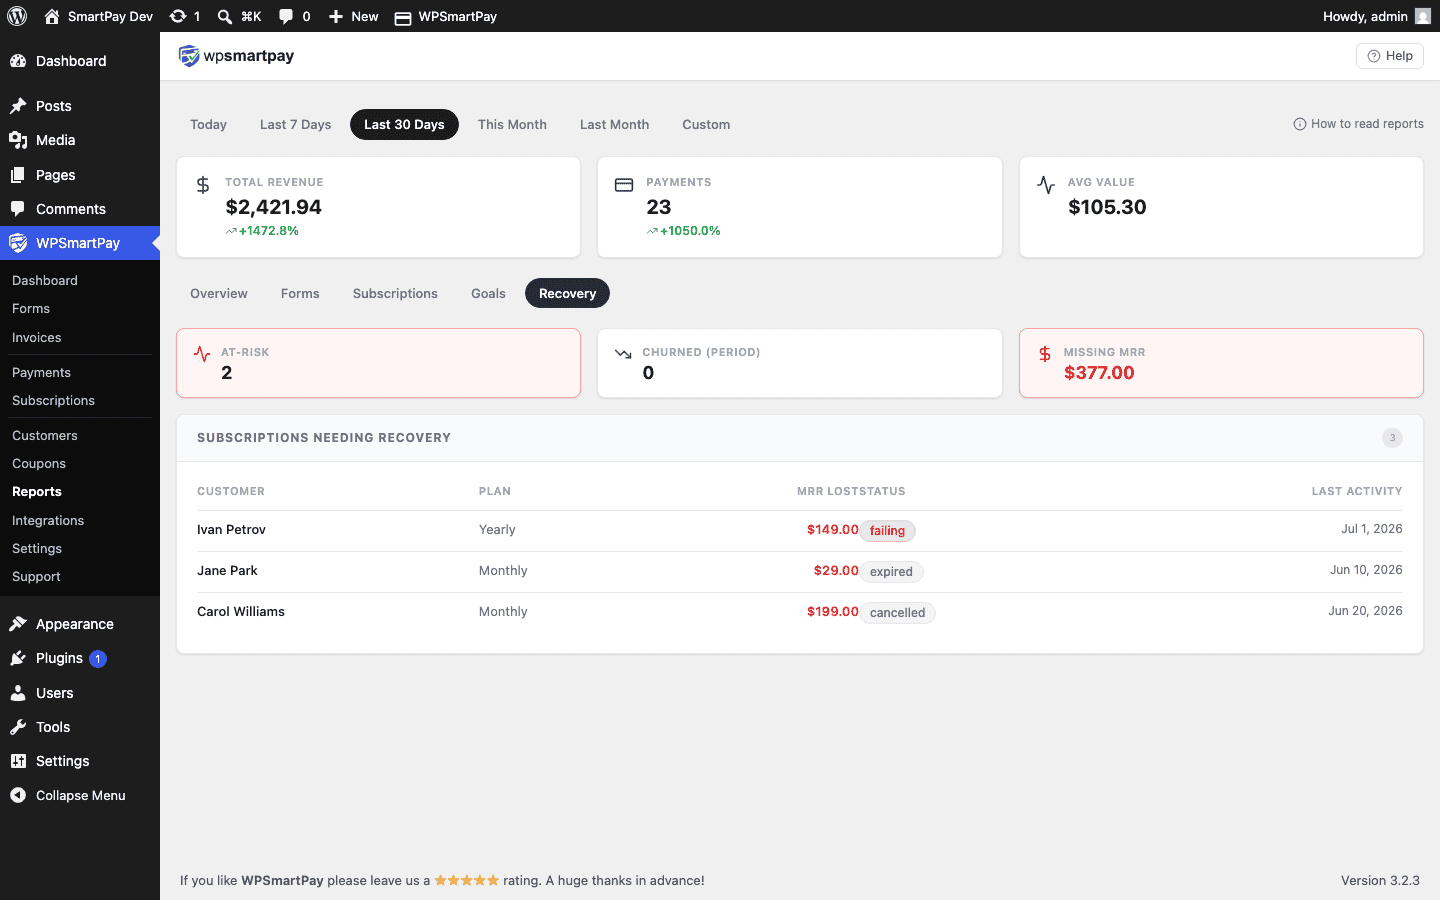 The Recovery report showing revenue at risk and the recovery status of each failed payment.## What the Report Shows
* **Revenue at Risk** — Total amount of failed or failing subscription renewals in the selected period. This is the maximum recoverable amount if all retries succeed.
* **Revenue Recovered** — Amount from failed payments that were subsequently recovered through gateway retries or customer card updates.
* **Recovery Rate** — Recovered ÷ At Risk × 100. A higher rate indicates effective gateway retry logic.
## Failed Payment List
The table below the summary cards lists individual failed or abandoned payment records with:
* **Customer** — Name and email of the customer with a failed charge.
* **Amount** — The amount that failed to process.
* **Subscription** — If it was a subscription renewal failure, a link to the subscription record.
* **Failed Date** — When the failure occurred.
* **Status** — **Failing** (gateway retrying), **Recovered** (subsequent retry succeeded), or **Lost** (all retries exhausted, subscription cancelled).
## Manual Follow-Up Actions
For subscriptions with status **Failing**:
1. Click the customer's email to open their customer profile.
2. Note the customer's email address.
3. Contact the customer directly (outside SmartPay) asking them to update their payment method in the Stripe Customer Portal.
4. Once they update their card, the next gateway retry will succeed and the subscription status returns to Active.
> **Tip:** Proactive outreach within the first 24–48 hours of a failure significantly improves recovery rates. Customers often have expired cards but have no idea a charge failed until you tell them.
# How to Accept Recurring Donations
Many nonprofits and creators want to accept recurring donations from supporters — a fixed monthly contribution, a custom amount the donor chooses, or a combination of both. WP SmartPay makes this possible without any dedicated donation plugin: a payment form with flexible pricing and subscription billing handles it entirely.
## Scenario
A nonprofit wants to offer supporters three giving levels ($10, $25, or $50/month) plus a "name your own amount" option. Donors should be charged automatically each month and receive a receipt. The organization's team should see donor totals in the Reports dashboard.
## What You Need
* WP SmartPay (free) for the payment form
* WP SmartPay Pro for subscription billing and revenue reports
* A payment gateway that supports recurring billing (Stripe, Paddle, or Mollie)
## Step 1: Create a Donation Form with Flexible Amounts
1. Go to **SmartPay → Forms → Add New**.
2. In the form editor, add a **Payment Amount** block.
3. Set the pricing type to **Set Prices** and add three options: $10, $25, $50.
4. Enable **Custom Amount** to let donors enter any value. Set a minimum of $1.
5. Add a label like "Monthly Giving Amount" to the amount field.
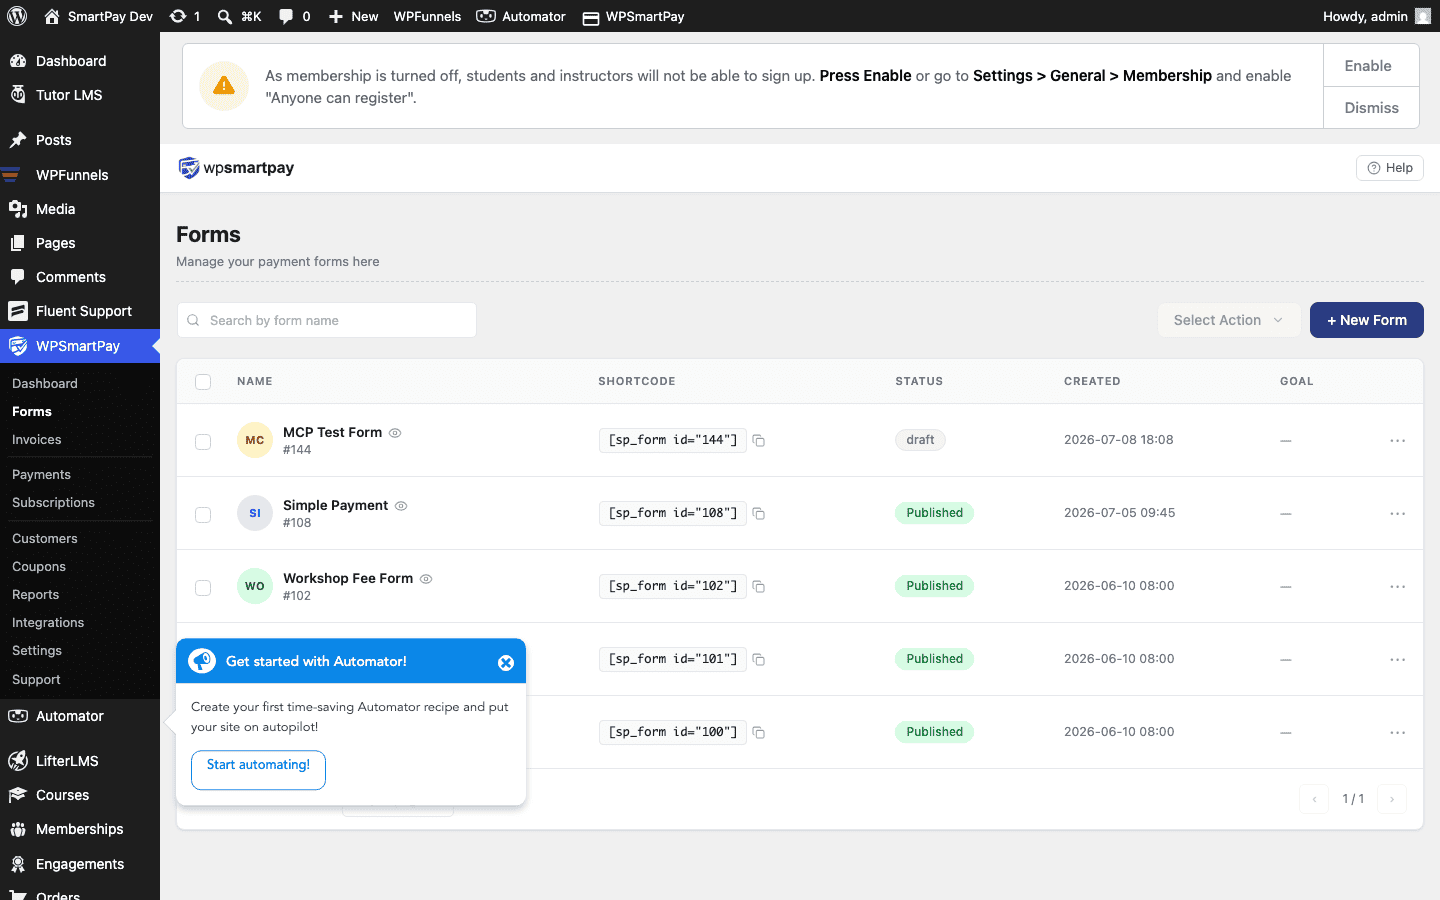 Create a new payment form — any form can become a donation form with the right pricing settings.## Step 2: Enable Subscription Billing
1. In the form editor sidebar, find the **Subscription** settings.
2. Set the billing period to **Monthly**.
3. Leave the subscription length as **Ongoing** so donors are charged until they cancel.
4. Optionally add a **Trial Period** (e.g., first month free) if you want to encourage sign-ups.
## Step 3: Set Up the Email Receipt
1. Go to **SmartPay → Settings → Email Notifications**.
2. Enable the **Payment Received** email — donors receive this after each successful charge.
3. Customize the subject and body to say "Thank you for your monthly donation."
## Step 4: Embed the Form on a Donation Page
1. Copy the form's shortcode from the form editor (e.g., `[smartpay_form id="123"]`).
2. Create a WordPress page titled "Donate" and paste the shortcode.
3. Publish the page and share the URL with supporters.
## Step 5: Track Donations in Reports
Once donations are flowing, go to **SmartPay → Reports → Revenue** to see monthly recurring revenue broken down by form. The **Goals** tab (Pro) lets you set a fundraising target and track progress with a visual progress bar.
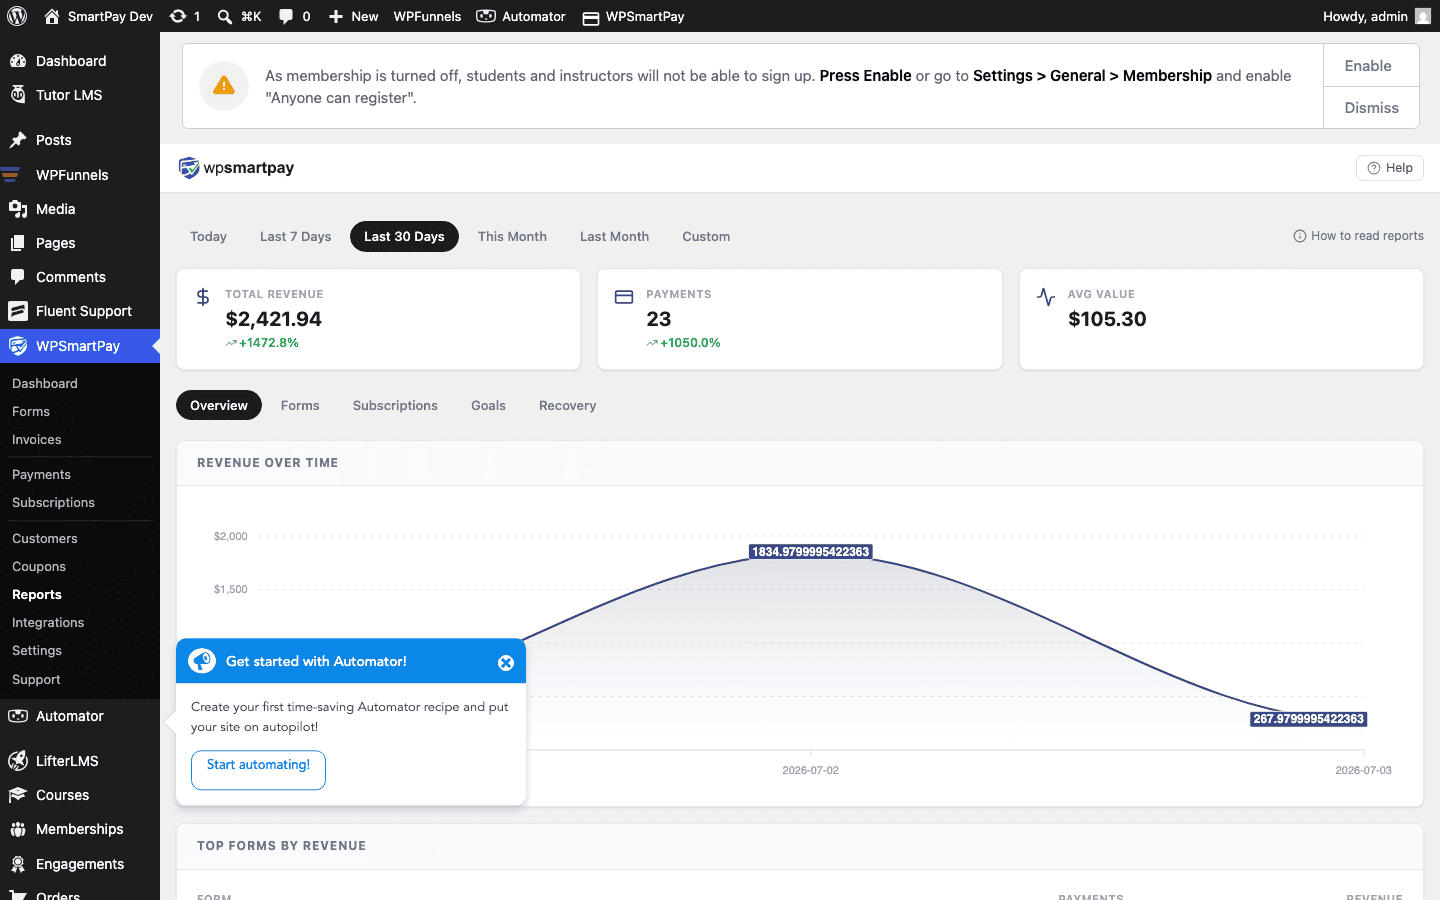 The Revenue Report shows recurring donation income month by month.## Result
Supporters visit the donation page, choose their giving level (or enter a custom amount), pay via Stripe or PayPal, and are automatically charged every month. Failed payments trigger SmartPay's built-in recovery flow, which retries the charge and notifies the donor. The nonprofit's admin dashboard shows real-time revenue with no manual tracking needed.
## Tips
* Add a **coupon code** (Pro) for one-time donor incentives without changing the subscription price permanently.
* Use **Mailchimp or ActiveCampaign integration** to add donors to a newsletter list automatically after their first payment.
* Set a **Revenue Goal** in the Reports tab to show a fundraising thermometer on your donation page (embed via shortcode).
# Refunding a Payment
WP SmartPay lets you issue refunds directly from the payment detail page. For gateways that support automatic refunds (Stripe and Paddle), the refund is processed immediately without logging into your gateway dashboard. For other gateways you get a guided manual process.
## Automatic Refunds (Stripe & Paddle)
1. Go to **SmartPay → Payments** and click the payment you want to refund.
2. On the payment detail page, click the **Refund** button.
3. Confirm the refund amount (full refund by default; you can enter a partial amount).
4. Click **Process Refund**.
SmartPay sends the refund request to the gateway API. Within seconds the gateway confirms and SmartPay updates the payment status to **Refunded**. The activity log records the event with a timestamp and the refund amount.
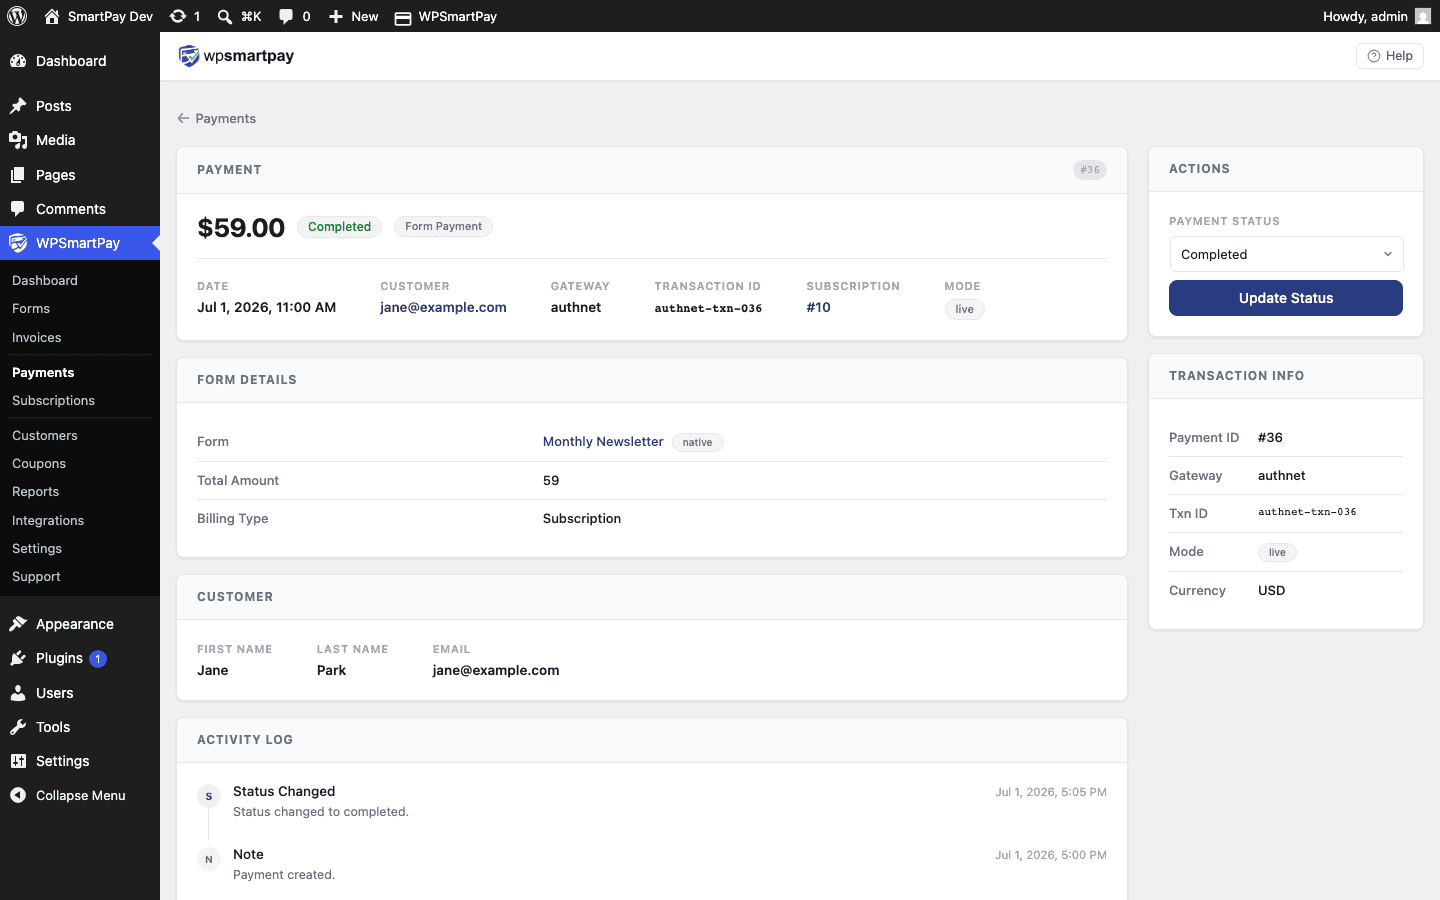 The Refund button on the payment detail page initiates the refund through the gateway API.## Manual Refunds (Other Gateways)
For gateways that don't have a SmartPay refund API (PayPal Standard, Razorpay, Mollie, etc.):
1. Log in to your gateway dashboard and issue the refund there.
2. Return to SmartPay's payment detail page.
3. Click **Mark as Refunded** to update the payment status in SmartPay.
This two-step process keeps your SmartPay records in sync with what actually happened in the gateway.
## Partial Refunds
When the Refund dialog opens you can change the amount to less than the full payment total. SmartPay records the partial refund amount in the activity log. The payment status changes to **Refunded** regardless of whether the refund was full or partial.
## Status After Refund
After a refund is processed or marked manually, the payment status changes to **Refunded** and the refund amount is subtracted from the customer's lifetime revenue total in the customer record.
## Customer Notification
SmartPay does not automatically send a refund notification email to the customer — you should communicate the refund directly, or customise the email notification settings at **SmartPay → Settings → Emails** if you have set up a refund email template.
# Troubleshooting Subscription Renewal Failures
Subscription renewal failures are one of the most common reasons subscribers lose access. This article explains why renewals fail, how SmartPay handles them automatically, and what to do when automatic recovery doesn't work.
## Why Renewal Payments Fail
* **Card expired:** The subscriber's card on file has passed its expiry date — the most common cause
* **Insufficient funds:** The subscriber's account had insufficient balance at renewal time
* **Card reported lost or stolen:** Bank blocked the charge
* **Subscription card blocked for international charges:** Some banks block recurring charges from non-local merchants
* **3D Secure re-authentication required:** Some European banks now require subscriber re-authentication on recurring charges
* **Hard block by bank:** The bank has blocked this specific merchant or transaction type
## What Happens Automatically
1. The gateway attempts the renewal charge on the billing date.
2. If declined, SmartPay changes the subscription status to **Failing**.
3. SmartPay sends an automatic **Payment Failure** email to the subscriber, asking them to update their payment method.
4. The gateway retries on its own schedule:
* **Stripe Smart Retries:** Stripe uses machine-learning to retry at the optimal time over the next 4 days (configurable in Stripe Dashboard → Revenue Recovery)
* **Paddle:** Retries daily for up to 4 weeks
* **Mollie:** Retries once after 2 days; then cancels
5. If all retries fail, the subscription is automatically cancelled and the subscriber loses access.
## Viewing Failing Subscriptions
1. Go to **SmartPay → Subscriptions**.
2. Filter by status: **Failing**.
3. Click a subscription to see the failure details — last attempt date, failure reason (if the gateway provided one), and subscriber contact info.
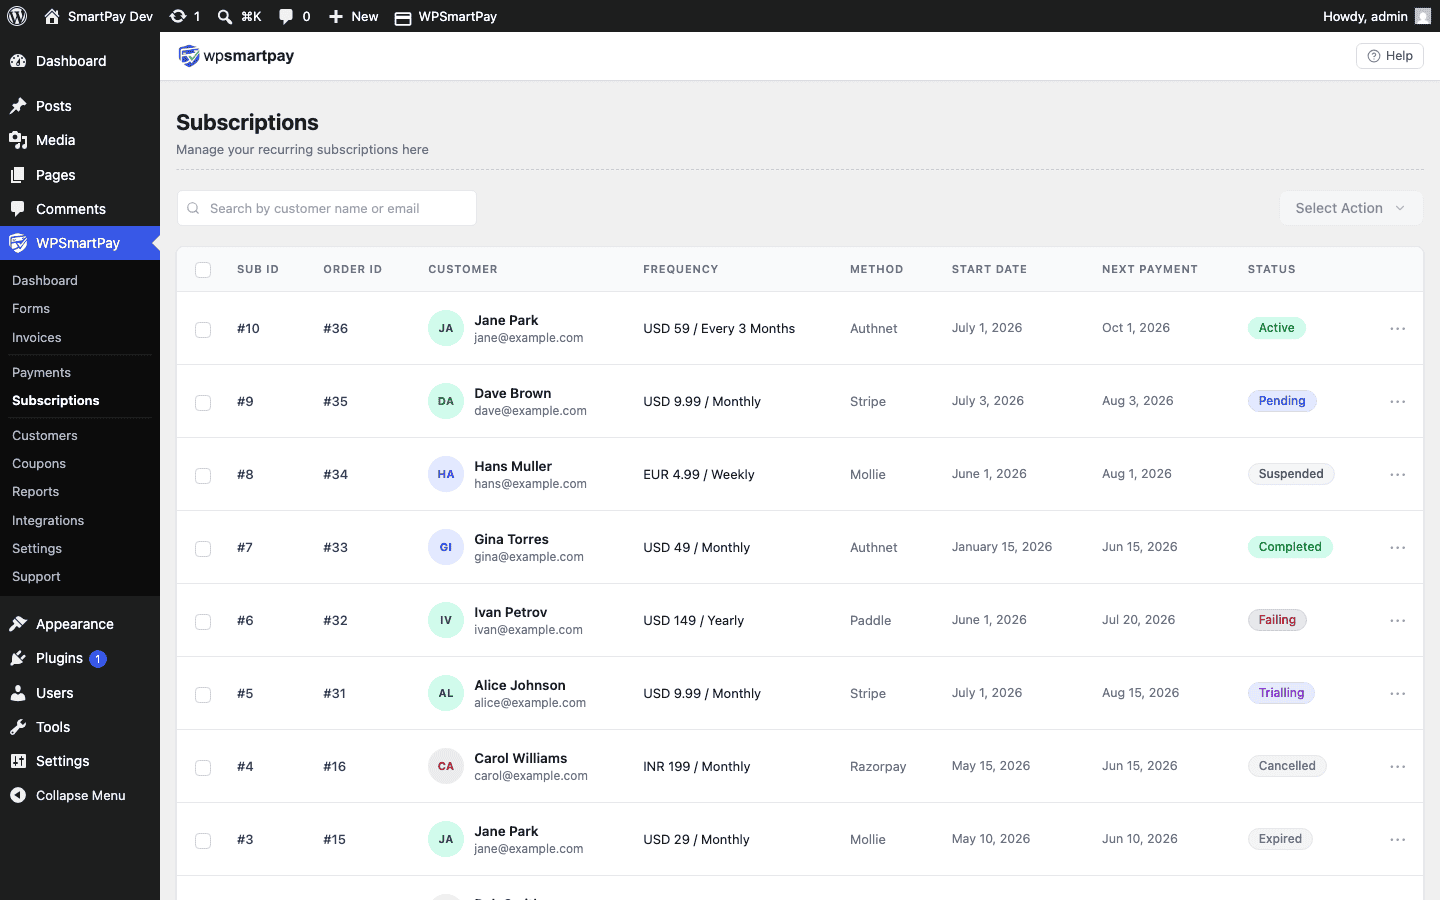Filter the subscriptions list by "Failing" to see all subscriptions with failed renewals that need attention.## Helping Subscribers Update Their Payment Method
1. Direct the subscriber to the **Customer Account Page** (the page with `[smartpay_account]`).
2. From their account, they click **Update Payment Method**.
3. A Stripe or Paddle secure form opens for them to enter a new card.
4. Once saved, the gateway will retry the failed charge.
Alternatively, as an admin you can send them a **payment update link** directly from the subscription detail page.
## Manually Retrying a Renewal
Once the subscriber updates their card, you can manually trigger a retry from the gateway dashboard:
* **Stripe:** Open the invoice in Stripe Dashboard → click **Retry payment**
* **Paddle:** Open the subscription in Paddle Dashboard → click **Retry**
SmartPay will receive the success webhook and change the subscription status back to **Active** automatically.
## Reactivating a Cancelled Subscription
If retries are exhausted and the subscription has been cancelled, the subscriber must re-subscribe via the payment form. Their new subscription will be a fresh record in SmartPay. If they have an LMS or membership integration, access will be re-granted after the new subscription is created.
## Preventing Renewal Failures
* **Enable dunning emails:** Configure a pre-expiry email sequence in your email marketing tool (Mailchimp, ActiveCampaign) to remind subscribers to update their card 7 days before renewal — especially if you know their card is expiring.
* **Use Stripe's Customer Portal:** Enable the Stripe Customer Portal in Stripe Dashboard → Settings → Billing → Customer Portal. Share the portal link so subscribers can self-service card updates without your involvement.
* **Paddle handles it:** If using Paddle as your gateway, Paddle (as merchant of record) sends its own payment recovery emails and handles dunning on your behalf — no setup required.
# Renewals, Billing & Failed Payment Recovery
WP SmartPay Pro handles subscription renewals automatically through gateway webhooks. Each renewal creates a new payment record, and failed renewals trigger gateway-side retries before eventually cancelling the subscription.
## How Renewals Are Triggered
SmartPay does not run renewal billing itself. Instead:
1. Your gateway (Stripe or Paddle) manages the billing schedule on its end.
2. When a renewal fires, the gateway charges the customer's card.
3. On success, the gateway sends a `invoice.paid` / `payment_intent.succeeded` webhook to your site.
4. SmartPay receives the webhook, creates a new **Payment** record linked to the subscription, and updates the Next Renewal date.
This means renewals work even if your WordPress site is down during the billing moment — the gateway handles the charge, and the record is created when the webhook is received once your site is back up.
## Each Renewal Creates a Payment Record
Every successful renewal appears in **SmartPay → Payments** as a normal completed payment with:
* Status: Completed
* Subscription ID in the metadata
* Gateway renewal transaction ID
You can see all renewals for a specific subscription from its detail page.
## Stripe Smart Retries for Failed Renewals
If a renewal charge fails (card declined, expired, etc.), Stripe automatically retries the charge on a schedule optimised by machine learning (Smart Retries). Typically:
* First retry: 3 days after the failure
* Second retry: 5 days after the first retry
* Third retry: 7 days after the second retry
You can configure the retry schedule in your Stripe dashboard under **Billing → Settings → Smart Retries**.
SmartPay updates the subscription to **Failing** status when the first renewal attempt fails. If a retry succeeds, the status returns to **Active**. If all retries are exhausted, the subscription moves to **Cancelled**.
## Payment Recovery Report
SmartPay tracks failed and abandoned subscriptions in the **Recovery** tab of **SmartPay → Reports**.
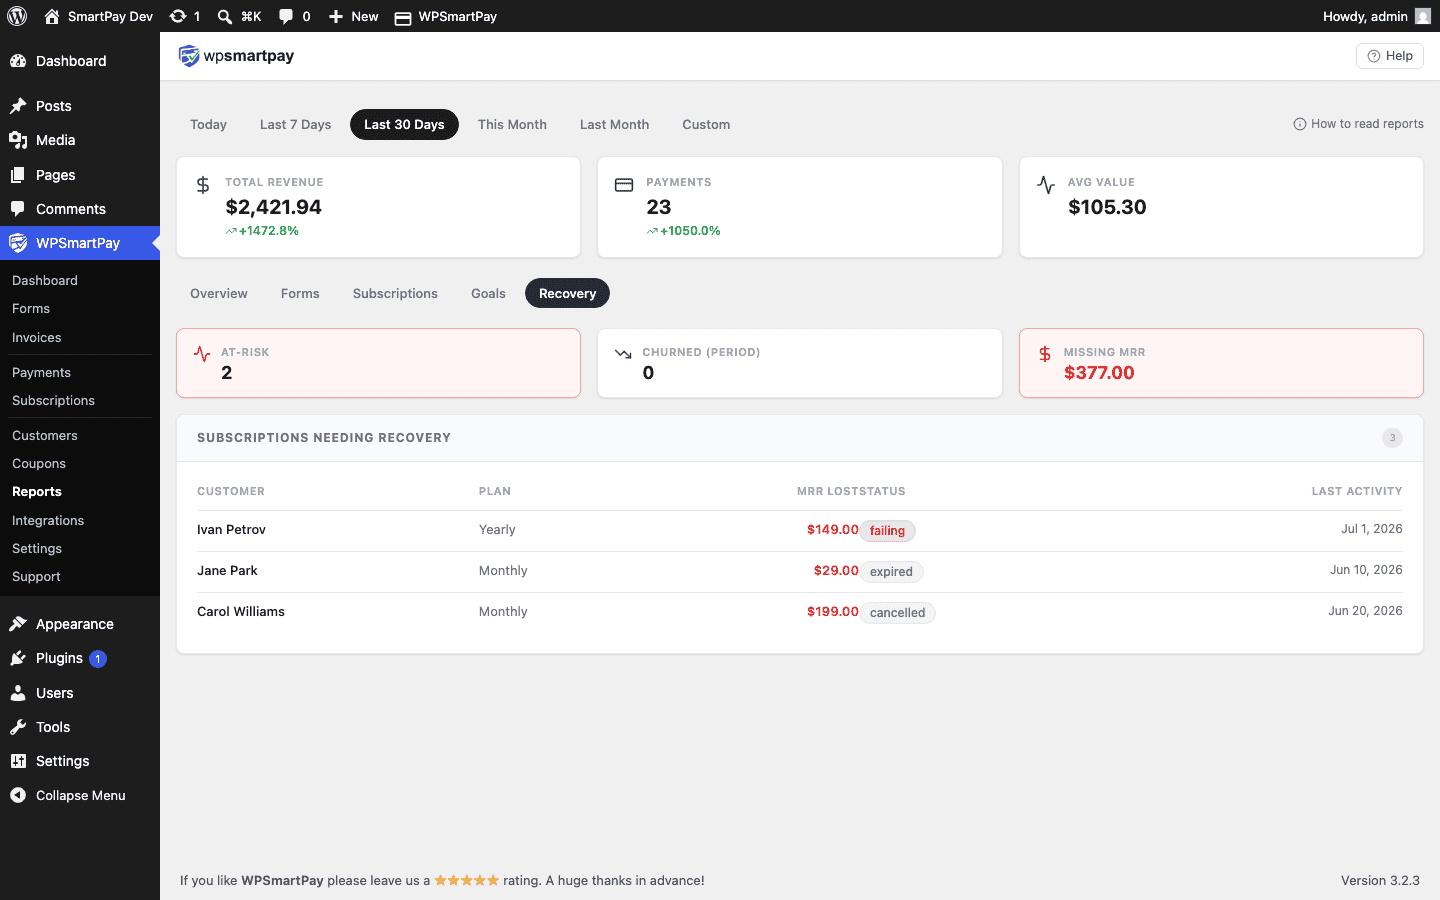 The Recovery report shows all failing subscriptions and revenue at risk.The Recovery report shows:
* Subscriptions in Failing status
* Amount at risk (monthly billing amount × failing subscriptions)
* Whether the gateway is actively retrying
* Revenue already recovered through successful retries
## Manual Recovery Actions
If a customer's card has changed and automatic retries will not succeed, reach out directly:
1. Find the customer in **SmartPay → Customers** and note their email.
2. Contact them to update their card in the Stripe Customer Portal.
3. Once the card is updated in Stripe, trigger a manual retry from the Stripe dashboard (Billing → Invoices → Retry).
4. SmartPay receives the success webhook and updates the subscription to Active.
# Reports Overview
WP SmartPay Pro includes a reporting suite that gives you a data-driven view of your revenue, forms performance, subscriptions, goals, and payment recovery. All reports live under **SmartPay → Reports**.
## Accessing Reports
Go to **SmartPay → Reports** in your WordPress admin sidebar. The Reports page opens on the Revenue tab by default.
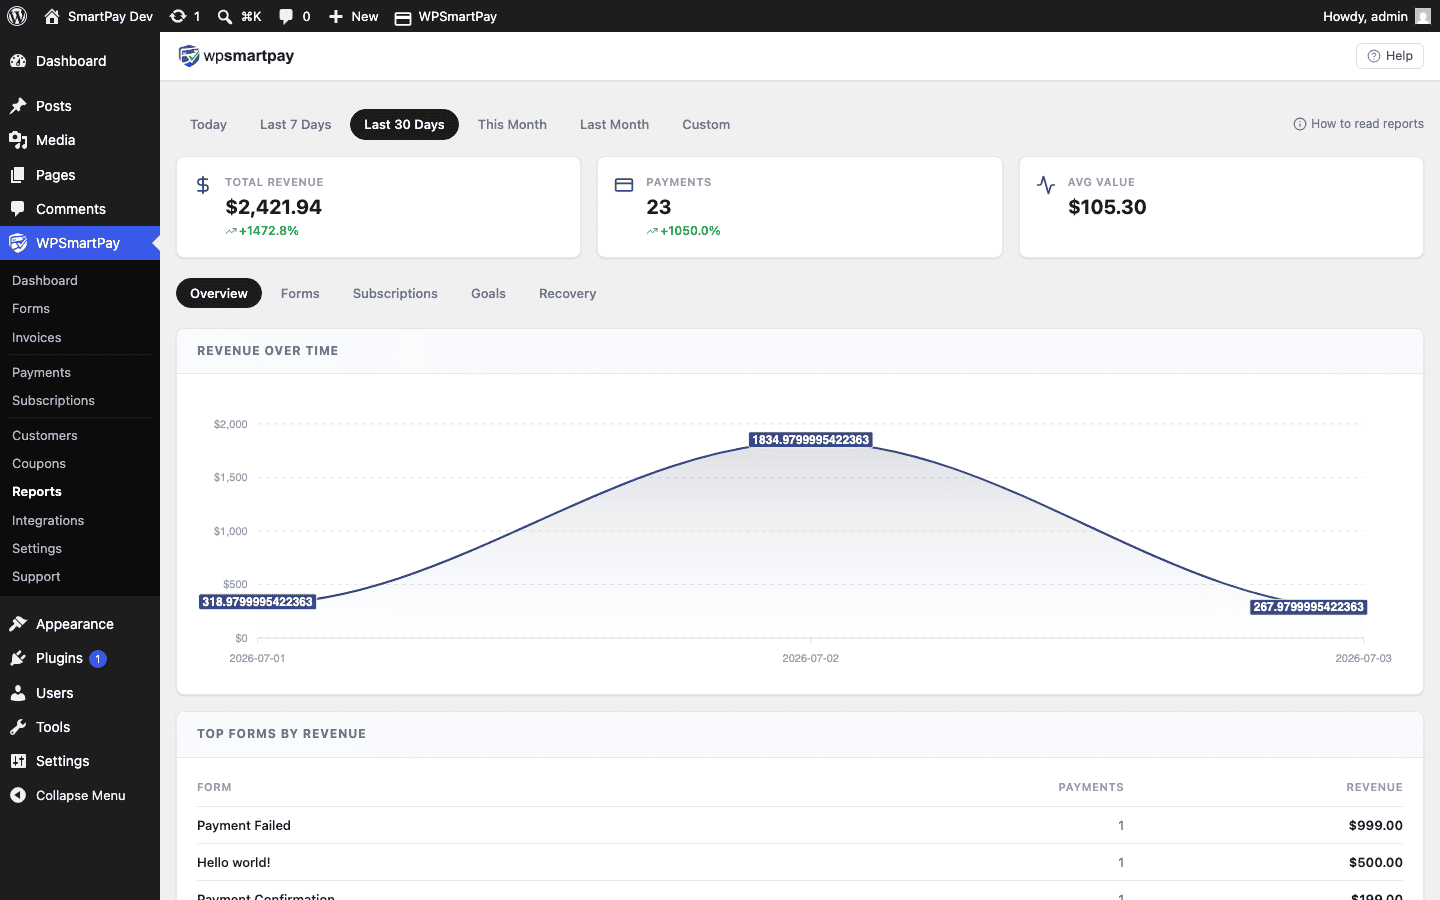 The Reports page with five tabs — Revenue is selected by default.## Five Report Tabs
* **Revenue** — Monthly bar chart, key stats (total revenue, order count, average order value), and top-performing forms and products. See [Revenue Report](https://docs.wpsmartpay.com/en/sp-rp-02-revenue-report).
* **Forms** — Per-form breakdown of views, completions, revenue, and conversion rate. See [Forms Report](https://docs.wpsmartpay.com/en/sp-rp-03-forms-report).
* **Subscriptions** — Active subscription count, Monthly Recurring Revenue (MRR), and subscription lifecycle metrics. See [Subscriptions Report](https://docs.wpsmartpay.com/en/sp-rp-04-subscriptions-report).
* **Goals** — Revenue goal progress bars and completion tracking. See [Revenue Goals & Progress Bar](https://docs.wpsmartpay.com/en/sp-rp-05-revenue-goals).
* **Recovery** — Failed and abandoned payment recovery status and revenue at risk. See [Payment Recovery Report](https://docs.wpsmartpay.com/en/sp-rp-06-recovery-report).
## Date Range Selector
The date range selector at the top of the Reports page controls which data is displayed across all tabs. Available periods include:
* **Today** — Current day only.
* **This Week** — Current calendar week (Monday to Sunday).
* **This Month** — Current calendar month.
* **Last Month** — Previous complete calendar month.
* **Custom Range** — Pick any start and end date.
Changing the period updates all tabs simultaneously — you only need to set it once.
> **Note:** Reports are available to WordPress users with the `manage_options` capability (Administrators by default). You can restrict access further using capability filters if needed.
# Require Login to Checkout
WP SmartPay lets you restrict payment forms to logged-in WordPress users only. When this toggle is on, a visitor who is not logged in sees a login prompt instead of the checkout form. Only after signing in do they reach the payment fields.
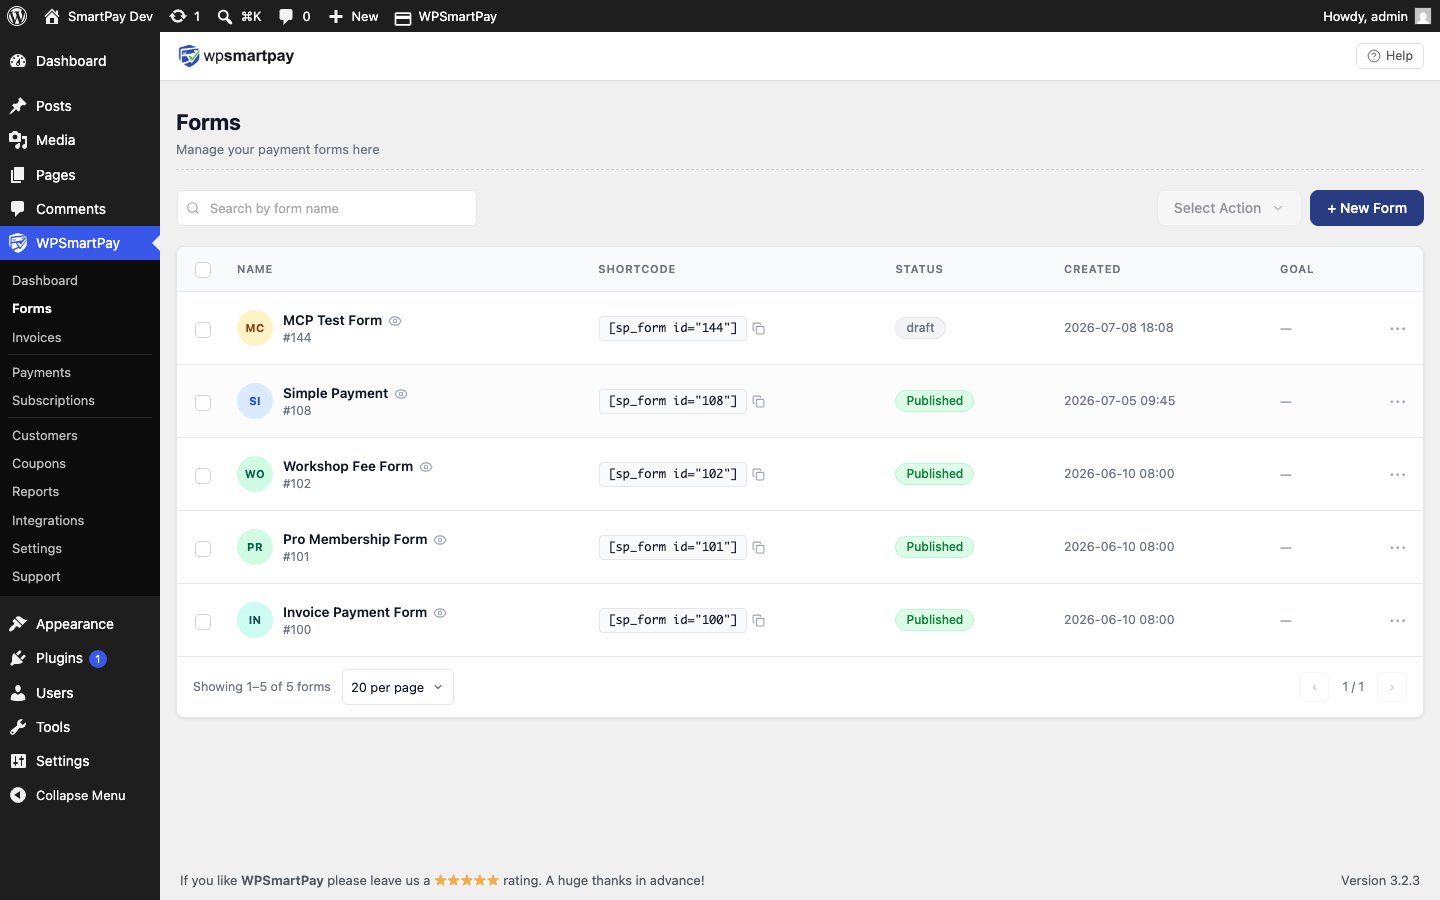## When to Use It
* **Member-only purchases** — Donations or products available only to existing members of your community.
* **Gated subscriptions** — Requiring an account ensures every subscriber has a WP user record, making it easy to grant or revoke access.
* **Preventing duplicate accounts** — When the payment is linked to a specific user's history, login-gating keeps the customer record clean.
## Enabling the Requirement
1. Open the form: **SmartPay → Forms → Edit**.
2. In the right sidebar, expand the **Options** panel.
3. Toggle **Require Login** to on.
4. Click **Update** to save.
## What the Visitor Sees
When a logged-out user visits a page with this form, they see a login form rendered by the `[smartpay_user_login]` shortcode instead of the payment checkout. After they log in successfully, they are redirected back to the payment page and the checkout form appears.
> **Note:** The login form on the checkout page uses the SmartPay frontend login shortcode, not the standard WordPress login page. Make sure you have set a **Login Page** in **SmartPay → Settings → General** that contains the `[smartpay_user_login]` shortcode — this is the page the visitor is redirected to when they are not logged in.
## Redirect After Login
SmartPay passes the original checkout page URL as a redirect parameter on the login form. After a successful login the visitor is automatically sent back to the page where the payment form is embedded, with the checkout now visible.
## Letting Users Register Instead
If you also want unregistered visitors to sign up and pay, place the `[smartpay_user_registration]` shortcode on the same login page — or on a separate registration page linked from it. The registration form creates a standard WordPress user account and logs the visitor in automatically.
# REST API Reference
WP SmartPay exposes a REST API under the `/wp-json/smartpay/v1/` namespace. You can use it to read payments, customers, forms, and subscriptions from external applications — dashboards, mobile apps, or custom integrations.
## Authentication
All API requests require authentication. Use WordPress Application Passwords (WordPress 5.6+):
1. Go to **WordPress Admin → Users → Profile → Application Passwords**.
2. Enter a name for the password (e.g., "My App") and click **Add New Application Password**.
3. Copy the generated password — it won't be shown again.
4. Authenticate using HTTP Basic Auth: `Authorization: Basic base64(username:password)`.
For server-side integrations, you can also use a WordPress nonce (`X-WP-Nonce`) when making requests from within WordPress (e.g., from JavaScript in the admin).
## Endpoints
### Payments
| Method | Endpoint | Description |
|---|---|---|
| `GET` | `/wp-json/smartpay/v1/payments` | List payments. Supports: `?status=completed`, `?page=1`, `?per_page=20`, `?from=2026-01-01`, `?to=2026-07-28` |
| `GET` | `/wp-json/smartpay/v1/payments/{id}` | Get a single payment by ID |
### Payment Response Fields
```
{
"id": 1234,
"key": "sp_abc123",
"amount": 4900,
"currency": "USD",
"status": "completed",
"gateway": "stripe",
"mode": "live",
"email": "jane@example.com",
"customer_id": 56,
"form_id": 5,
"form_title": "UI Kit",
"created_at": "2026-07-28T10:23:00Z",
"updated_at": "2026-07-28T10:23:05Z"
}
```
### Customers
| Method | Endpoint | Description |
|---|---|---|
| `GET` | `/wp-json/smartpay/v1/customers` | List customers |
| `GET` | `/wp-json/smartpay/v1/customers/{id}` | Get a single customer |
### Subscriptions (Pro)
| Method | Endpoint | Description |
|---|---|---|
| `GET` | `/wp-json/smartpay-pro/v1/subscriptions` | List subscriptions |
| `GET` | `/wp-json/smartpay-pro/v1/subscriptions/{id}` | Get a single subscription |
### Forms
| Method | Endpoint | Description |
|---|---|---|
| `GET` | `/wp-json/smartpay/v1/forms` | List payment forms |
| `GET` | `/wp-json/smartpay/v1/forms/{id}` | Get a single form |
## Example Requests
### List completed payments (curl)
```
curl -X GET \
"https://yoursite.com/wp-json/smartpay/v1/payments?status=completed&per_page=50" \
-H "Authorization: Basic $(echo -n 'admin:xxxx xxxx xxxx xxxx xxxx xxxx' | base64)"
```
### Get a payment by ID (JavaScript fetch)
```
const response = await fetch(
'https://yoursite.com/wp-json/smartpay/v1/payments/1234',
{
headers: {
'X-WP-Nonce': wpApiSettings.nonce,
},
}
);
const payment = await response.json();
```
## Extending the REST API
You can register custom endpoints under the SmartPay namespace from your plugin:
```
add_action( 'rest_api_init', function() {
register_rest_route( 'smartpay/v1', '/custom-report', [
'methods' => WP_REST_Server::READABLE,
'callback' => 'my_custom_report_handler',
'permission_callback' => function() {
return current_user_can( 'manage_options' );
},
]);
});
function my_custom_report_handler( WP_REST_Request $request ) {
// Your custom report logic
return rest_ensure_response( [ 'total' => 1234 ] );
}
```
## Notes
* Amounts are returned in the **smallest currency unit** — for USD, $49.00 is returned as `4900` (cents). Always divide by 100 for USD, EUR, GBP; some currencies (JPY) have no minor unit.
* The API requires an active SmartPay Pro license for Pro endpoints (`smartpay-pro/v1/`).
* All list endpoints support pagination via `?page=N&per_page=N`. Default page size is 20.
* Date filtering uses ISO 8601 format: `?from=2026-01-01T00:00:00&to=2026-07-28T23:59:59`.
# Revenue Goals & Progress Bar
WP SmartPay Pro lets you set revenue goals tied to specific payment forms and display a fundraising progress bar on your site. Use goals for donation campaigns, crowdfunding targets, event fundraisers, or any effort where you want visitors to see progress toward a total.
## Setting a Revenue Goal
1. Go to **SmartPay → Reports** and click the **Goals** tab.
2. Click **Add Goal**.
3. Fill in:
* **Goal Name** — A label for internal reference (e.g., "Spring 2026 Fundraiser").
* **Form** — The payment form this goal is tracking. Revenue from payments on this form counts toward the goal.
* **Target Amount** — The revenue goal in your store currency (e.g., 10000 for $10,000).
* **Period** — The timeframe: **Month**, **Year**, or **Lifetime**. Month and Year reset automatically at the start of each period.
4. Click **Save Goal**.
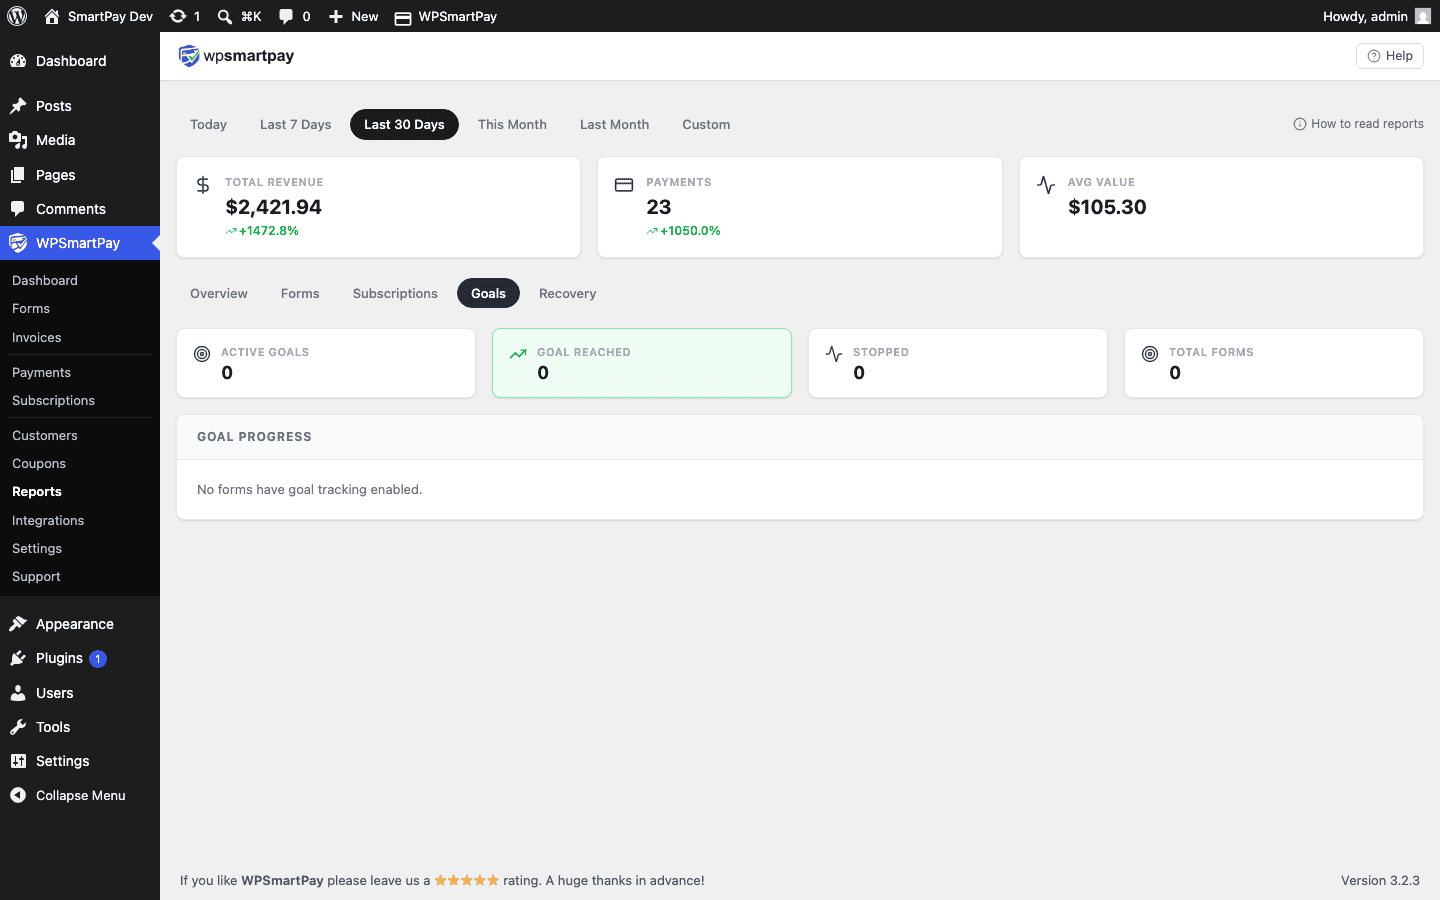 The Goals tab showing a revenue goal with current progress displayed as a percentage bar.## How Progress Is Calculated
Progress = sum of all **Completed** payment amounts on the linked form within the selected period ÷ target amount × 100.
Only Completed payments count. Refunded, failed, and pending payments do not increment progress.
## Embedding the Progress Bar
Copy the shortcode shown on the goal row in the Goals tab. It looks like:
```
[smartpay_goal id="1"]
```
Paste this shortcode on any WordPress page or widget. The bar renders as a visual percentage bar with the raised amount and target displayed. It updates in real time as new payments are received — no manual refresh required.
A common layout is placing the goal shortcode above or below the donation form itself:
```
[smartpay_goal id="1"]
[sp_form id="42"]
```
## Resetting or Changing the Goal
To update a goal's target amount or form, click **Edit** on the goal row in the Goals tab. Monthly and yearly goals reset automatically; to reset a Lifetime goal you need to delete and recreate it.
## Multiple Goals
You can have multiple goals, each linked to a different form. Each goal has its own shortcode and progress is tracked independently.
# Revenue Report
The Revenue report is the main financial overview in WP SmartPay Pro. It shows your total earnings, order volumes, and average transaction value for any time period, along with a month-by-month bar chart and a breakdown of top performers.
## Opening the Revenue Report
Go to **SmartPay → Reports**. The **Revenue** tab is selected by default.
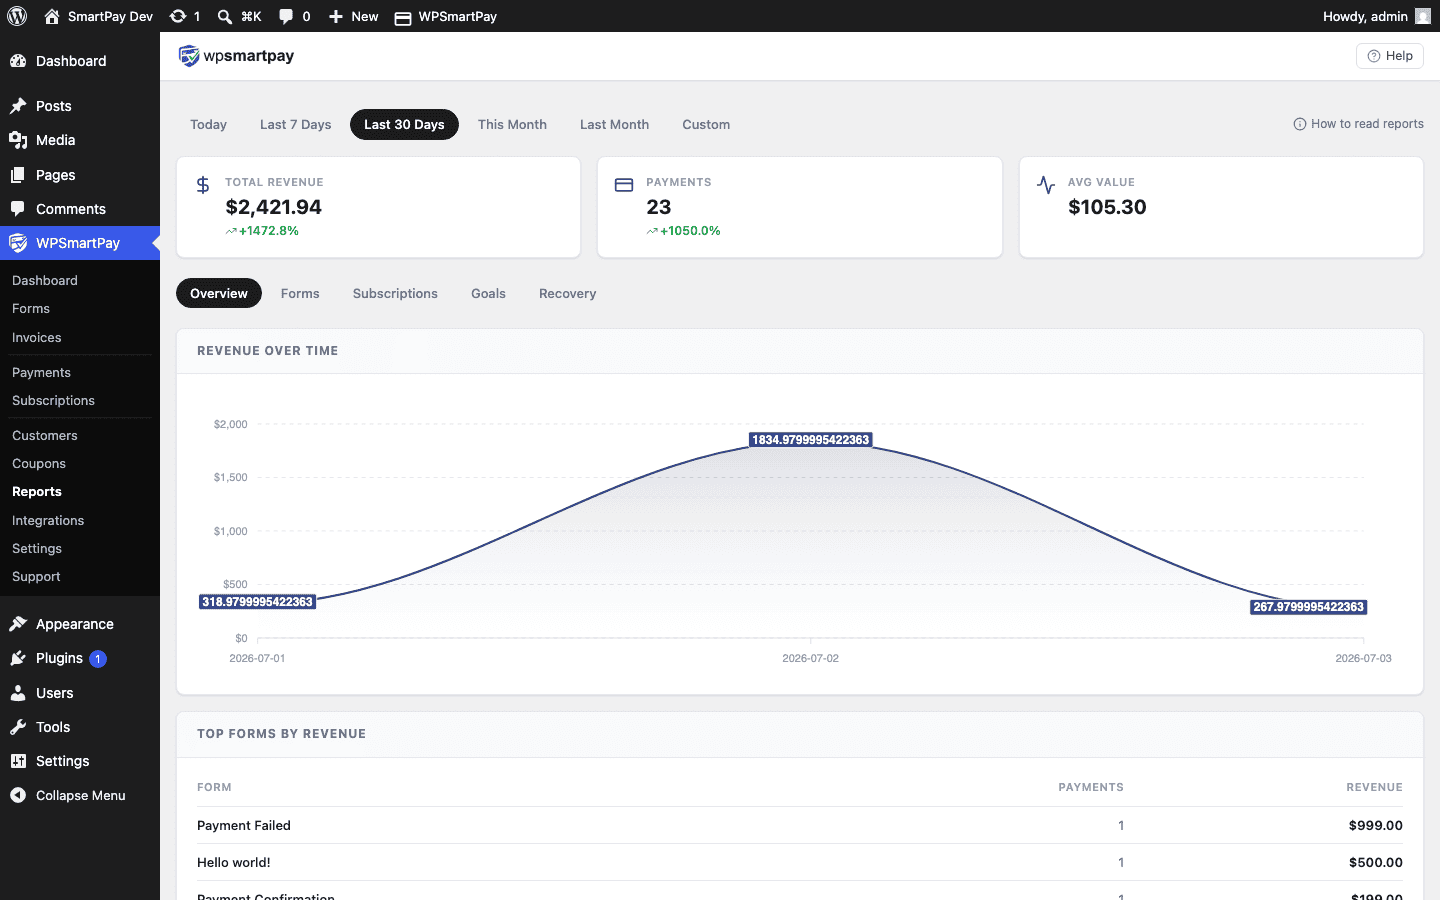 The Revenue report with bar chart, key metric cards, and top-earning forms listed below.## Stats Cards
Four headline metric cards appear at the top of the report:
* **Total Revenue** — Sum of all completed payment amounts in the selected period. Refunded and failed payments are excluded.
* **Total Orders** — Count of completed payments in the period.
* **Average Order Value** — Total Revenue ÷ Total Orders.
* **New Customers** — Number of first-time paying customers (customers whose first completed payment falls within the period).
## Revenue Bar Chart
The bar chart displays completed payment revenue grouped by:
* **Day** — When the date range is Today or 7 days or fewer.
* **Week** — When the date range spans several weeks.
* **Month** — When the date range is a month or longer.
Hover over any bar to see the exact revenue for that period. The chart uses your store currency.
## Top Forms
Below the chart, a table lists the top-performing payment forms ranked by revenue in the selected period. Each row shows the form name, total payments, and revenue. Click a form name to jump to its editor.
## Top Products
If you use digital products in addition to payment forms, a second table lists top-earning products by the same metrics.
## Comparing Periods
To compare revenue month-over-month, use the custom date range selector:
1. Set the range to last month (e.g., June 1–30).
2. Note the revenue figure.
3. Change the range to the current month (e.g., July 1–31).
4. Compare.
SmartPay does not show a side-by-side comparison view — you need to compare periods manually by switching the date filter.
# All Shortcodes Reference
WP SmartPay provides a set of shortcodes for embedding payment forms, customer account pages, receipts, and dashboard widgets anywhere on your WordPress site. This page lists every shortcode with its parameters and usage examples.
## Payment Form Shortcodes
### `[sp_form]`
Embeds a payment form by ID. This is the current standard shortcode.
```
[sp_form id="123"]
```
| Parameter | Required | Description |
|---|---|---|
| `id` | Yes | The numeric ID of the payment form to embed. |
### `[smartpay_form]`
Legacy form embed shortcode. Identical to `[sp_form]`; included for backward compatibility.
```
[smartpay_form id="123"]
```
### `[smartpay_product]`
Renders a purchase button or product widget for a digital product.
```
[smartpay_product id="5"]
```
| Parameter | Required | Description |
|---|---|---|
| `id` | Yes | The numeric ID of the digital product. |
## Account & Dashboard Shortcodes
### `[smartpay_user_login]`
Displays a login form for customers. After login, redirects to the **Login Page** redirect URL set in General Settings.
```
[smartpay_user_login]
```
No parameters. Place on a dedicated login page and set that page as the **Login Page** in **SmartPay → Settings → General**.
### `[smartpay_user_registration]`
Displays a customer registration form that creates a WordPress user account.
```
[smartpay_user_registration]
```
### `[smartpay_user_profile]`
Allows the logged-in customer to update their name, email, and password.
```
[smartpay_user_profile]
```
### `[smartpay_dashboard]`
Shows the logged-in customer's complete payment history — all their past payments with amounts, dates, form names, and receipt links.
```
[smartpay_dashboard]
```
## Receipt Shortcode
### `[smartpay_payment_receipt]`
Renders the payment receipt for the current transaction. This shortcode reads the payment ID from the URL query string automatically — place it on the page set as **Payment Success Page** in General Settings and it will always show the right receipt.
```
[smartpay_payment_receipt]
```
## Goal Progress Bar Shortcode (Pro)
### `[smartpay_goal]`
Displays a fundraising progress bar for a specific revenue goal.
```
[smartpay_goal id="1"]
```
| Parameter | Required | Description |
|---|---|---|
| `id` | Yes | The numeric ID of the revenue goal. Find it in SmartPay → Reports → Goals. |
## Finding Shortcode IDs
The easiest way to find shortcode IDs:
* **Forms** — Go to **SmartPay → Forms**. The Shortcode column shows the full shortcode with the ID pre-filled.
* **Products** — Go to **SmartPay → Products**. Same as forms — the ID is in the shortcode column.
* **Goals** — Go to **SmartPay → Reports → Goals**. The shortcode is shown on each goal row.
## Usage Examples
Embed a donation form and goal bar on the same page:
```
[smartpay_goal id="1"]
[sp_form id="10"]
```
Create a "My Account" page with login + dashboard:
```
[smartpay_user_login]
[smartpay_dashboard]
```
(The dashboard block only shows when the user is logged in; the login form only shows when they are not.)
# Slack Integration
WP SmartPay Pro integrates with Slack to keep you updated on your payment activity in real time.
You can connect your Slack workspace and send payment notifications directly to a selected Slack channel, making it easy to monitor successful payments and stay informed without checking your WordPress dashboard.
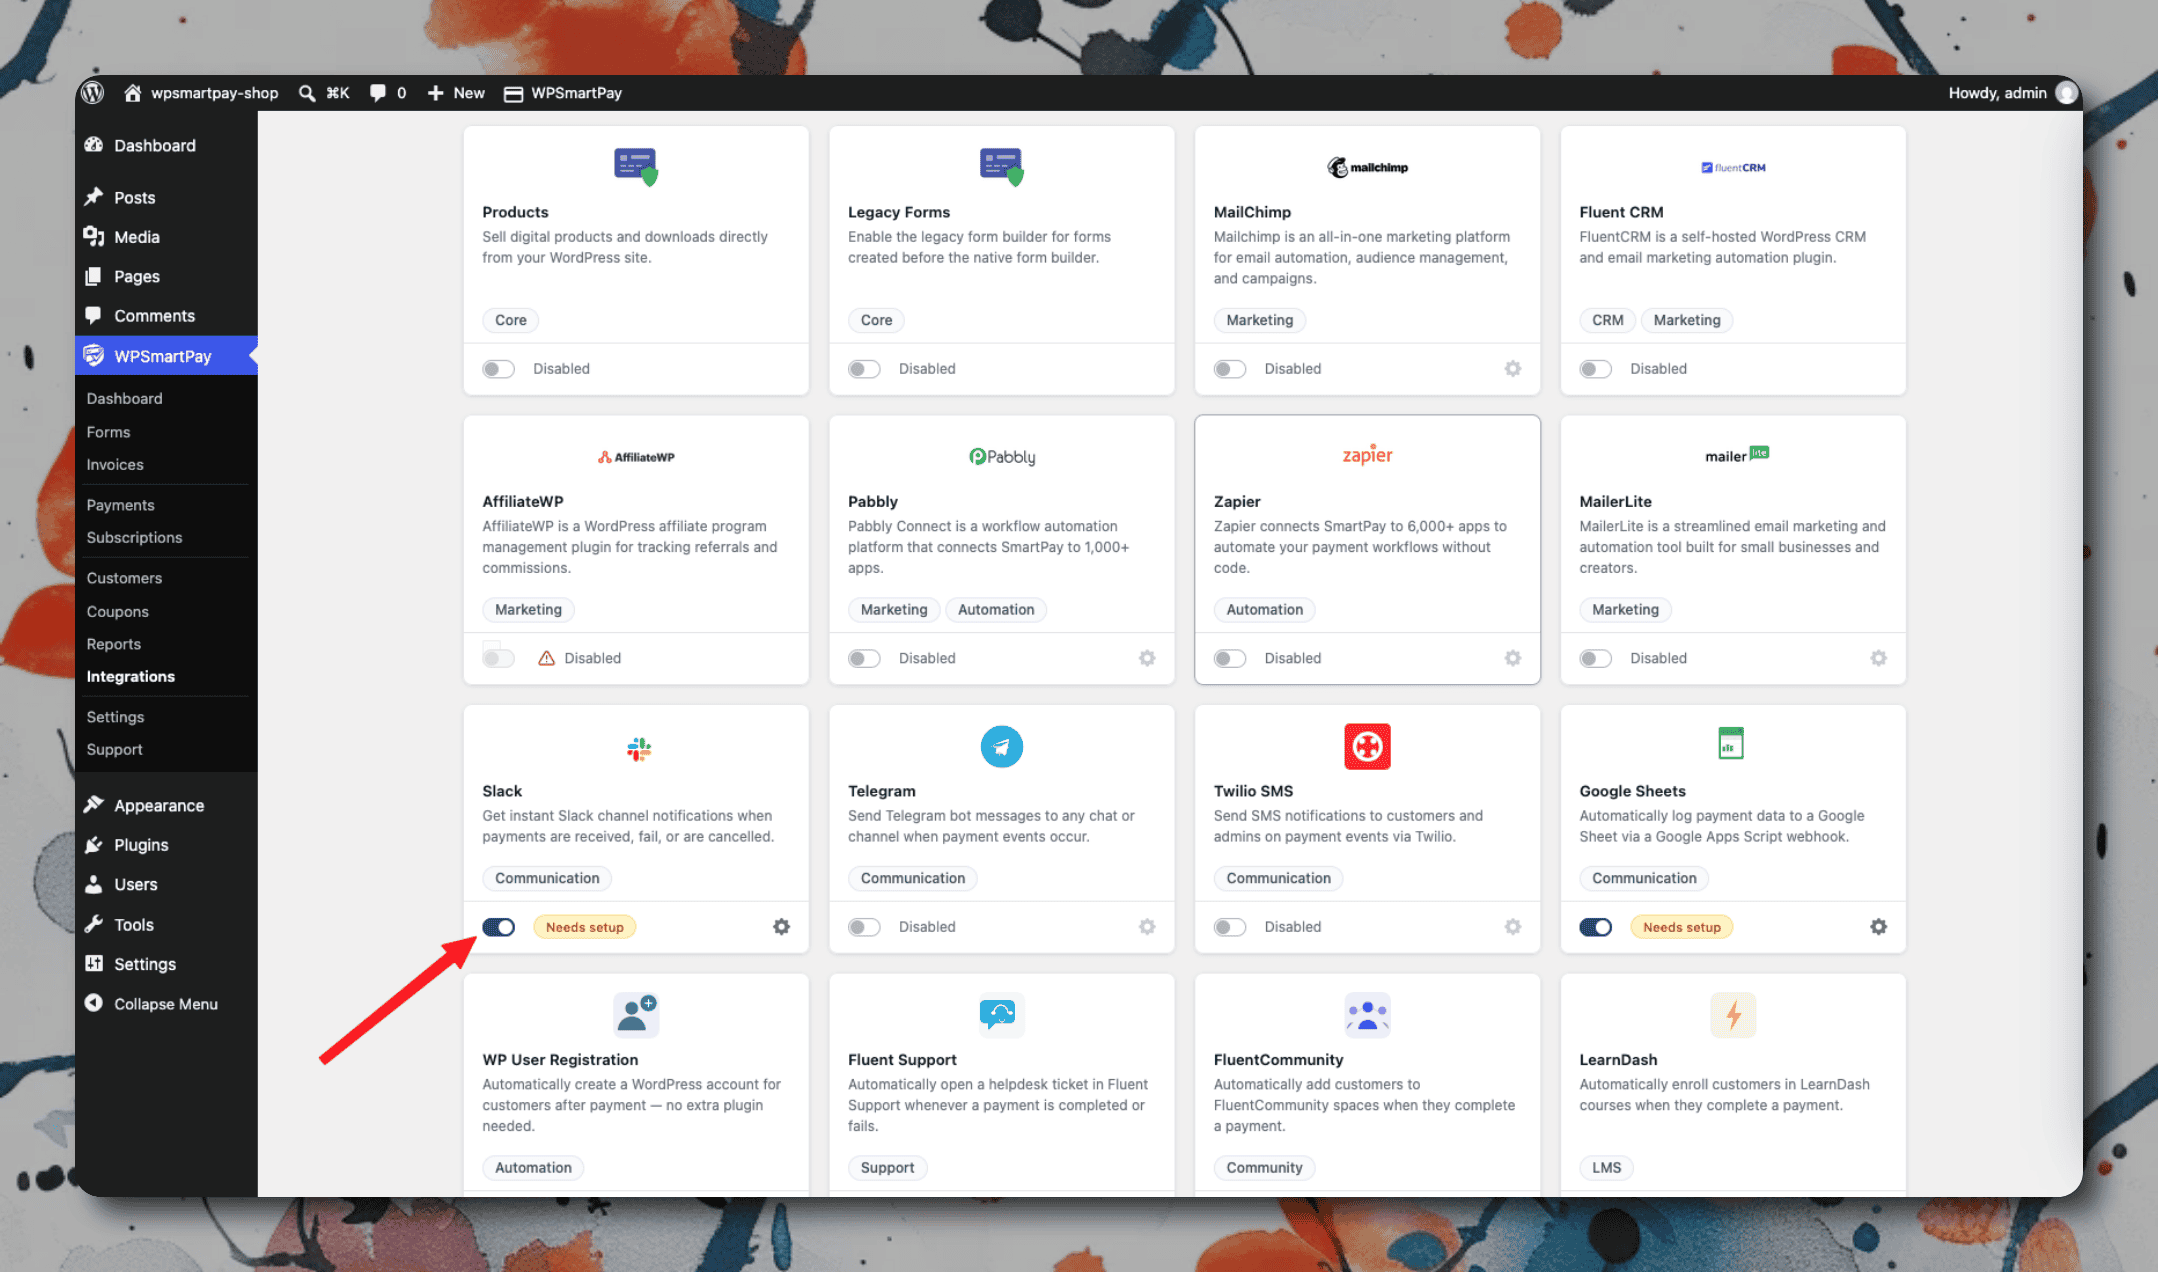### Setting Up
1. Go to [api.slack.com/apps](https://api.slack.com/apps) and create a new app (or use an existing one).
2. Under **Incoming Webhooks**, activate webhooks and click **Add New Webhook to Workspace**.
3. Select the channel to post to and authorize. Copy the webhook URL.
4. In WordPress, go to **SmartPay → Extensions → Slack → Settings**.
5. Paste the webhook URL and save.
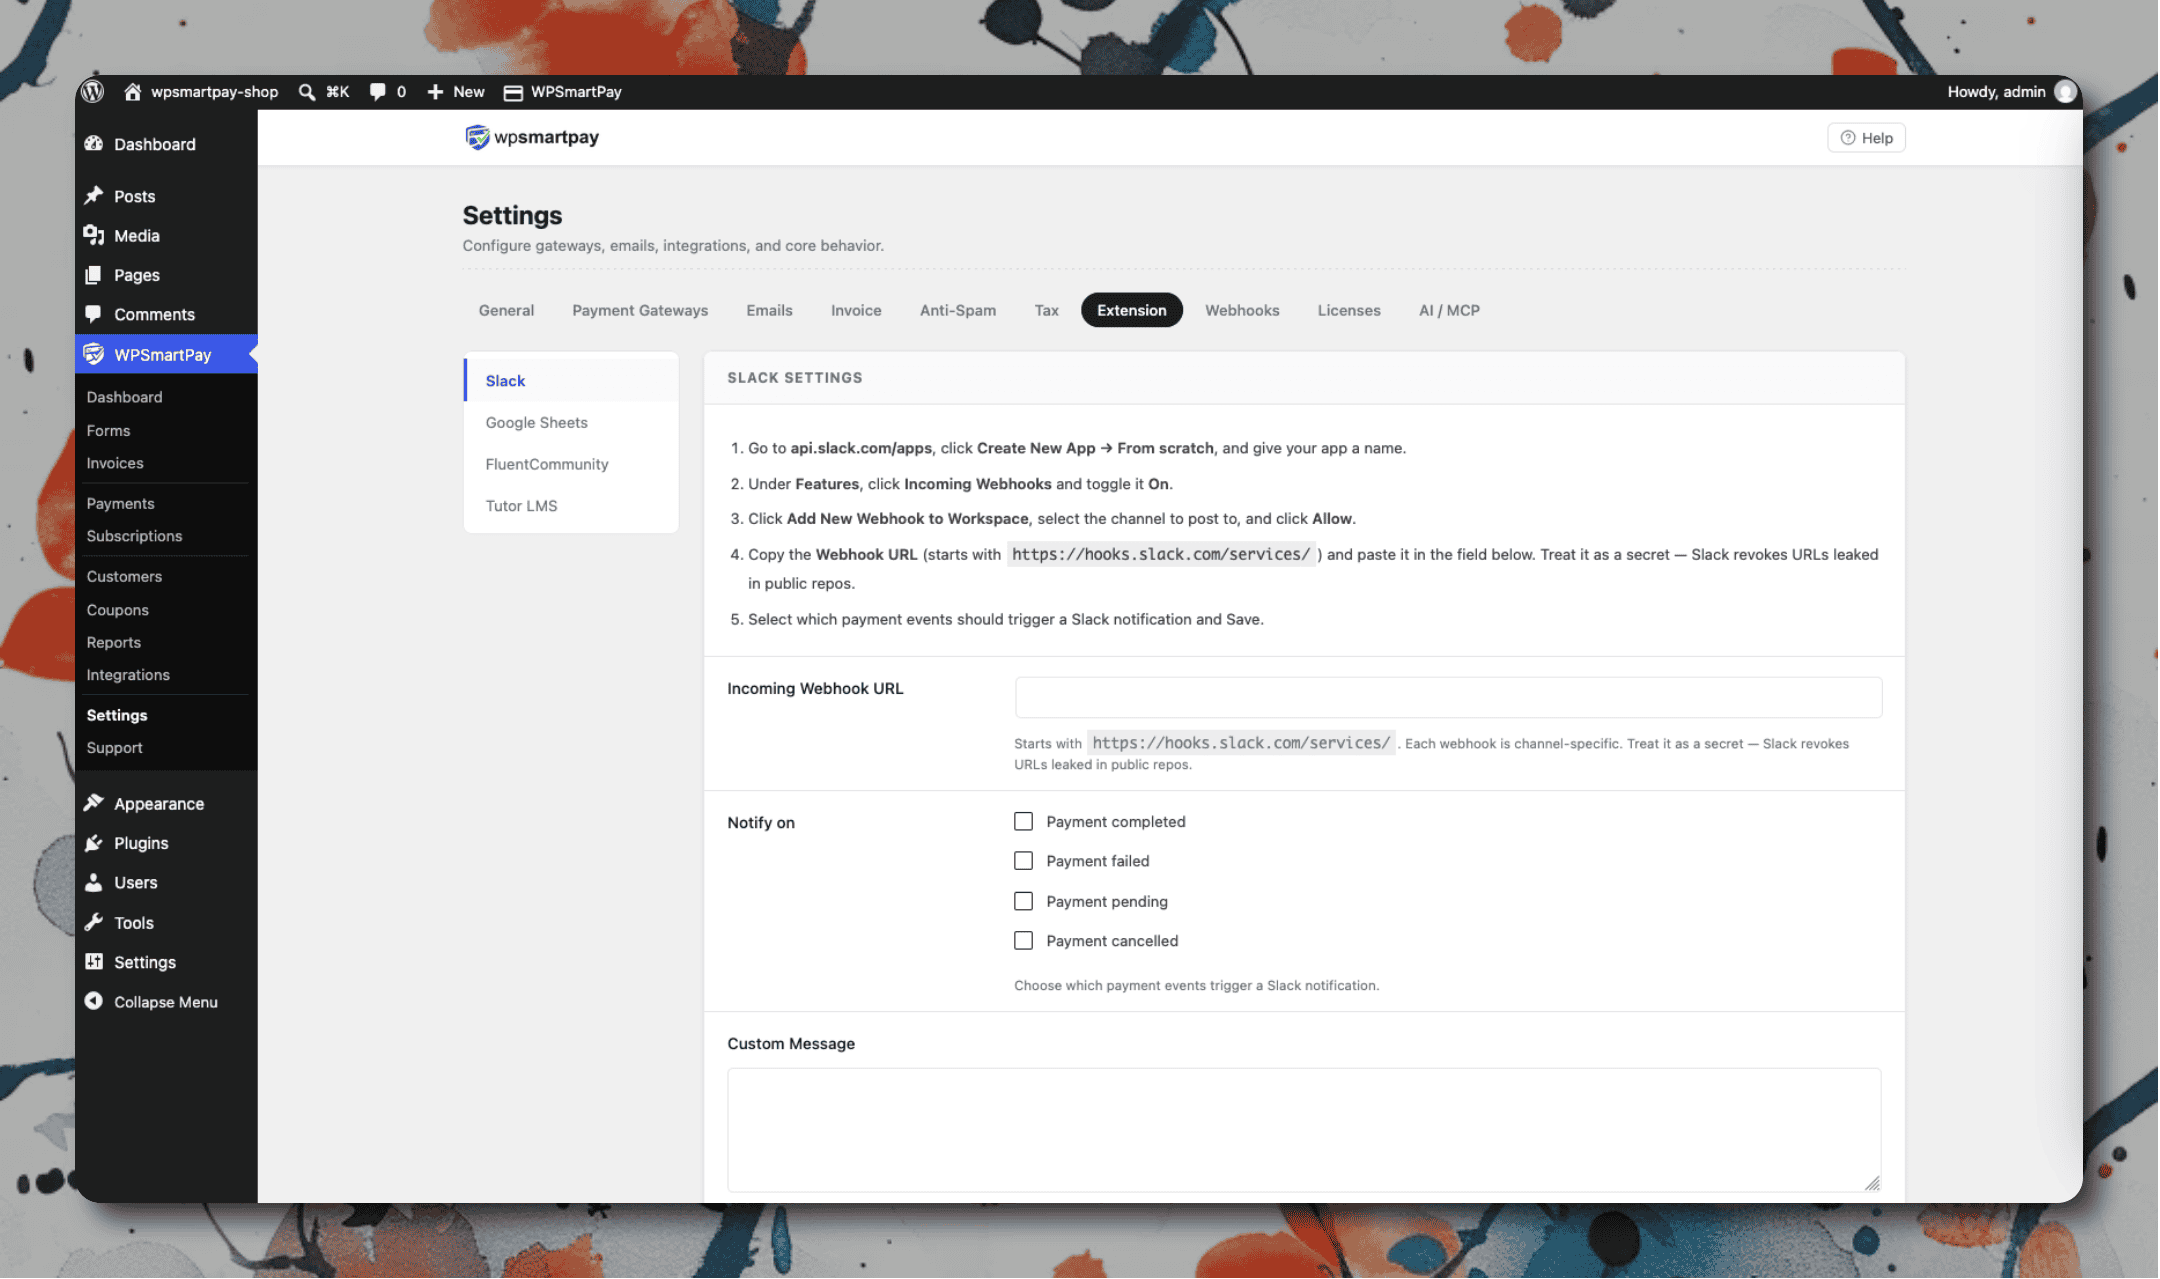### What Gets Sent
For each completed payment, SmartPay posts a message containing:
* Customer name and email
* Payment amount and currency
* Form/product name
* Gateway used (Stripe, PayPal, etc.)
* Direct link to the payment in the SmartPay admin
### Filtering Which Events to Send
In the Slack settings, choose which events trigger a notification:
* Payment completed ✓
* Payment failed
* Subscription created
* Subscription cancelled
* Refund issued
## Tips
* **Route different events to different channels:** Create multiple Slack webhooks pointing to different channels — one for sales (#sales-alerts), one for failures (#payment-failures) — and configure each in a separate webhook.
* **Don't send test mode payments to Slack:** In the Slack settings, enable the option to suppress test-mode notifications so your sales channel only shows real payments.
# Stripe
Stripe is the most popular payment gateway in WP SmartPay Pro. It processes credit/debit cards directly on your site (no redirect to a third-party page), supports recurring subscriptions, and offers Smart Retries for failed renewals. Stripe is available to businesses in 40+ countries.
## Prerequisites
* A [Stripe account](https://stripe.com) (free to create; verify your identity and banking details to activate live payments).
* WP SmartPay Pro active with a valid license.
* HTTPS on your site (required by Stripe for live card collection).
## Finding Your Stripe API Keys
1. Log in to your [Stripe Dashboard](https://dashboard.stripe.com).
2. Go to **Developers → API Keys**.
3. Copy the **Publishable key** and **Secret key**.
4. For test keys, toggle **Test mode** in the Stripe Dashboard (top-right) and copy the test keys.
## Connecting Stripe in SmartPay
1. Go to **SmartPay → Settings → Payment Gateways**.
2. Find **Stripe** and tick **Enable**.
3. Paste your **Live Publishable Key** and **Live Secret Key**.
4. Paste your **Test Publishable Key** and **Test Secret Key**.
5. Click **Save Settings**.
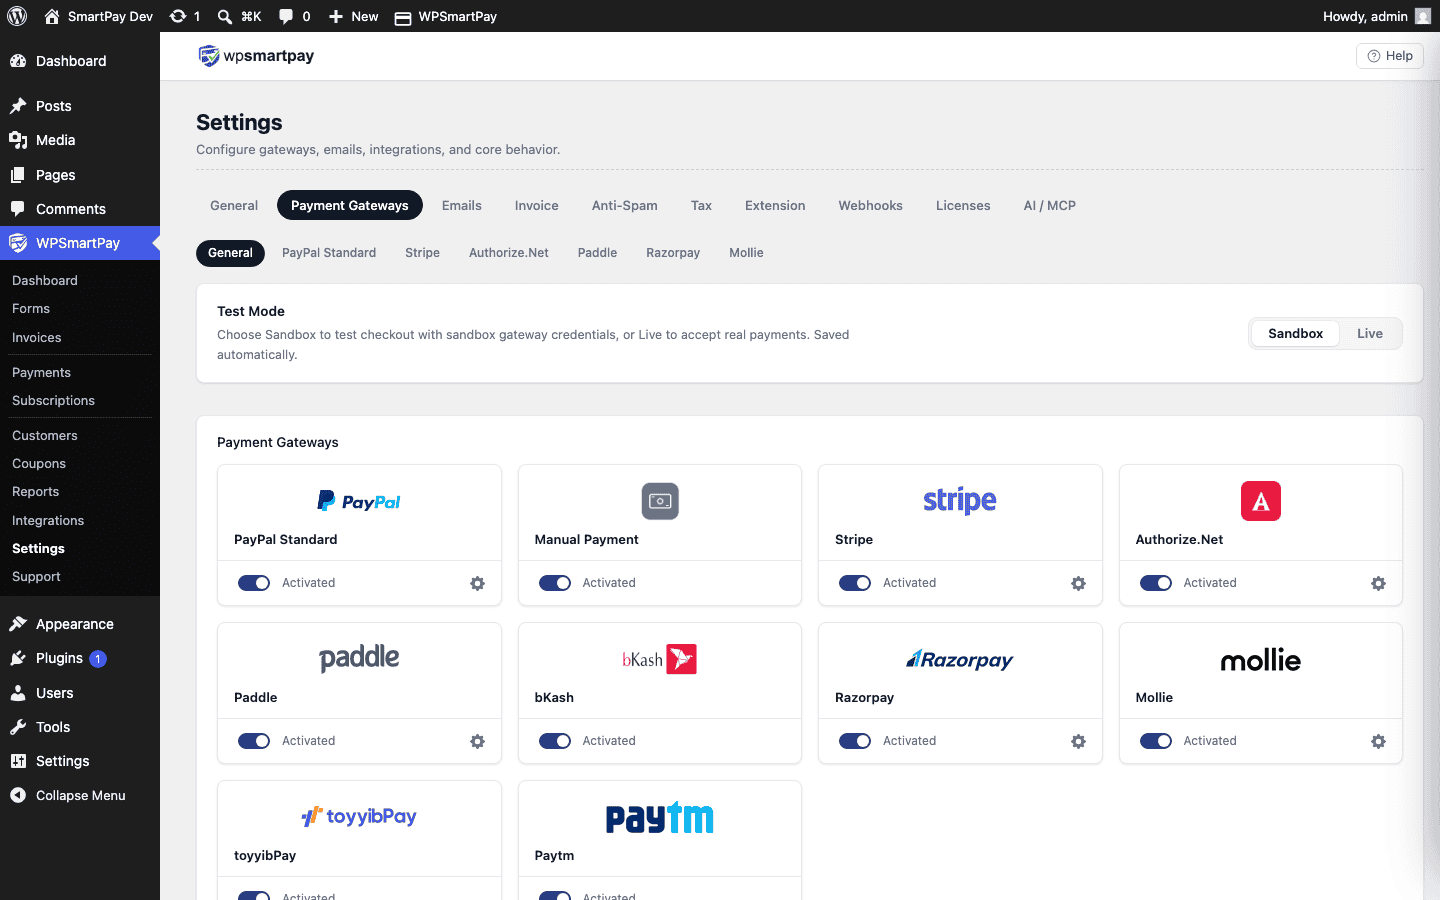 Enter your Stripe API keys in the Gateway Settings — both live and test sets.## Setting Up Stripe Webhooks
Stripe uses webhooks to notify SmartPay of payment events (completion, failure, refund, subscription renewal). Without webhooks, payments may stay in Pending status indefinitely.
1. In your Stripe Dashboard, go to **Developers → Webhooks**.
2. Click **Add endpoint**.
3. Enter your SmartPay webhook URL: `https://yoursite.com/?smartpay-listener=stripe`
4. Under **Select events**, choose **Select all events** or at minimum:
* `payment_intent.succeeded`
* `payment_intent.payment_failed`
* `customer.subscription.deleted`
* `invoice.paid`
* `invoice.payment_failed`
* `charge.refunded`
5. Click **Add endpoint**.
6. Copy the **Webhook Signing Secret** and paste it into SmartPay's Stripe settings.
## Test Mode Configuration
Toggle **Test Mode** on in SmartPay Gateway Settings. Use these test card numbers at checkout:
| Card Number | Result |
|---|---|
| `4242 4242 4242 4242` | Always succeeds |
| `4000 0000 0000 0002` | Always declines (insufficient funds) |
| `4000 0025 0000 3155` | Requires 3D Secure |
Use any future expiry date and any 3-digit CVC.
## Supported Payment Methods
* Visa, Mastercard, American Express, Discover, JCB, UnionPay
* Apple Pay and Google Pay (on supported devices/browsers)
* SEPA Direct Debit (EUR)
* iDEAL (Netherlands)
## Supported Currencies
Stripe supports 135+ currencies. Your store currency in SmartPay General Settings must match a currency your Stripe account is configured to accept.
## Common Errors & Fixes
* **"No such payment\_intent"** — Publishable and secret keys are mismatched (e.g., live publishable with test secret). Use keys from the same environment.
* **Payments stuck at Pending** — Webhook not set up or signing secret incorrect. Verify the webhook endpoint URL and secret in Stripe Dashboard.
* **"Your card was declined"** — In test mode, use test card `4242…`. In live mode, the customer's card was declined by their bank.
* **Webhook signature verification failed** — Signing secret in SmartPay does not match the one shown in Stripe's webhook details. Re-copy the signing secret.
# Subscription Detail & Management
Clicking any subscription in the SmartPay list opens its detail page — a complete view of the billing plan, renewal history, and customer information, with tools to manage or cancel the subscription.
## Opening a Subscription
Go to **SmartPay → Subscriptions** and click the subscription ID or customer name.
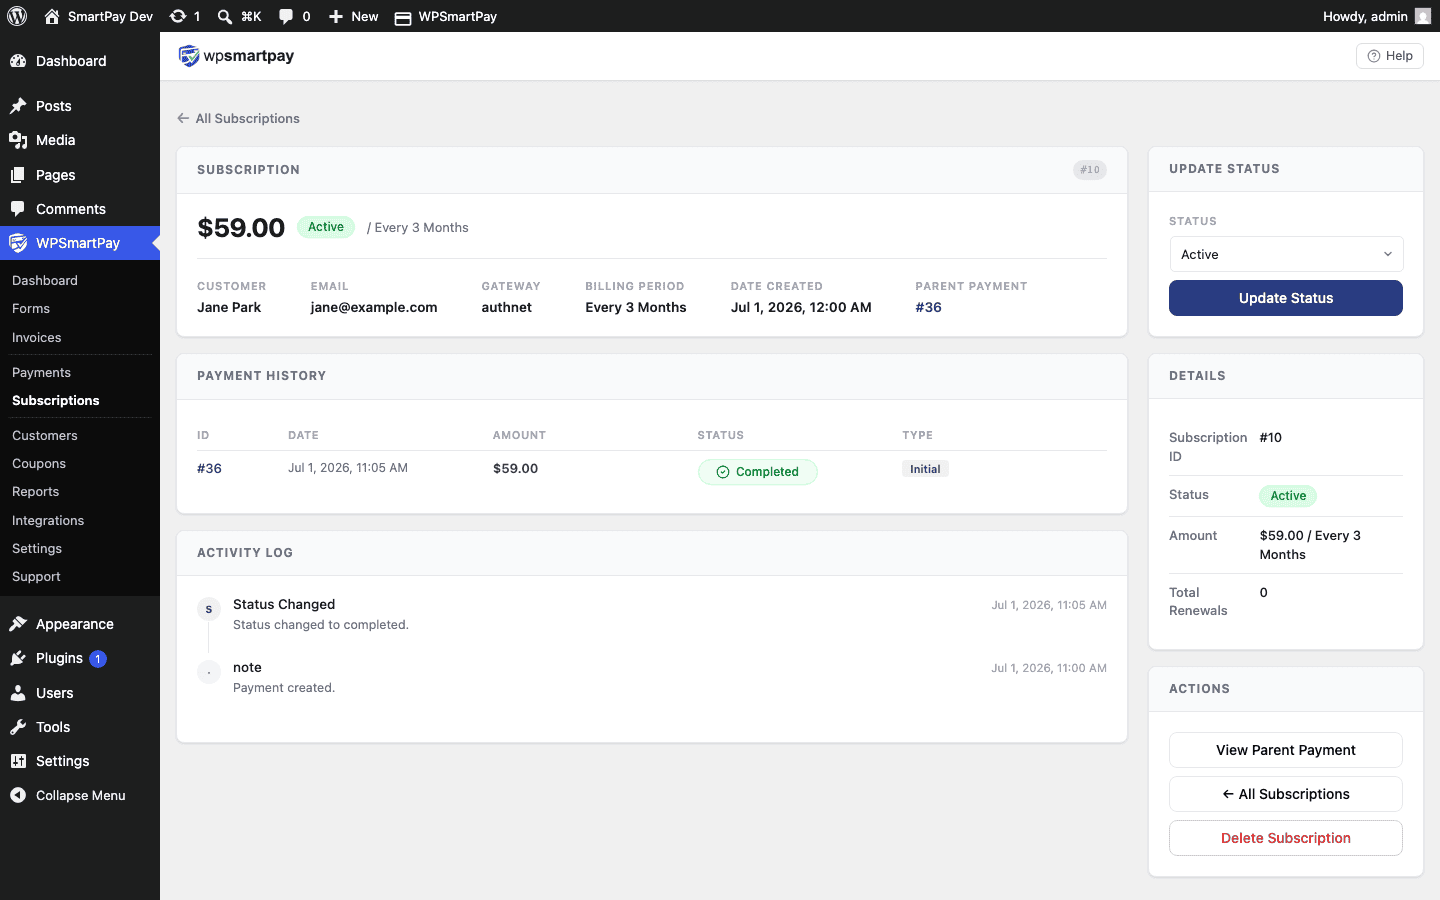 The subscription detail page showing plan terms, status, and the full renewal payment history.## Plan Summary
The top section displays the core subscription terms:
* **Status badge** — Active, Trialling, Failing, Cancelled, or Expired.
* **Amount & Interval** — The recurring charge amount and billing frequency (e.g., $49.00 / month).
* **Start Date** — When the first charge was made (or when the trial ends if trialling).
* **Next Renewal** — The next scheduled billing date.
* **Expiry** — If max billing cycles are set, the date the plan will expire after the last cycle.
* **Gateway** — Which payment processor manages the billing.
* **Gateway Subscription ID** — The processor's own ID (e.g., Stripe's `sub_…`). Useful when cross-referencing with your gateway dashboard.
## Customer Info
The customer card shows the subscriber's name, email, and a link to their full customer profile, where you can see all their other payments and subscriptions.
## Linked Payment History
A table below the plan summary lists every payment associated with this subscription — one row per billing cycle — with the date, amount, and status. Click any row to open the full payment detail page for that renewal charge.
## Admin Actions
* **Cancel** — Cancels the subscription at the gateway and marks it Cancelled in SmartPay. See [Cancelling a Subscription](https://docs.wpsmartpay.com/en/sp-sb-04-cancelling-subscription) for the full cancellation walkthrough.
* **View Customer** — Opens the customer profile page.
# Subscription List & Statuses
The WP SmartPay subscriptions list is your central view of every recurring billing agreement on your site. You can see the status of each subscription, when the next renewal is due, and which customers are on which plans.
## Opening the Subscriptions List
Go to **SmartPay → Subscriptions** in your WordPress admin sidebar.
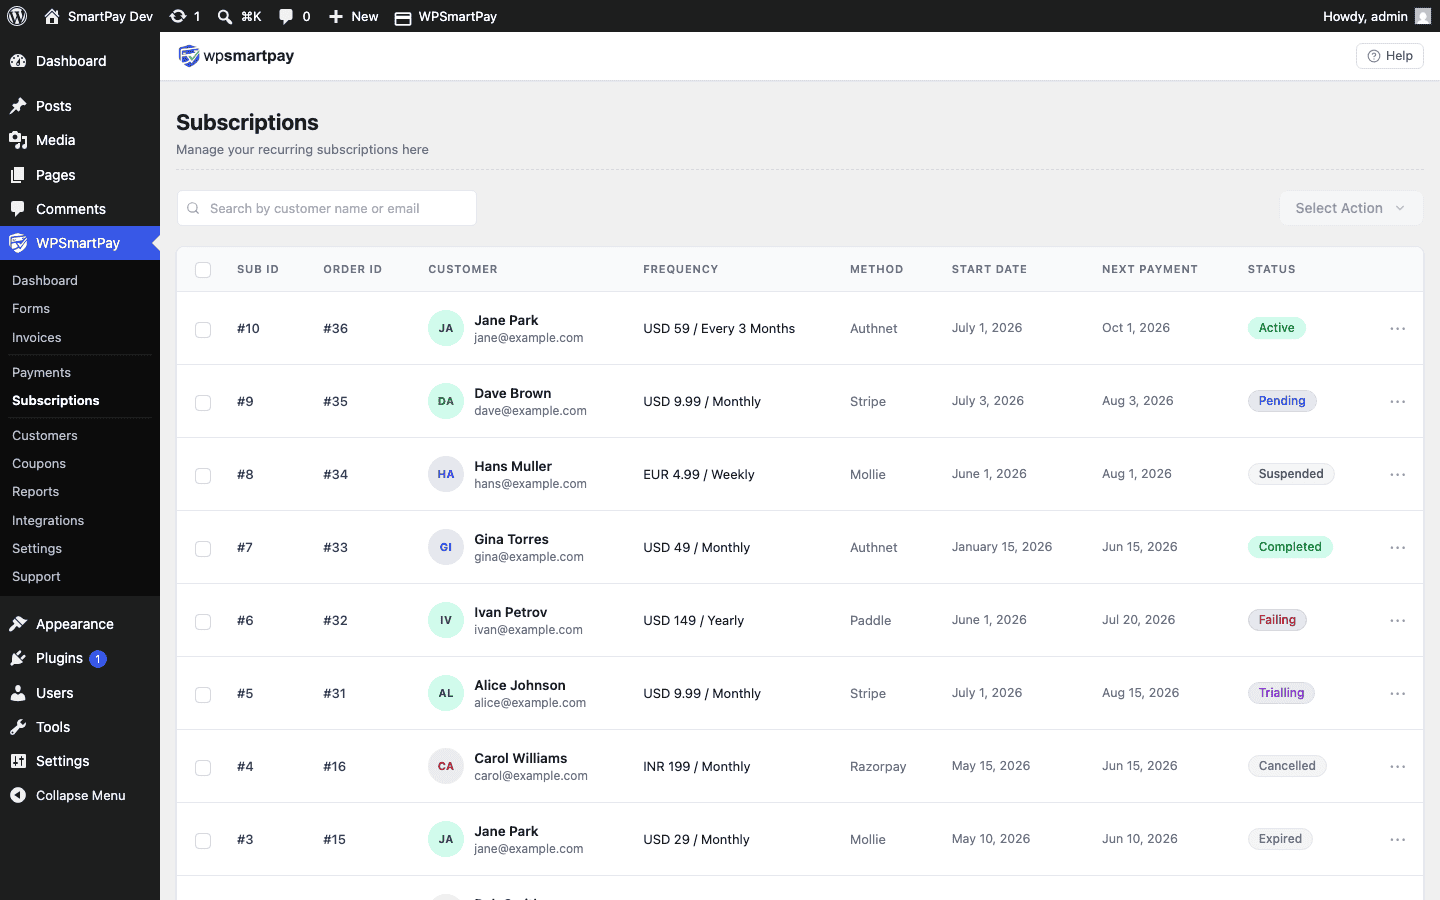 The Subscriptions list with status badges, amounts, billing intervals, and next renewal dates.## Column Overview
* **ID** — Unique subscription identifier (e.g., SUB-001). Click to open the subscription detail page.
* **Customer** — Name and email. Click to open the customer profile.
* **Plan / Form** — The payment form that created this subscription and the billing amount + interval (e.g., $29.00 / month).
* **Status** — Current lifecycle status (see below).
* **Next Renewal** — Date of the next scheduled billing event. Blank for cancelled or expired subscriptions.
* **Created** — Date the subscription was first created.
## Subscription Statuses
### Active
The subscription is in good standing. The customer's card is being charged on schedule. All renewals have succeeded.
### Trialling
The customer is in a free trial period. No charges have been made yet. Billing begins when the trial period ends.
### Failing
The most recent renewal attempt failed (card declined, expired, etc.). The gateway is retrying automatically. The subscription remains Failing until a renewal succeeds (→ Active) or retries are exhausted (→ Cancelled).
### Cancelled
The subscription has been cancelled — either by the customer, by an admin, or automatically after all gateway retries failed. No future renewals will be attempted. The subscription record is kept for historical reference.
### Expired
The subscription reached its maximum billing cycles and completed naturally. The plan has ended as designed — no cancellation action was needed.
## Filtering by Status
Click the status tabs at the top of the list — All, Active, Trialling, Failing, Cancelled, Expired — to see only subscriptions in that state. Use this to quickly identify customers whose cards are failing so you can follow up.
# Subscription Pricing & Billing Cycles (Pro)
WP SmartPay Pro lets you turn any payment form into a recurring subscription form. Once enabled, customers are charged automatically on a defined schedule — weekly, monthly, annually, or at any custom interval — until they cancel or the subscription expires.
## Prerequisites
* WP SmartPay Pro must be active.
* A subscription-capable gateway must be configured: **Stripe** or **Paddle Billing**. PayPal Standard does not support automated recurring billing.
## Enabling Subscription Mode on a Form
1. Open the form: **SmartPay → Forms → Edit**.
2. In the right sidebar, expand the **Pricing** panel.
3. Click the **Subscription** tab (appears in Pro alongside the standard Amount tab).
4. Toggle **Enable Subscription** to on.
## Billing Interval
Set how often the customer is charged:
* **Daily** — Charged every day. Rare; good for high-frequency services.
* **Weekly** — Charged every 7 days.
* **Monthly** — Charged on the same date each month (e.g., every 15th).
* **Quarterly** — Every 3 months.
* **Yearly** — Charged once per year.
* **Custom** — Set any interval in days (e.g., every 14 days for a bi-weekly plan).
## Free Trial Period
Offer a trial before billing starts. Enter the number of trial days in the **Trial Period** field. During the trial, the customer's card is not charged. The first charge occurs at the end of the trial.
A trial of 0 days means billing starts immediately on signup.
## Max Billing Cycles
Set a **Maximum Billing Cycles** count to automatically stop the subscription after N payments. For example, a 12-month annual plan with monthly billing and max 12 cycles bills for one year and then cancels automatically without requiring any manual intervention.
Leave this blank for indefinite subscriptions that continue until the customer cancels.
## How Subscription Checkout Differs
When a customer completes a subscription checkout:
1. SmartPay creates a subscription record in **SmartPay → Subscriptions**.
2. The first payment is processed immediately (or after the trial period ends).
3. Each subsequent payment creates a new **Payment** record linked to the same subscription.
4. Gateway webhooks notify SmartPay of each renewal — no manual action needed.
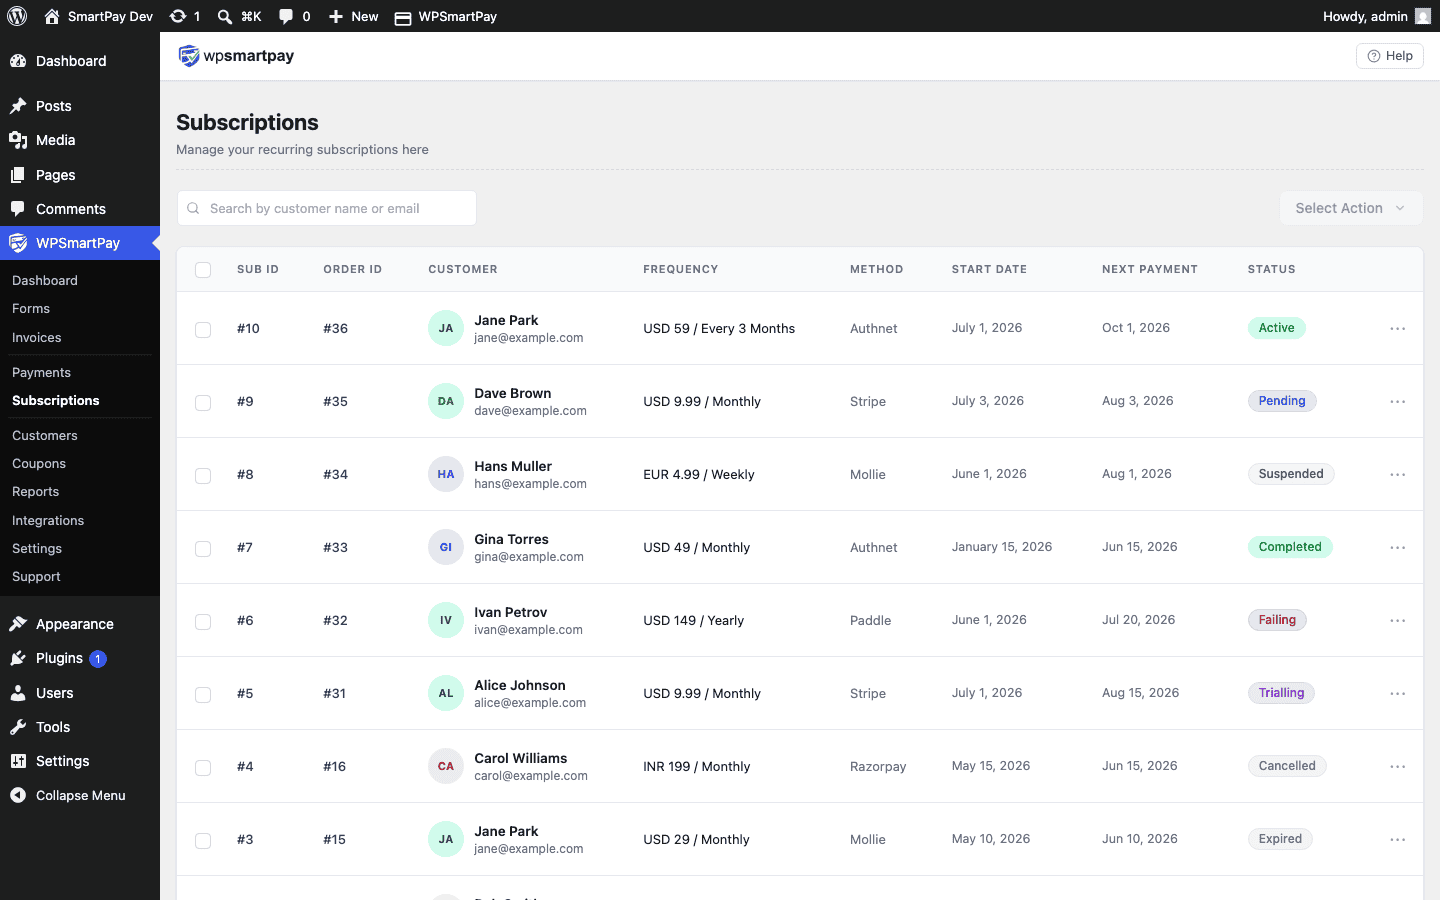 Subscriptions created through your form appear here with status, amount, and next renewal date.> **Note:** The subscription form checkout does not show a separate "Subscribe" label — it uses the same checkout fields as a one-time form. You may want to add a heading block to the form canvas that explains the billing schedule to the customer.
# Subscriptions Overview
WP SmartPay Pro adds recurring billing to any payment form. Instead of a single one-time charge, subscription customers are billed automatically on a set schedule — weekly, monthly, annually, or at any custom interval — until they cancel or the plan expires.
## What Is a Subscription in SmartPay?
A SmartPay subscription is a billing agreement between your site and a customer that:
* Defines an amount, a billing interval, and an optional end date.
* Stores the agreement in **SmartPay → Subscriptions**.
* Automatically charges the customer on each renewal via the gateway.
* Creates a new **Payment** record for each successful renewal charge.
## Supported Gateways
Recurring billing requires gateway-side support for subscription handling. SmartPay Pro supports subscriptions through:
* **Stripe** — Most widely used. Supports all SmartPay subscription features including trials, max billing cycles, and Smart Retries for failed renewals.
* **Paddle Billing** — Merchant-of-record model; Paddle handles tax collection and compliance. Supports monthly and annual plans.
> **Note:** PayPal Standard does not support automated recurring billing through SmartPay. If you need PayPal subscriptions, you need a PayPal extension that handles PayPal's billing agreement flow, or use Stripe/Paddle instead.
## Subscriptions vs One-Time Payments
| Feature | One-Time | Subscription |
|---|---|---|
| Creates a Payment record | ✓ (one) | ✓ (one per billing cycle) |
| Creates a Subscription record | ✗ | ✓ |
| Auto-charges on renewal | ✗ | ✓ |
| Cancellable by admin or customer | N/A | ✓ |
| Failed payment recovery | ✗ | ✓ (via gateway retries) |
## How Subscriptions Relate to Payments
Every subscription has one or more payments linked to it. The first payment is created when the customer subscribes. Each subsequent renewal creates a new payment record with the subscription ID stored in its metadata. You can view all payments for a subscription from the subscription detail page.
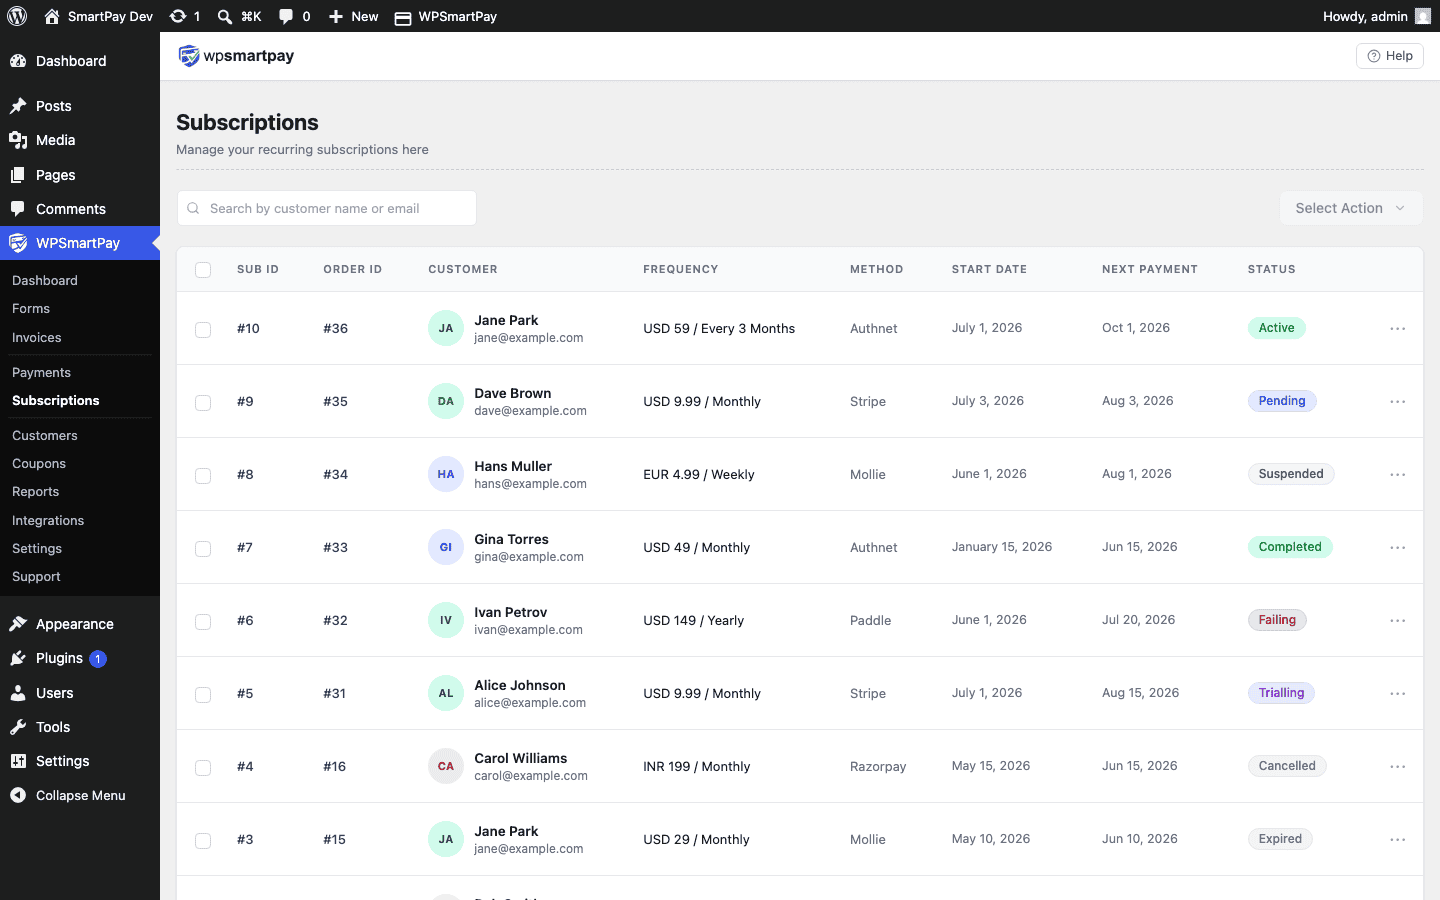 The Subscriptions list — each row is one billing agreement with a customer.## Enabling Subscriptions on a Form
Subscriptions are configured per form. See [Subscription Pricing & Billing Cycles](https://docs.wpsmartpay.com/en/sp-fm-08-subscription-pricing) for step-by-step instructions on enabling the subscription pricing mode on a payment form.
# Subscriptions Report
The WP SmartPay Pro Subscriptions report gives you a high-level view of your recurring revenue business: how many active subscriptions you have, your Monthly Recurring Revenue estimate, and how subscriptions have trended over the selected period.
## Opening the Subscriptions Report
1. Go to **SmartPay → Reports**.
2. Click the **Subscriptions** tab.
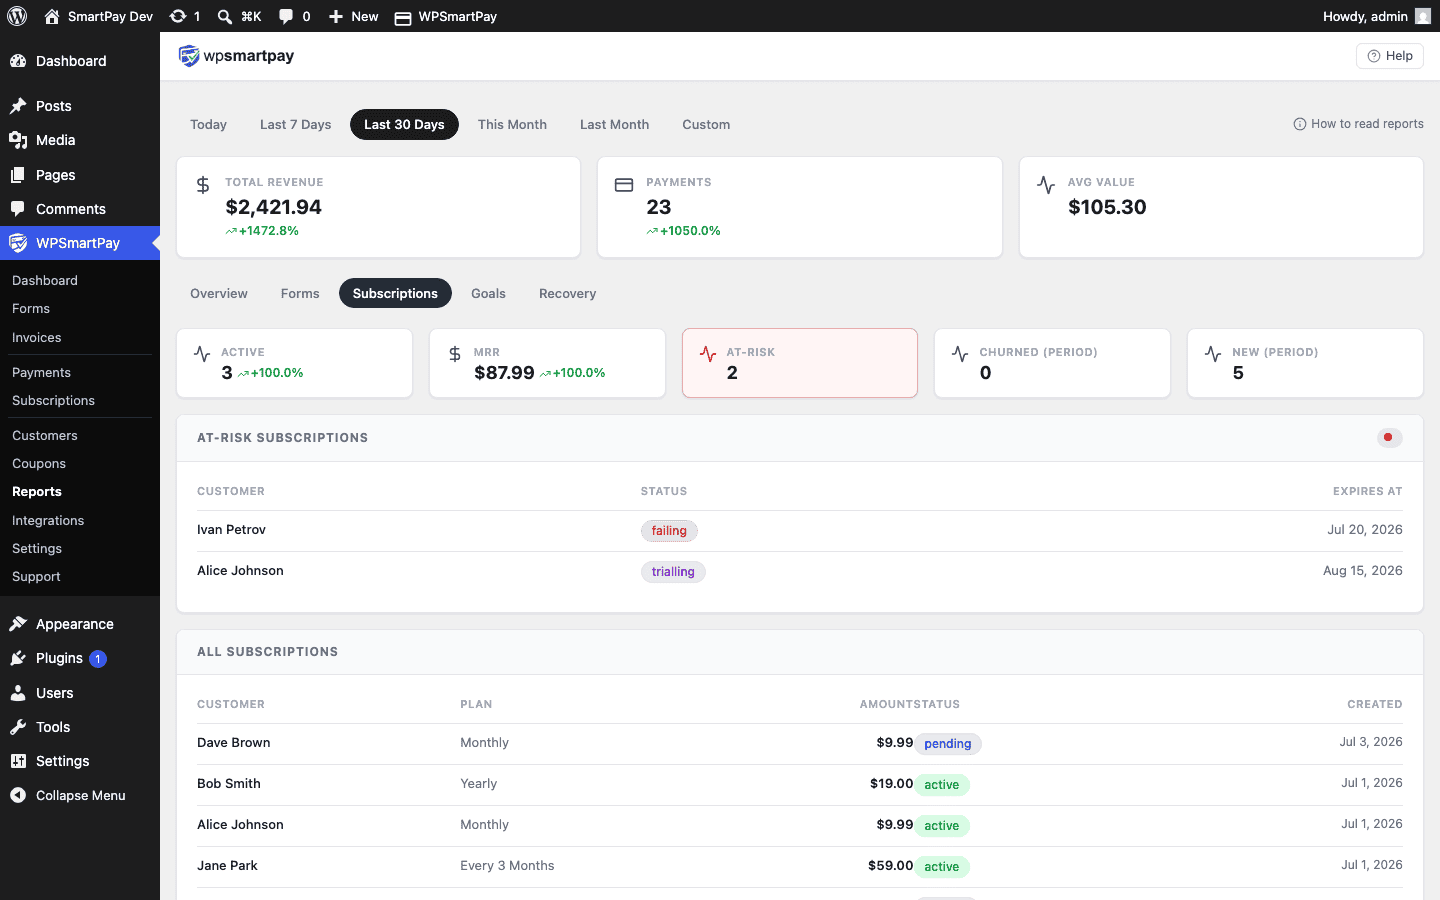 The Subscriptions report with Active count, MRR, and period filtering.## Key Metrics
* **Active Subscriptions** — Number of subscriptions currently in Active status. This is the count of paying customers on recurring plans at this moment.
* **Trialling** — Subscriptions in a free trial. These will convert to Active (or cancel) when the trial ends.
* **Cancelled** — Subscriptions cancelled during the selected period.
* **Expired** — Subscriptions that completed their maximum billing cycles during the period.
## Monthly Recurring Revenue (MRR)
The MRR figure is an estimate calculated from active subscriptions:
* Monthly subscriptions: amount × 1
* Annual subscriptions: amount ÷ 12
* Weekly subscriptions: amount × 4.33 (average weeks per month)
MRR gives you a normalised view of recurring revenue regardless of the billing frequency mix. It is useful for tracking growth month-over-month.
## Period Filtering
The date range selector affects subscription metrics differently from the revenue report:
* The Active, Trialling, Cancelled, and Expired counts show subscriptions in that state as of the **end** of the selected period.
* MRR reflects the subscription mix at the **end** of the period.
Set the date range to "This Month" to see your current state. Compare month-over-month by switching ranges manually.
# System Info
The System Info page in WP SmartPay gives you a snapshot of your WordPress environment, server configuration, and SmartPay settings in one place. When you need to contact support, copying this information helps the support team diagnose issues faster.
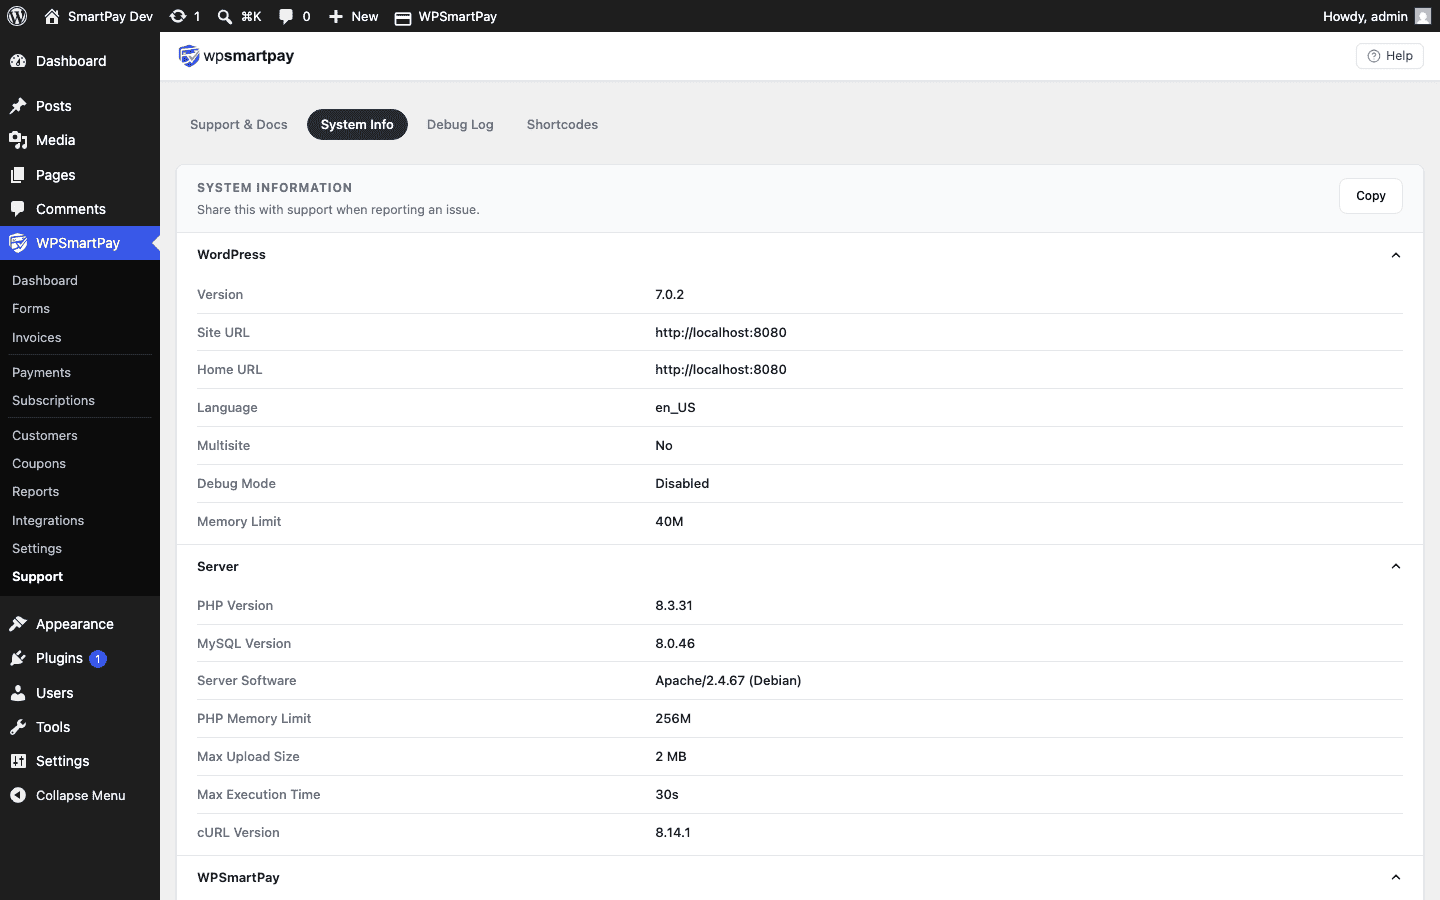 The System Info page under SmartPay → Support — copy this to clipboard before submitting a support ticket.## Opening System Info
Go to **SmartPay → Support → System Info**.
## What System Info Shows
The page is divided into sections:
### WordPress Environment
* WordPress version
* WP Multisite (yes/no)
* WP Memory Limit and Max Memory Usage
* WP Debug Mode status
* WordPress language/locale
* Permalink structure
### Server Environment
* PHP version
* PHP memory limit
* PHP max execution time
* PHP max upload size
* MySQL / MariaDB version
* cURL version
* Web server software (Apache, Nginx, etc.)
### Active Theme
* Theme name, version, and author
* Whether a child theme is active
### Active Plugins
* List of all active plugins with name and version — helps identify potential conflicts
### WP SmartPay Configuration
* Free plugin version
* Pro plugin version
* License status
* Currency setting
* Test mode status
* Active gateway(s)
* Configured page IDs (success page, login page, etc.)
## Copying System Info
Click **Copy to Clipboard** at the bottom of the page. All the information is formatted as plain text, ready to paste into a support ticket.
> **Note:** System Info includes your active plugin list and SmartPay settings, but not your API keys, database passwords, or other sensitive credentials. It is safe to share with the SmartPay support team.
# Tax on a Form (Pro)
WP SmartPay Pro lets you add a tax rate to individual payment forms. The tax is calculated on the form's base amount, shown at checkout as a separate line item, and included on auto-generated invoices.
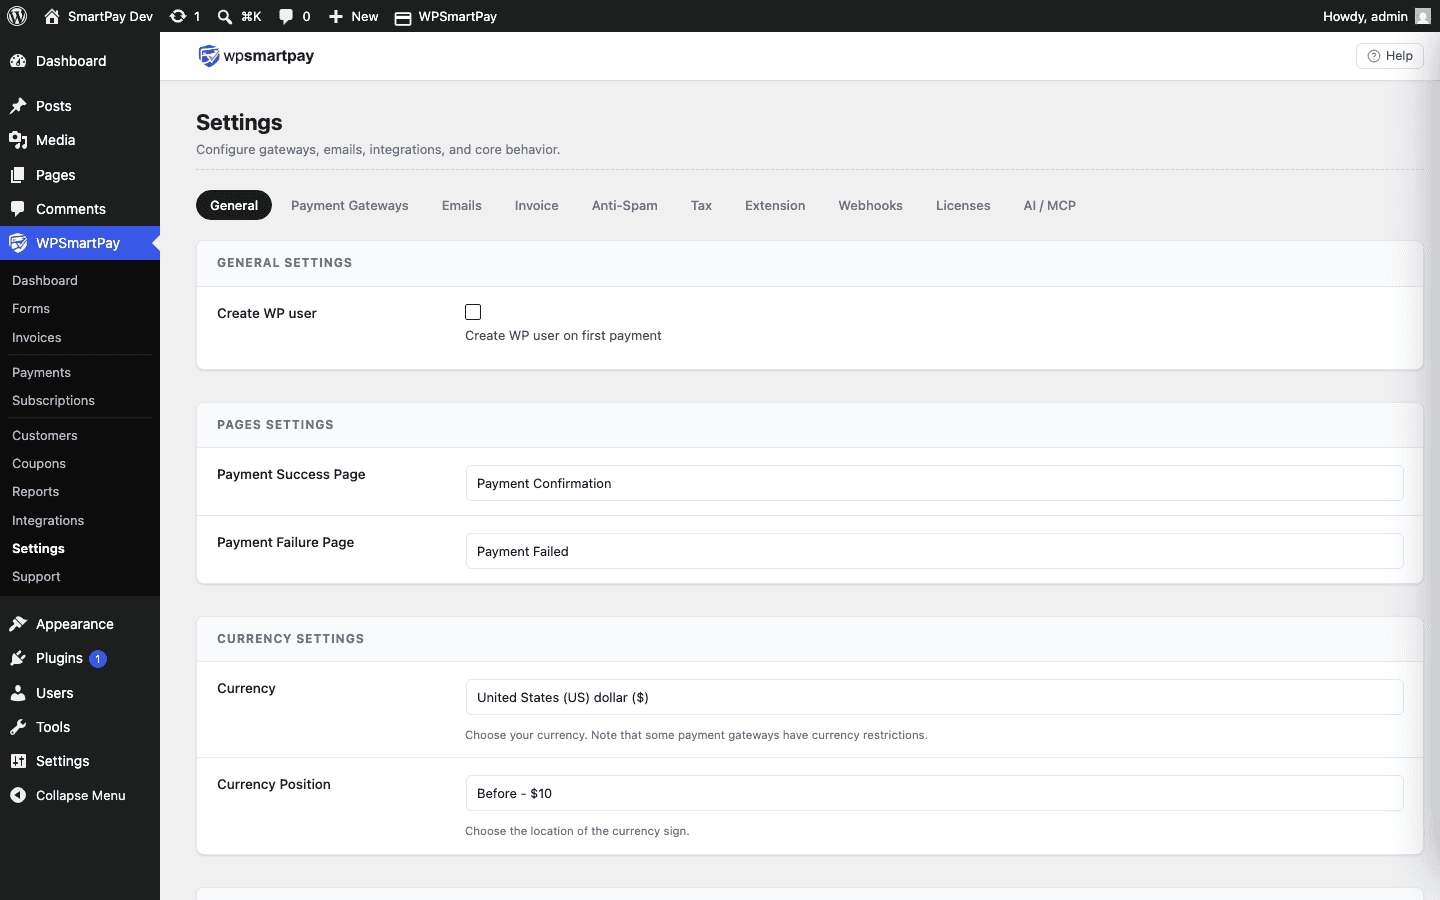## Enabling Tax on a Form
1. Open the form: **SmartPay → Forms → Edit**.
2. In the right sidebar, expand the **Pricing** panel.
3. Locate the **Tax** section (Pro).
4. Toggle **Enable Tax** to on.
## Configuring the Tax Rate
* **Tax Label** — The name shown at checkout and on the invoice (e.g., "GST", "VAT", "Sales Tax").
* **Tax Rate (%)** — The percentage to charge. For example, 10 for 10%.
* **Inclusive vs Exclusive** — Choose whether the stated form price already includes tax (inclusive) or whether tax is added on top of the stated price (exclusive).
## Display at Checkout
With tax enabled, the checkout form shows:
* Subtotal
* Tax label + calculated tax amount
* Total (subtotal + tax)
The customer sees the full breakdown before clicking the pay button, making the charge fully transparent.
## Tax on Invoices
When Pro invoices are generated for a payment from a tax-enabled form, the invoice automatically includes the tax as a separate line item with the tax label and rate. This makes the invoice suitable for accounting and tax reporting.
## Per-Form Configuration
Tax is configured on a per-form basis. One form can have 10% VAT, another can have no tax, and a third can use a different label. There is no global tax rate in SmartPay — each form is independent.
> **Note:** SmartPay does not automatically determine the correct tax rate based on customer location. If you need location-based tax calculation (e.g., EU VAT), you will need to configure the appropriate rate manually per form or use an integration that handles tax compliance.
# Telegram Integration
### Telegram Integration
WP SmartPay Pro integrates with Telegram to help you receive real-time payment notifications directly in your Telegram chats.
By connecting your Telegram bot, you can send payment updates to a selected chat or group, making it easy to monitor transactions and stay informed without checking your WordPress dashboard.
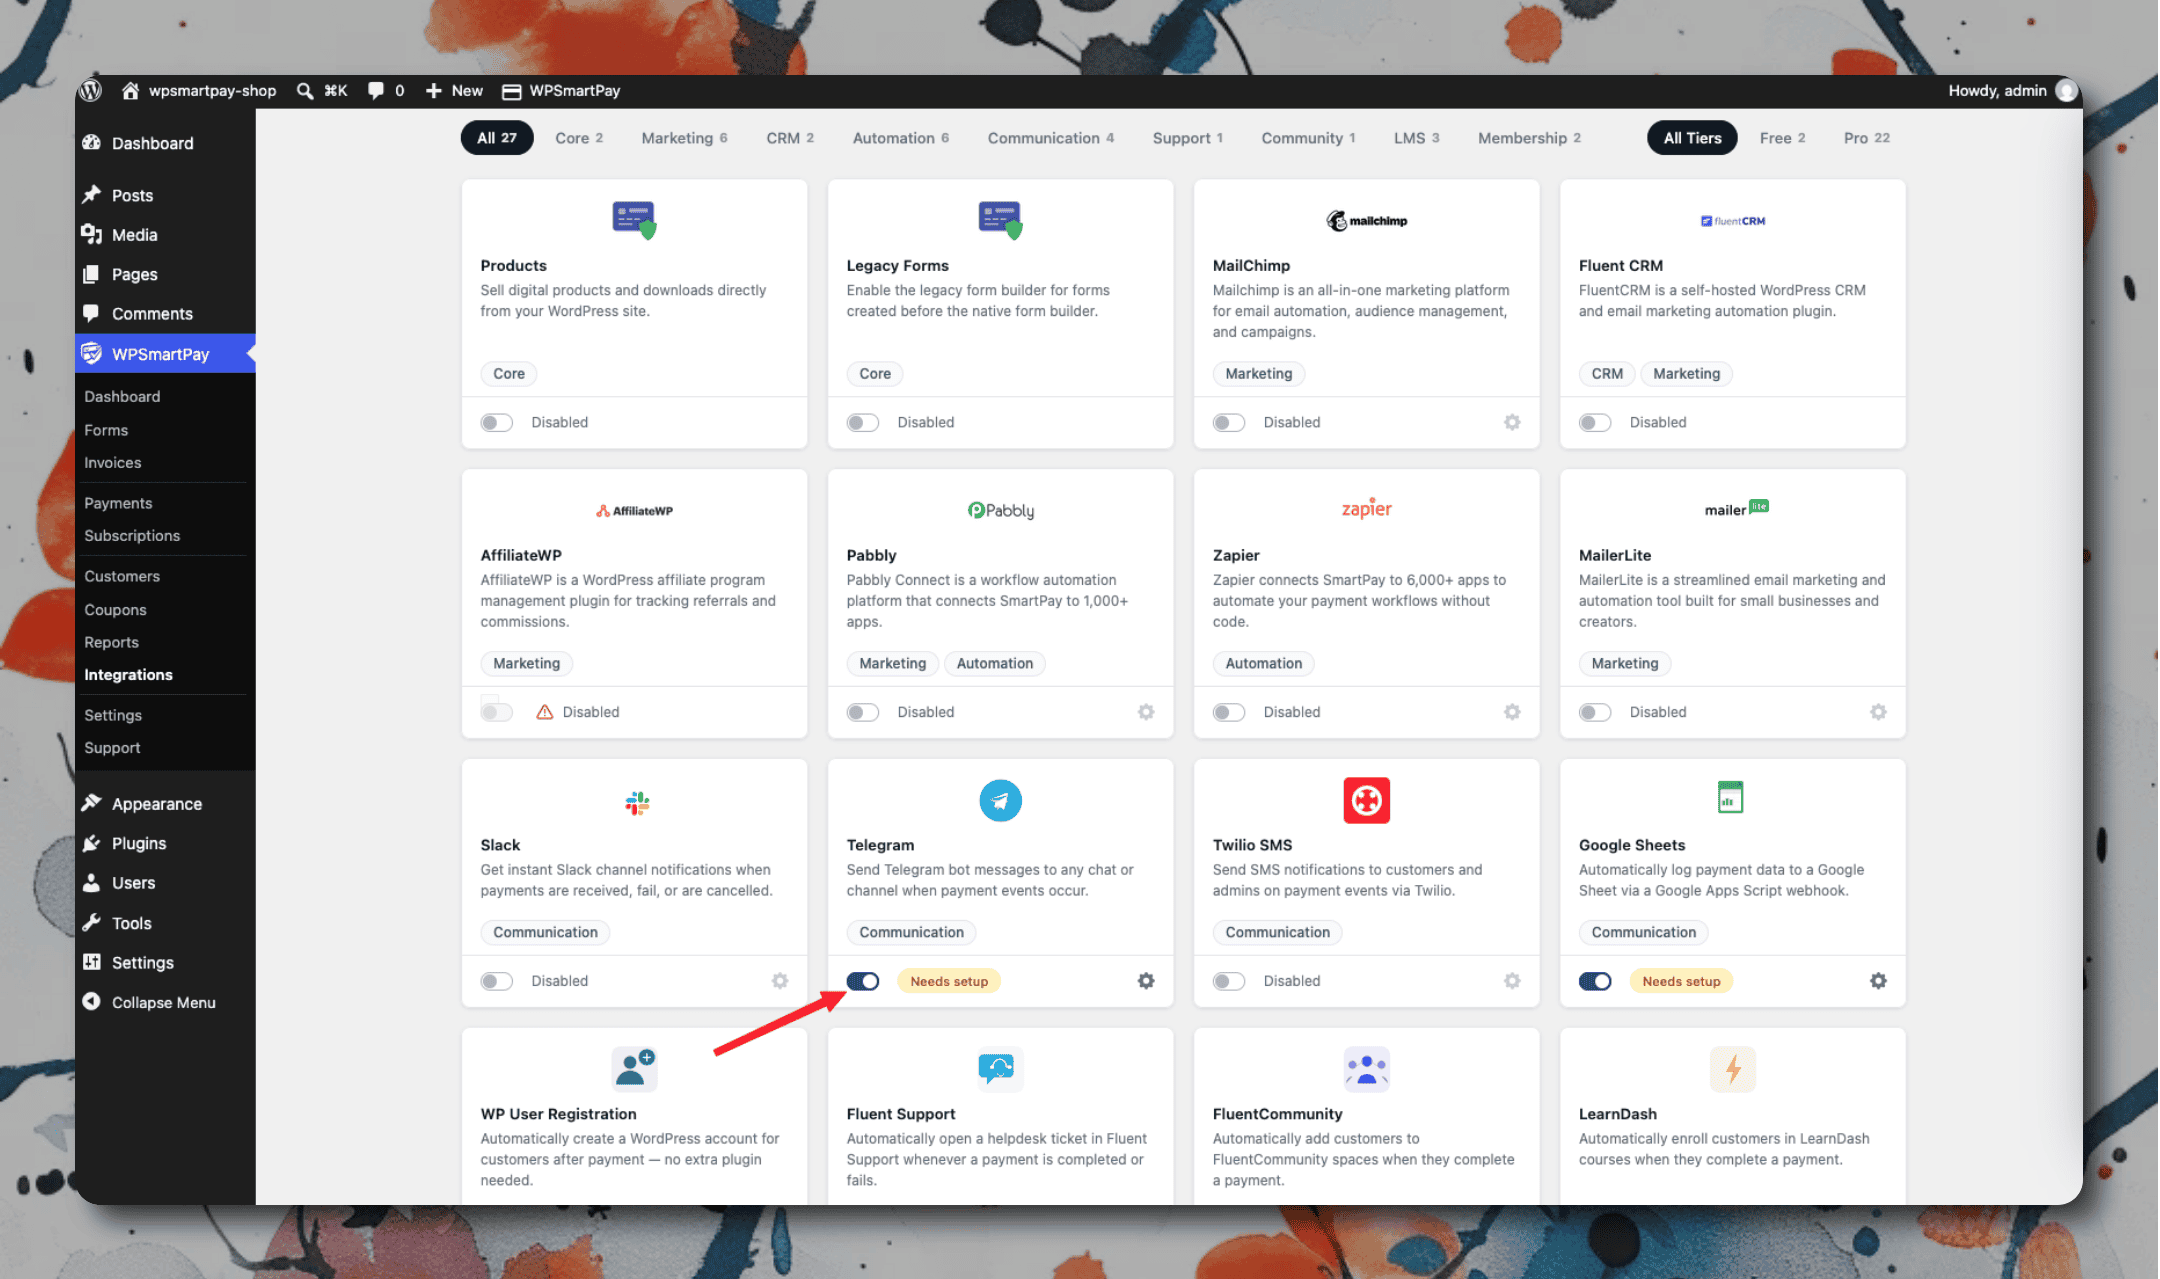### Setting Up
1. Open Telegram and message **@BotFather**. Send `/newbot` and follow the prompts to get a bot token.
2. Start a conversation with your new bot (or add it to a group/channel). Get the Chat ID — the easiest way is to send a message, then visit `https://api.telegram.org/bot{YOUR_TOKEN}/getUpdates` and find `chat.id` in the JSON.
3. In WordPress, go to **SmartPay → Extensions → Telegram → Settings**.
4. Enter your Bot Token and Chat ID. Save.
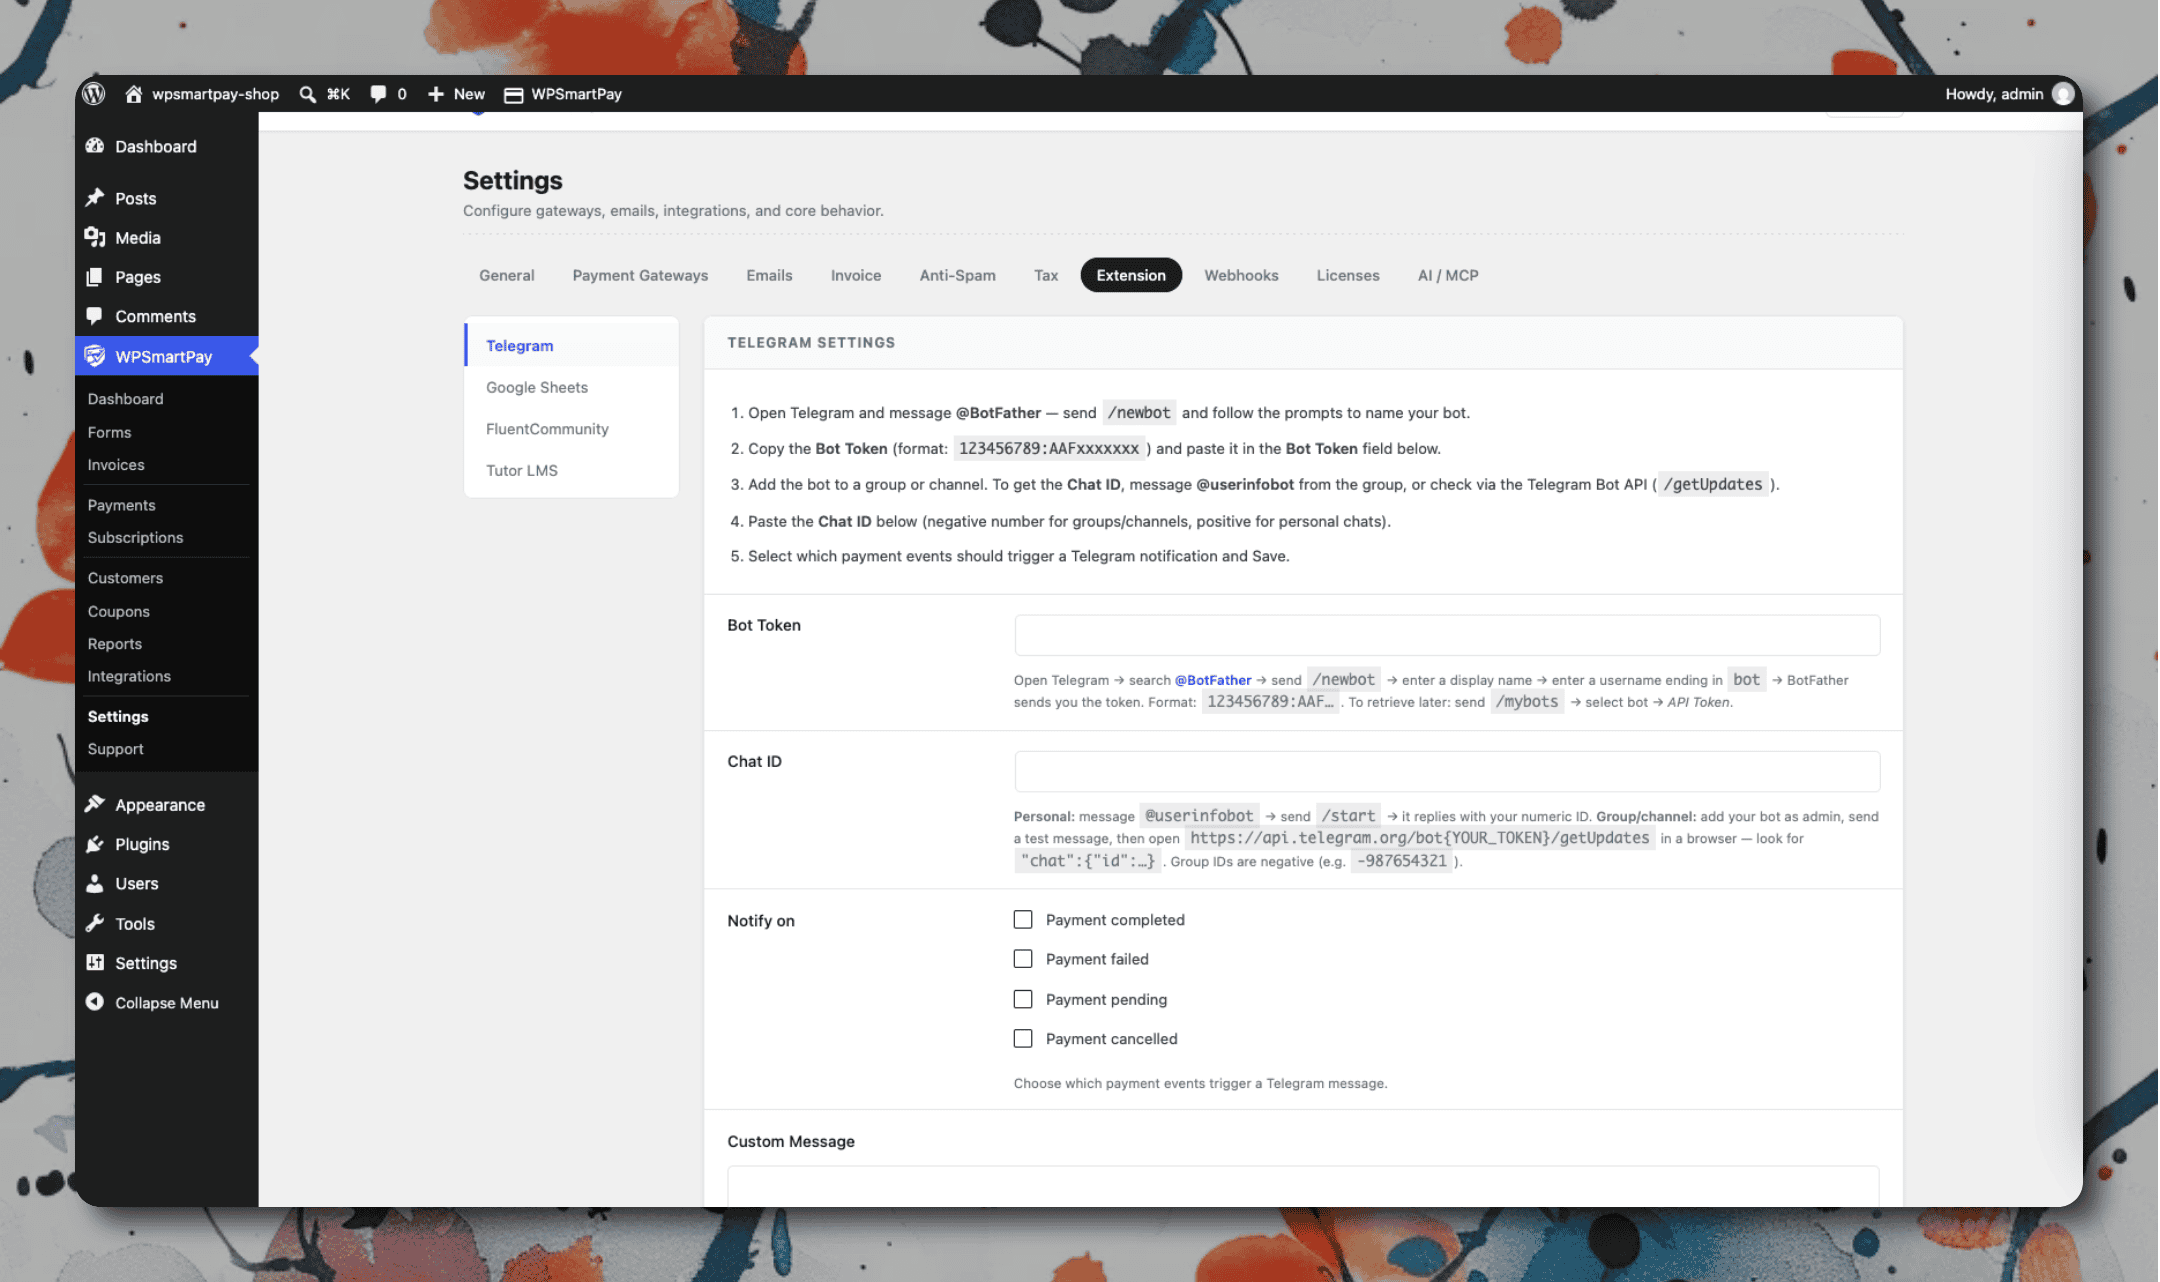### Example Notification
```typescript
[object Object],[object Object],[object Object],[object Object],[object Object],[object Object],[object Object],[object Object],[object Object],[object Object],[object Object],[object Object],[object Object],[object Object],[object Object],[object Object],[object Object],[object Object],[object Object],[object Object],[object Object],[object Object],[object Object],[object Object],[object Object],[object Object],[object Object],[object Object],[object Object],[object Object],[object Object],[object Object],[object Object],[object Object],[object Object],[object Object],[object Object],[object Object],[object Object],[object Object],[object Object],[object Object],[object Object],[object Object],[object Object],[object Object],[object Object],[object Object],[object Object],[object Object],[object Object],[object Object],[object Object],[object Object],[object Object],[object Object],[object Object],[object Object],[object Object],[object Object],[object Object],[object Object],[object Object],[object Object],[object Object],[object Object],[object Object],[object Object],[object Object],[object Object],[object Object],[object Object],[object Object],[object Object],[object Object]
```
## Tips
* **Telegram for mobile teams:** Telegram is especially useful if your team is mobile-first — the Telegram bot posts instantly and supports group chats with no per-message cost.
# Test Cards & Gateway Sandbox Credentials
Before going live, always test your payment forms using each gateway's sandbox credentials and test card numbers. This article lists the test cards and credentials for every gateway WP SmartPay Pro supports.
## Enabling Test Mode
1. Go to **SmartPay → Settings → General**.
2. Toggle **Test Mode** to on and save.
3. A yellow "Test Mode Active" banner will appear at the top of SmartPay admin screens.
4. All payments made while test mode is active are fake — no real money moves and charges are not processed through live gateway accounts.
## Stripe Test Cards
Stripe uses the same API keys in test mode — just set them in **SmartPay → Settings → Gateways → Stripe** using your Stripe *test* API keys (starting with `sk_test_` and `pk_test_`).
| Scenario | Card number | Expiry / CVV |
|---|---|---|
| Successful payment | `4242 4242 4242 4242` | Any future date / Any 3 digits |
| Requires authentication (3DS) | `4000 0025 0000 3155` | Any future date / Any 3 digits |
| Card declined (generic) | `4000 0000 0000 0002` | Any future date / Any 3 digits |
| Insufficient funds | `4000 0000 0000 9995` | Any future date / Any 3 digits |
| Card expired | `4000 0000 0000 0069` | Any future date / Any 3 digits |
## PayPal Sandbox
1. Go to [developer.paypal.com](https://developer.paypal.com) and log in.
2. Under **Sandbox → Accounts**, create a Personal (buyer) sandbox account.
3. In SmartPay settings, enter your *sandbox* PayPal email in the PayPal settings.
4. At checkout, use the sandbox buyer account email and password to simulate a payment.
## Razorpay Test Credentials
| Card type | Card number | Expiry / CVV |
|---|---|---|
| Visa (success) | `4111 1111 1111 1111` | Any future date / Any 3 digits |
| Mastercard (success) | `5267 3181 8797 5449` | Any future date / Any 3 digits |
| UPI (success) | Use VPA: `success@razorpay` | — |
| UPI (failure) | Use VPA: `failure@razorpay` | — |
| Net Banking | Select any bank → use test credentials shown on redirect page | — |
Use your Razorpay *test mode* API keys (from the Razorpay Dashboard, toggle to Test mode).
## Mollie Test Credentials
Mollie uses a test API key (starting with `test_`) — no real test card numbers needed. At checkout in test mode, Mollie shows a status selector (Paid, Failed, Cancelled, Pending) so you can simulate any outcome.
## Paddle Test Credentials
Paddle uses a sandbox environment. Use your Paddle sandbox vendor credentials in SmartPay settings. At checkout, Paddle's sandbox shows a pre-filled test card — just click Pay to simulate a successful purchase.
## Authorize.Net Test Cards
| Scenario | Card number | Expiry |
|---|---|---|
| Successful payment | `4007000000027` | Any future date |
| Declined | `4222222222222` | Any future date |
## bKash Test Credentials
bKash provides sandbox credentials through their developer portal. Use the test phone number and PIN provided in your bKash sandbox account. No real wallet balance is needed.
## What to Verify After a Test Payment
* Payment appears in **SmartPay → Payments** with status **Completed**
* Customer appears in **SmartPay → Customers**
* Confirmation email arrives at the buyer's address
* For subscriptions: subscription appears in **SmartPay → Subscriptions** with status **Active**
* Any integrations fire correctly (email list, LMS enrollment, Slack notification)
* Success redirect page loads correctly
Once all tests pass, go to **SmartPay → Settings → General** and disable Test Mode before accepting real payments.
# Test Mode & Live Mode
WP SmartPay has a built-in Test Mode that lets you run complete payment flows — form submission, gateway processing, receipt, and notifications — without moving any real money. Use Test Mode during development and switch to Live Mode only when your store is ready for real customers.
## Enabling Test Mode
1. Go to **SmartPay → Settings → Payment Gateways**.
2. At the top of the page, toggle **Test Mode** to on.
3. Click **Save Settings**.
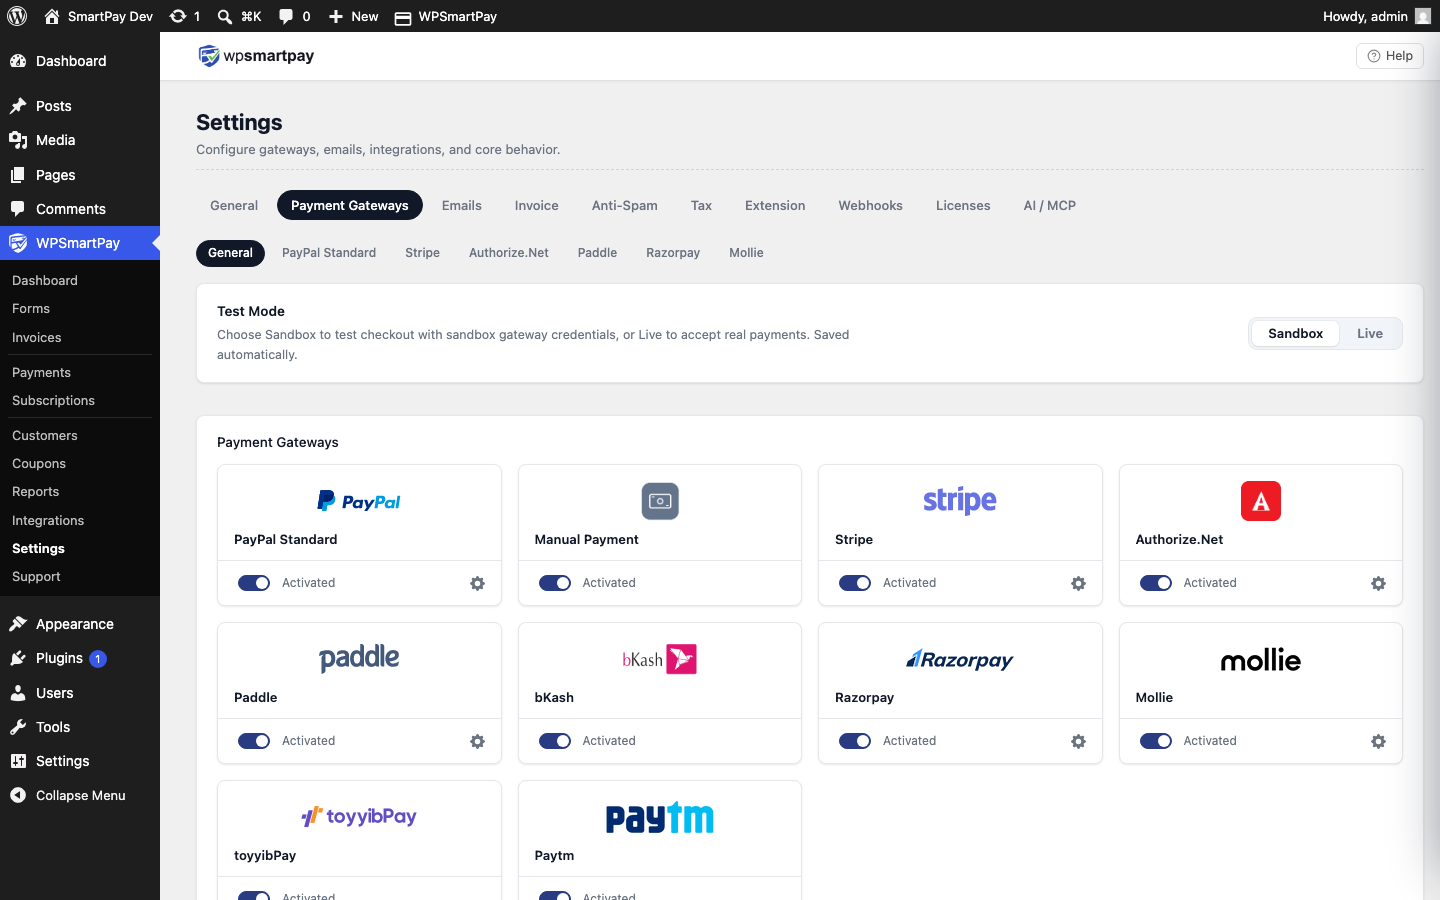 The Test Mode toggle at the top of the Payment Gateways settings page.When Test Mode is on, a yellow banner appears in the admin sidebar and on the checkout form warning that no real payments are being processed.
## Test Credentials per Gateway
Each gateway has separate fields for live and test credentials. In Test Mode SmartPay reads the test credentials; in Live Mode it reads the live credentials. Enter both sets so you can switch back and forth without re-entering keys.
### Stripe Test Credentials
Log in to your Stripe dashboard and toggle to **Test mode** (top-right toggle). Copy the **Test Publishable Key** and **Test Secret Key** into SmartPay's Stripe settings under the Test fields.
### Stripe Test Card Numbers
| Card Number | Result |
|---|---|
| `4242 4242 4242 4242` | Always succeeds |
| `4000 0000 0000 0002` | Always declines |
| `4000 0025 0000 3155` | Requires 3D Secure authentication |
Use any future expiry date and any 3-digit CVC.
### PayPal Sandbox
Create a [PayPal sandbox account](https://developer.paypal.com/tools/sandbox/) and use the sandbox email as your PayPal email in SmartPay's test credentials.
### Mollie Test Mode
Mollie provides a test API key starting with `test_` in your Mollie dashboard. Enter it in SmartPay's Mollie test key field.
## Test Payments in the Admin
Payments made in Test Mode appear in **SmartPay → Payments** alongside live payments, but are labelled with a **Test** mode badge. To see only test payments, use the **Mode: Test** filter on the Payments list.
## Switching to Live Mode Checklist
1. Go to **SmartPay → Settings → Payment Gateways**.
2. Confirm your **live** API keys are entered in the Live fields (not test keys).
3. Toggle **Test Mode** off.
4. Click **Save Settings**.
5. Make one real low-value test payment (e.g., $1) to confirm the live integration works.
6. Check your gateway dashboard to confirm the payment appears there.
> **Warning:** Never use live API keys in Test Mode or test API keys in Live Mode. Mixing them will cause all payment attempts to fail.
# Testing the Full Subscription Lifecycle
Subscription billing involves more than a single payment — renewals, cancellations, failed charges, and webhook timing all need to be verified before you launch. This guide covers how to test the full subscription lifecycle in SmartPay Pro.
## Prerequisites
* Test Mode enabled in **SmartPay → Settings → General**
* A subscription-capable gateway configured with sandbox/test credentials (Stripe or Mollie recommended for testing)
* A subscription form created in **SmartPay → Forms**
## Step 1: Test the Initial Signup
1. Visit your subscription form on the frontend.
2. Submit with a Stripe test card: `4242 4242 4242 4242`.
3. Verify in **SmartPay → Subscriptions** that a new subscription appears with status **Active**.
4. Verify the customer email received a confirmation.
5. If you have an LMS or membership integration, verify the user was enrolled/granted access.
## Step 2: Simulate a Renewal
Waiting for a real renewal cycle (days or months) isn't practical in testing. Use the gateway's test tools to fast-forward time:
### Stripe
1. In the [Stripe Dashboard (test mode)](https://dashboard.stripe.com/test/subscriptions), find the subscription you just created.
2. Click **Actions → Fast-forward subscription** to advance the billing cycle to the next renewal date.
3. Stripe will fire the `invoice.paid` webhook event, which SmartPay receives and records as a renewal payment.
4. Verify a second payment appears in **SmartPay → Payments** linked to the same subscription.
### Mollie
Mollie's test mode approves the next recurring charge immediately. After the initial mandate is confirmed, trigger the subscription via Mollie's API or simply wait — in Mollie test mode, subscription intervals are compressed.
## Step 3: Test a Failed Renewal
### Stripe
1. In Stripe Dashboard (test mode), find the subscription.
2. Update the payment method to a declining card: `4000 0000 0000 0341`.
3. Fast-forward the billing cycle.
4. Stripe fires a `invoice.payment_failed` webhook.
5. In SmartPay, the subscription should change to **Failing**.
6. Verify the payment failure email is sent to the customer.
7. If connected to LMS/membership, verify access is suspended.
## Step 4: Test Subscription Cancellation
1. In SmartPay, go to the subscription detail and click **Cancel**.
2. Choose between "Cancel at end of period" or "Cancel immediately".
3. Verify the subscription status changes to **Cancelled**.
4. Verify gateway webhook fires (Stripe sends `customer.subscription.deleted`).
5. If connected to LMS/membership, verify the user's access is revoked.
## Step 5: Test the Customer Account Page
1. Create a WordPress page with the shortcode `[smartpay_account]`.
2. Log in as the test subscriber.
3. Verify they can see their subscription, billing date, and status.
4. Click **Cancel Subscription** and verify the cancellation flow.
5. Click **Update Payment Method** and verify the secure Stripe/Paddle form appears.
## Step 6: Test a Fixed-Term Subscription (Installment Plan)
1. Create a form with billing period set to **Monthly** and subscription length set to **3 months**.
2. Complete a test signup.
3. In Stripe, fast-forward twice more (for a total of 3 renewals).
4. After the 3rd payment, the subscription should automatically change to **Completed**.
5. No further renewals should occur.
## Webhook Testing Tips
* **Stripe CLI:** Install the Stripe CLI and run `stripe listen --forward-to localhost:8080/smartpay/v1/webhook/stripe` to forward Stripe events to your local dev environment without a public URL.
* **ngrok for local testing:** If testing on localhost, use ngrok to expose a public URL: `ngrok http 8080`. Use the ngrok HTTPS URL as the webhook endpoint in Stripe/Razorpay.
* **Webhook log in SmartPay:** Check **SmartPay → Settings → Webhooks** for incoming webhook delivery status and retry failed deliveries.
## Checklist Before Going Live
* ☑ Initial subscription payment completes and status shows Active
* ☑ Renewal webhook fires and second payment records in SmartPay
* ☑ Failed renewal changes status to Failing and sends failure email
* ☑ Cancellation changes status to Cancelled and revokes access
* ☑ Customer account page shows correct subscription state
* ☑ Test Mode disabled before launch
* ☑ Live gateway credentials entered (not sandbox keys)
# Toyyibpay
Toyyibpay is a Malaysian payment gateway that supports FPX online banking, credit/debit cards, and e-wallets. It is popular with Malaysian businesses looking for a simple API integration. WP SmartPay Pro includes a Toyyibpay integration for accepting payments from Malaysian customers.
## Prerequisites
* A [Toyyibpay account](https://toyyibpay.com). Business verification required for live payments.
* Your Toyyibpay User Secret Key and Category Code.
* WP SmartPay Pro with a valid license.
## Country Availability
Toyyibpay is available to businesses registered in Malaysia.
## Finding Your Toyyibpay Credentials
1. Log in to your Toyyibpay account at [toyyibpay.com](https://toyyibpay.com).
2. Go to **Profile → User Secret Key** to copy your secret key.
3. Go to **Category** to create or find your payment category and copy the **Category Code**.
## Connecting Toyyibpay in SmartPay
1. Go to **SmartPay → Settings → Payment Gateways**.
2. Find **Toyyibpay** and tick **Enable**.
3. Enter your **User Secret Key** and **Category Code** in the live fields.
4. Enter sandbox credentials in the test fields (Toyyibpay provides a sandbox environment at `dev.toyyibpay.com`).
5. Click **Save Settings**.
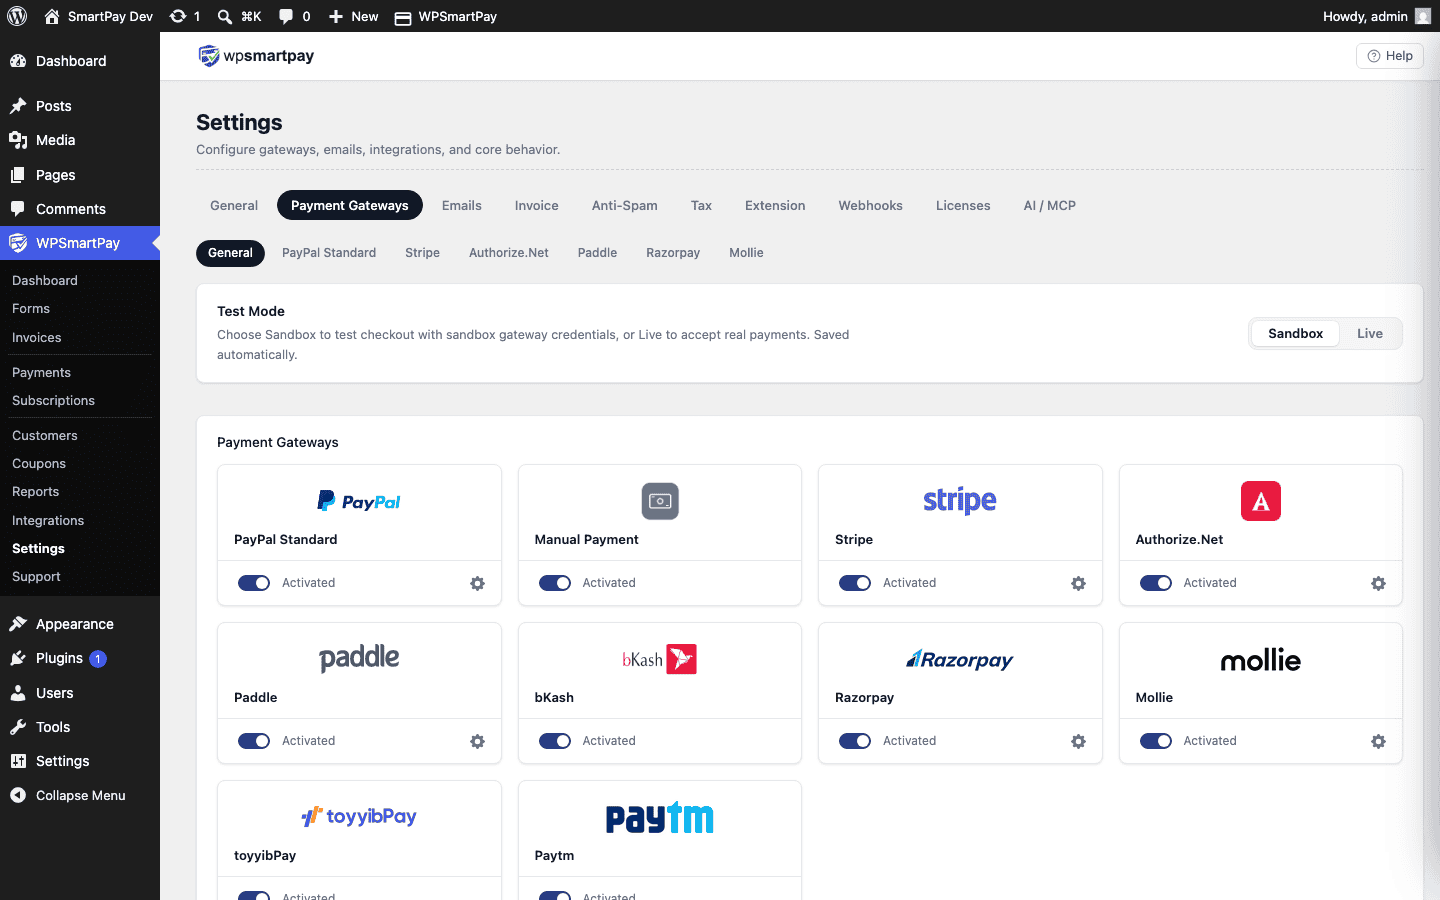 Toyyibpay settings — enter your User Secret Key and Category Code.## How Toyyibpay Checkout Works
When a customer selects Toyyibpay at checkout:
1. SmartPay creates a Toyyibpay bill via the API.
2. The customer is redirected to Toyyibpay's hosted payment page.
3. The customer selects their payment method (FPX, card, or e-wallet) and completes payment.
4. Toyyibpay redirects the customer back to your site and sends a callback to SmartPay.
5. SmartPay updates the payment status based on the callback.
## Supported Payment Methods
* FPX Online Banking (all Malaysian banks)
* Visa and Mastercard
* Touch 'n Go eWallet
* ShopeePay
* GrabPay
## Supported Currencies
Malaysian Ringgit (MYR) only.
## Common Errors & Fixes
* **"Invalid category code"** — The Category Code must match exactly what is set in your Toyyibpay account. Codes are case-sensitive.
* **Callback not received** — Ensure your site URL is accessible publicly and matches the URL registered in Toyyibpay. Local/test sites on localhost will not receive callbacks.
# Tutor LMS Integration
Skip the bulky e-commerce plugins and sell your Tutor LMS content directly through WPSmartPay. This integration creates a seamless bridge between your payment forms and your e-learning platform.
As soon as a transaction clears, students are instantly enrolled in their chosen courses, ensuring an uninterrupted transition from checkout to the classroom.
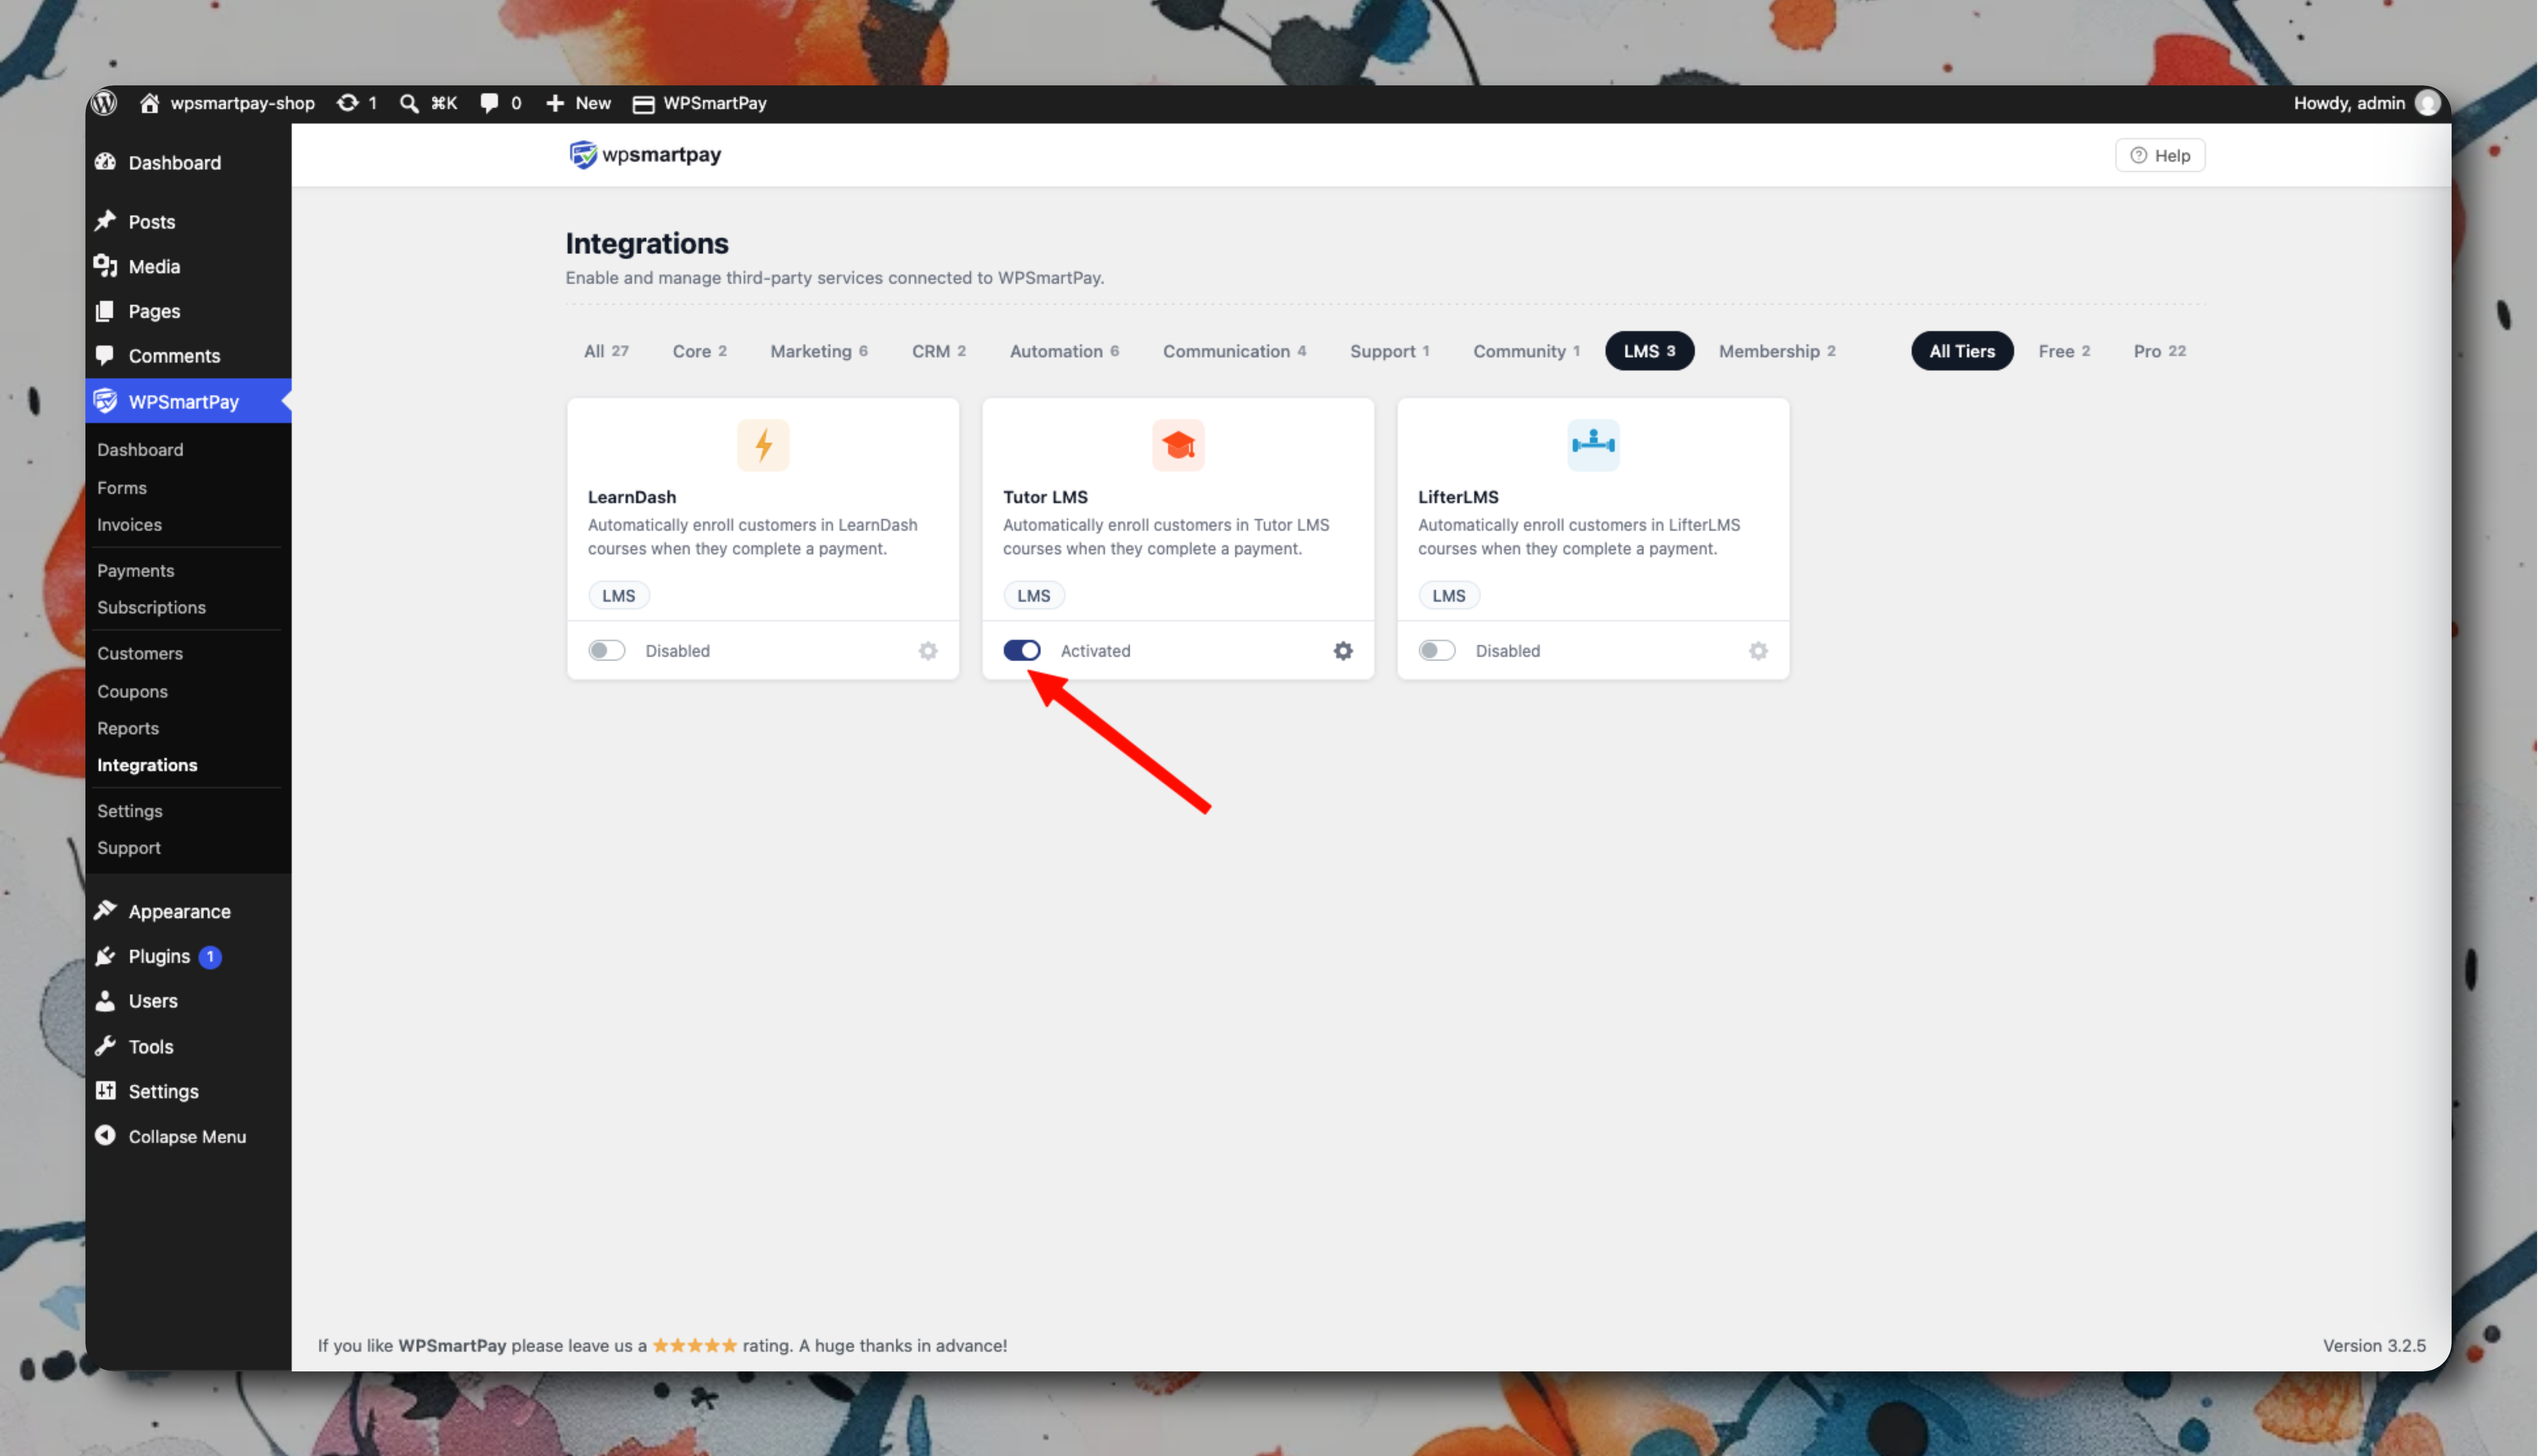### Setup
1. Go to **SmartPay → Extensions → Tutor LMS → Settings** and activate.
2. In each SmartPay payment form, under the **Integrations** tab, select the Tutor LMS Course to enroll the buyer in.
3. Save.
### How Access Is Managed
| Payment Event | Tutor LMS Action |
|---|---|
| Successful Order (One-Time) | Student is instantly enrolled in the specific Course |
| New Subscription Activated | Student is instantly enrolled in the specified Course |
| Subscription Renewal Clears | Enrollment remains active |
| Subscription cancelled | Course access is revoked |
| Renewal Payment Fails | Course access is revoked, and the student is locked out |
| Order Refunded | Student is completely unenrolled and loses access to the course |
Tutor LMS enrollments are per-course. If you want to sell access to multiple courses, either use a Tutor LMS Bundle or add multiple SmartPay–Tutor LMS mappings on the same form.
# Twilio SMS Integration
With Twilio integration, WP SmartPay Pro can automatically send payment notifications through SMS.
Connect your Twilio account to keep customers or your team updated with important payment and transaction alerts directly on their mobile devices.
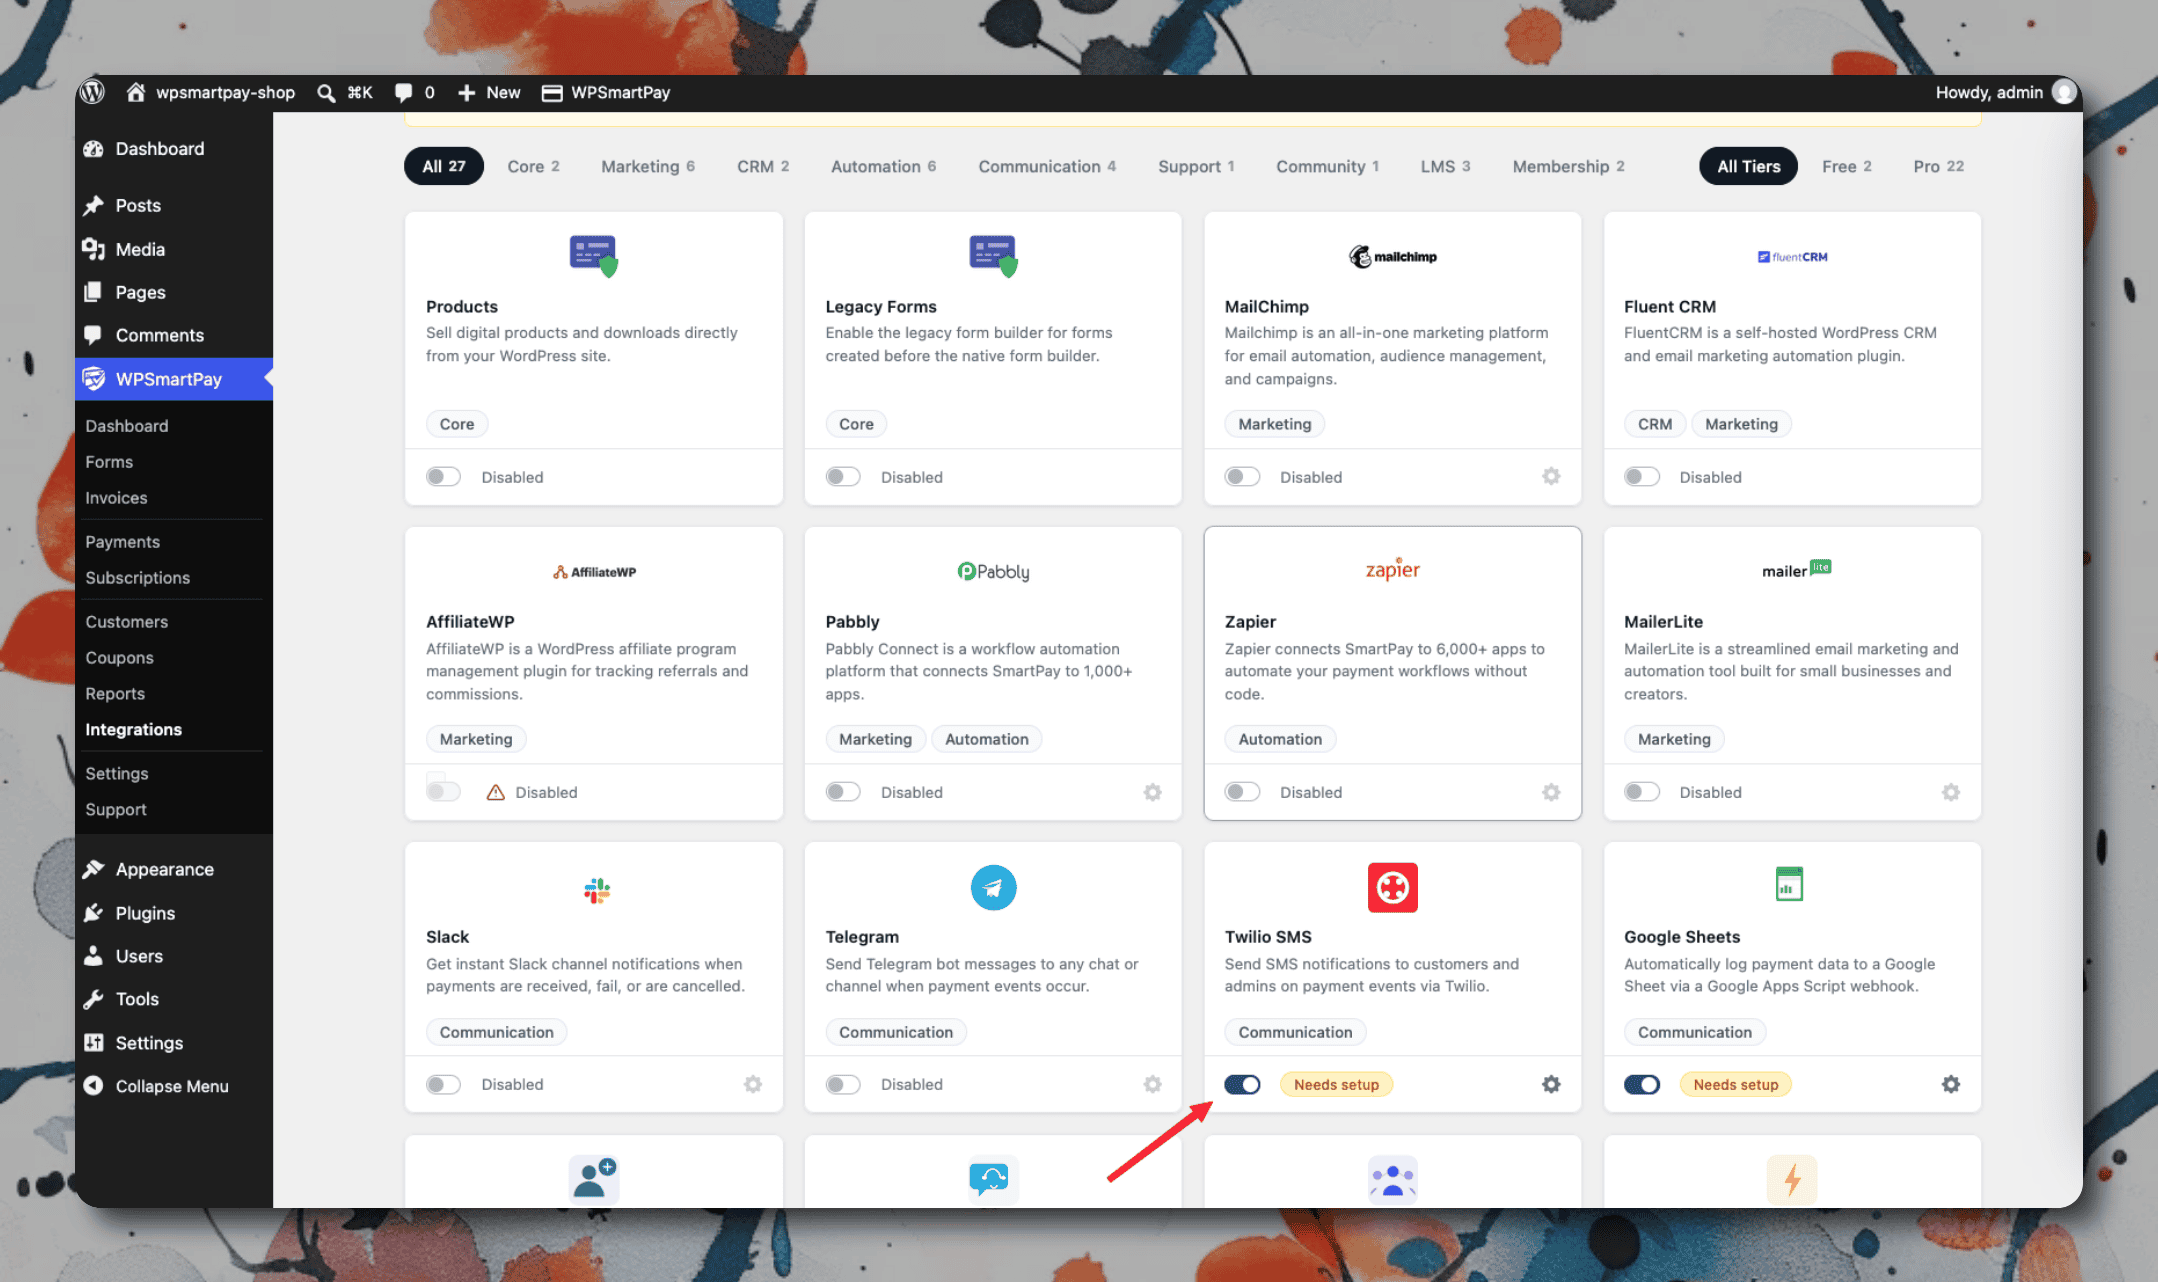### Setting Up
1. Create an account at twilio.com if you don't have one.
2. From the Twilio Console, get your **Account SID**, **Auth Token**, and a **Twilio phone number**.
3. In WordPress, go to **SmartPay → Extensions → Twilio → Settings**.
4. Enter your Account SID, Auth Token, from-number, and the recipient number (your phone or a team number).
5. Save and make a test payment to confirm SMS delivery.
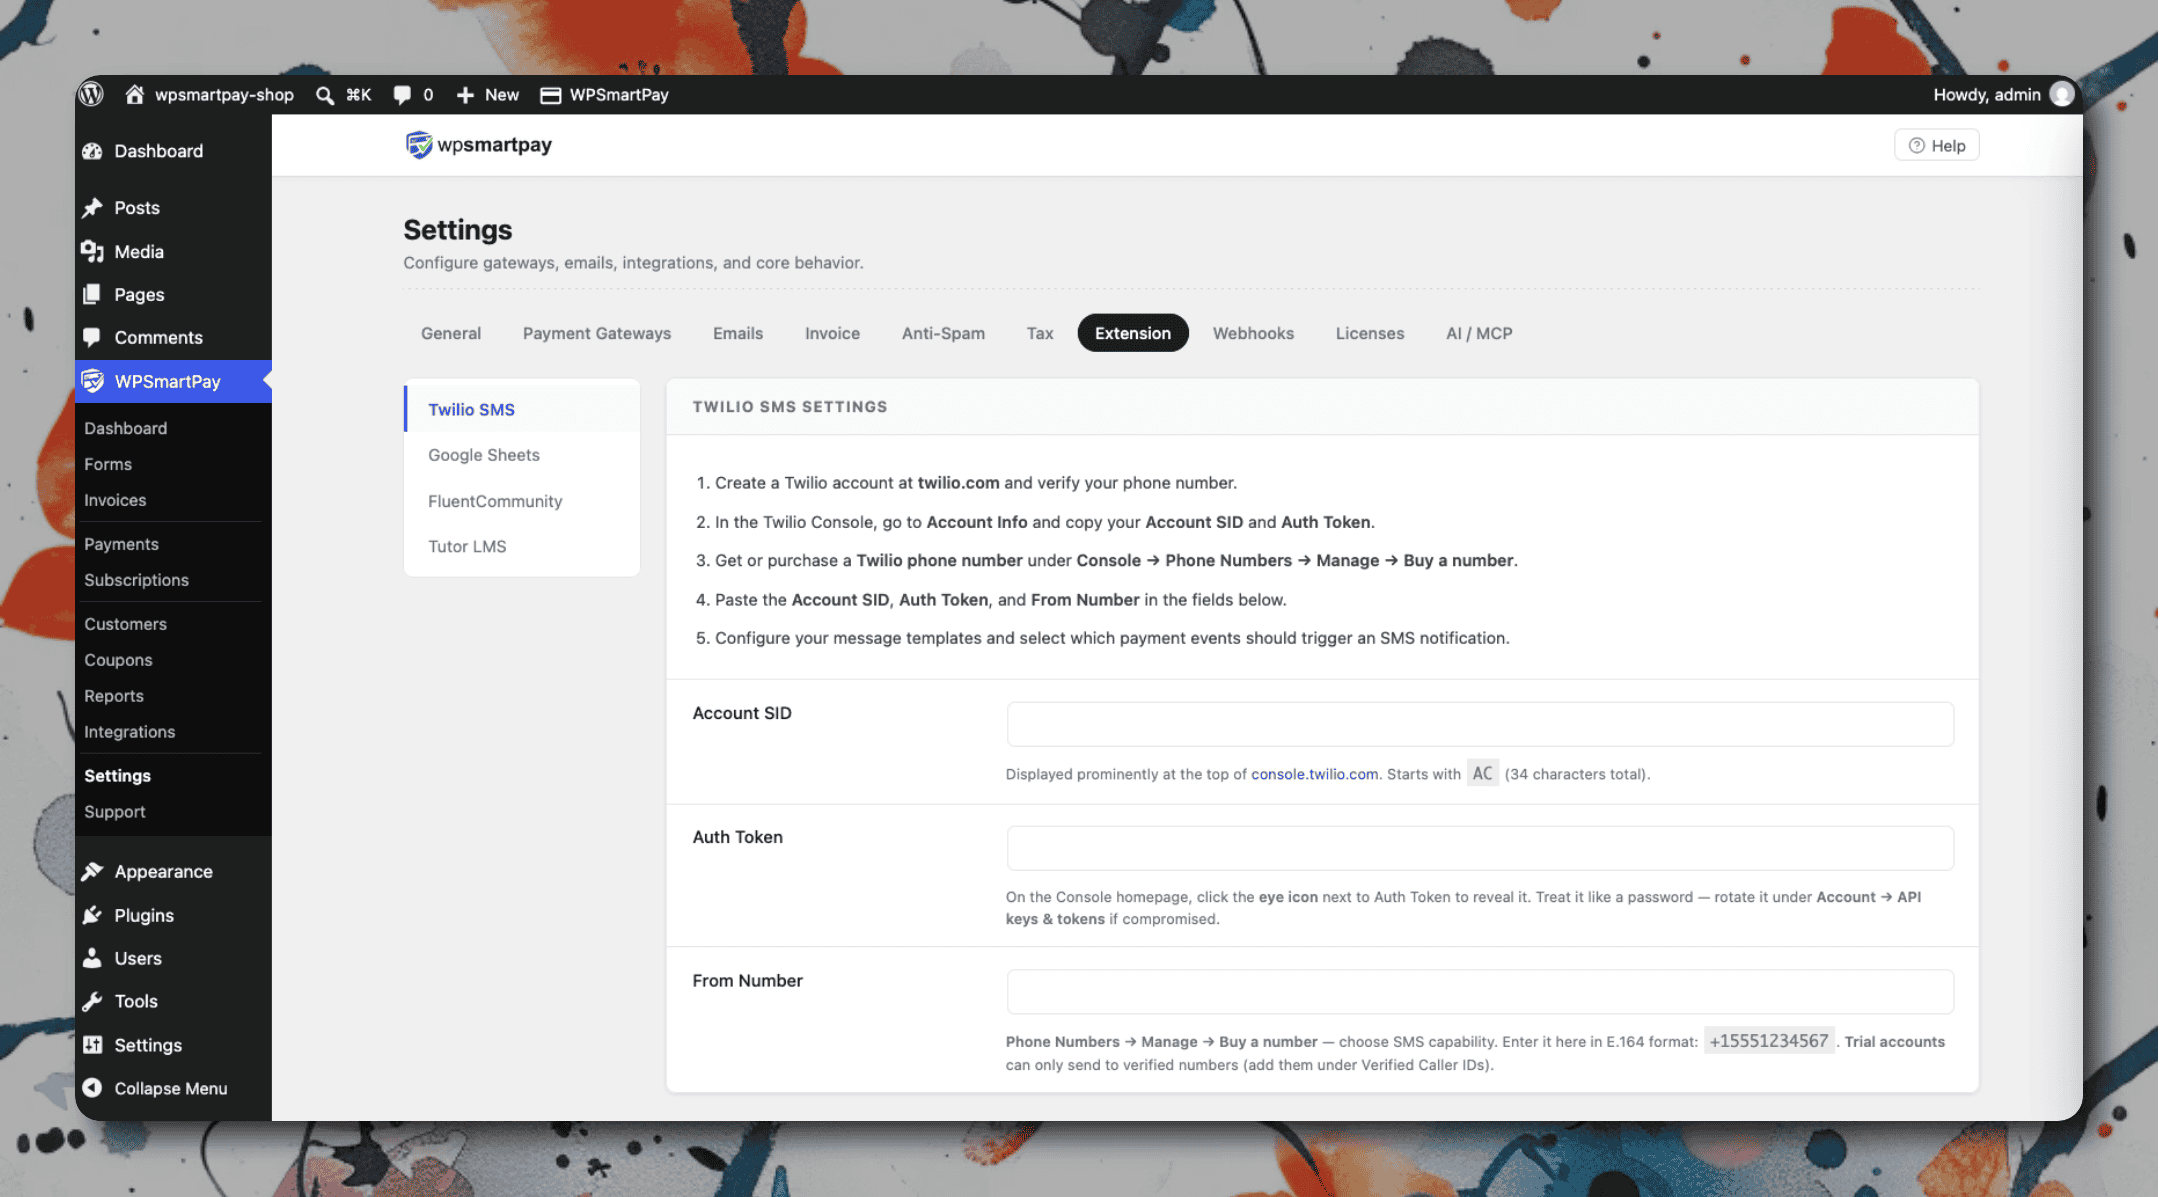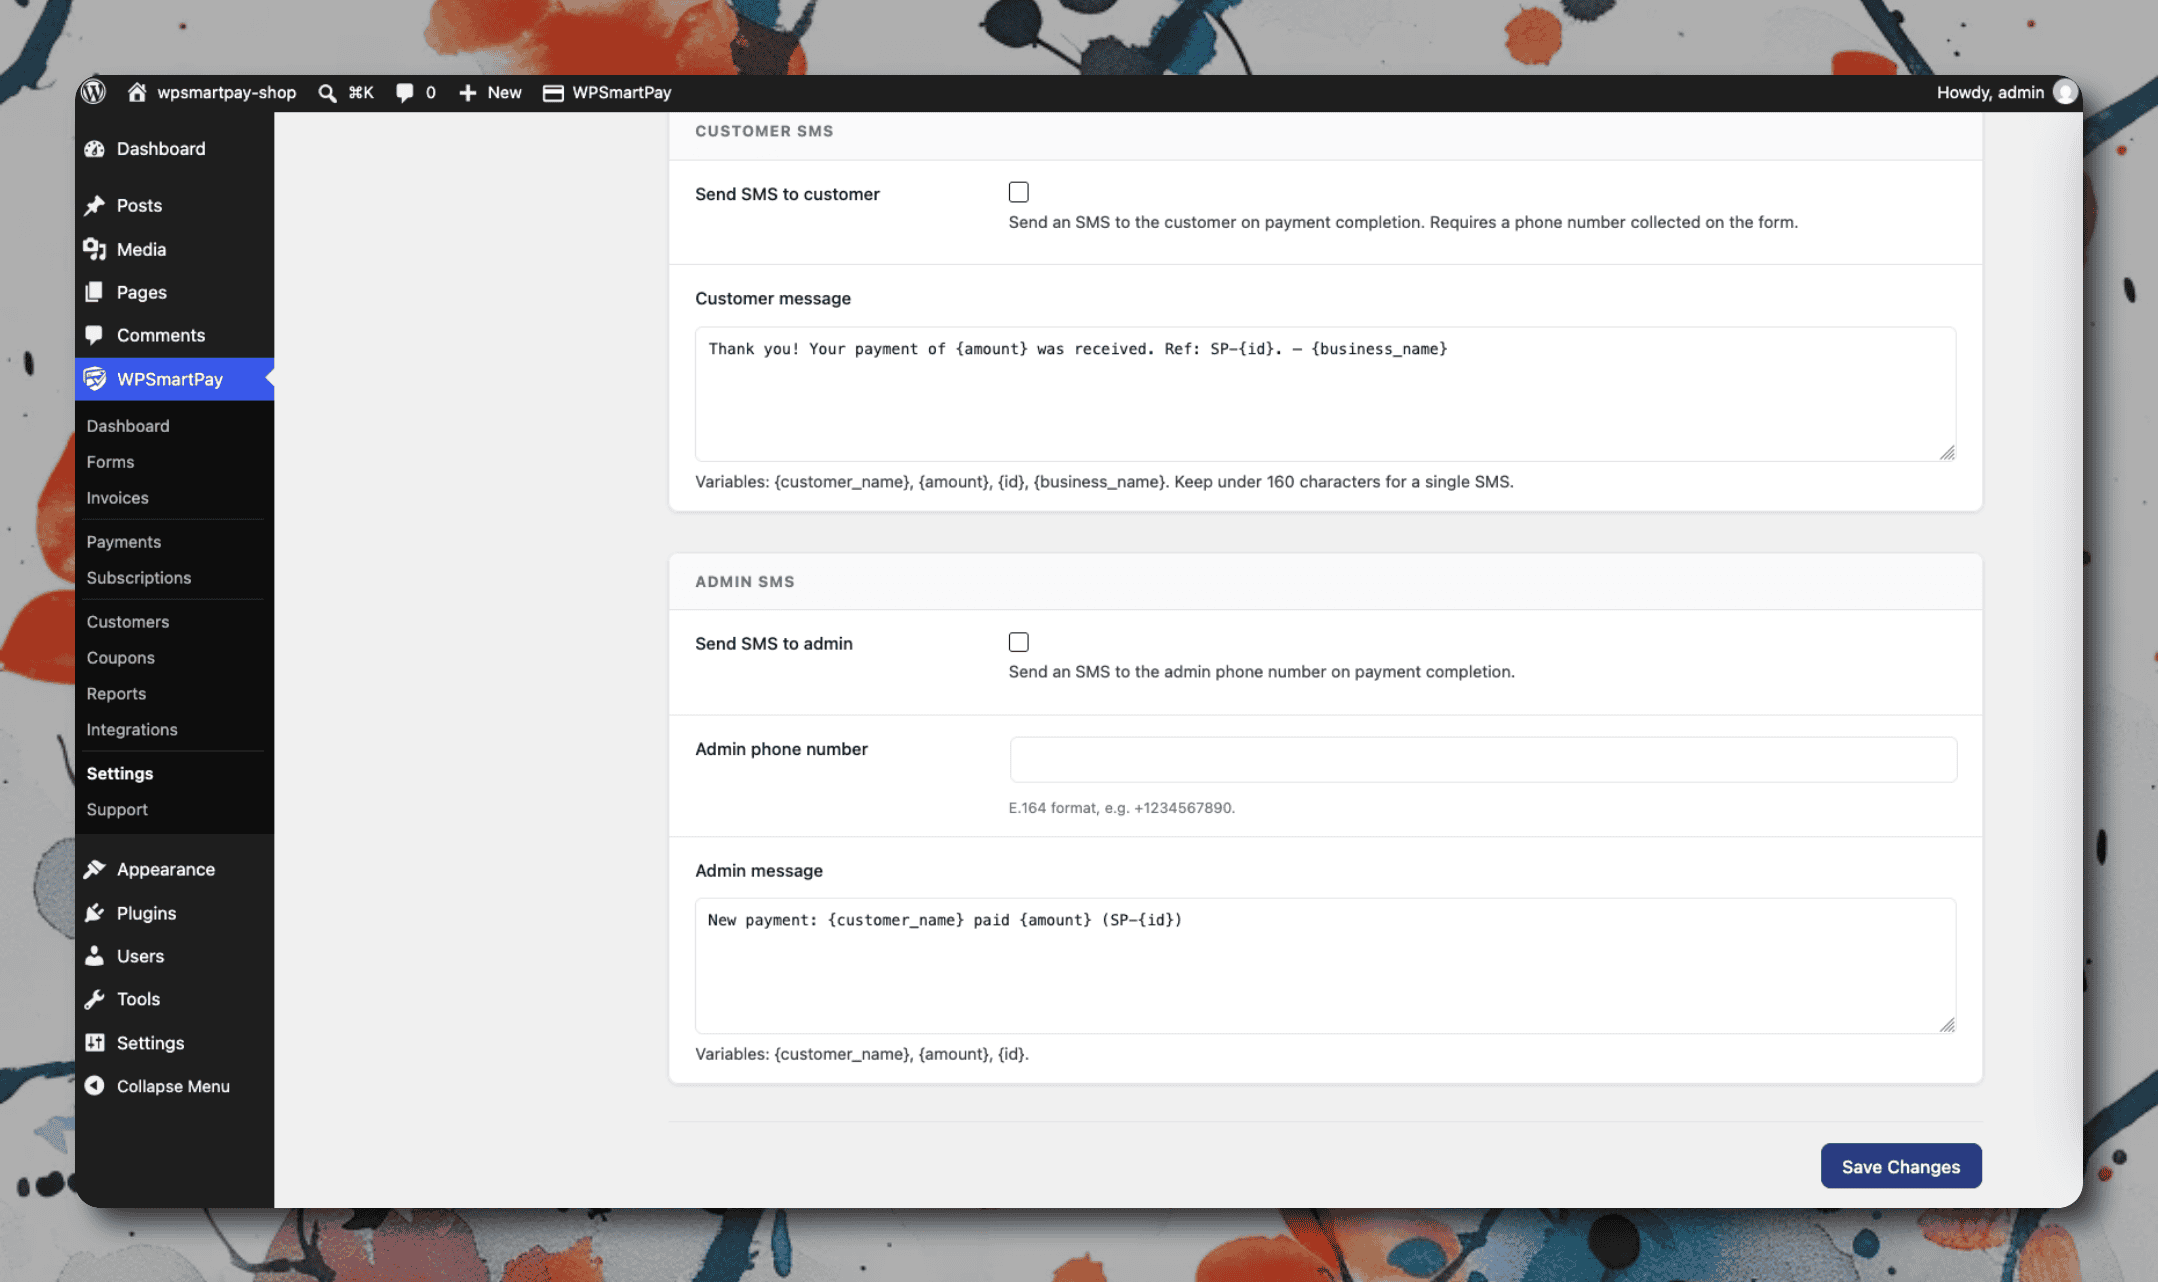### SMS Message Format
Messages are sent as plain text and kept short for SMS compatibility:
```typescript
[object Object],[object Object],[object Object],[object Object],[object Object],[object Object],[object Object],[object Object],[object Object],[object Object],[object Object],[object Object],[object Object],[object Object],[object Object],[object Object],[object Object],[object Object],[object Object],[object Object],[object Object],[object Object],[object Object],[object Object],[object Object],[object Object],[object Object],[object Object],[object Object],[object Object]
```
# VAT Invoice Add-on
Paddle VAT Invoice Add-on for WooCommerce allows you to generate VAT-compliant invoices effortlessly. Follow this simple setup guide to get started.
### Download the VAT Invoice Add-on
Log in to your account, go to **Downloads**, and download file (**paddle-invoice-woo.zip)**.
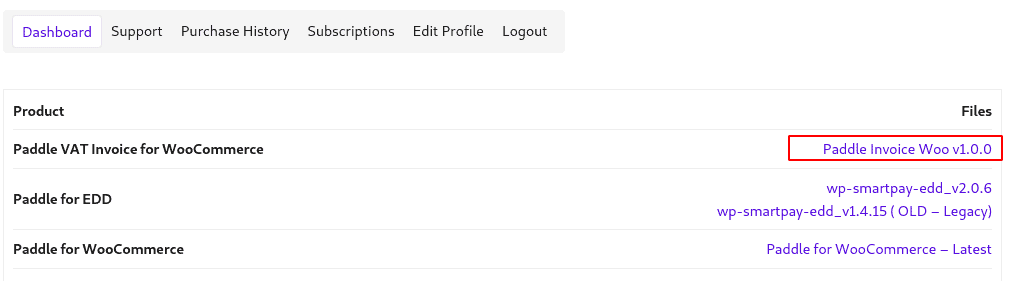
### Install the Add-on
WordPress dashboard, go to **Plugins > Add New**, click **Upload Plugin**, select the downloaded **VAT Invoice Add-on** file, and click **Install Now**.
### Activate the Add-on
After installation, click **Activate Plugin** to enable the add-on.

### Generate VAT Invoices
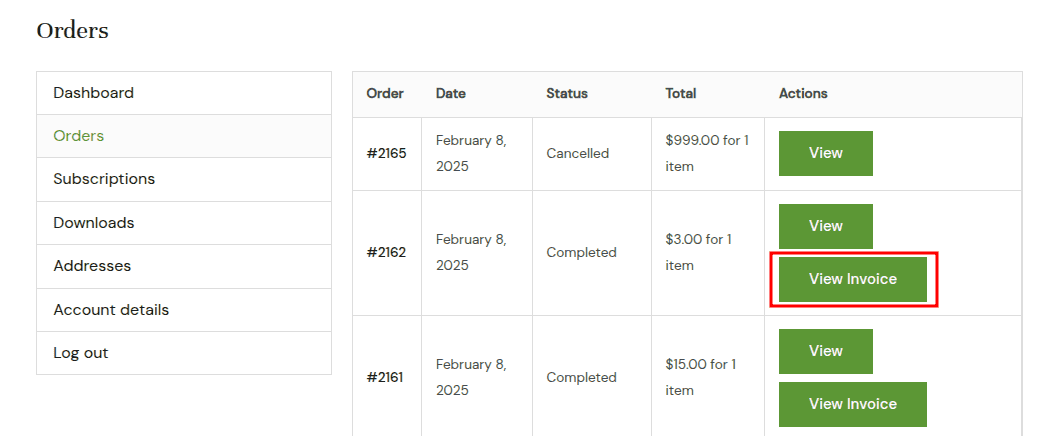
Once the add-on is activated, VAT invoices will be automatically generated for transactions processed through Paddle for WooCommerce.
Below is an example of a VAT invoice generated using the add-on:
Learn more about [Paddle VAT Invoice Add-on](https://wpsmartpay.com/paddle-vat-invoice-add-on/).
# Webhook Delivery Log (Pro)
WP SmartPay Pro's outgoing webhook system keeps a delivery log of every webhook it has attempted to send to your configured endpoints. Use this log to verify deliveries, diagnose failures, and re-send any that were not received.
## Opening the Delivery Log
1. Go to **SmartPay → Settings → Webhooks**.
2. Click on the endpoint you want to inspect.
3. Click the **Delivery Log** tab.
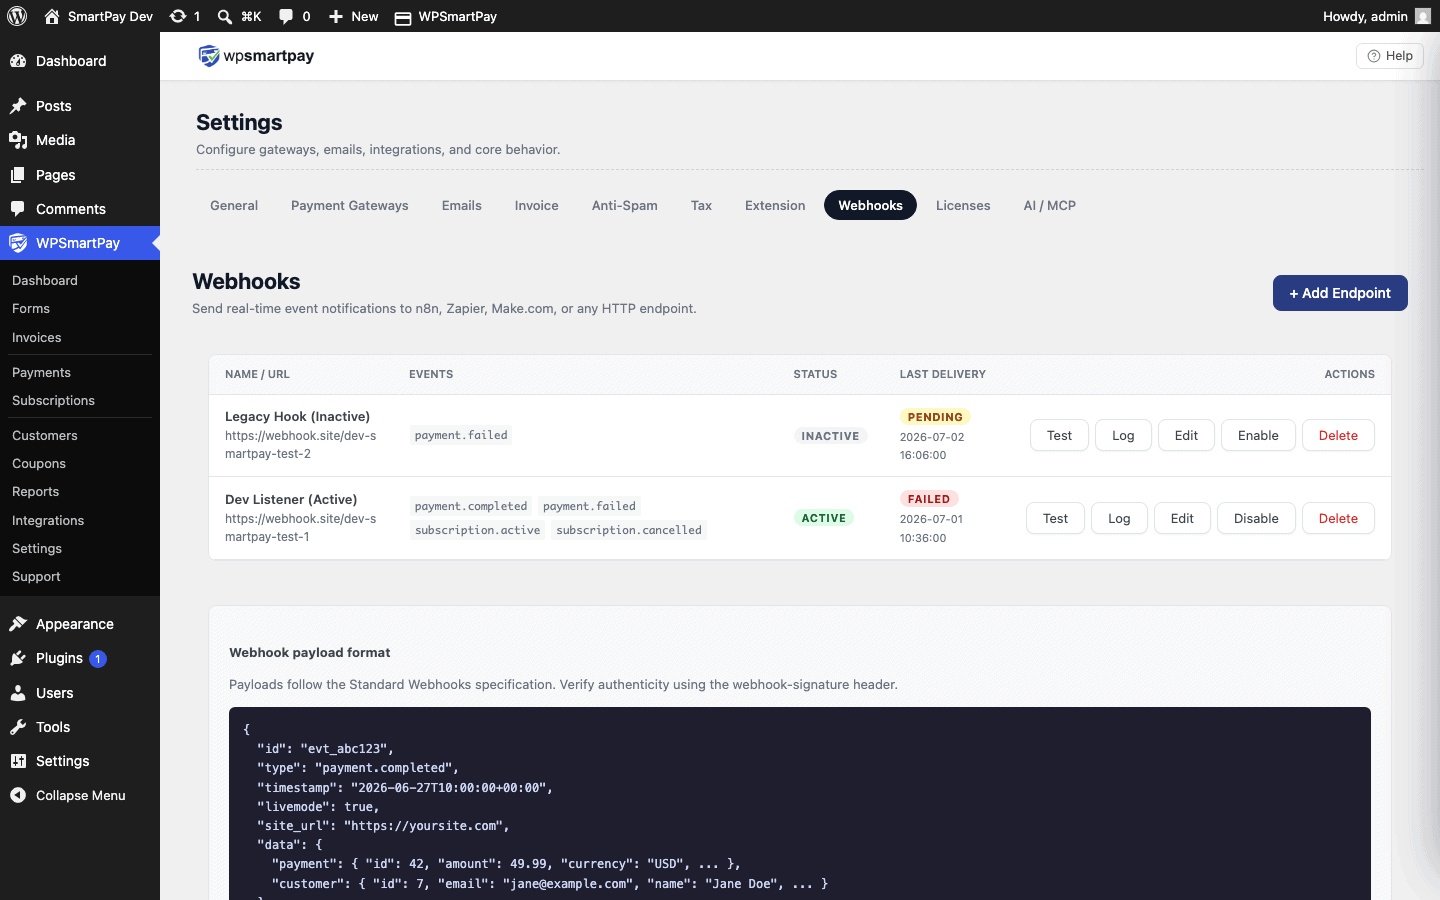 The Webhooks settings page — click an endpoint to access its delivery log.## Reading the Log
Each row in the delivery log represents one webhook attempt:
* **Event** — The event type that triggered this delivery (e.g., `payment.completed`).
* **Sent At** — When SmartPay sent the webhook request.
* **Response Code** — The HTTP status code returned by your endpoint. A `2xx` code (200, 201, 204) means success. Any other code is a failure.
* **Response Time** — How long your server took to respond, in milliseconds. If consistently high (>5000ms), your endpoint may be timing out.
* **Status** — **Delivered** (success) or **Failed**.
## Re-Sending Failed Deliveries
To retry a failed webhook:
1. Find the failed row in the delivery log.
2. Click **Retry**.
SmartPay immediately sends the same payload again to the endpoint. If your server is back up and responding correctly, the retry should succeed and the status will update to Delivered.
## Understanding Failure Reasons
* **5xx response code** — Your endpoint server had an error. Check your server's own error logs for the cause.
* **4xx response code** — Your endpoint rejected the request (wrong URL, auth required, payload invalid). Check the URL is correct and the server does not require authentication SmartPay is not providing.
* **Connection timeout (no response)** — Your server did not respond within the timeout window (~30 seconds). Investigate slow responses or server downtime at the delivery timestamp.
## Automatic Retry Schedule
SmartPay automatically retries failed webhook deliveries on a back-off schedule:
* 1st retry: 5 minutes after failure
* 2nd retry: 30 minutes after first retry
* 3rd retry: 2 hours after second retry
After three automatic retries, no further automatic attempts are made. Manual retry via the log remains available indefinitely.
# Outgoing Webhooks
WP SmartPay Pro can send real-time HTTP notifications to any external URL when payment events occur on your site. These outgoing webhooks are how you connect SmartPay to your own applications, internal tools, or services that don't have a built-in SmartPay integration.
## Opening Webhook Settings
Go to **SmartPay → Settings → Webhooks**.
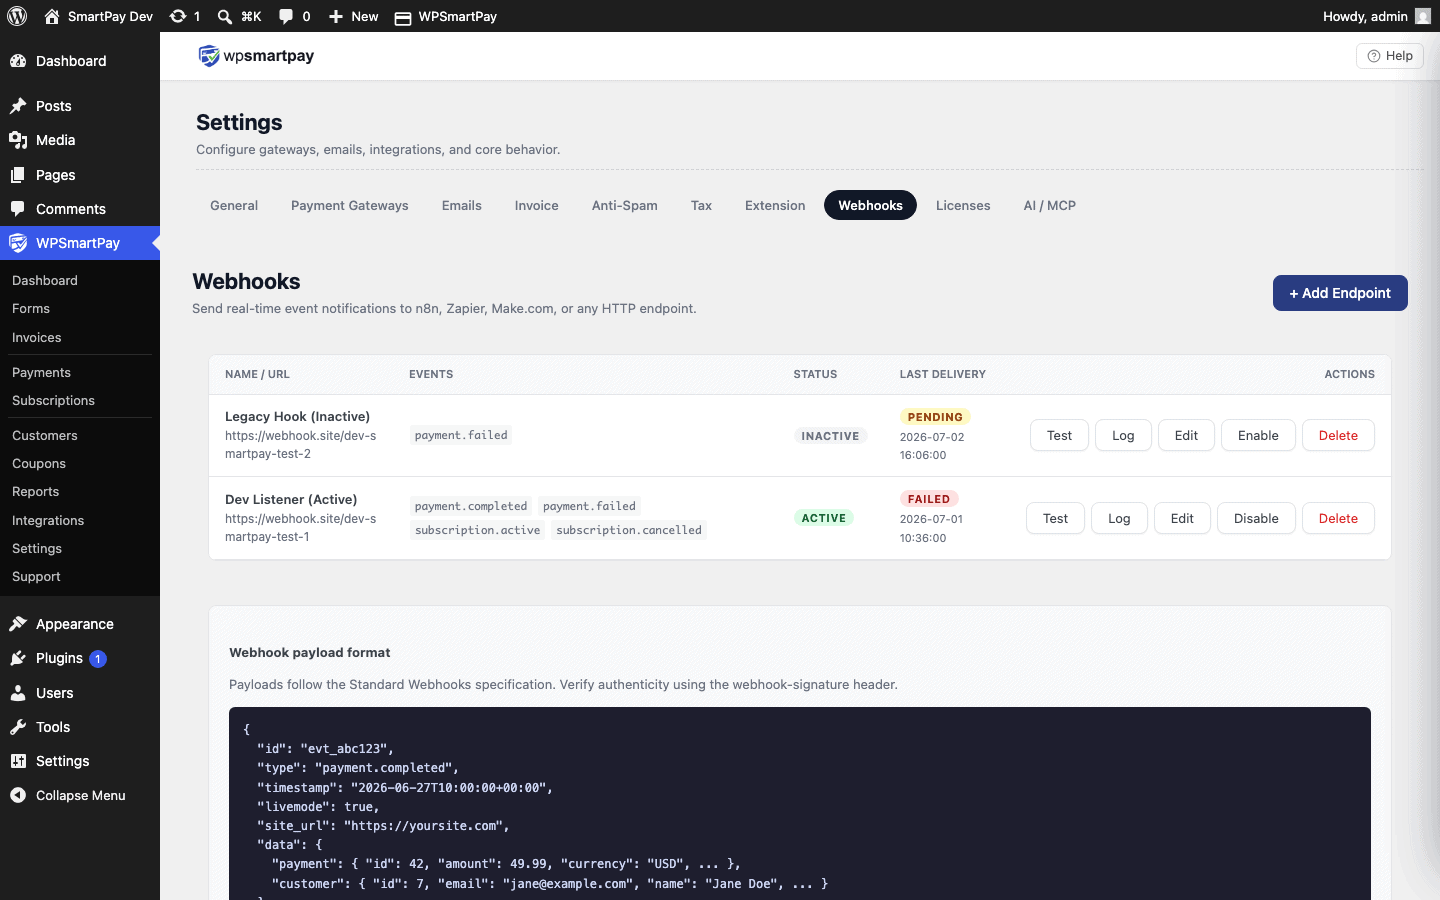 Webhook settings — add multiple endpoints, each listening for different events.## Adding a Webhook Endpoint
1. Click **Add Endpoint**.
2. Enter the **Endpoint URL** — the HTTPS URL that will receive POST requests from SmartPay.
3. Enter an optional **Secret** — a random string used to sign the webhook payload for verification. If left blank, no signature is added.
4. Select the **Events** you want this endpoint to receive (see list below).
5. Click **Save**.
## Available Events
* `payment.completed` — A payment was successfully completed.
* `payment.failed` — A payment attempt failed.
* `payment.refunded` — A payment was refunded.
* `subscription.created` — A new subscription was created.
* `subscription.cancelled` — A subscription was cancelled.
* `subscription.expired` — A subscription reached its max billing cycles.
* `subscription.renewed` — A subscription renewal payment succeeded.
* `customer.created` — A new customer record was created.
## Payload Format
Each webhook is a POST request with a JSON body. Example `payment.completed` payload:
```
{
"event": "payment.completed",
"timestamp": "2026-07-01T10:30:00Z",
"data": {
"id": 42,
"amount": 2900,
"currency": "USD",
"status": "completed",
"customer_email": "alice@example.com",
"customer_name": "Alice Johnson",
"form_id": 5,
"gateway": "stripe",
"created_at": "2026-07-01T10:30:00Z"
}
}
```
## HMAC Signature Verification
If you set a **Secret** on the endpoint, SmartPay signs each payload using HMAC-SHA256 and sends the signature in the `X-SmartPay-Signature` header. Verify it in your receiving application:
```
// Node.js example
const crypto = require('crypto');
const secret = 'your_webhook_secret';
const payload = req.rawBody; // raw request body string
const signature = req.headers['x-smartpay-signature'];
const expected = crypto.createHmac('sha256', secret).update(payload).digest('hex');
const isValid = crypto.timingSafeEqual(Buffer.from(signature), Buffer.from(expected));
```
## Delivery Log
Click an endpoint's row to see its **Delivery Log** — a list of recent webhook deliveries with the HTTP response code, response time, and whether the delivery succeeded (2xx) or failed (non-2xx).
## Retrying Failed Deliveries
If a delivery failed (your server was down or returned a non-2xx status), click **Retry** on any failed log entry to re-send the webhook immediately.
## Testing an Endpoint
Click **Send Test** on any saved endpoint to receive a sample `payment.completed` payload with placeholder data. Use this to confirm your receiving server is set up correctly before real events occur.
# WP User Registration
Automatically creates a WordPress user account when a customer completes a payment. Ideal for membership or course sites that require a WordPress account to access gated content.
### Requirements
* [User Registration by WPEverest](https://wordpress.org/plugins/user-registration/) must be installed and active. The free version available on WordPress.org is sufficient.
### Setup
1. Go to **SmartPay → Extensions** and toggle **WP User Registration** on.
2. Click the gear icon to open **Settings → Extensions → WP User Registration**.
3. Choose the default **User Role** to assign on account creation (e.g. *Subscriber*).
4. Enable **Send Welcome Email** to notify new users with their login credentials.
5. Click **Save Changes**.
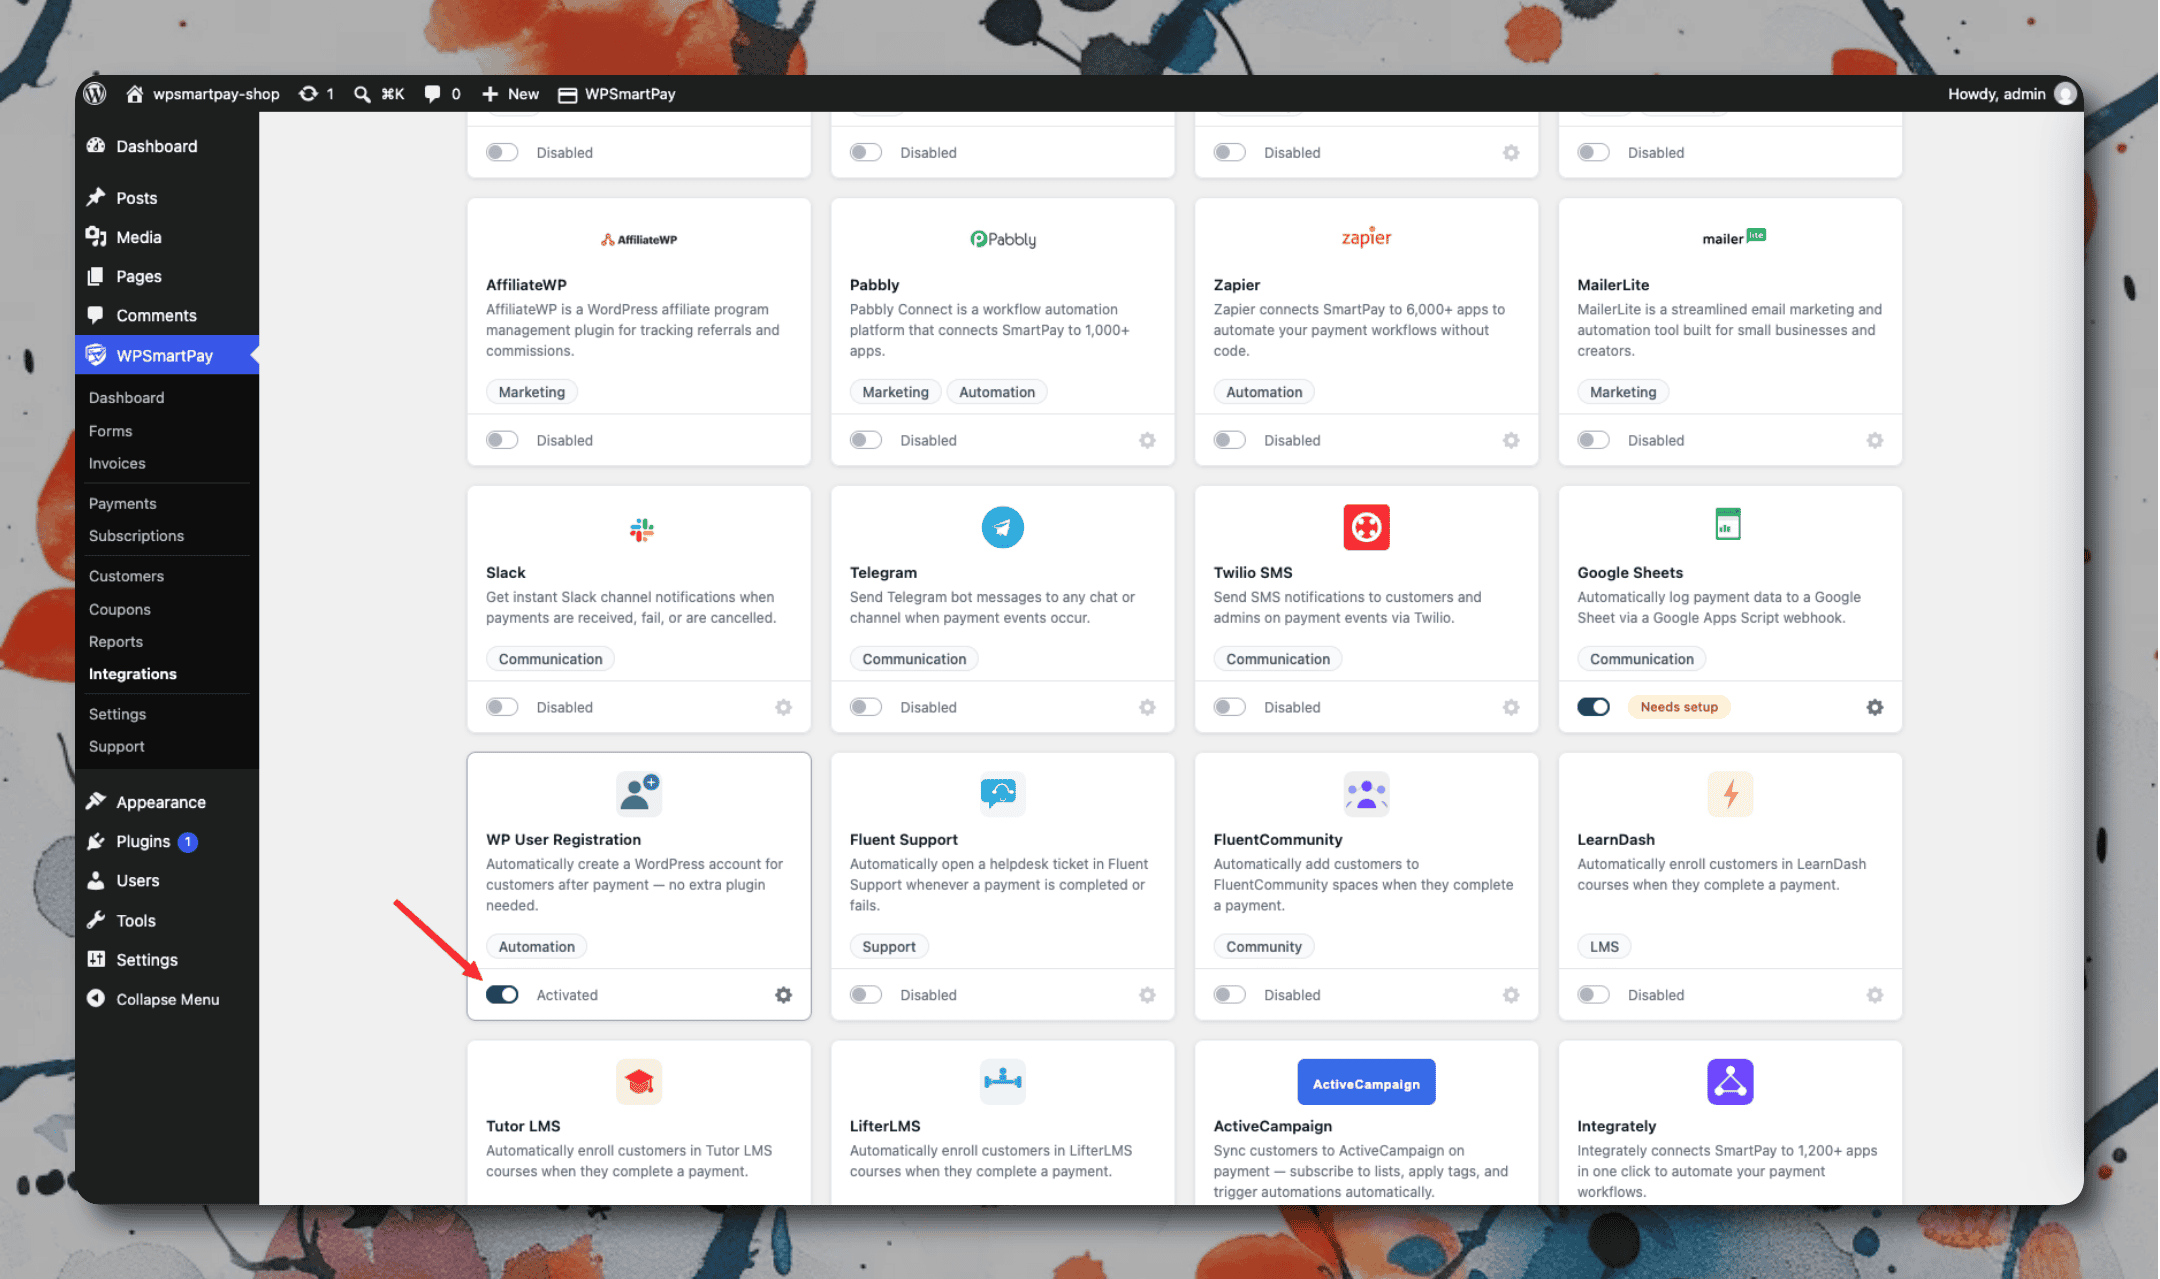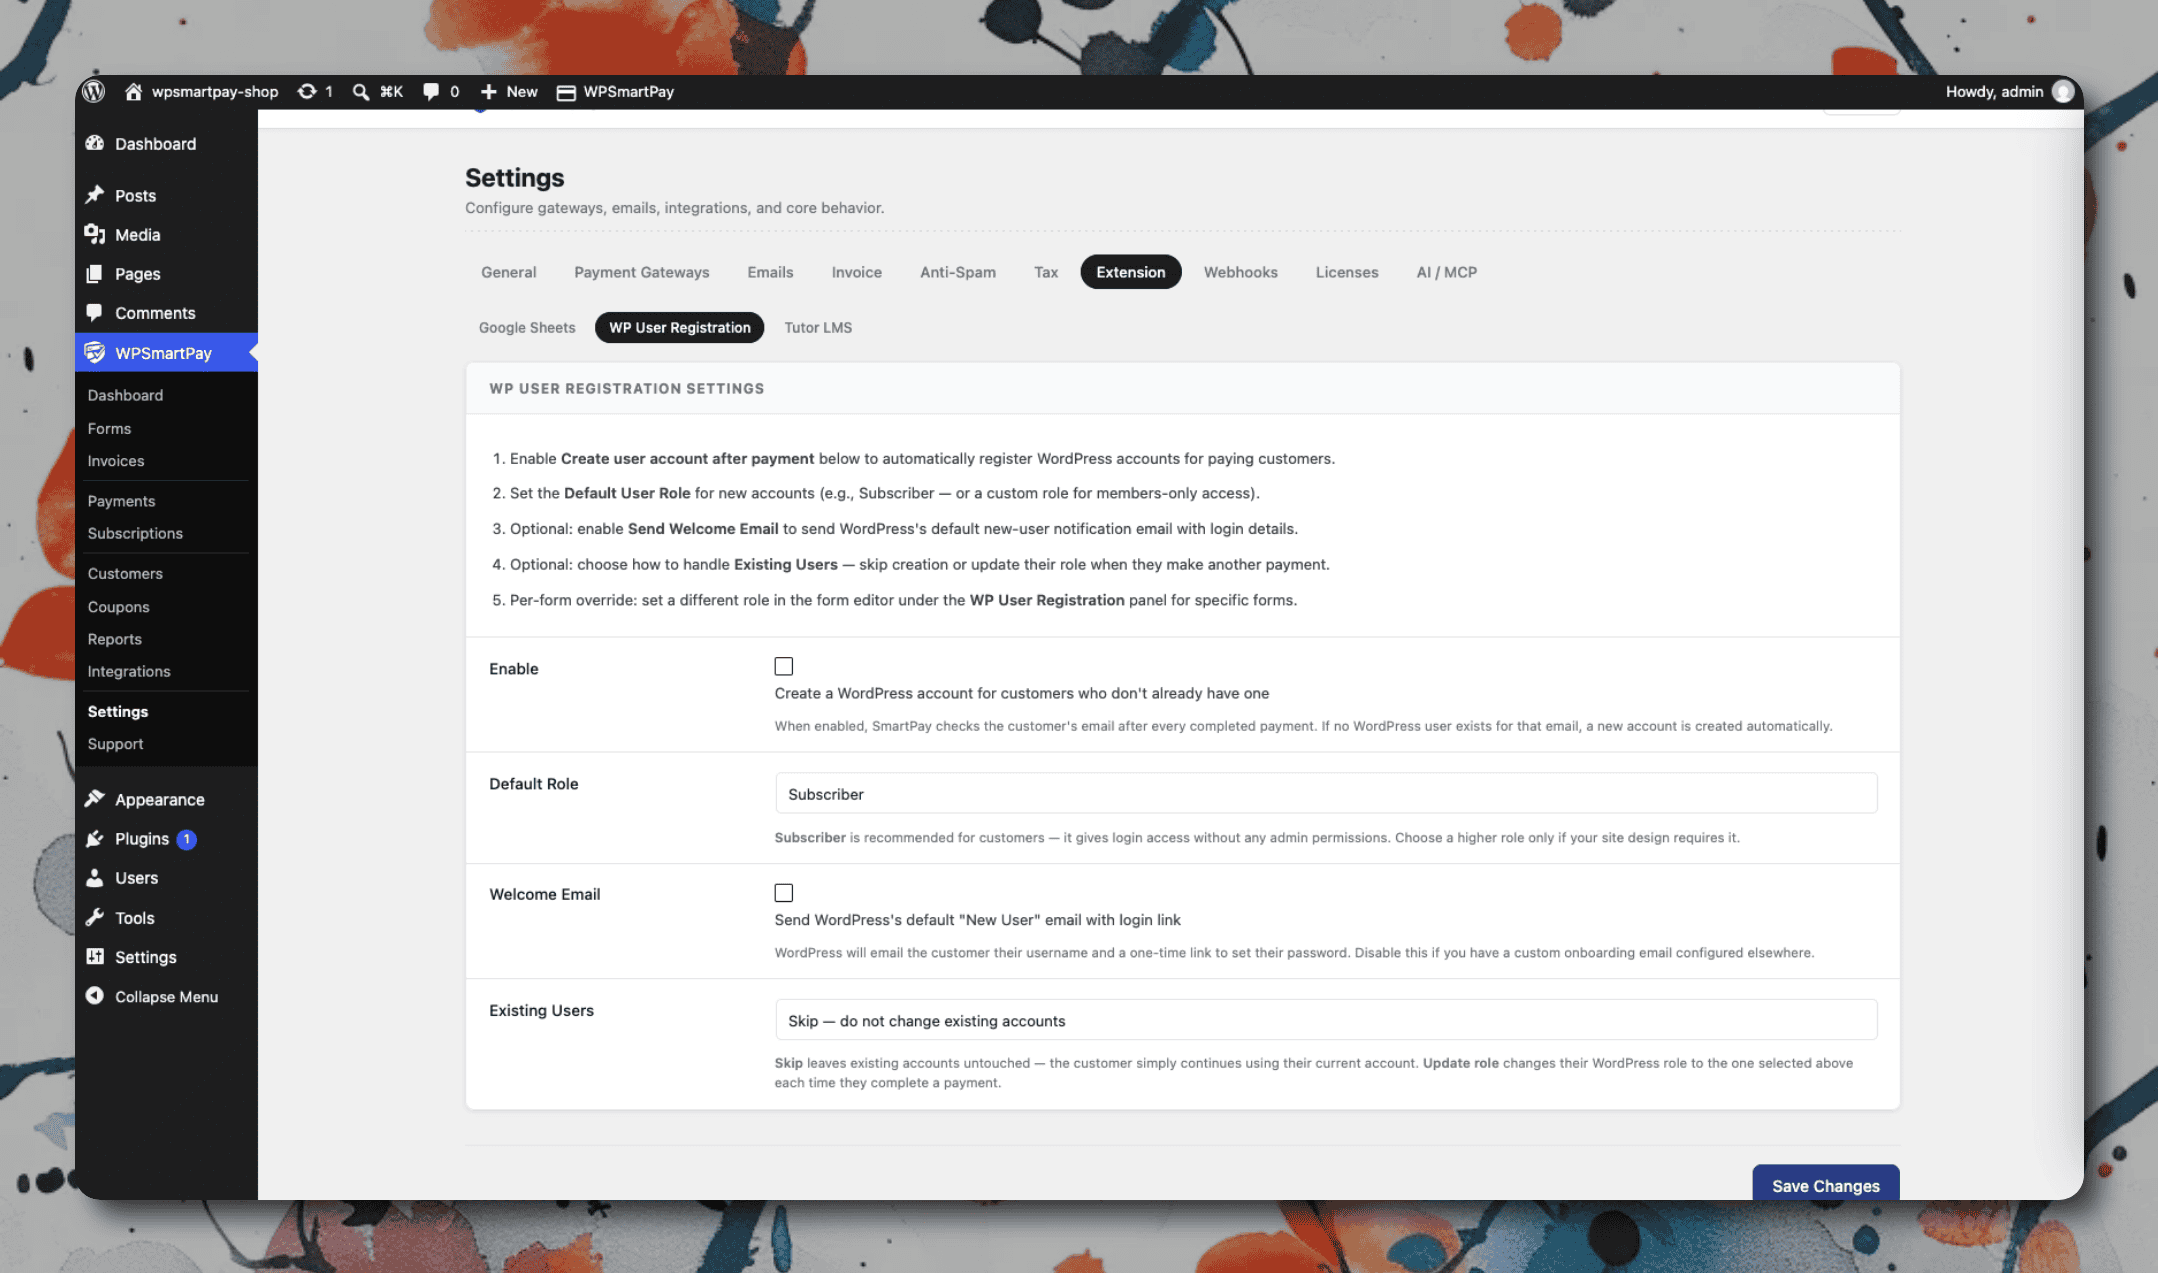> **Per-form role override:** Open any form in the form editor, go to the **WP User Registration** panel in the sidebar, and set a different role for purchases through that specific form.
# WPFunnels
Redirects customers to a WPFunnels funnel page or any custom URL after payment — useful for delivering upsells, onboarding sequences, or custom thank-you pages built in WPFunnels.
### Requirements
* [WPFunnels](https://wordpress.org/plugins/wpfunnels/) must be installed and active (free version on WordPress.org). Build at least one funnel in **WPFunnels → Funnels** before configuring the redirect URL.
### Setup
1. Go to **SmartPay → Extensions** and toggle **WPFunnels** on.
2. Click the gear icon to open **Settings → Extensions → WPFunnels**.
3. Enter the **Default Funnel URL** — customers who complete a payment will be redirected here unless a per-form override is set.
4. Click **Save Changes**.
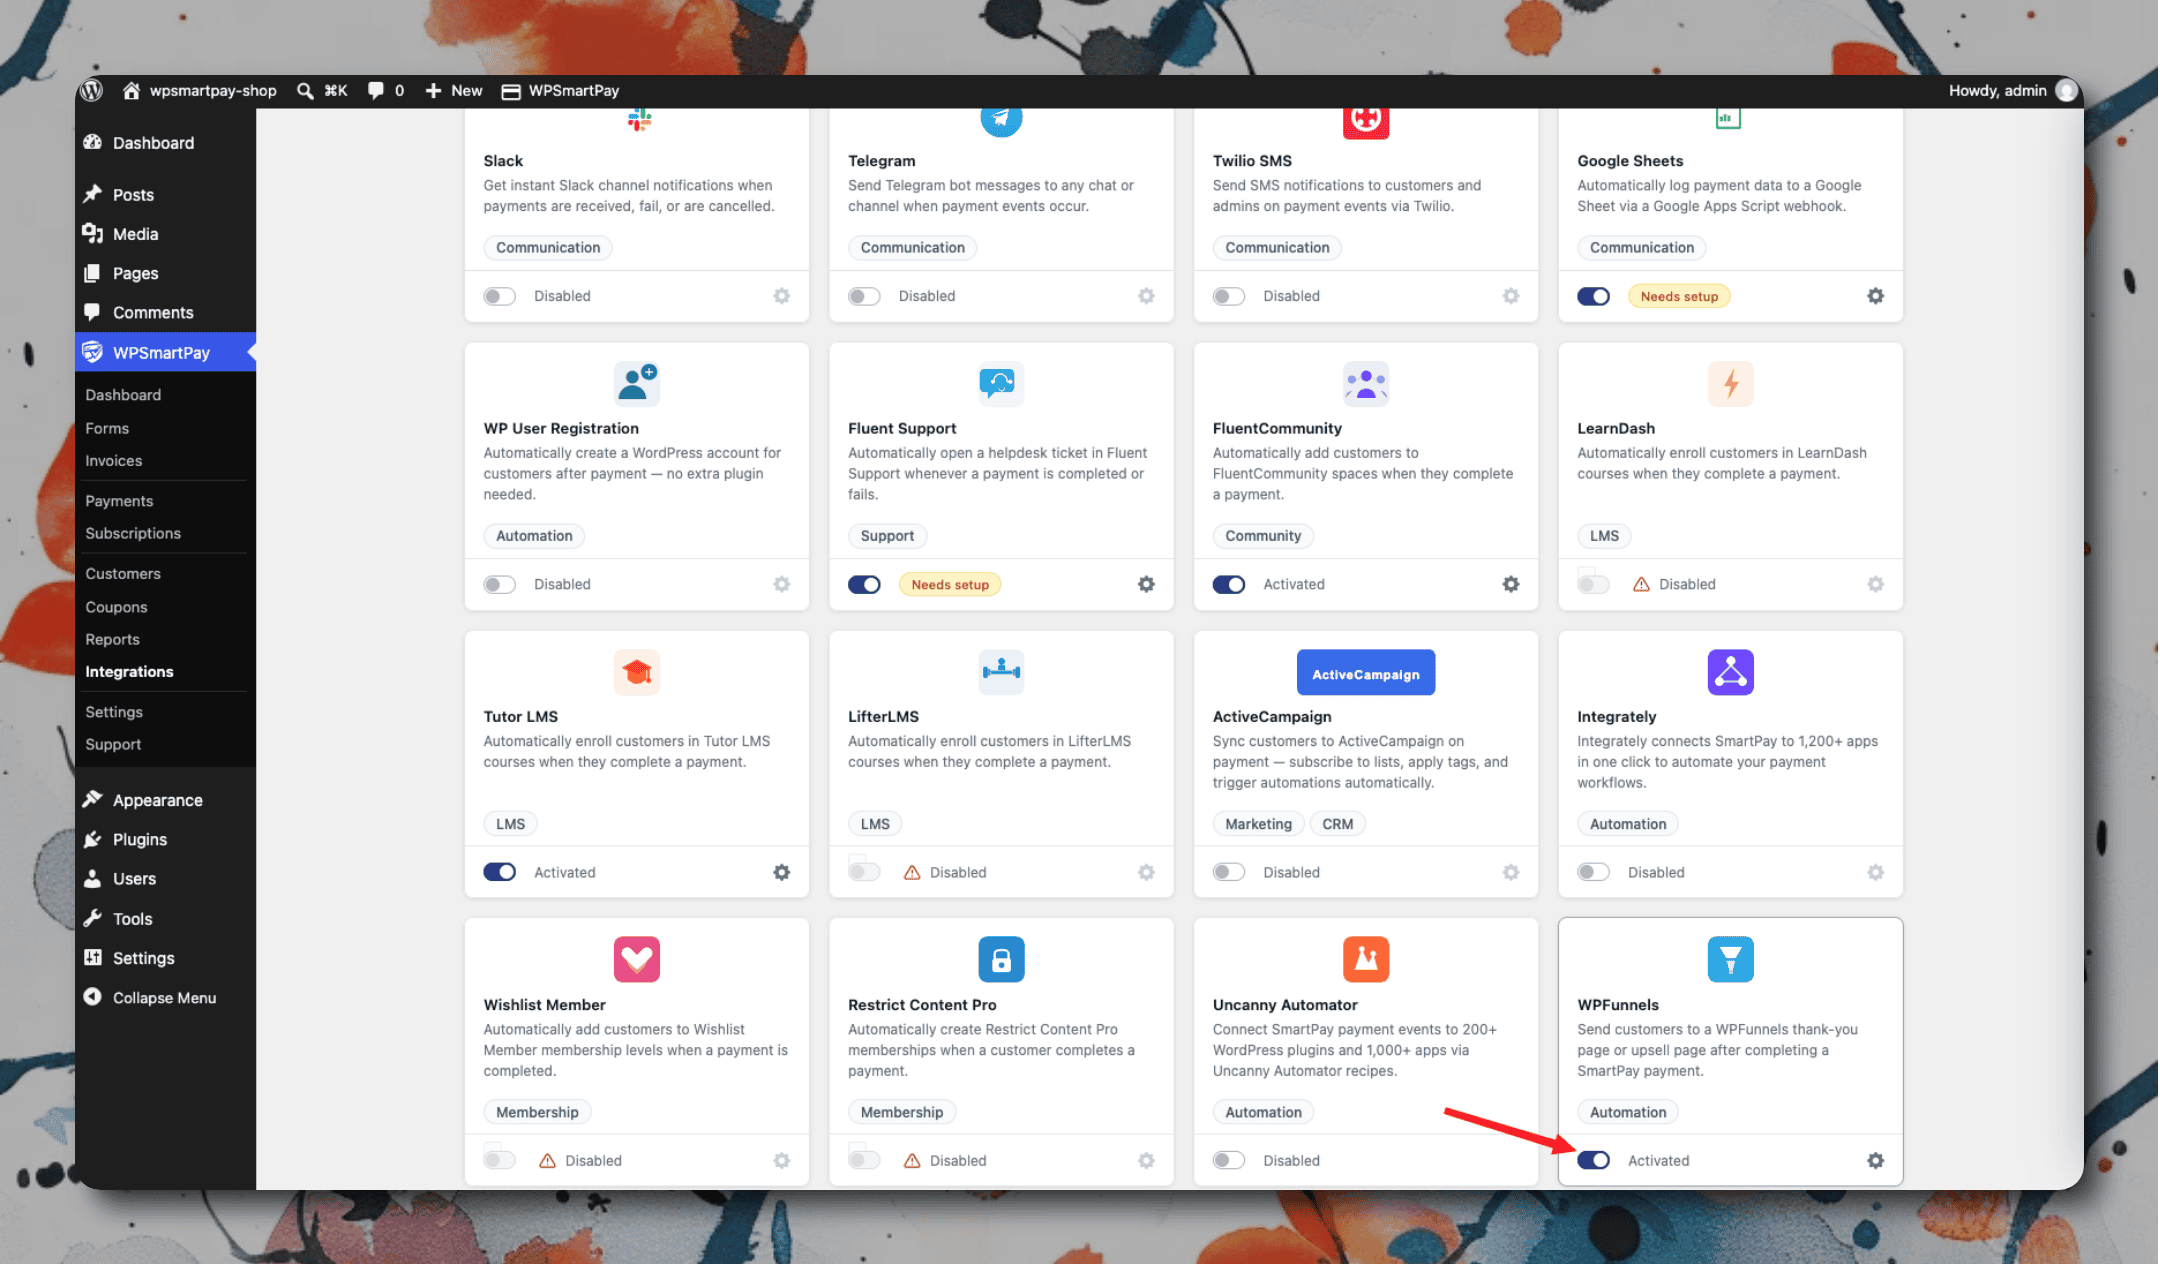> **Per-form redirect:** Open any form in the form editor, go to the **WPFunnels** panel in the sidebar, and enter the funnel URL for that specific form — this overrides the global default.