
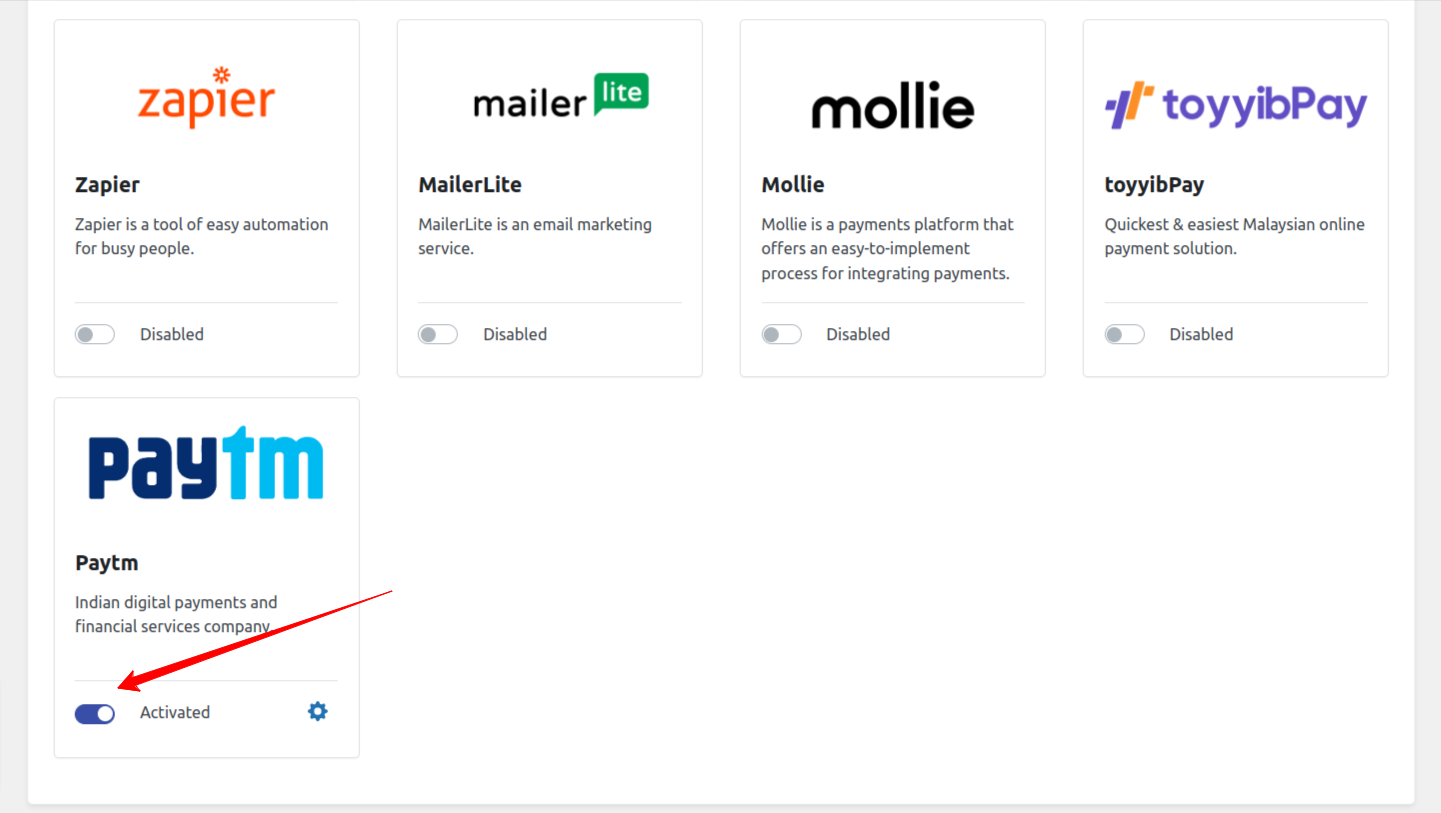
In WordPress admin, go to SmartPay > Integrations. You will find available list of extensions those can be integrated with WPSmartPay. Please enable and activate the Paytm integration.
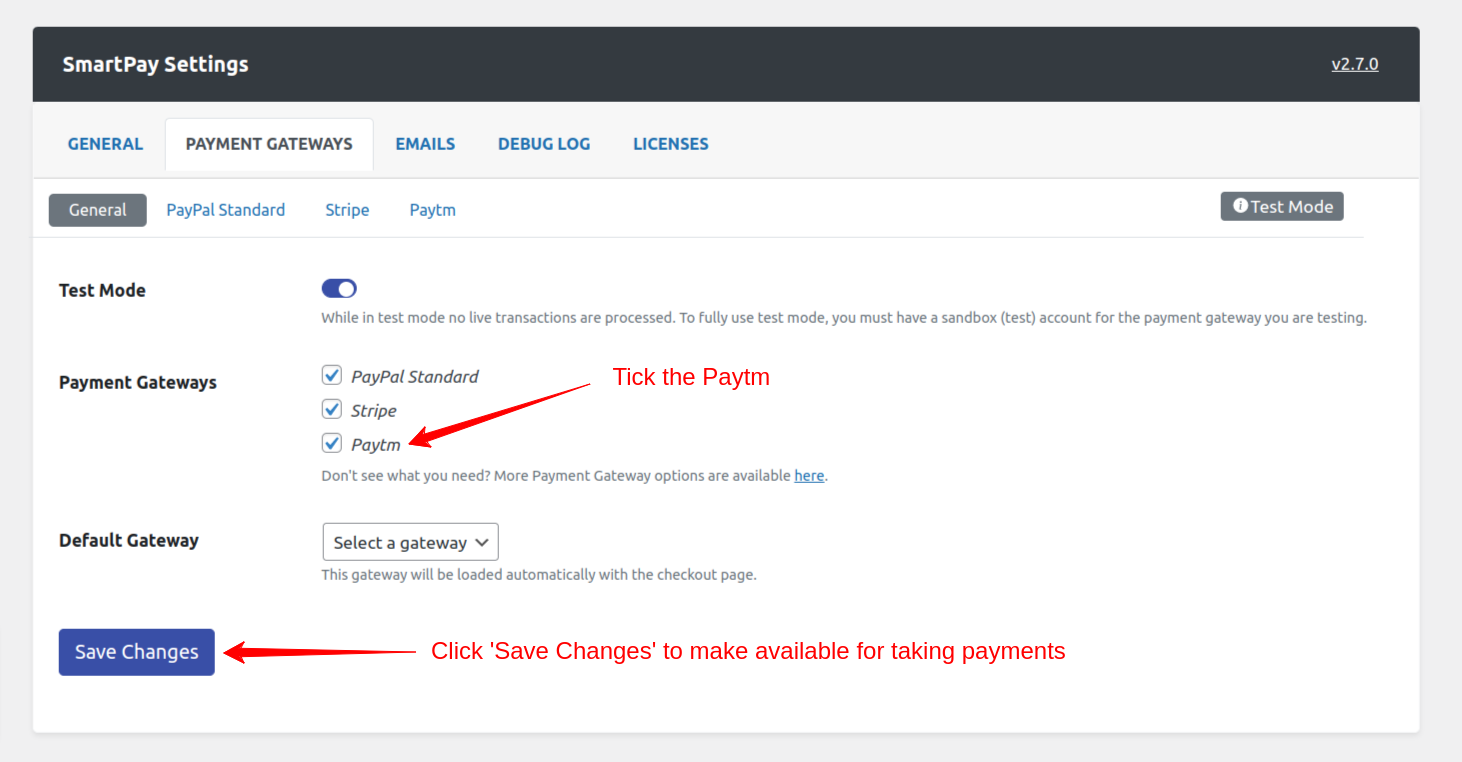
Next, In your WordPress admin, go to Smartpay > Settings. Click on Payment Gateways tab. Under the General tab, select Paytm checkbox in payment gateways settings and click on Save Change button to save the settings.
Then you will find Paytm Tab. Click the Paytm tab under Payment Gateways tab settings. If you have enabled test mode, then you need to put the Test MID and Test Secret Key. If you are production mode, then you need to put the Live MID and Live Secret Key on Live fields. Another configurations are also available, if you need, you can update these settings also.
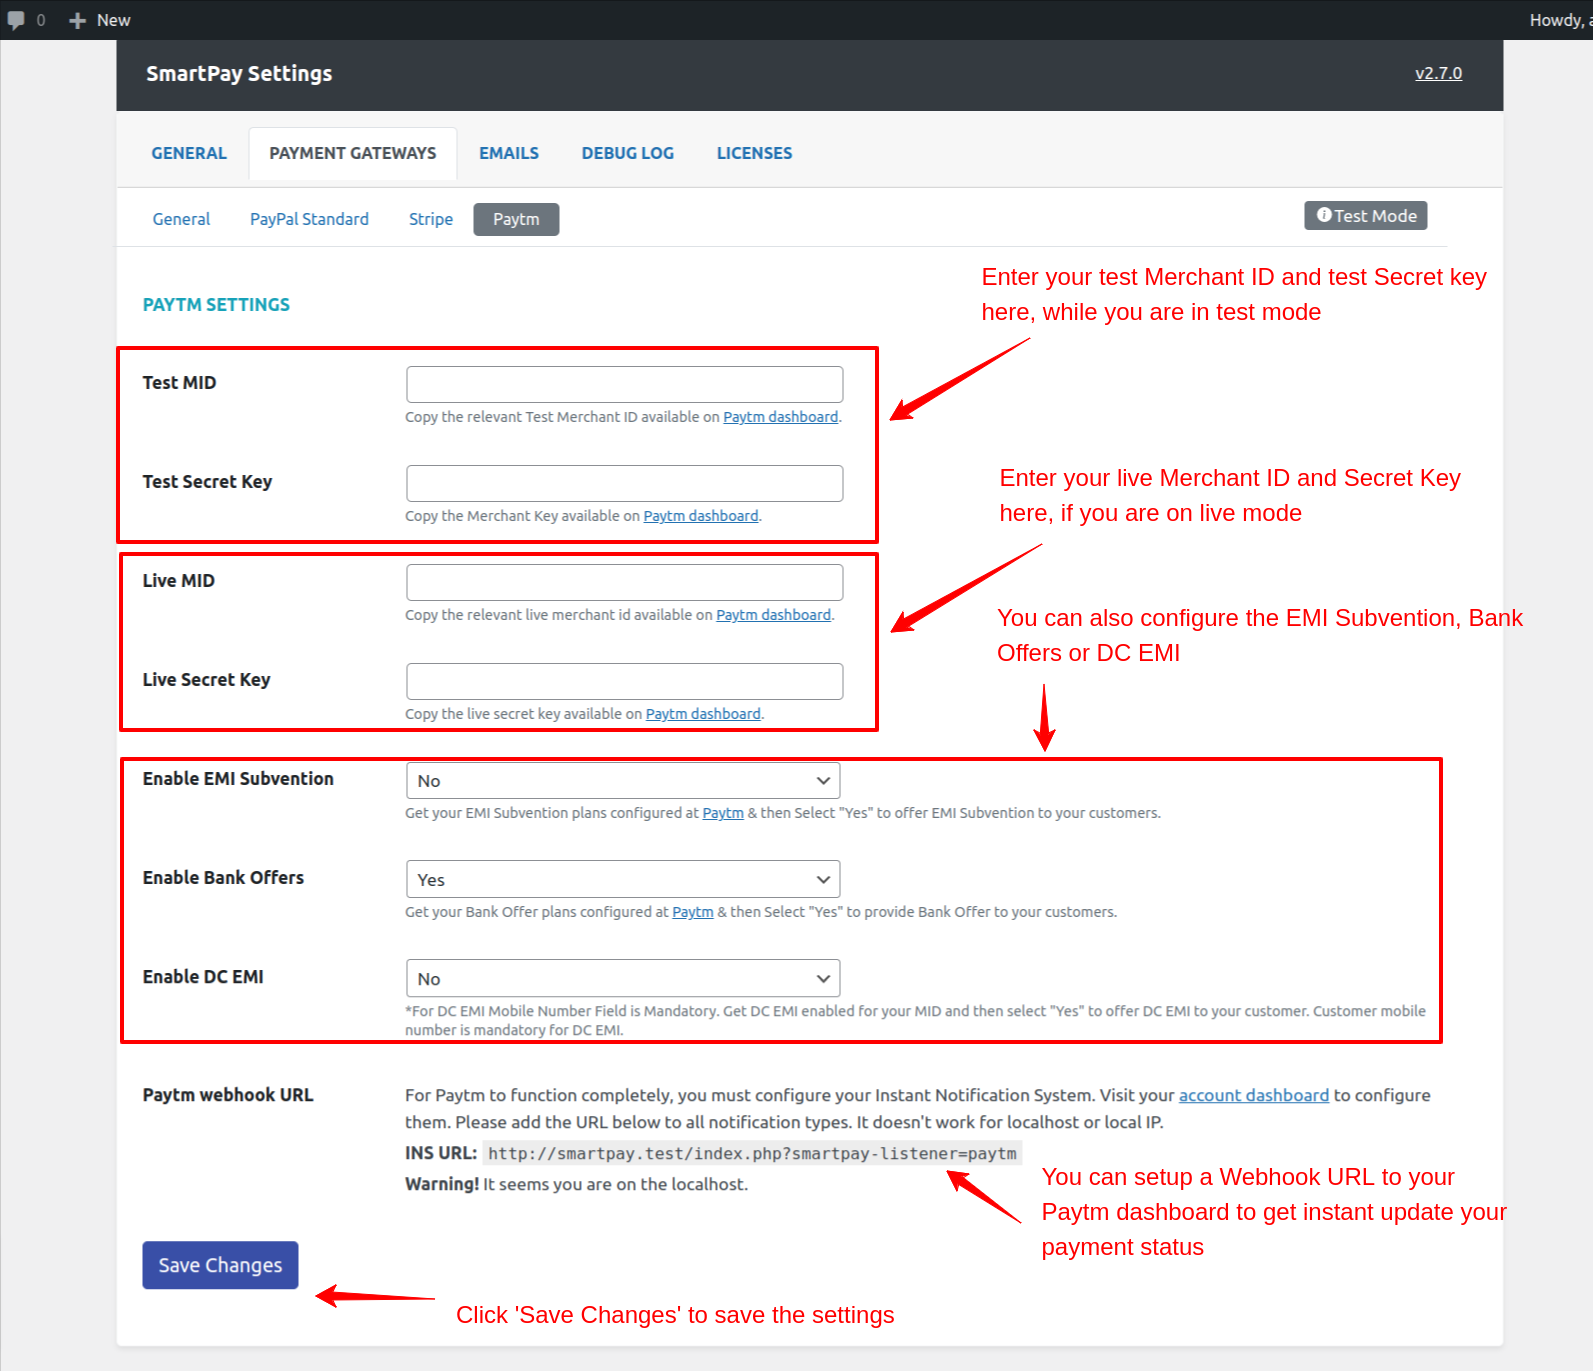
N.B: Test mode can be found at SmartPay > Settings > Payment Gateways > General
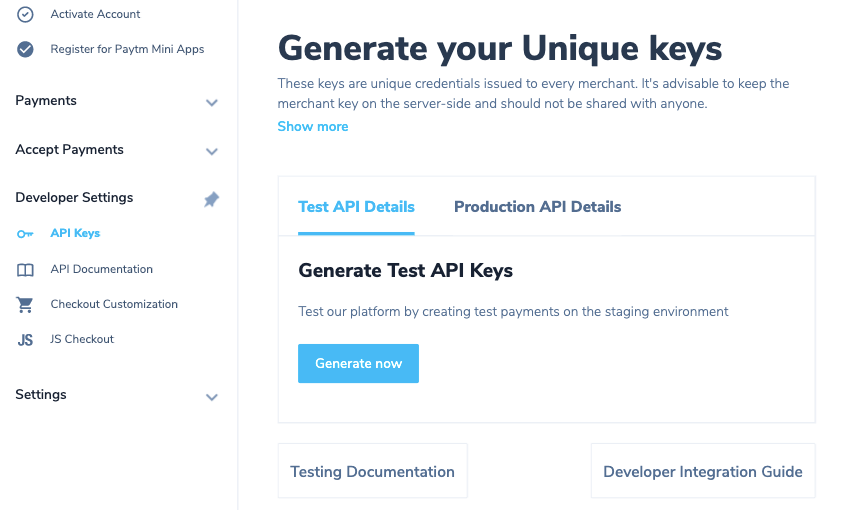
Next, Login into your Paytm dashboard. Follow the below steps to get your API keys.
- Select the API Keys under Developers on the left menubar.
- Select the mode for which you want to generate the API Key from the menu.
- Click Generate now to generate a key for the test mode and in case of live mode, first activate the account by submitting documents and then generate the key by clicking the Generate now button.
- You will get the merchant ID and merchant key in response to the above. Please make a note of these to be used further.
Copy the above credentials and paste these into WPSmartPay Paytm settings.
That’s it for the configuration. Now, you can get the Paytm available on WPSmartPay.