N.B: The integrations with stripe only available in WPSmartPay pro plugin.
In WordPress admin, go to SmartPay > Integrations. You will find the available list of extensions that can be integrated with WPSmartPay. Please Activate the Razorpay integration.
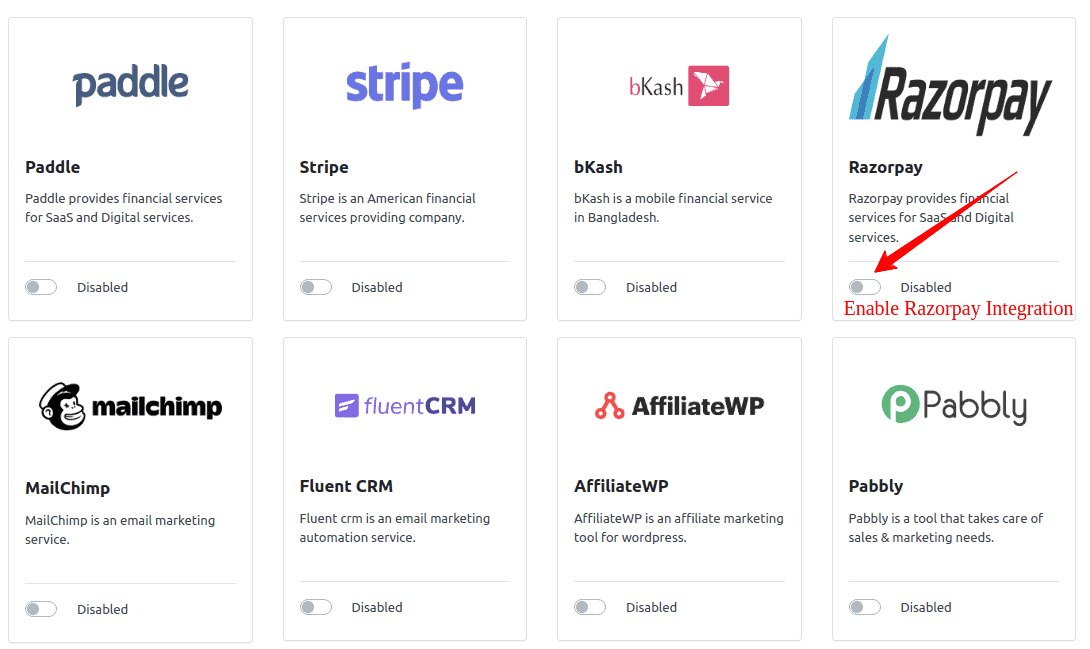
After activation, you will see that Razorpay is Activated.

Next, In your WordPress admin, go to Smartpay > Settings. Click on the Payment Gateways tab. Under the General tab, select the Razorpay checkbox in payment gateways settings and click on the Save Change button to save the settings.

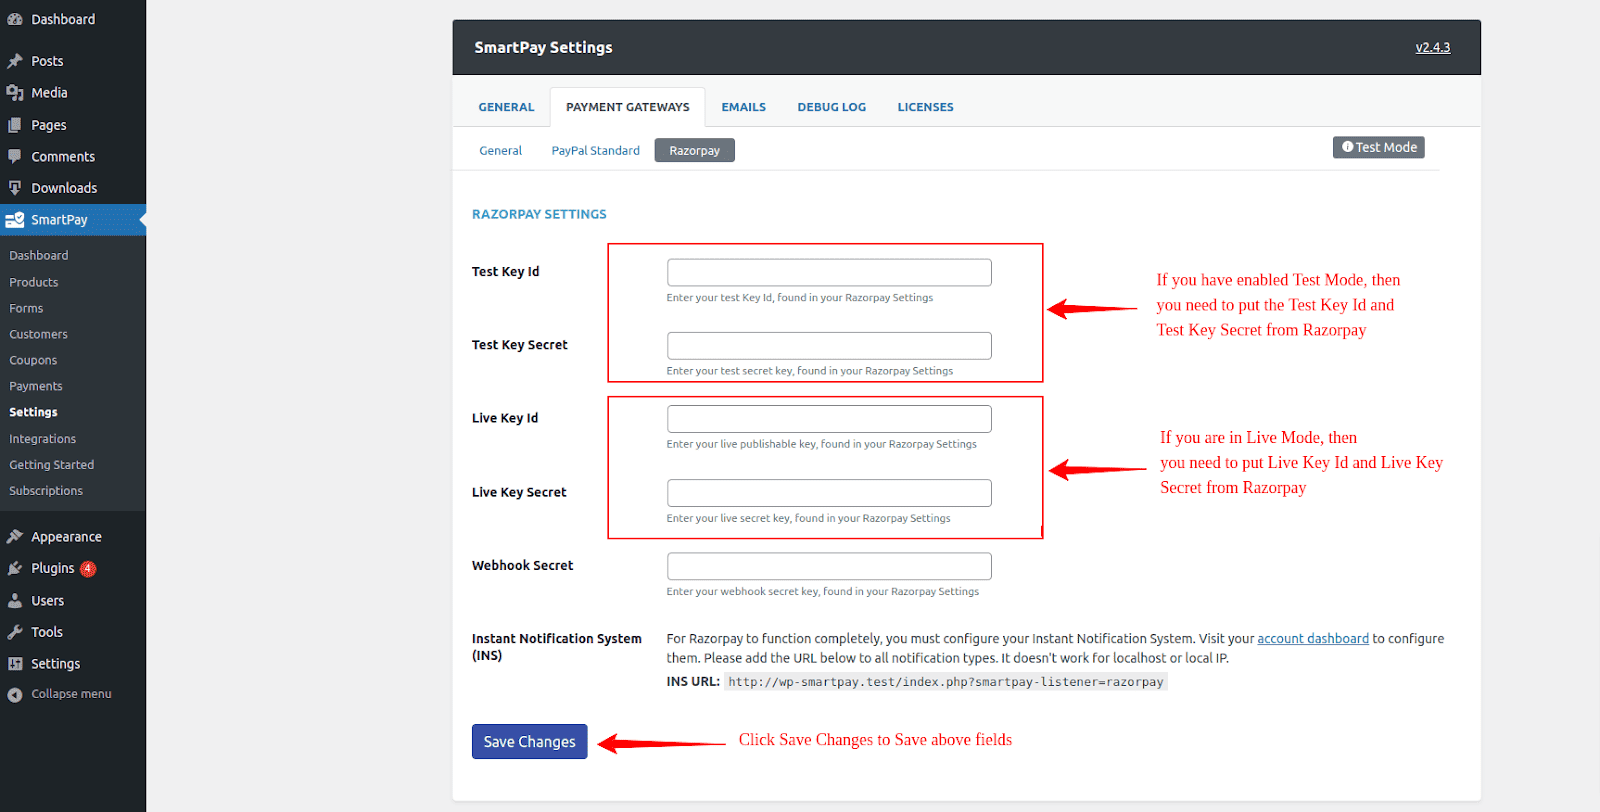
Then you will find Razorpay Tab. Click the Razorpay tab under Payment Gateways tab settings. If you have enabled test mode, then you need to put the Test Key ID and Test Key Secret. If you are not in test mode, then you need to put the Live Key Id and Live Key Secret.
N.B: Test mode can be found at SmartPay > Settings > Payment Gateways > General
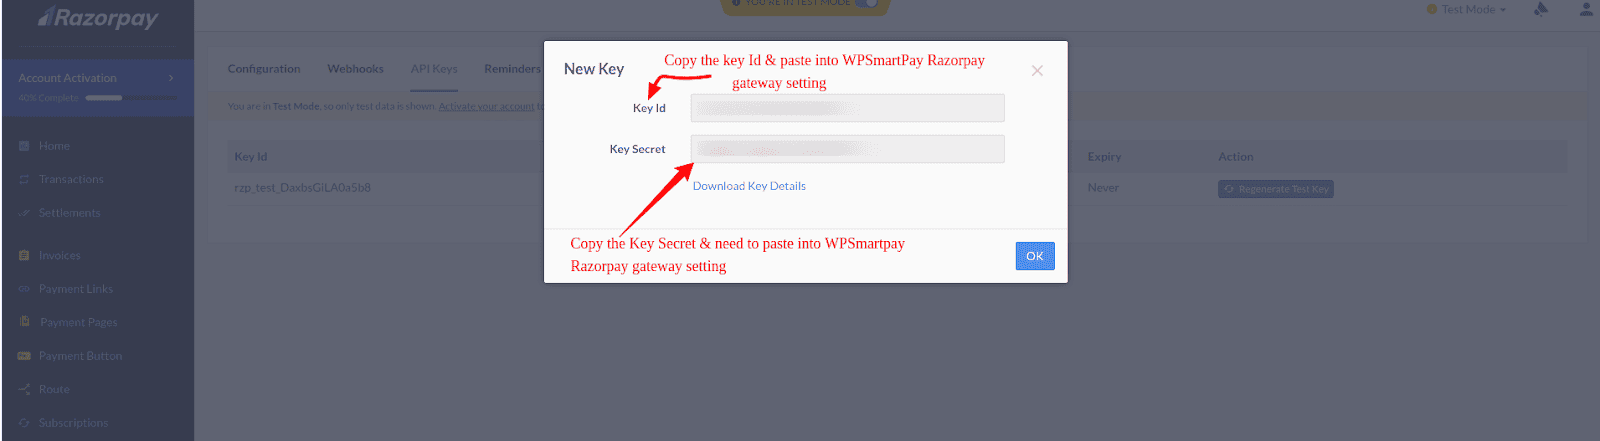
Next, login into your Razorpay dashboard. Go to Settings > API Keys > Generate Test/Live Key and copy the Key Id and Key Secret and put those keys into WPSmartPay Razorpay gateway settings.
Next, Go to Smartpay > Settings > Payment Gateways > Razorpay. Copy Instant Notification System URL(INS URL).

Now go to Razorpay dashboard > Settings > Webhook Click Add New Webhook. Paste the copied Instant notification system URL(INS URL) in Webhook URL.
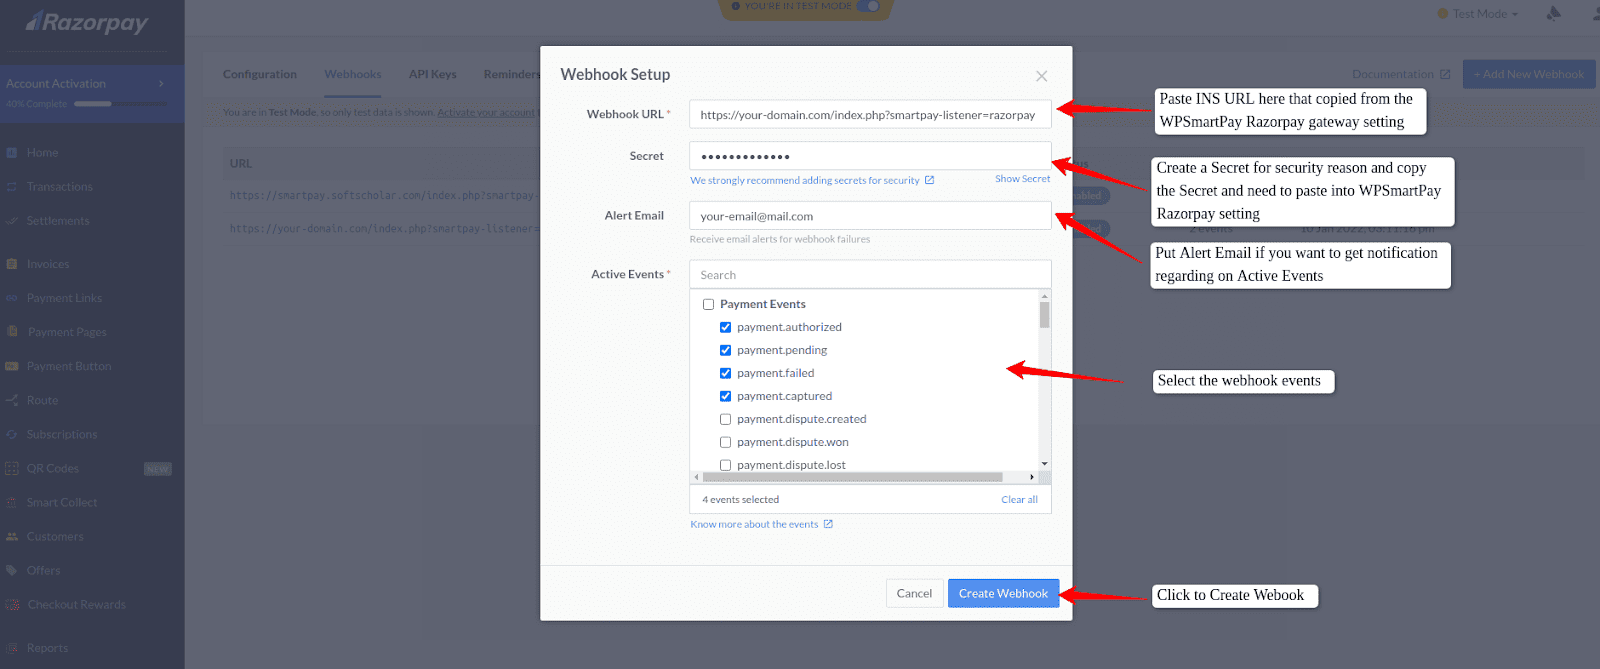
Select below webhooks events and click Add/Edit Webhook Setup and you are ready to use Razorpay as a payment gateway in WPSmartPay.
payment.captured
payment.failed
refund.created
refund.processed
order.paid
subscription.activated
subscription.completed
subscription.cancelled
subscription.halted
That’s it, If any modification is needed please add or tell me where the modification is needed. I will update the docs.
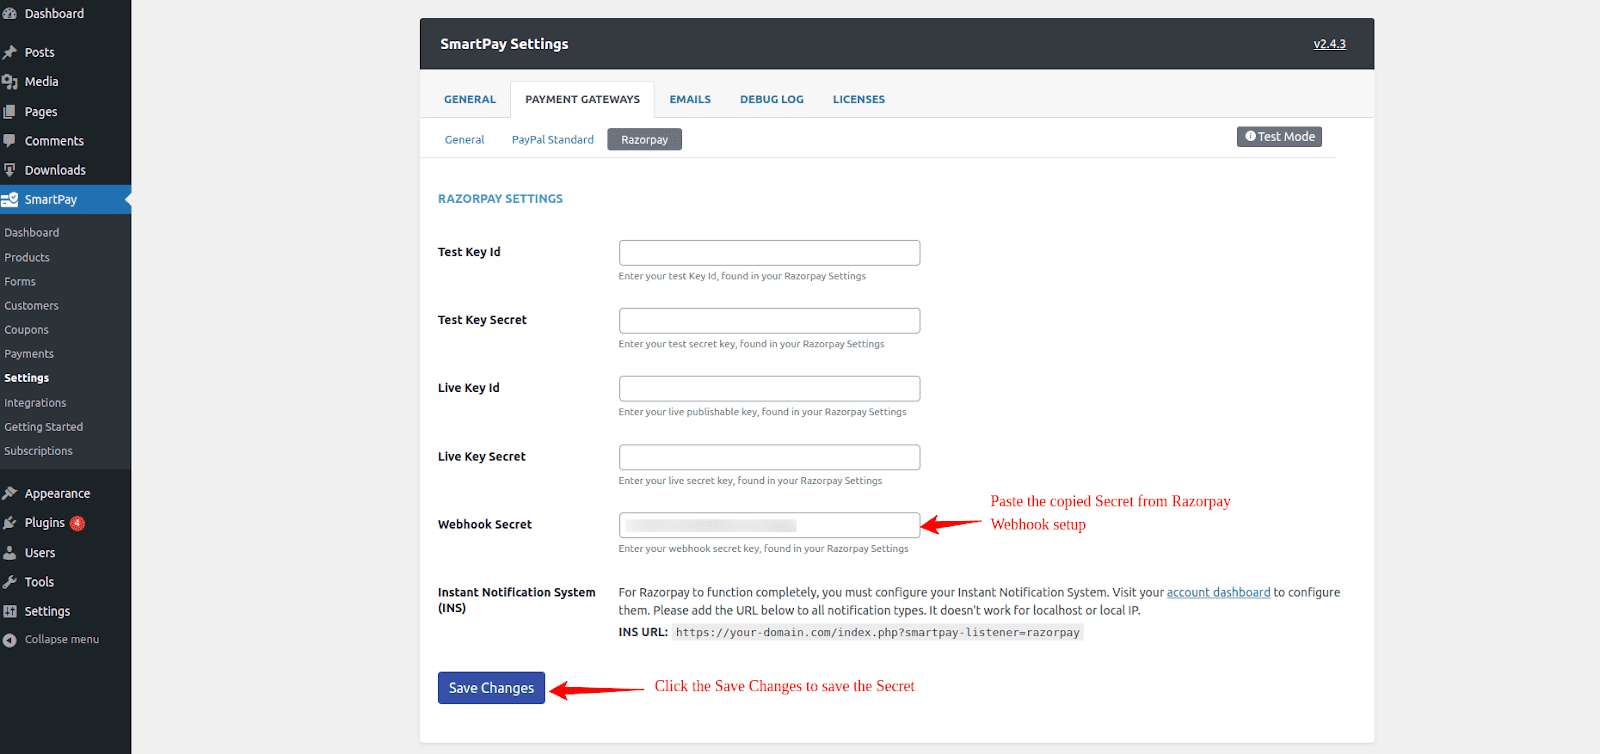
Now go to SmartPay > Settings > Payment Gateways > Razorpay Paste the copied Secret from Razorpay Webhook Setup.